
Invoice Add
Updated:
Executing the Process is a vital part when integrating any applications. This Document will let the users to understand how the integration process can be executed through workflow for
adding Invoice from Magento2 to SAP Business One.
Note: Before proceeding with any integration configuration, users are advised to view the pre-requites of the integration process.
Prerequisites
- SAP Business One Add-On for APPSeCONNECT is required to be installed.
- Login to the APPSeCONNECT Portal and choose the app MAGENTO2 and SAP Business One (≥8.8) from the APPS Section.
- Navigate to the connections module and create a connection for the selected applications.
- Now navigate to the Workflow module. You can either create a workflow or can choose a pre-packaged workflow from the Choose Workflow Option.
- Before Integrating with SAP Business One and Magento2 all the master data needs to be synced. Master Data Sync is used for synchronizing set of core information (viz. Websites, Product Category, Attribute set, and Tax Class etc.) from Magento2 to SAP B1.
Brief Description
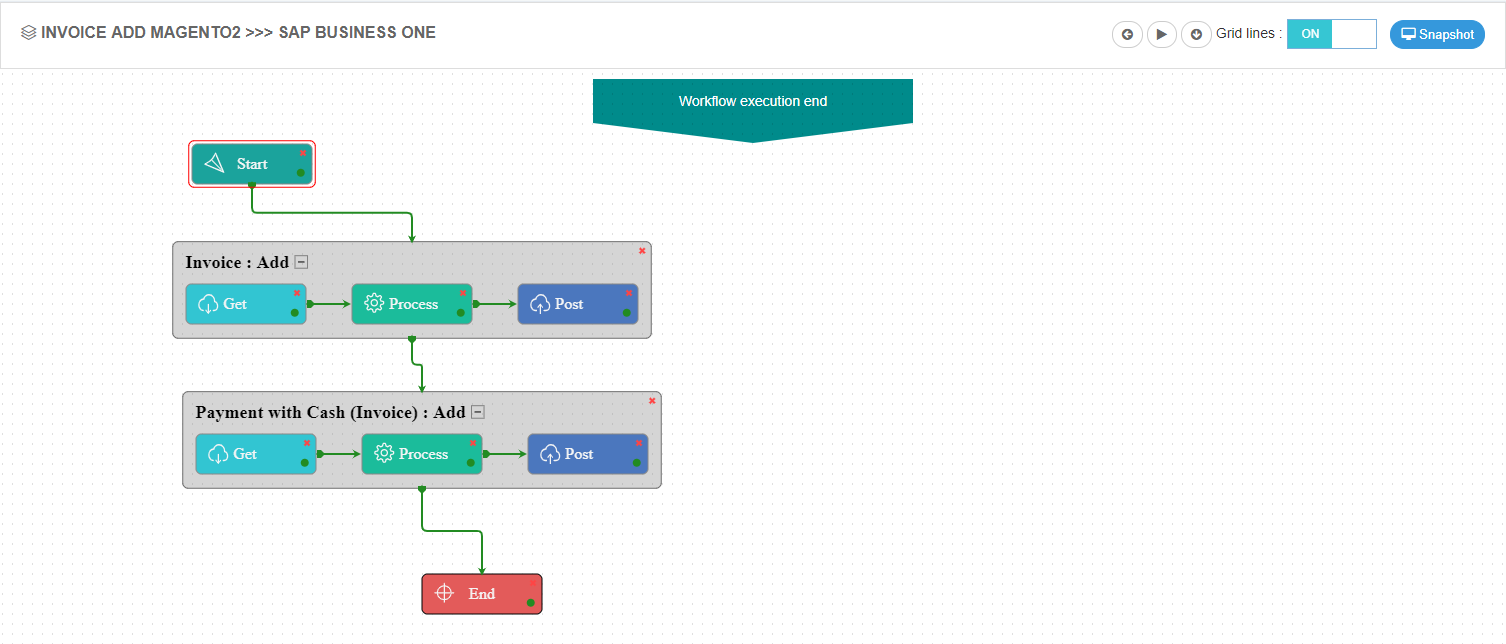
After adding the Sales Order, the Invoice of the Order is now ready to sync in the SAP Business One. Therefore, a workflow is created to sync the Invoice of the order along with the dependency touchpoint Payment with Cash as post-tax in SAP Business One.
To know more, See touchpoint dependencies.
See, steps to generate an Invoice for an Order.
Note: Please enable the checkbox for Creating the Shipment
Lookup Mapping
Click here (will navigate to the Order Add Document) to know about the Lookup Mapping for Invoice Add
Attribute Mapping/Transformation
Following the Provided Mapping, the user can sync the Order Add Workflow from Magento2 to SAP Business One. To know more, see Mapping & Transformation Techniques.
- Mapping for the
ComplexObject Document_Lines

Mapping for the variable $curItmId
- $curItmId – Here, the mapping is done with the of Magento2.
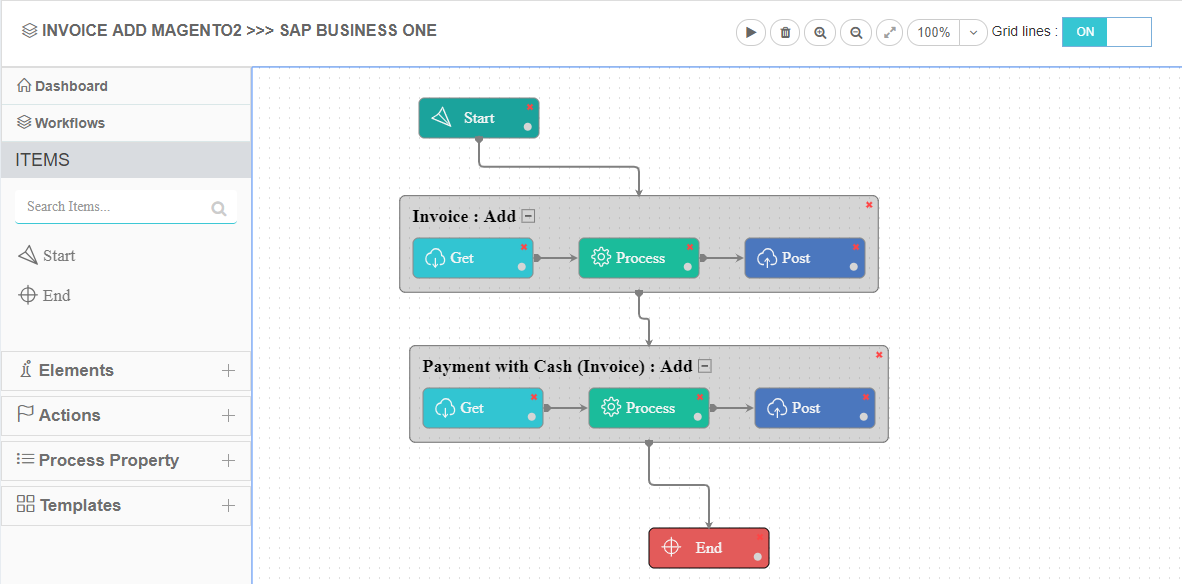
Executing the Workflow Integration
**Note: Before integrating with Magento2 and SAP Business One, make sure all the Master Data Touchpoints are synced. Also See Prerequisitesfor Integration **
- Once the workflow is designed, Update the Configuration in agent for deploying the workflow in the agent.
- Click on the run button in the workflow panel in the cloud portal.
- Once the Execution is finished, click
Resync Buttonin the agent.
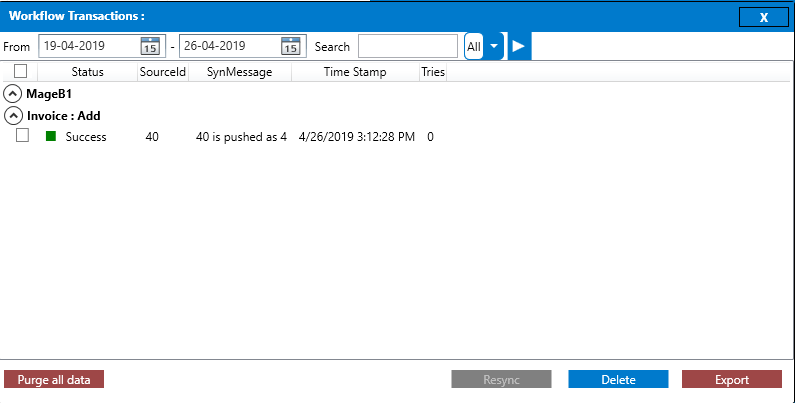
- The Resync Panel show the Success Result in the agent.
- The User can also trigger or deploy the workflow from the cloud Portal by clicking on the run button.
Integration Data Survey
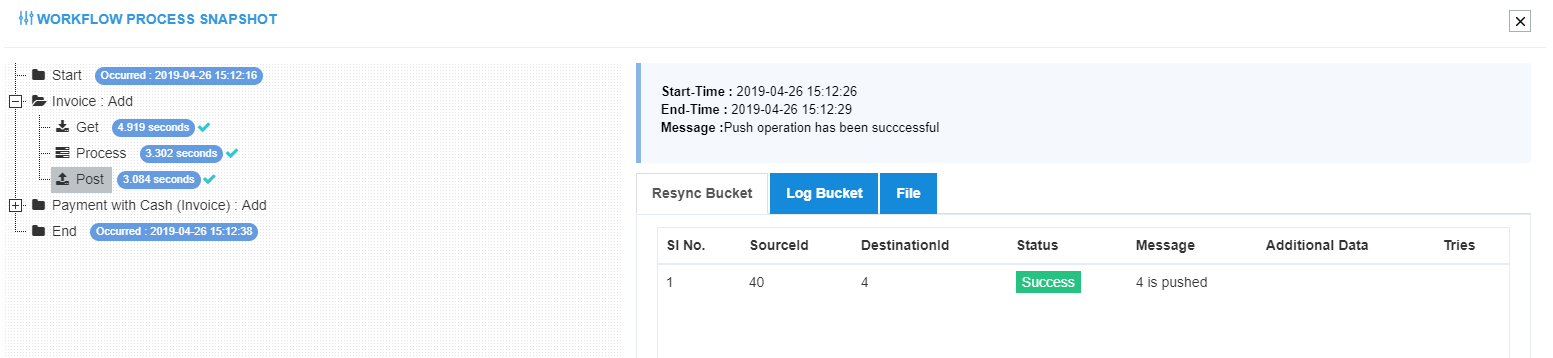
The user can survey the data by viewing the Processed Snapshot from the node level of the workflow.
This Snapshot View displays the successful execution of the workflow.
The Invoice with the source id 40 is successfully synced to SAP Business One with its destination ID as 04.
Post-Conditions
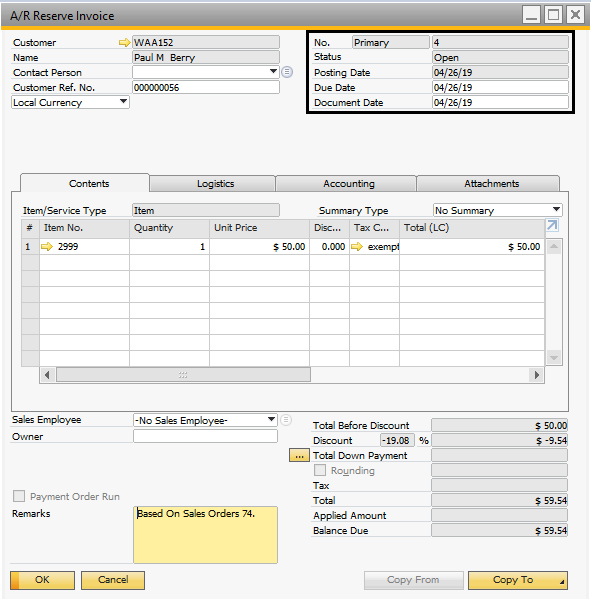
The user can view the invoice synced in the SAP Business One by navigating to Sales -> A/R -> A/R Reserve Invoice.
Frequency of Use
The user can execute the Integration through workflow as and when required.
Troubleshooting
- Error Details:
Row without tax was found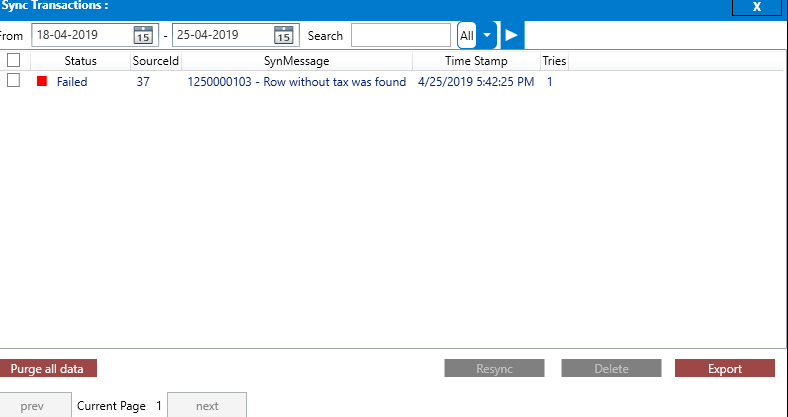
For troubleshooting this error, the mapping for the Variable $curItmId needs to be modified as given in the Attribute Mapping/Transformation part of this document.
- Error: Details:
Base Doc Missmatch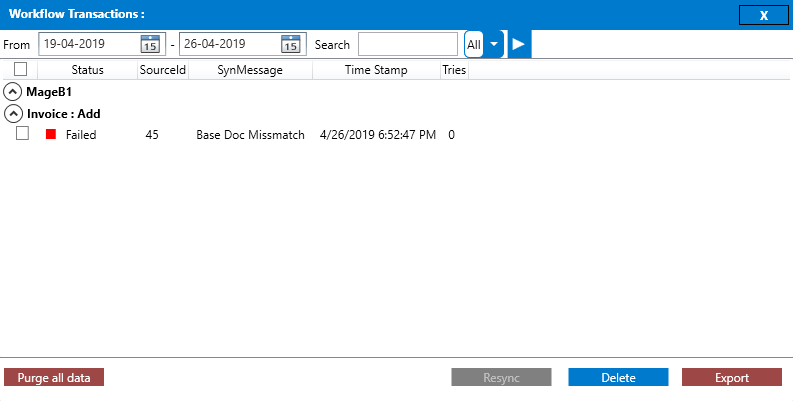
This Error usually occurs when dependent document is not found in the destination Application. For Example: If the Order Add is not synced, and for the order the invoice is synced, this error will occur as SAP Business does not contain the Order Document for that Invoice.
Therefore, for troubleshooting this error, the necessary documents need to synced first before integrating the Invoice.

