Slack
Updated:
Slack is a messaging app for business that connects people to the information that they need
by bringing people together to work as one unified team. Slack transforms the way that organisations communicate.
Benefits of Slack
Stay Connected - Slack makes it easy to contact your colleagues, you can message anyone inside or outside
your organisation and collaborate just as you would in person. People can work in dedicated spaces called channels,
which bring the right people and information together.
Flexible - Slack supports asynchronous work. When work is organised in channels, you can access the information
you need in your own time, regardless of your location, time zone or function. Ask questions, catch up with new developments
and share updates without having to coordinate schedules.
Inclusive - In Slack, everyone in an organisation has access to the same shared and searchable information.
When teams work together in channels, information can be shared with everyone at once, helping teams to stay aligned and
make decisions more quickly.
As APPSeCONNECT is a Business Process Automation tool, this will allow you to develop and configure seamless integration between business applications.
Therefore, application configuration is a fundamental activity prior to the process of integration. If your chosen application is
Slack, credentials need to be provided for validating the agent both in case of OP and Cloud. Here you will find the detailed description on
how to configure the agents for the application Slack, troubleshooting issues and its action filter.
Pre-requisites for Slack Configuration
1) Create an admin account in Slack as well as an app.
2) Click here to know the authentication mechanism and different APIs of the application along with their structures.
3) You need to know App ID, Client ID and Client Secret.
4) You need to add Slack App to any Slack channel as per your requirement.
How to get App ID, Client ID and Client Secret?
1) Open any Slack app that you have created valid login credentials.
2) From Basic Information page of the app, you will be get App ID, Client ID and Client Secret.
How to add Slack App into any Slack channel?
Open any Slack Channel as per requirement, Naviagte to Members -> Integrations -> Add Apps -> Search.
Inside the search box, find out the APP from where you need to send the notification to the respective slack channel.
You can add any
Slack APPto multiple channels in which you want to get notified.
On-Premise Agent Configuration
Installation of On-Premise Agent
You need to install the agent on your local server. To Know about On-Premise Agent Configuration, Click here.
Configure the Slack Application in OP Agent
1) Create a processflow or a triggered processflow with Slack as source or destination application, and deploy the processflow in On-Premise agent.
2) Open the agent and click the checkbox in Settings Panel.
3) Move into the App Configurational Panel of the agent and configure the details of the respective application.
Steps to Configure the credentials in OP Agent
1) Open the OP Agent by providing correct credentials.
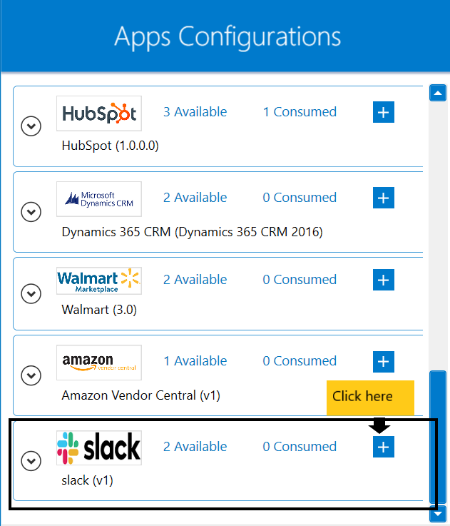
2) In the App Configurations panel of the agent, click on the + button, beside the application slack.
The credential panel opens for the application calendly.
3) Enter App ID, Client ID and Client Secret at the required place.
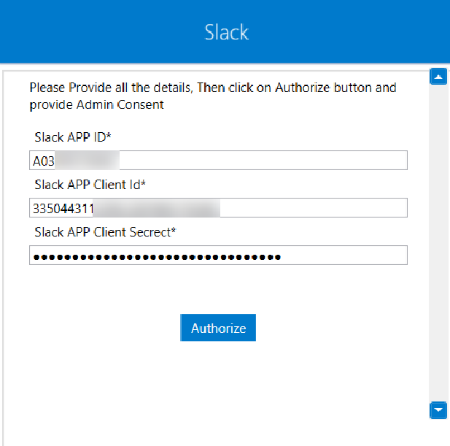
4) Click on the Authorize button, to validate the connection.
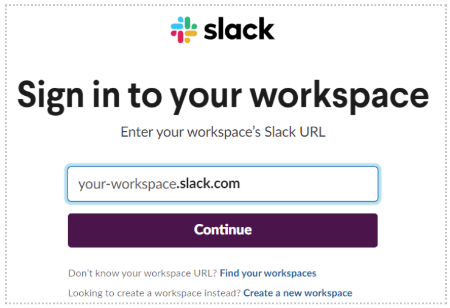
After clicking Authorize, a pop-up browser will open where you need to provide the workspace name and click on Continue.
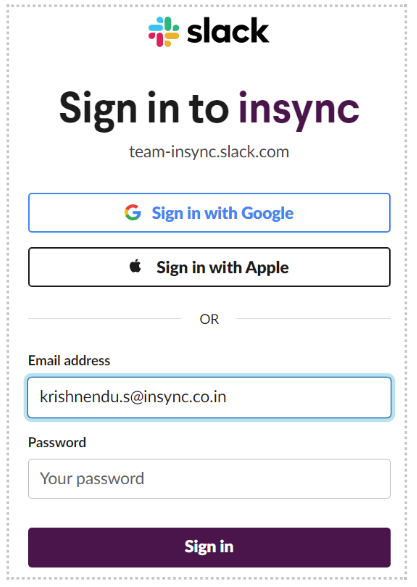
5) You will be re-directed to slack log-in page. Provide email-id, password and click on Sign in.
 Click on
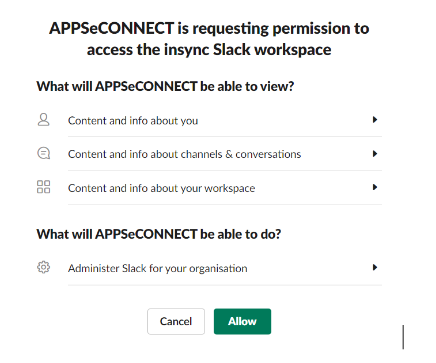
 Allow, to complete the configurations.
 After completing all the configurations, a success message in your OP agent home page will be displayed, with
the credentials getting saved automatically.
After completing all the configurations, a success message in your OP agent home page will be displayed, with
the credentials getting saved automatically.
Cloud Agent Configuration
Configure the Slack Application in Cloud Agent
1) Login to APPSeCONNECT portal with valid credentials.
2) Navigate to Manage > App. Expand the slack application and click on Credential.
3) Expand the REST node, click on Add New Credential.
4) Provide the necessary information Credential Name only. The Base Url will be pre-written.
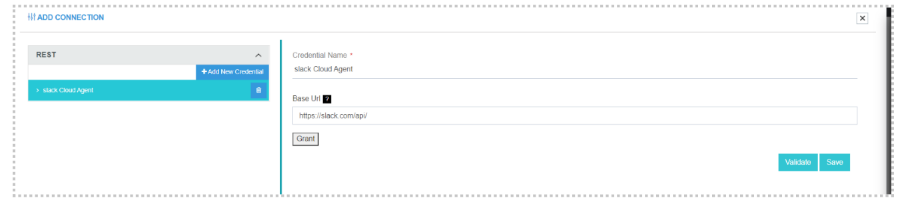
5) Click on Grant, to validate the connection.
After clicking on Grant, a pop-up browser will open where you need to provide the workspace name and click on Continue.
You will be re-directed to slack log-in page. Provide email-id, password and click on Sign in.
Click on Allow, to complete the configurations.
After completing all the configurations, a success message in your OP agent home page will be displayed, with
the credentials getting saved automatically.
Troubleshooting
ISSUE 1
While validating the credentials in the agent, sometimes the validation fails due to improper
Slack APP ID, Slack APP Client Id and Slack APP Client Secret.
Check the credentials once again and re-Authorize the credentials.
ISSUE 2
Some of the basic troubleshooting issues happens due to improper validations or even if it is accurately validated, and if processflow don’t sync properly. This basic issue resolves after removing the Temp and Cache files from the portal and from your system. Therefore after clearing all this, you need to deploy and excute the processflow again to perform the required business integration in a smooth and free-flowing way. For E.g. If the Source Application not Found in the log file appears, the probable cause is due to the presence of the Temp and Cache Files.
Action and its Attributes
While defining a connection to an API in Slack, you require clear understanding about the data requirements and endpoint configurations. You can refer to this document to find all the endpoint details of your Slack application. To define the endpoint in APPSeCONNECT, you need to define Schemas and Actions. Actions are specifically targeted for an endpoint while schema is the data needed to execute the API.
While using slack as the destination application to notify the users about their requirement,
you can inform them by sending message individually or through a channel. However, while using the same
you need to use chat as the schema and chat.postMessage as the action in both the cases.
Action Filter Implementation
Data may be fetched/posted from source/destination application using APIs, and as you are aware of, API provides filters
which will allow you to specify a subset of data from the whole bunch of data created in the server,
the same can be specified through Actions and Action filters. The Action generally defines the
endpoint of the application which is being used, while the filters define the search criteria
of the data. You can add these parameters in the action filter to define the search criteria.
However, while posting data to the slack application from any source application using APPSeCONNECT,
no longer you need to provide any action filter. Just mention the channel name and/or user name in mapping.
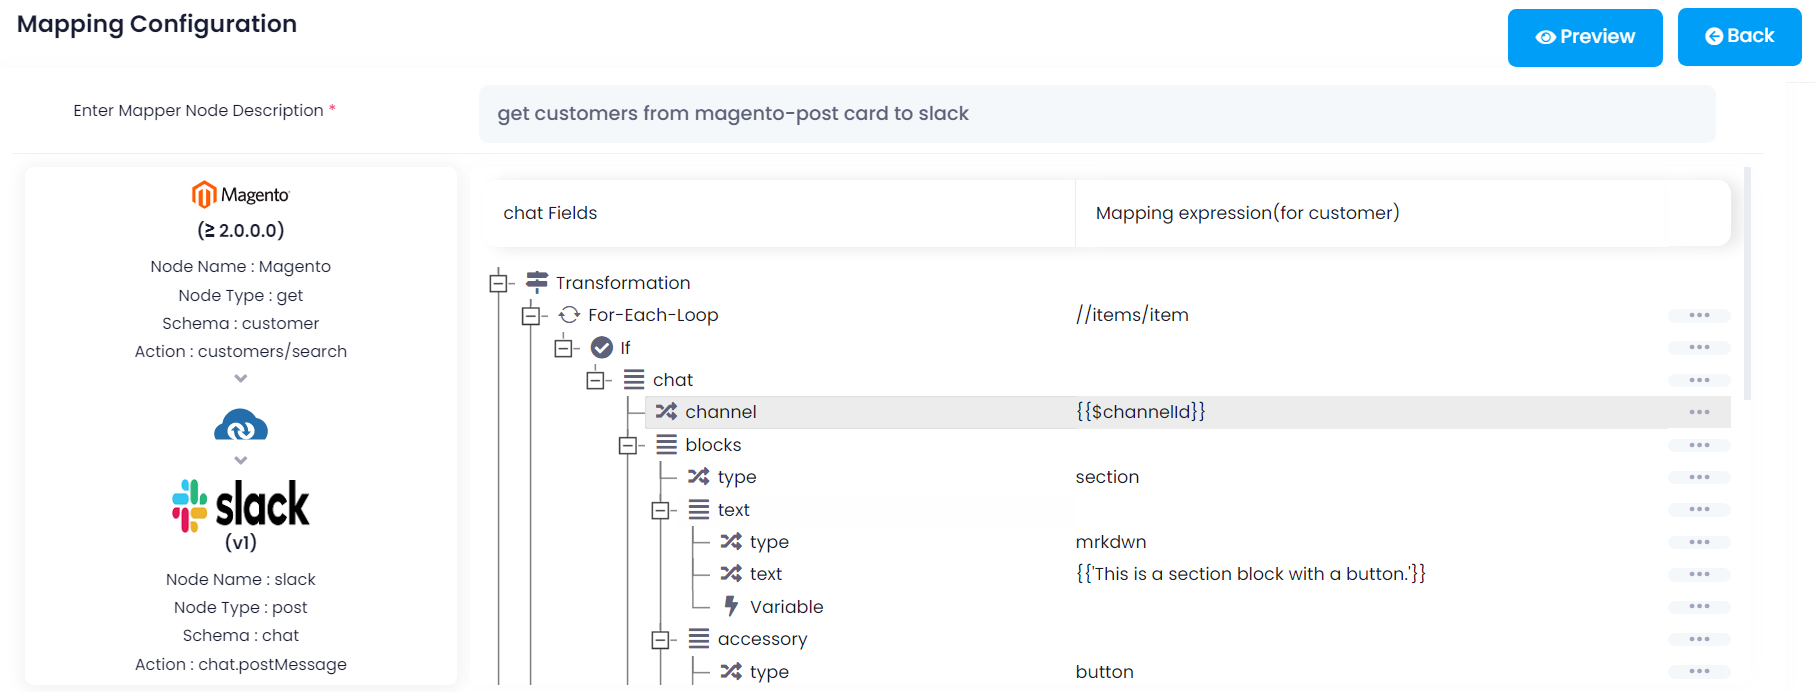
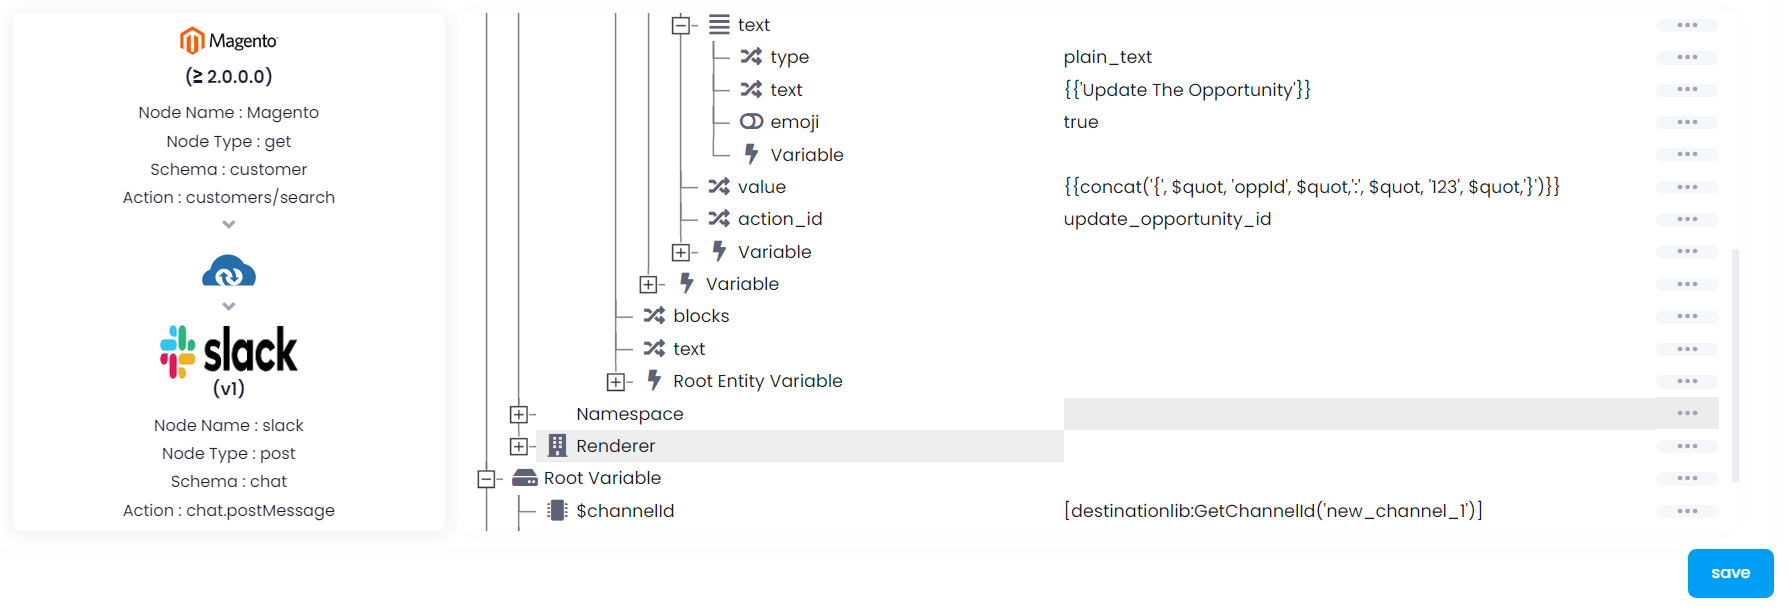
Suppose you need to notify to any slack user, every week how many new customers are added in any E-Commerce application such as Magento.
To handle this situation, you need to use GetUserId function and provide the email id of the user
who will receive the notification in the slack.
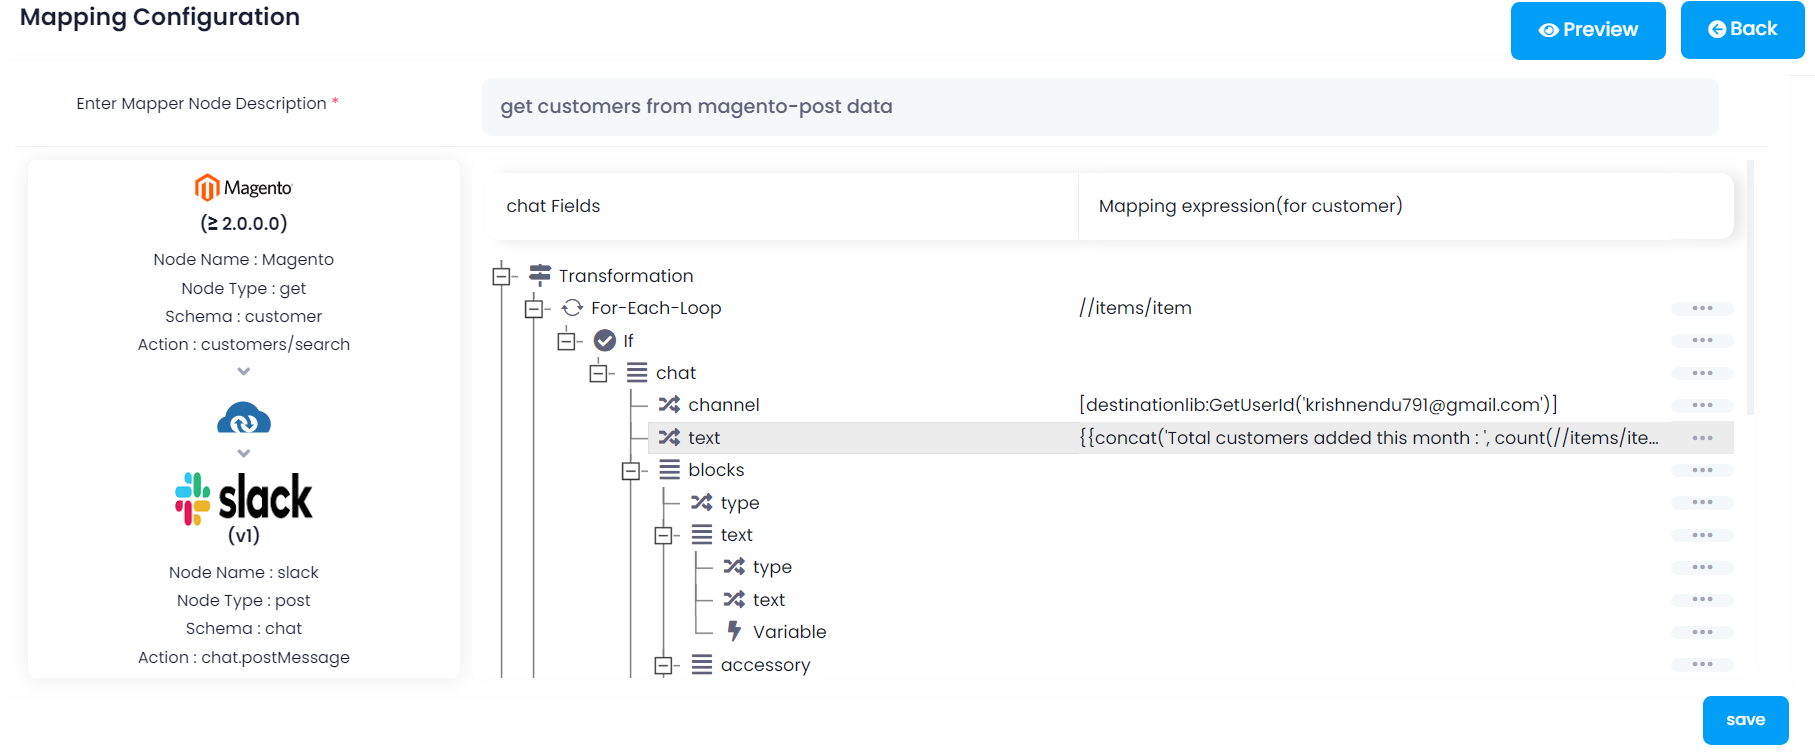
You can also send similar notifications to any slack channel using the following configurations in the mapper node.
Retrieve the channelid using GetChannelId and type as section along with the other mentioned specification.