
RealTime ProcessFlow Execution
Updated:
Integration depends on the way the application exposes data, which is generally done through APIs,
where one can communicate with the APIs, to create the list of data in the platform. Hence as an integration platform,
it occasionally needs to pull data from the application and sync only the data which is modified overtime.
We have a number of sync strategies to integrate data using Polling technique, which as an users/implementors
you need to follow to identify the latest data to be synced.
On the other hand, Webhook allows the application to generate a call back to the external application
whenever a new data is updated to the application. Such an integration which is initiated by the application
itself is called Triggered Integration. To perform the aforesaid integration, you need to design a trigger
processflow, which receives the data from outside world and executes various steps in the pipeline.
This section of the documentation will guide you with the process of Creating & Saving trigger processflows. The steps for implementing the same is provided below :
Prerequisites for Creating Trigger ProcessFlows
- Should have valid credentials for logging in to the APPSeCONNECT portal.
- Applications should be chosen from the apps section, for proceeding with the design of processflows.
- Before designing a trigger processflow, you should get familiar with different trigger types.
- Should have the basic knowledge of creating and saving processflows.
Steps to create a Trigger ProcessFlow
1) Login to the Portal and navigate to the Designer > ProcessFlow module. The Process Flow listing page appears.
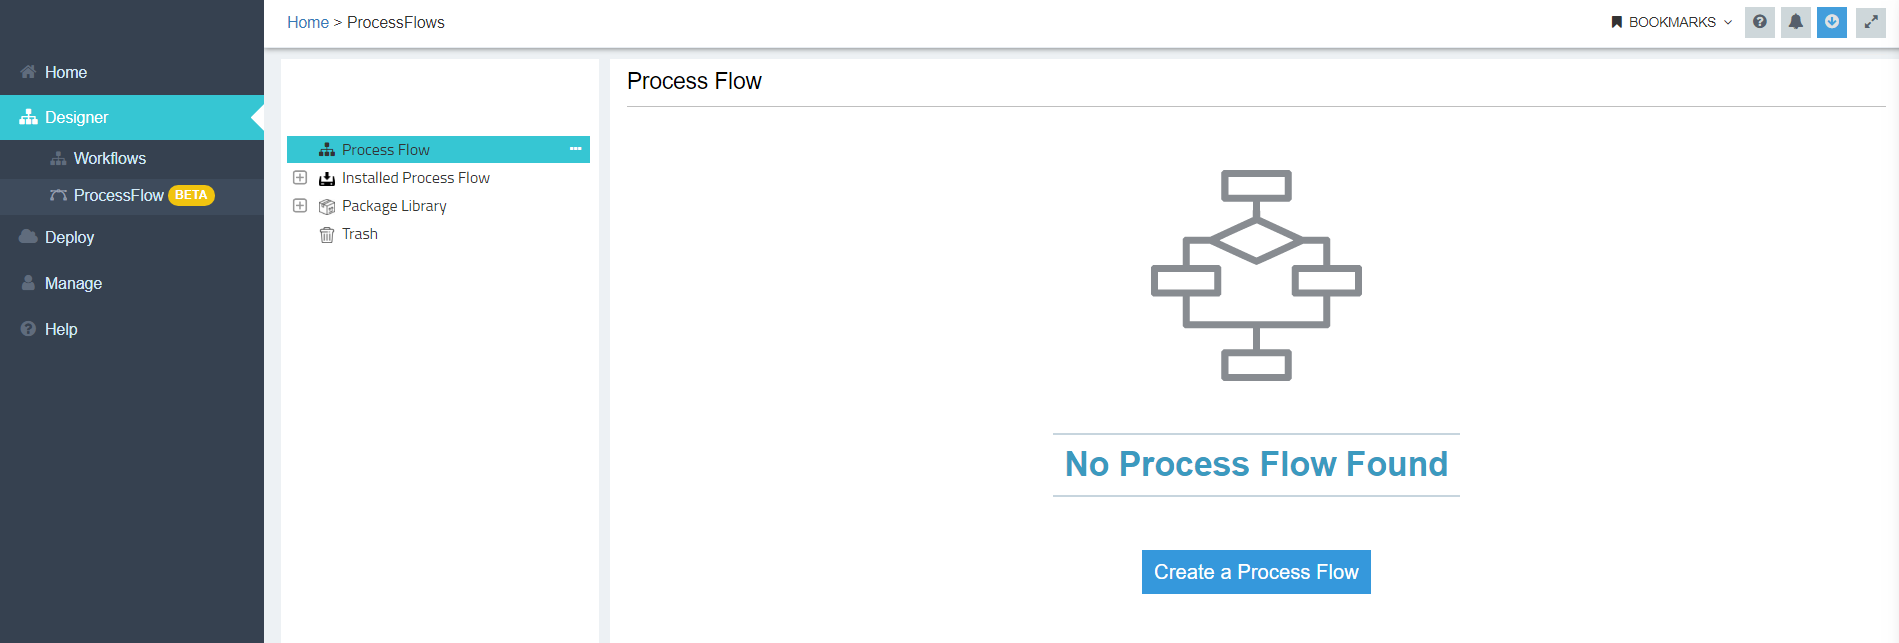
2) By default, Process Flow folder is selected, where you can create new processflows as well as you can also view and edit existing processflows.
3) Click on the new button for creating a new processflow.

Note : If the Folder is empty, you can view the button Create a Process Flow, that navigates
you to the processflow Designer Page.
4) A pop-up will appear where you need to put the ProcessFlow name. Select Ok, you will be navigated to the processflow Designer Page else you can abort the processflow creation by clicking on Cancel.
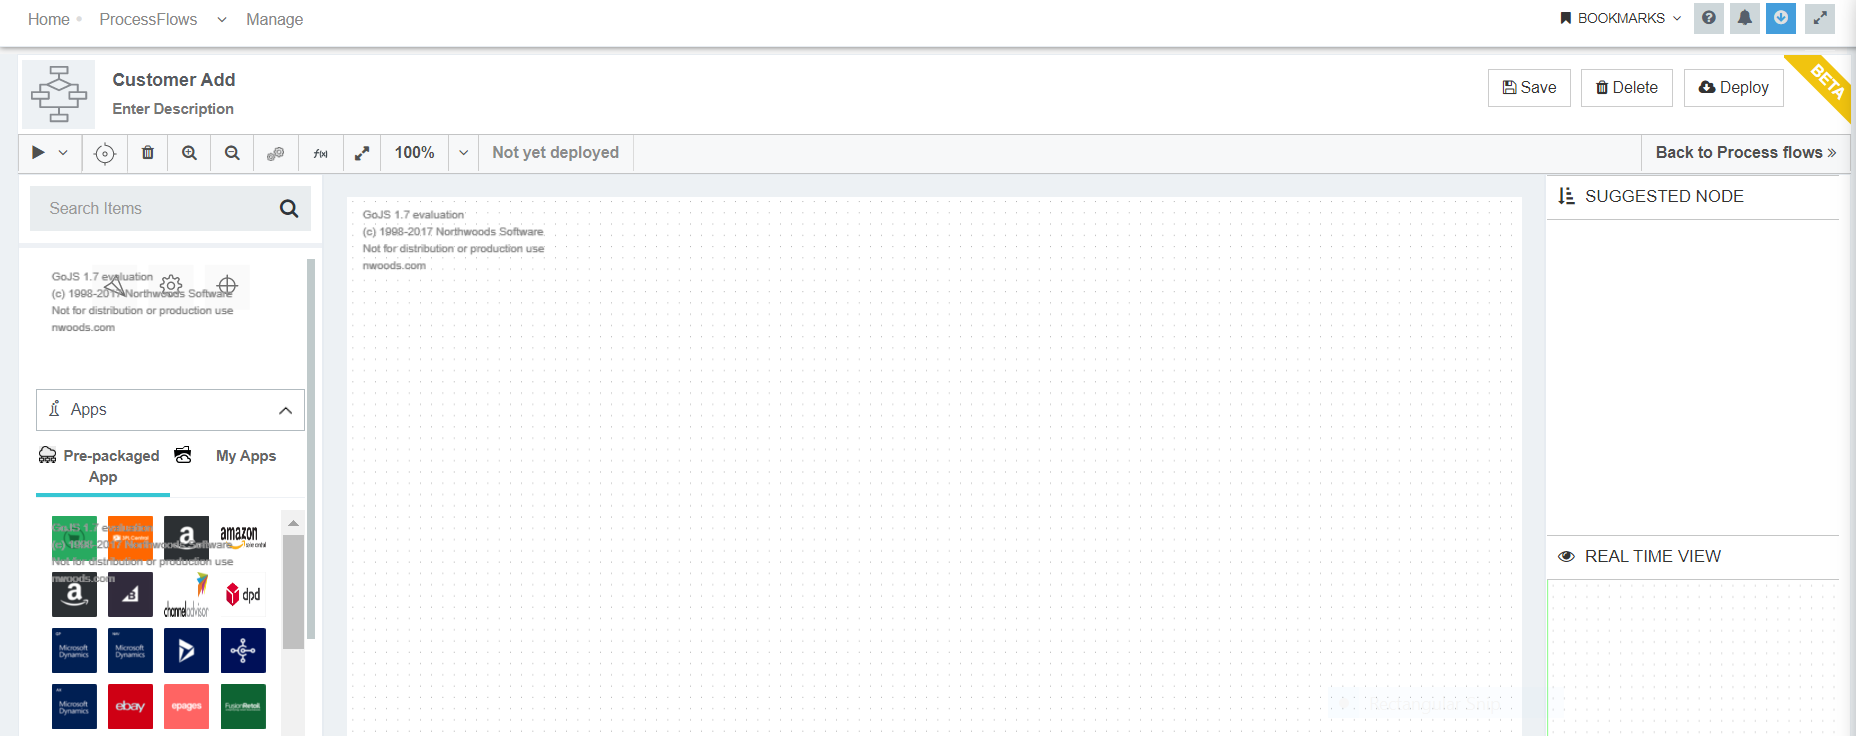
5) Provide a Description for the processflow in the processflow header panel.

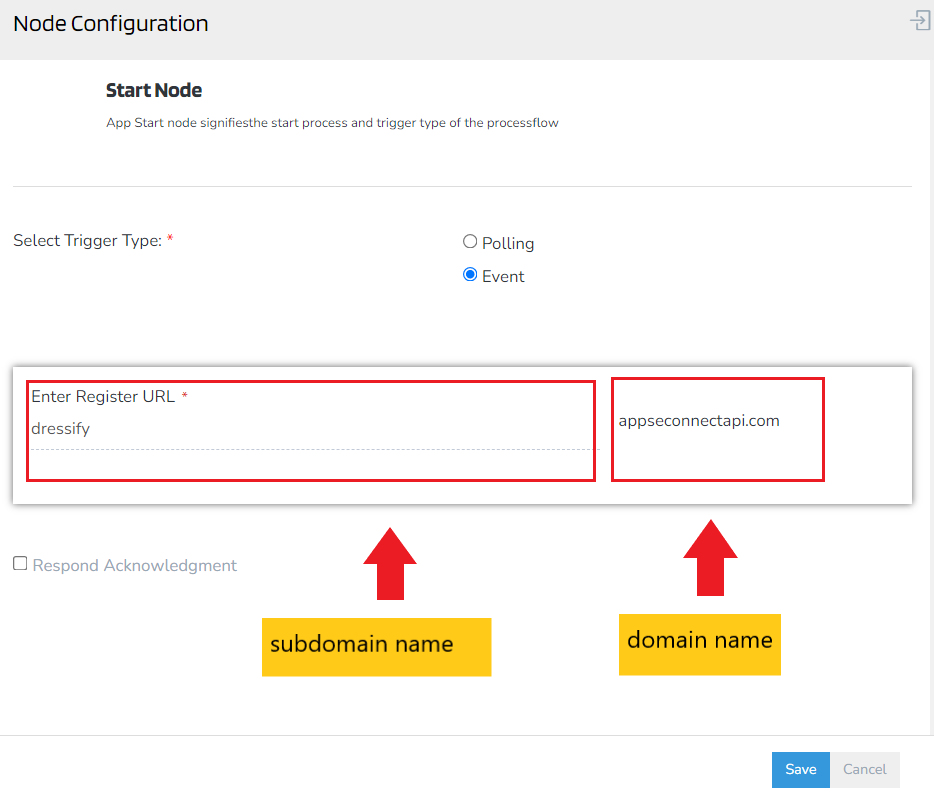
6) Drag the start node into the canvas. Select the Trigger Type as Event. On selecting the Trigger Type as Event, the following field would appear : Enter Register URL. Provide the details for the field.
Enter Register URL : You will have to provide your Organisation name as the sub-domain that would be merged with the APPseCONNECT Domain.
7) Navigate to our Getting Started section, to complete the remaining steps of creating a processflow.

Note : In this scenerio, trigger processflow is designed using shopify and SAP Business One as source and destination application respectively.
8) Deploy the designed processflow in OP or Cloud environment.
9) Navigate to Deploy > Environments. Click on the ellipsis for the respective triggger processflow. Click on ProcessFlow URL and copy the url.
10) Create a webhook for your choosen source application and assign the ProcessFlow URL to the webhook that you have created. As soon as, you create a new data in your source application corrosponding to your choosen endpoint, the syncing process will be triggered and the data will be mapped into the destination application.
Note :
- No need to provide any Action Filter in case of Trigger ProcessFlow.
- You can deploy Trigger ProcessFlow both in OP as well as in Cloud Agent.
- The Execution button in the processflow designer page will be in disabled mode.
- If your ProcessFlow triggered is of EVENT Type, the ACTIONS column will have the option of ProcessFlow URL that will display you the Triggered URL of your Organisation.

