
You are looking at an old and deprecated content. Please check Overview of ProcessFlow for latest updates.
Steps to choose your workflow
Tags:
developers
Updated:
Workflow in APPSeCONNECT provides integration solution which helps any business to execute integration flow of data between two or more applications.
An implementer can now be able to use the CHOOSE WORKFLOW feature in the APPSeCONNECT Portal. This document will help the implementer to go through the feature in detail.
Usability of Choosing Workflow feature
- This Feature lists you all the pre-packaged workflows.
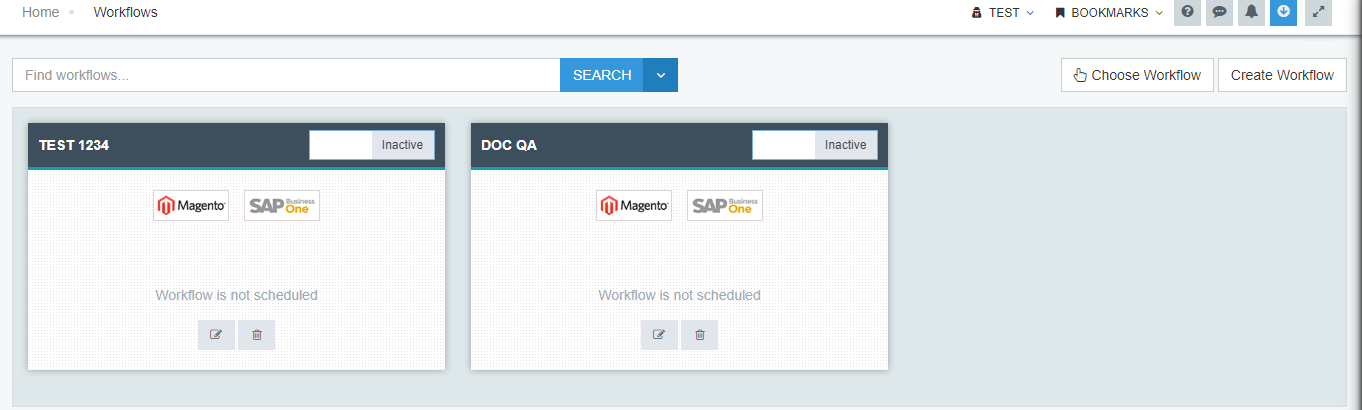
- You can view existing workflows or can create workflow in your workflow panel.
- Choose a pre-packaged workflow, and a Connection specific request pops-up in case of multiple existing pre-packaged App Connection.
Steps to choosing Workflow in your workpanel
- Login to your APPSeCONNECT Portal with valid credentials.
- Click on the Workflow module Under Designer and the Workflow Panel opens up. The Workflow Panel shows you the workflows created in your workflow panel. For a new user, you can
create a workflow.
- Click Choose Workflow button and you can view the list of workflows migrated from the BASE appears.
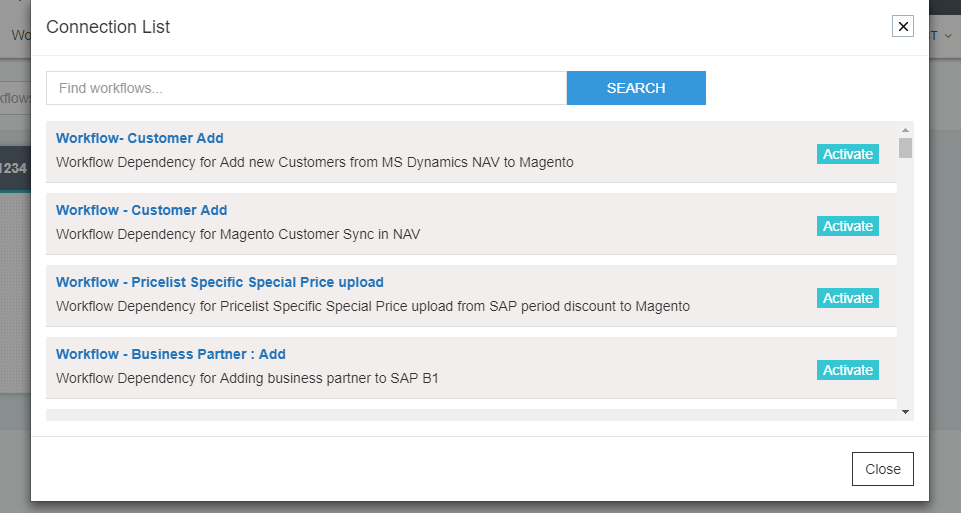
- You can choose any of the Workflow from the list. The Chosen Workflow will appear in your Workflow Panel.
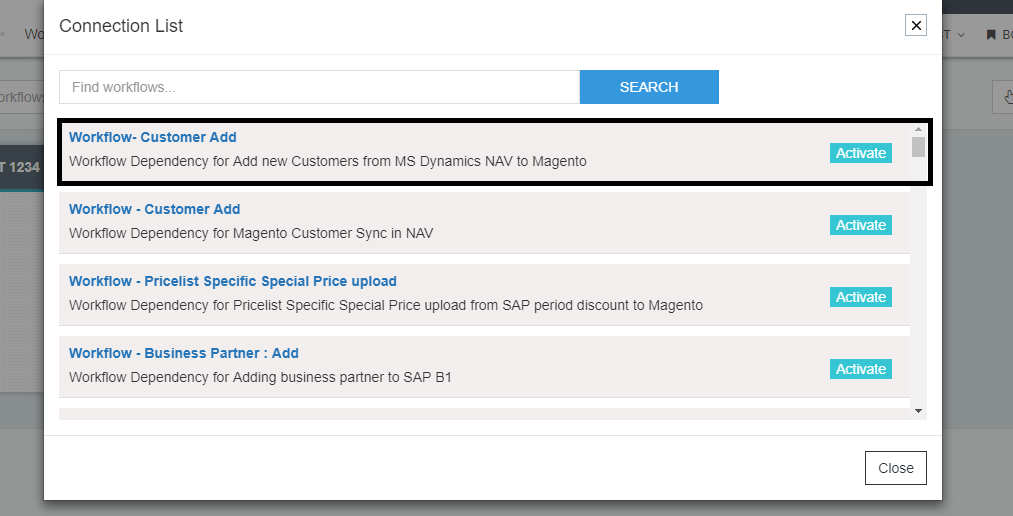
Here we have chosen the Activate the Workflow-Customer [Add MS Dynamics NAV to Magento]
- If the organisation has more than one connection template for Pre-packaged applications, a connection specific request pops up where you need to specify
for which connection you want the workflow to get activated.
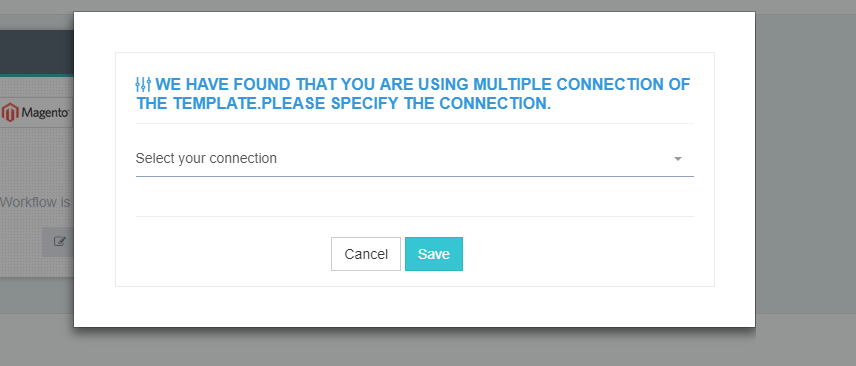
- Click Save the Workflow gets added to the organisation workflow panel.
Note: Choose workflow or Pre-packaged workflows option will not be available for Custom or Technology applications
Protip: On adding the pre-packaged workflow in the organisation, the added workflow disappears from the Choose Workflow List. Deleting the workflow, the workflow name re-appears in the list

