
Adding Credentials
Updated:
How to add credentials for Cloud Integration:
Generic OLEDB Adapter is a software which provides OLEDB applications a leverage to communicate and adapt with the AEC Portal. This Document provides you the detailed process of validating a OLEDB database application in the APPSeCONNECT Cloud Portal.
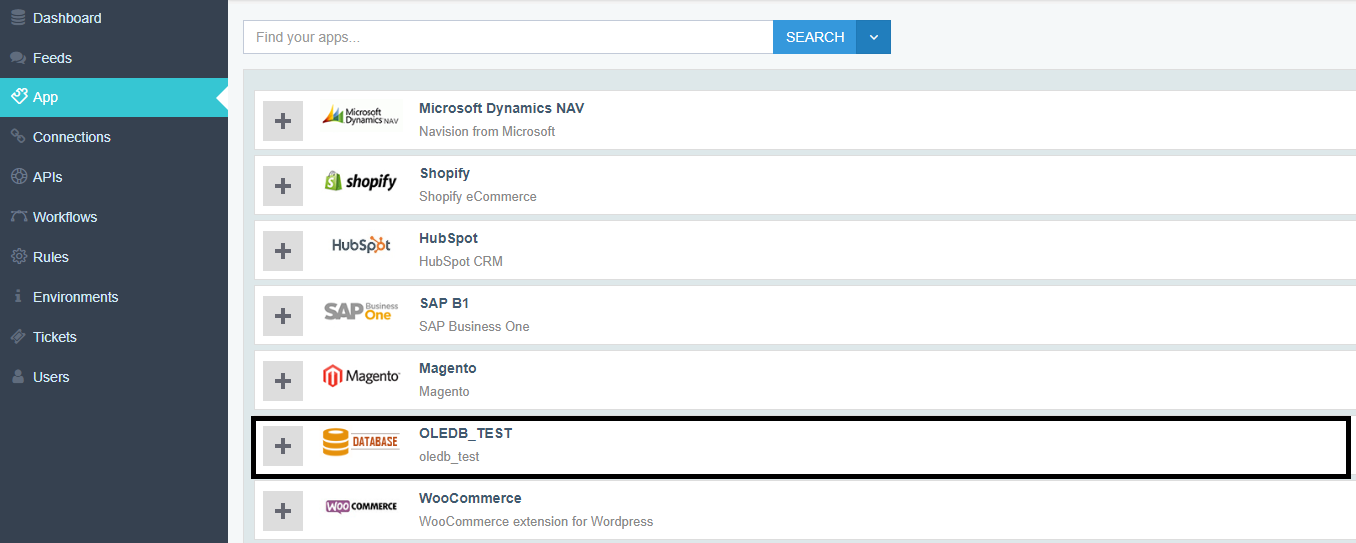
- Go to the APP module of the AEC Portal. Click on the button beside the OLEDB Application name
which you have created.
- Click on the credential Button.
- The Credential Page opens up. Click on the button to expand the node and then Click
ADD NEW CREDENTIAL.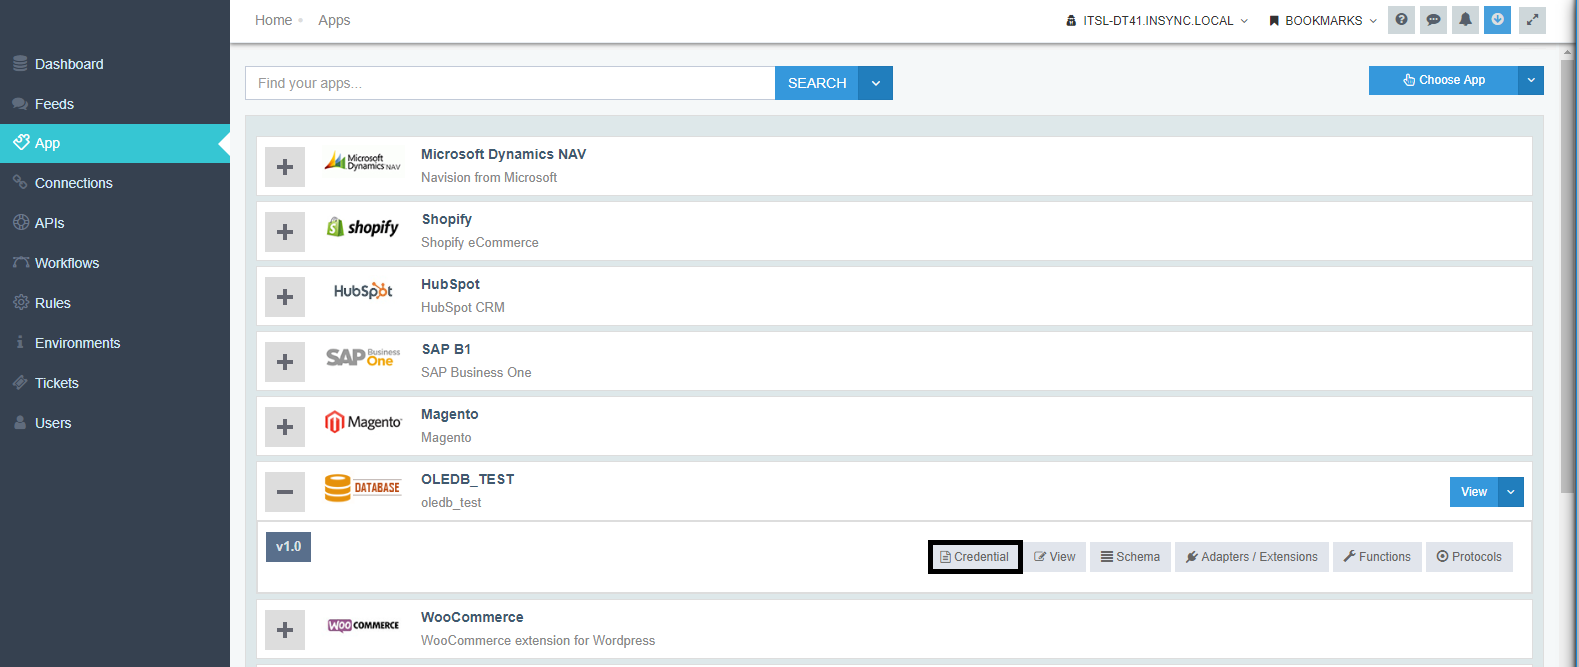
Note: If you don’t have a cloud environment created on your organisation, You will be getting this message Please create an cloud environment to Grant the credentials on clicking the Add new Credential button. To know more about creating Cloud Environment,
Click Here
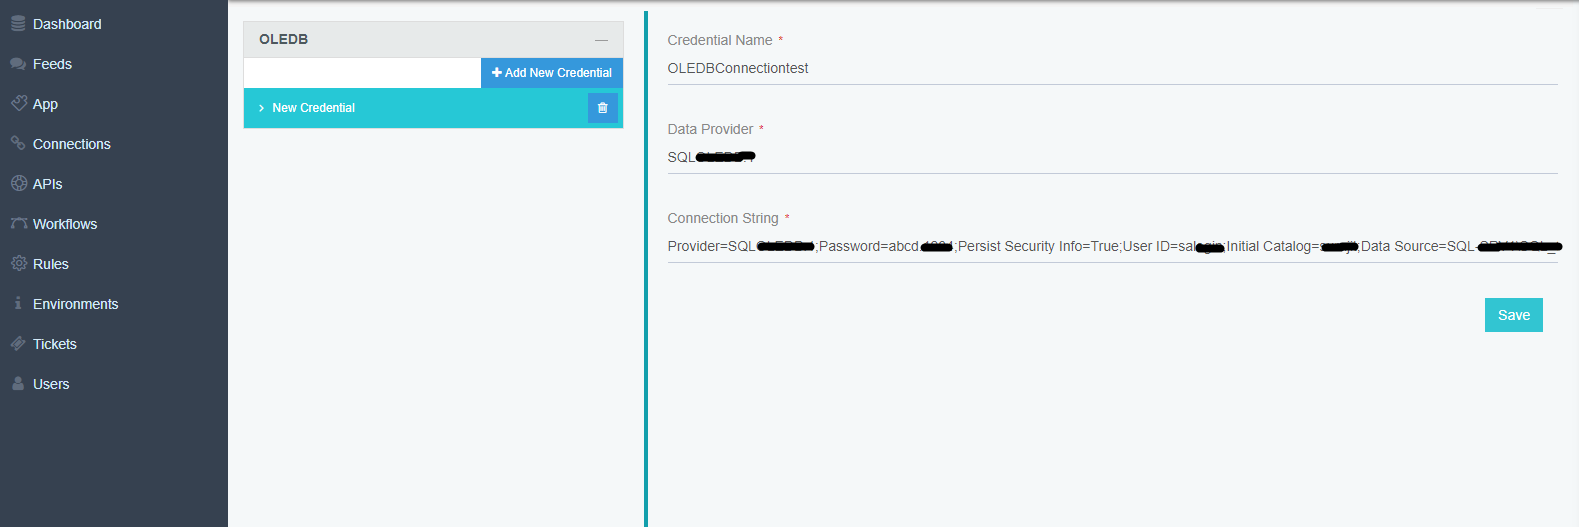
- Enter the Credential Name, Data Provider and the Connection String.
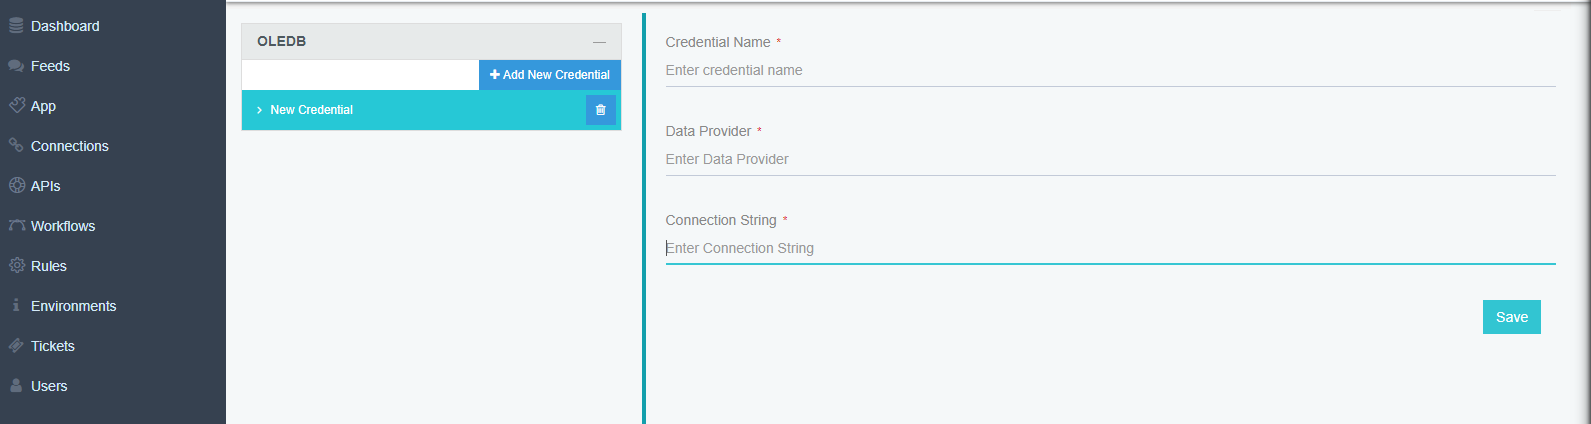
- Credential string is needed to be provided in this format always.
For instance: Provider=SQL**;Password=abcd;Persist Security Info=True;User ID=salogin;Initial Catalog=jim;Data Source=SQL-SRV1***
Detailed description of the credential string is given below:
- Provider - This is your database server provider.
- Password - The password is of the database server
- Persists Security Info - This is the authentication info displayed on enabling the password for saving.
- UserID - The Username or the UserID for the database server.
- Initial Catalog - It is the database name on the selected server.
- DataSource - This is the name of the Database Server.
Input all the details & Click SAVE.
Note: Data Provider is the Database Service Provider.
How to add credential for On-premise integration
Generic OLEDB Adapter is a software which provides OLEDB applications a leverage to communicate and adapt with the AEC Portal. This section provides you the detailed process of validating a OLEDB database application in the APPSeCONNECT OP Agent.
- In the app config panel, configure the OLEDB App Configuration Process.
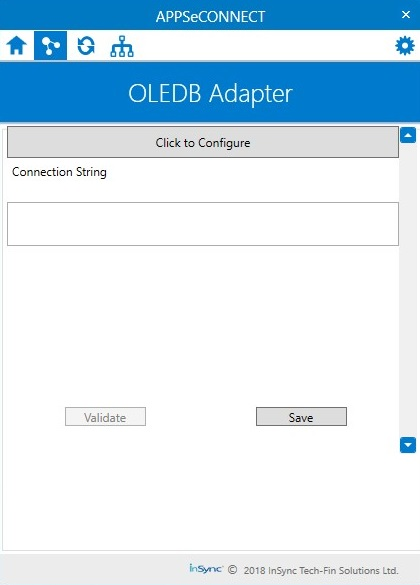
- The OLEDB configuration window, consists of click to Configure and connection String.
- Select click to configure. Select your OLE Database provider.
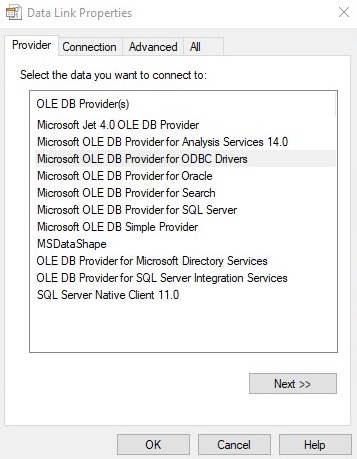
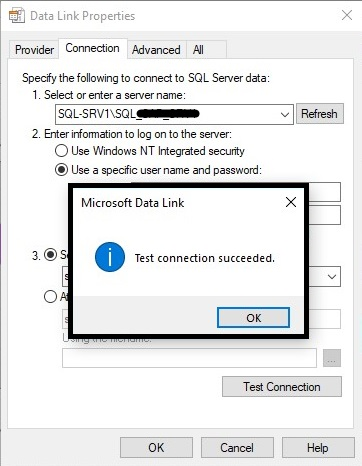
- The Data link Property Window appears.
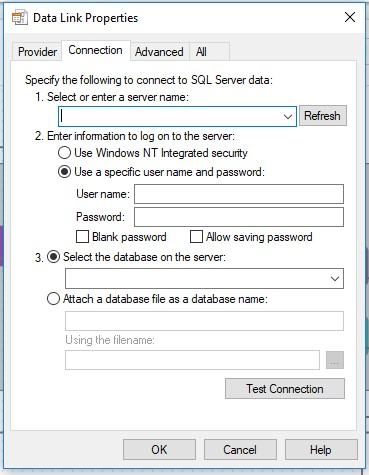
- Select or enter the Server Name from the dropdown option.
- Provide the Username and Password of the database server. Apply the Allow saving password checkbox.
- Select the database, from the dropdown option, present on that Server.
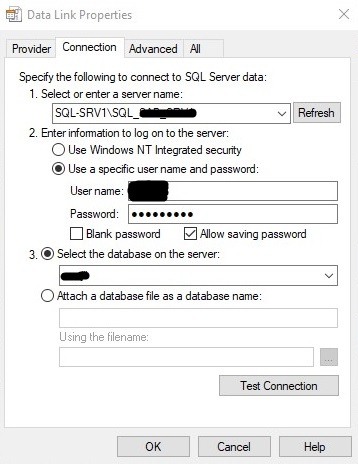
- Click on Test Connection. A success message pops up on successful connection.
- On successful connection, the connection string field on the App Configuration Window gets auto-generated. The Connection string comprises of the following elements.
- Provider - This is your database server provider.
- Password - The password is of the database server
- Persists Security Info - This is the authentication info displayed on enabling the password for saving.
- UserID - The Username or the UserID for the database server.
- Initial Catalog - It is the database name on the selected server.
- DataSource - This is the name of the Database Server.
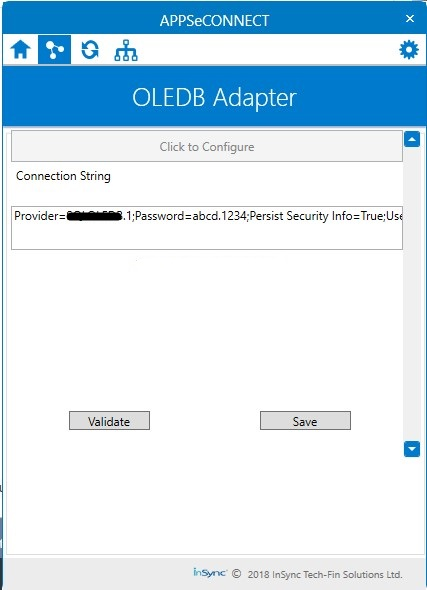
Click on Validate and Save.

Protip: Removing or erasing the generated connection string enables the click to configure button
Protip: It is mandatory to apply the allow saving password checkbox, else it will not allow login to the database which will cause failure while Testing the Connection and Validation

