
Basics of Source-Destination Mapping
Updated:
Mapping triggers the transformation process between the Source and the Destination Applications. Source and Destination schemas are mapped in the Transformation section of the processflow. This document will help you to know about the Source-Destination Mapping in APPSeCONNECT portal.
Pre-requisites for Source and Destination Mapping
- Valid credentials for logging into the APPSeCONNECT Portal.
- Choose APP or Create APP
- Create Connection template The pathway for source-destination mapping section is provided here.
Source-Destination Mapping
Mapping of the attributes of destination application with source application attributes is implemented by the process known as
Source-Destination mapping.
 Mapping Processes are initiated at various level of Input Packets
- For-Each loop - This is used for execution on a block of code on each element in a collection of items. It is useful to display each item in a collection of items till when the loop is defined. Under For-Each loop, Entities have been used and Variables are set under Entities.
- Complex Object Collection - This specify the mapping list within a complex object. This mainly includes the collection of complex object and attributes.
- Complex Object - Complex Objects are the objects which are highly structured and large in size (can also be small) of Variable Representation Length (VLR).
- Attributes - Each target system configuration constructs an “attribute map” which contains all the attributes known by the system.
Variables are defined by two types of scopes.
- Root Variable - Global variable which can used in any entity.
- Root Entity Variable - This is a local variable which is generally used under the scope of an entity.
Steps to Perform the Source-Destination (Attribute) Mapping
- Log in with valid credentials in the AEC portal.
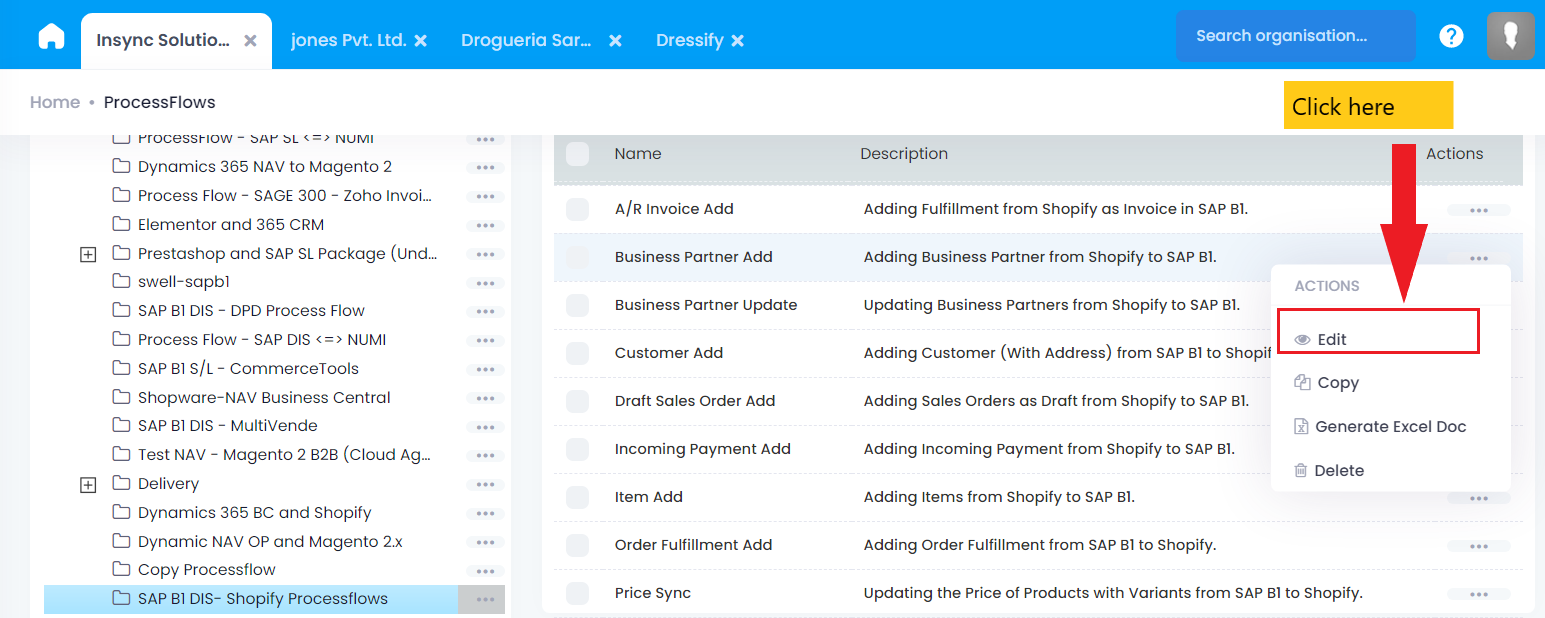
- Navigate to Designer -> ProcessFlow. Create or open a pre-built processsflow by clicking on edit.
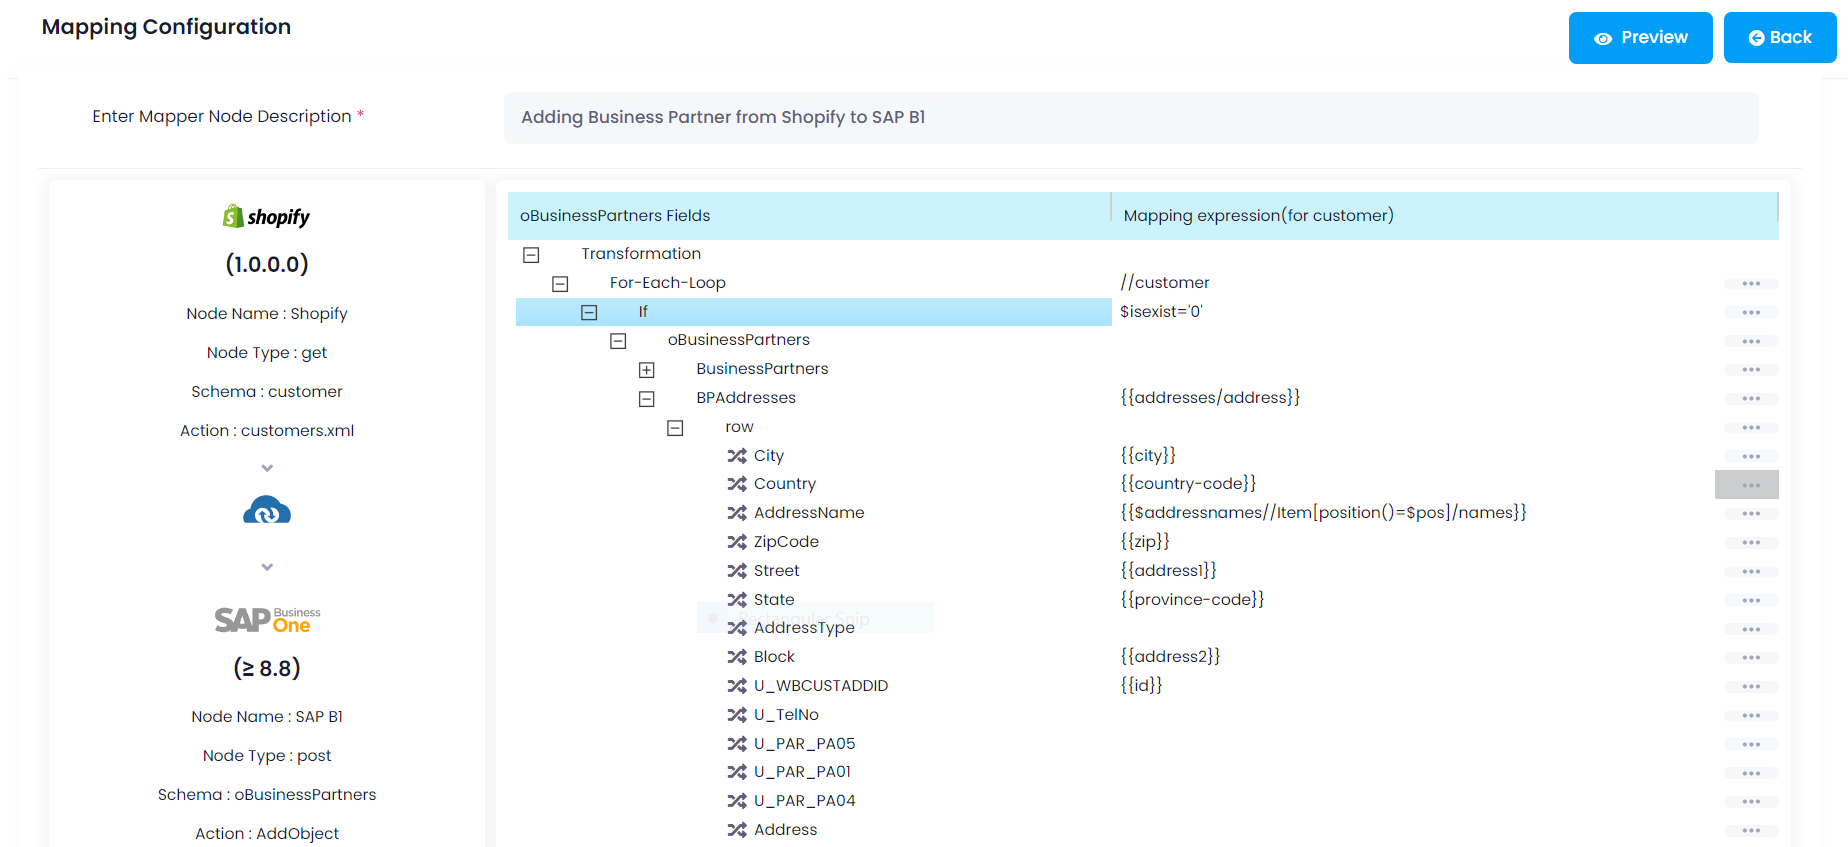
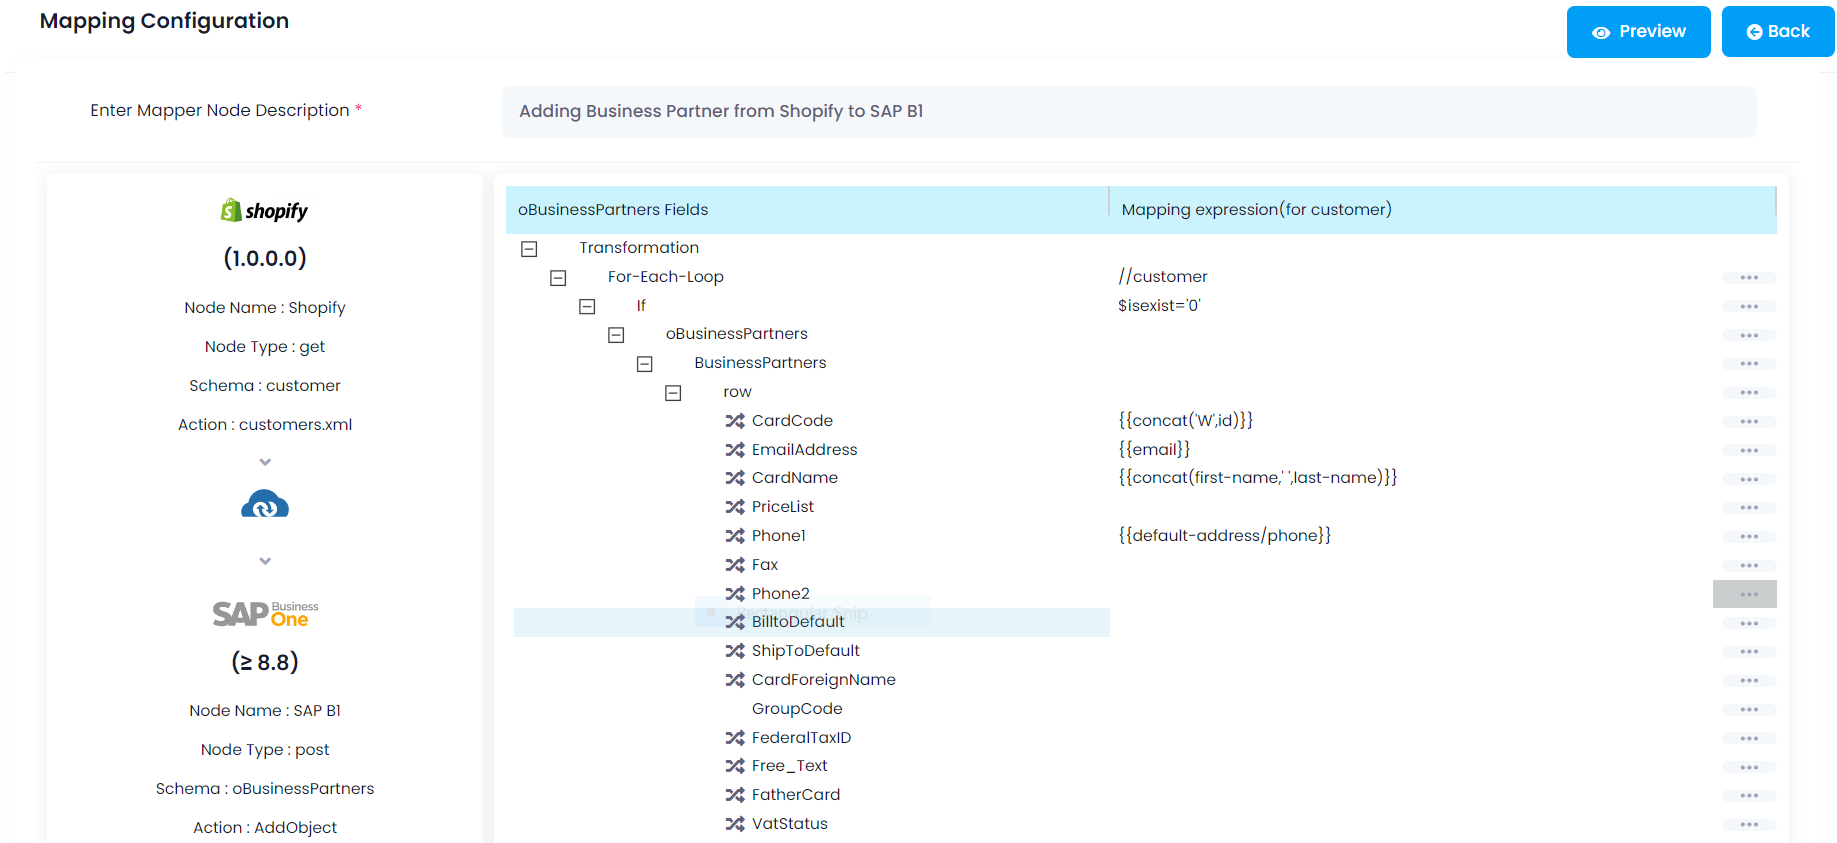
- Click on the Node Configuration icon of Mapper node. The transformation page opens up. Here you can perform your necessary mappings.
- Expand the For-Each Loop node for mapping the attributes. Click on the Do Mapping button provided beside every attribute.
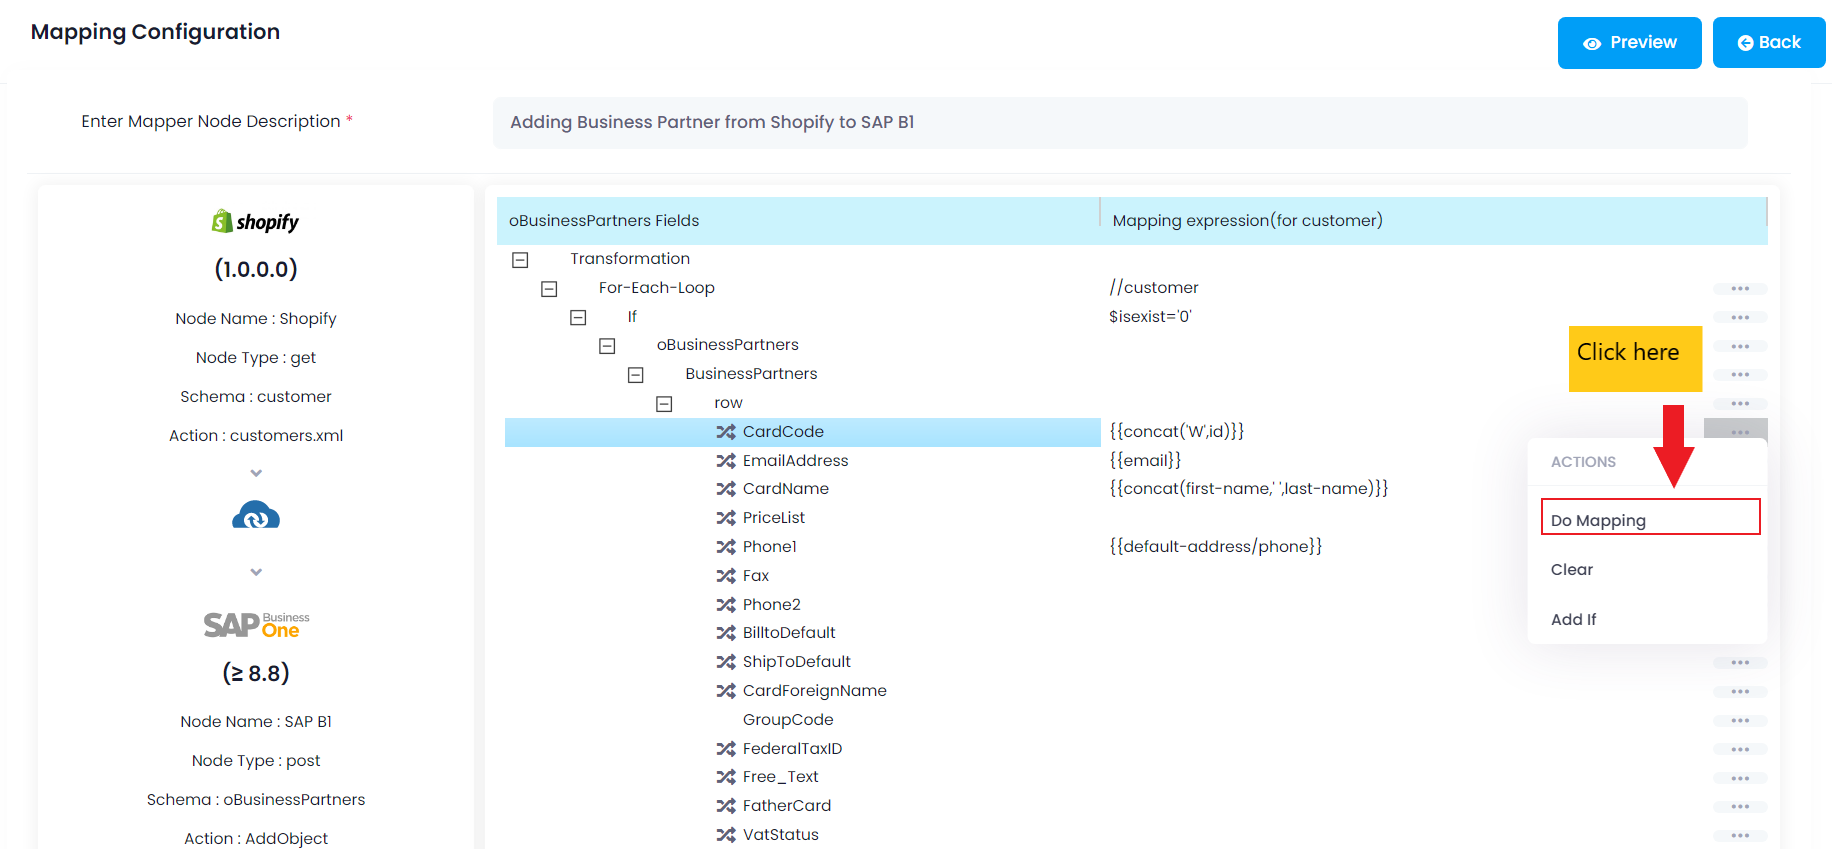
-
The Mapping window opens up. You need to provide the fields for mapping is this window. The User can also click on the entities/attributes to get it on the box.
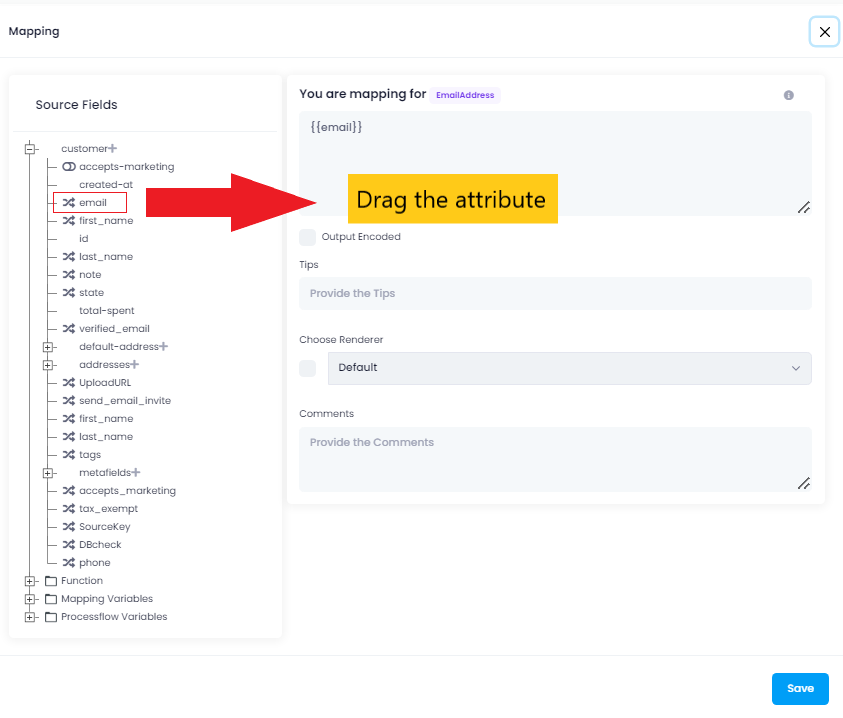
- Click on the Save button after the mapping is done in that attribute. Similarly other attributes can also be mapped.
Points to Remember
-
You can also perform Variable mapping and Lookup mapping.
-
The user can enable and disable the attribute mappings. The
Disabling Mappingfeature is not available for the attributes with the primary key.**
For more details on Attribute Mapping click here.

