
Product Add
Updated:
Executing the Process is a vital part when integrating any applications. This Document will let the users to understand how the integration process can be executed through workflow for adding Simple Product from SAP Business One to Magento2.
Brief Description
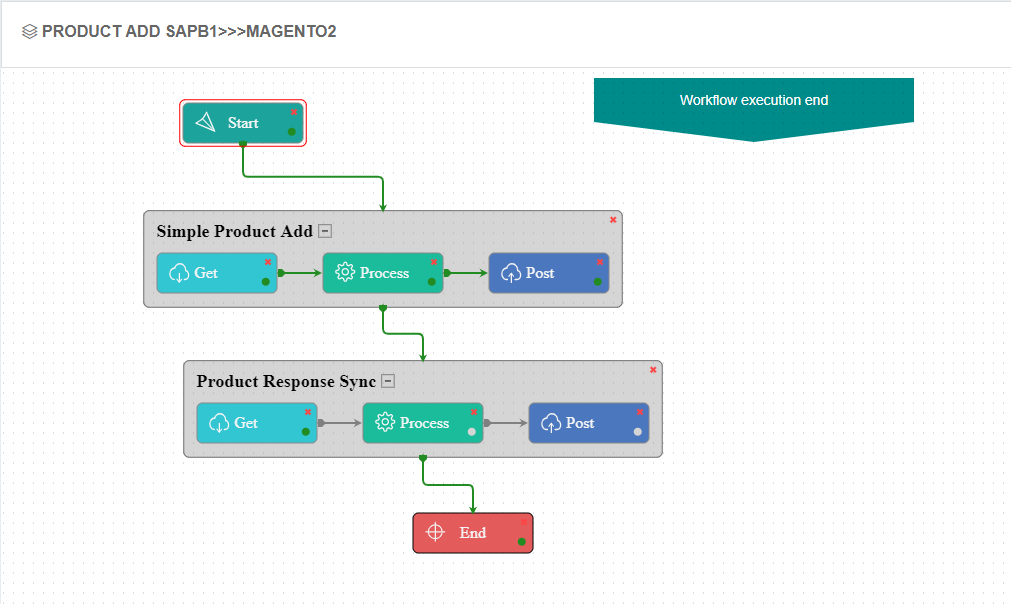
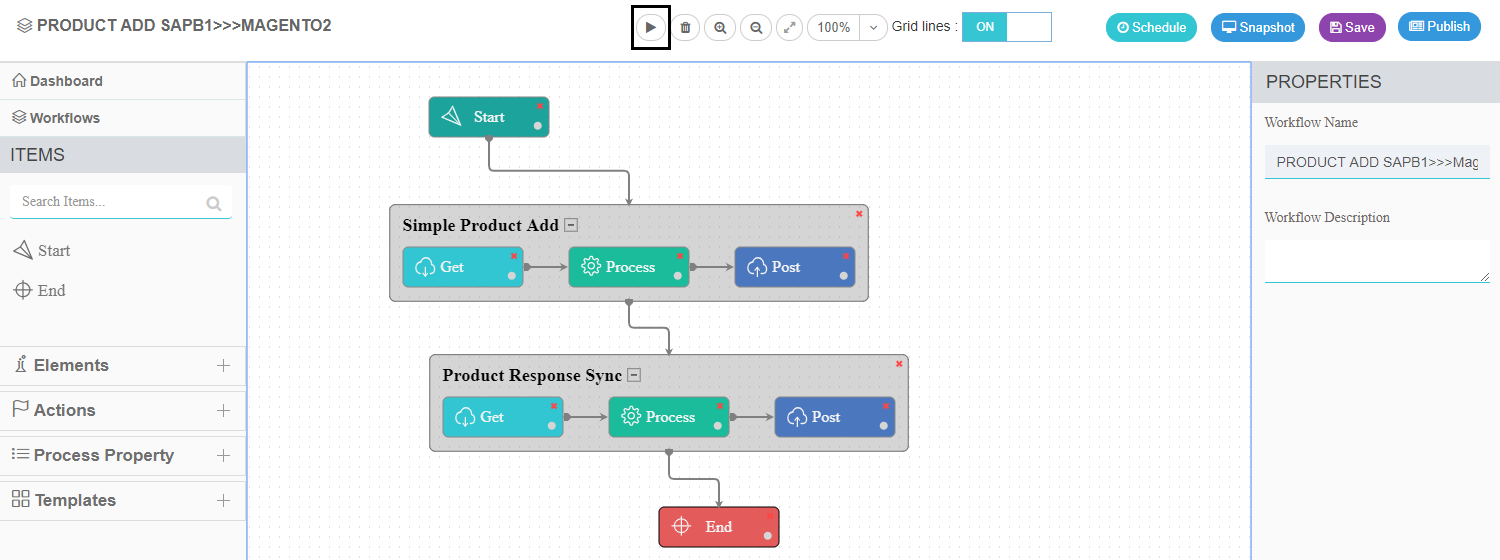
In this case, the Product Add Workflow is used for adding simple product from SAP Business One to Magento2.
Here, a workflow is created where all the Simple Products are fetched form SAP Business One and are posted to Magento2.
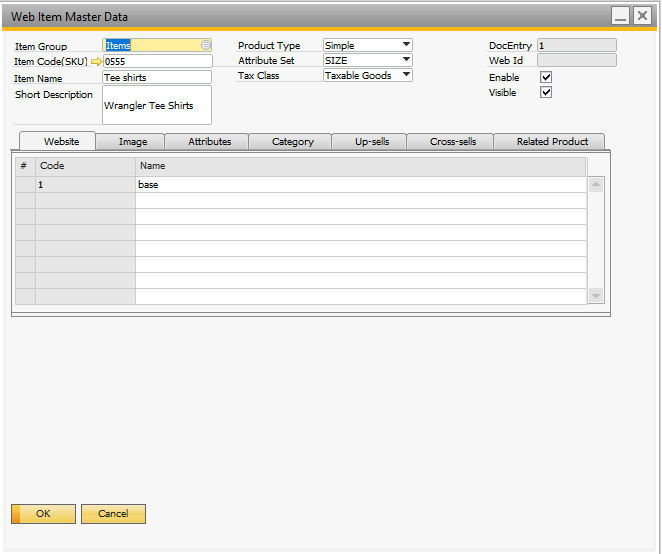
Login to SAP Business One Client Application. Item add need to be inserted through web item master data.
Lookup Mapping
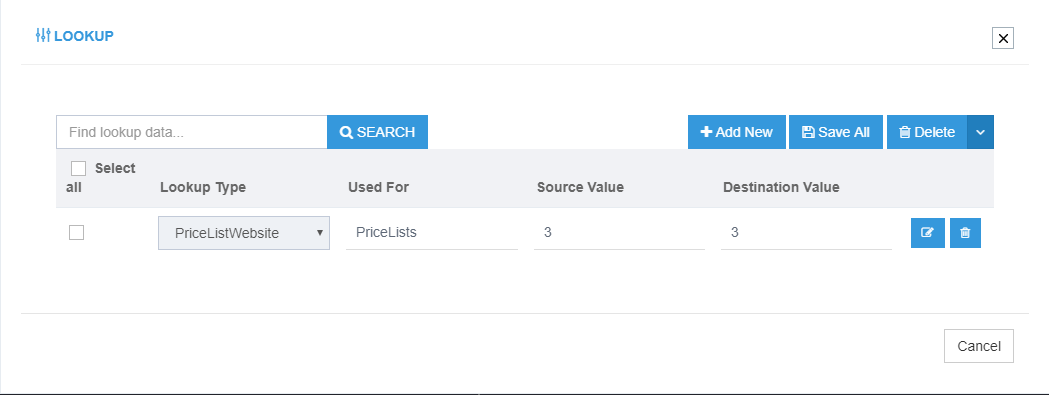
The lookup Mapping for the PriceLists is needed to be done if there is a different Pricelist other than the default value 1. For Example: If the PriceLists selected as 3, the destination value too is needed to be mapped.
On mapping the lookups, the attribute mapping for Price field is needed to be altered. The mapping should be:
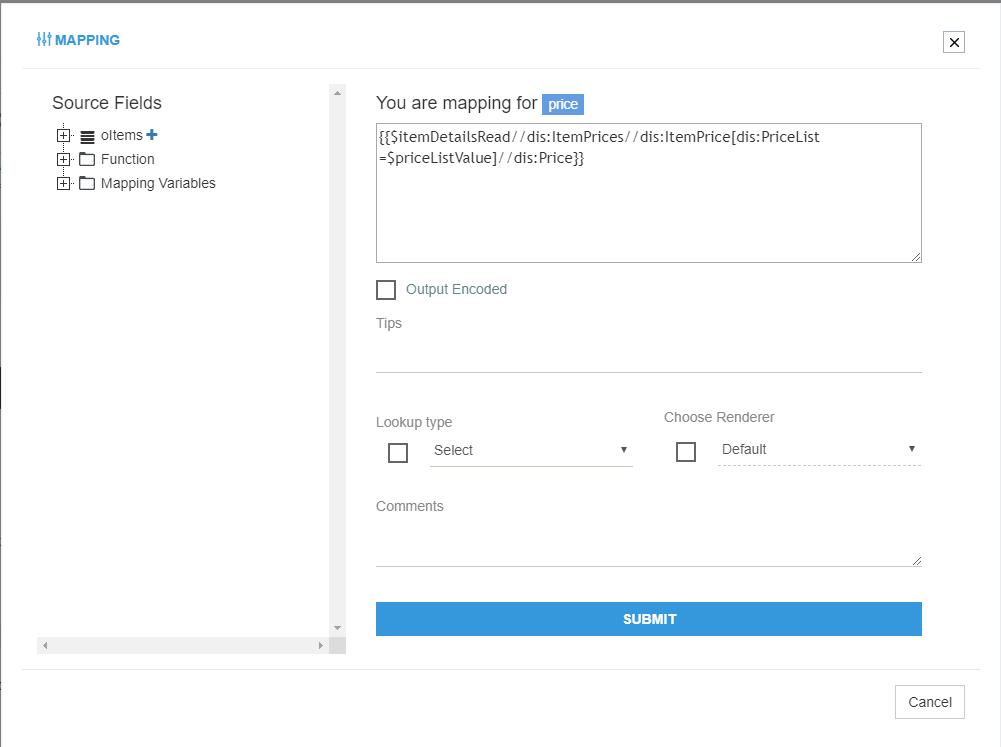
Simultaneously, a variable is needed to be created as the variable $priceListValue that is used in the mapping above is not declared.
Therefore, in the Root Variable section, add a new Variable with the name $priceListValue whose datatype should be string. Click here to know how to add a new Root Variable.
On its creation, click on the Open Variable Button to initialize the lookup. For mapping variable:
- Select the function getMapping(ObjectType,Value) from the Generic Functions.
- The ObjectType is the Lookup Type (PriceListWebsite) and the Value is the mapping of the attribute Price ($itemDetailsRead//dis:ItemPrices//dis:ItemPrice/dis:PriceList).
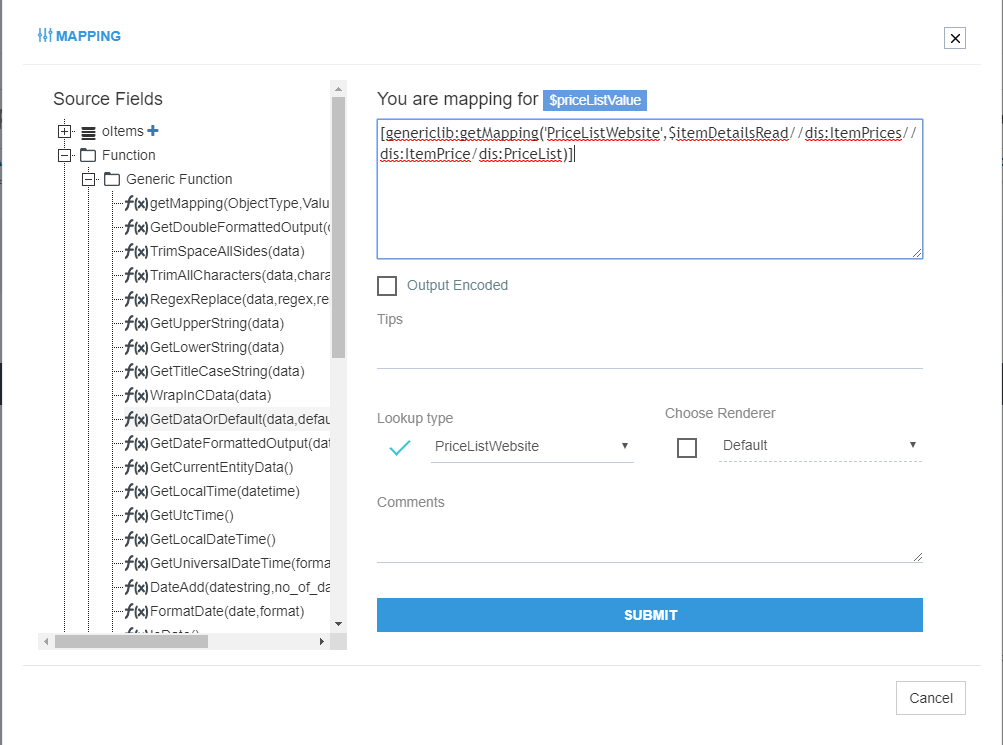
Note: Objects/Variables with string datatypes should be provided in single quotes.
Attribute Mapping/Transformation
Following the Provided Mapping, the user can sync the Simple Product Add from SAP Business One to Magento2. To know more, see Mapping & Transformation Techniques.
Mapping for the ‘Simple Product add Touchpoint’
-
Mapping for the
ComplexObjectCollectionProduct.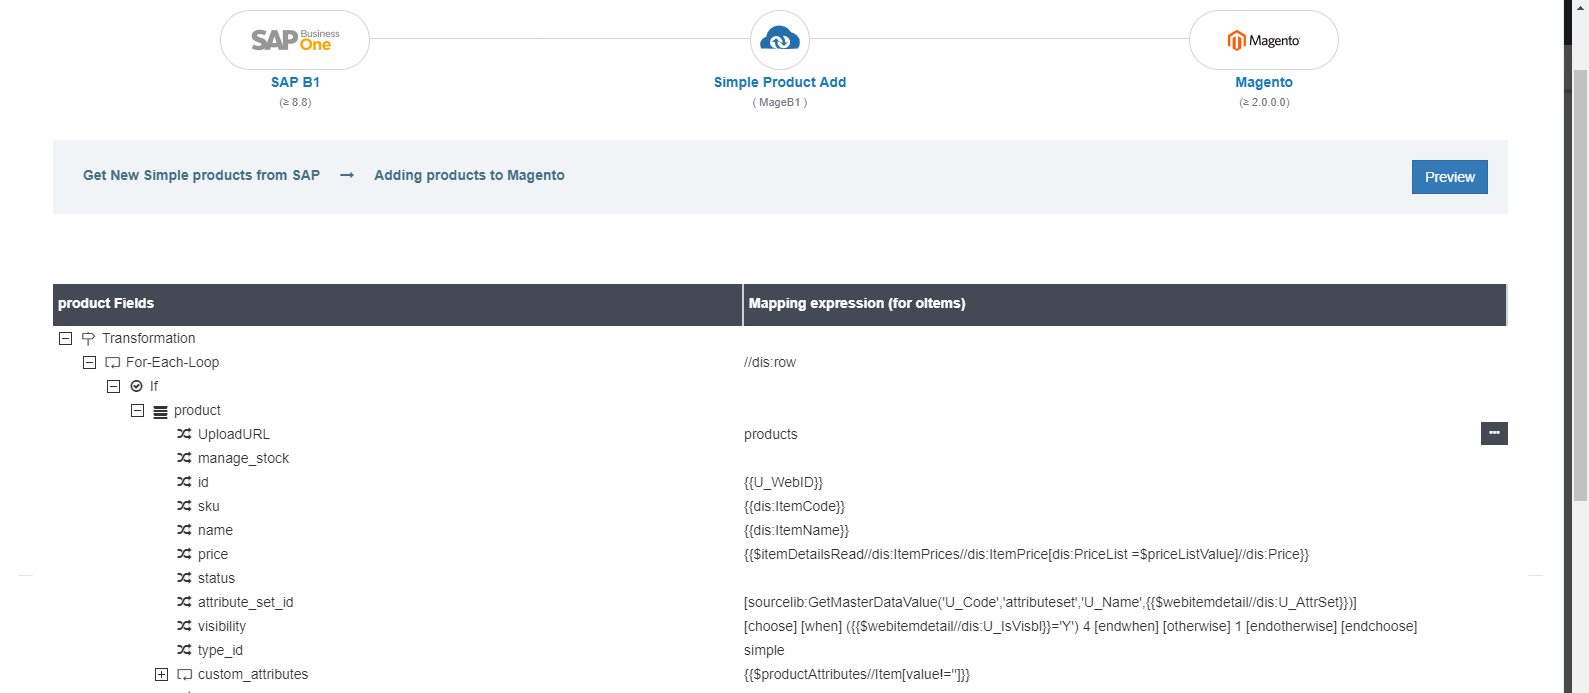 a. Id: Here the itemID is being mapped with the destination attribute U_WebID.
b. sku: Here the product SKU is being mapped with the ItemCode attribute in Magento2.
c. name: Here the name is being mapped with the ItemName attribute in Magento2.
d. price: This maps with the pricelist in Magento2.
e. Attribute_set_id: This field maps with the attribute set of the product in Magento2
f. type_id: This maps the type of product. -
Mapping for the ComplexObject
custom_attributes.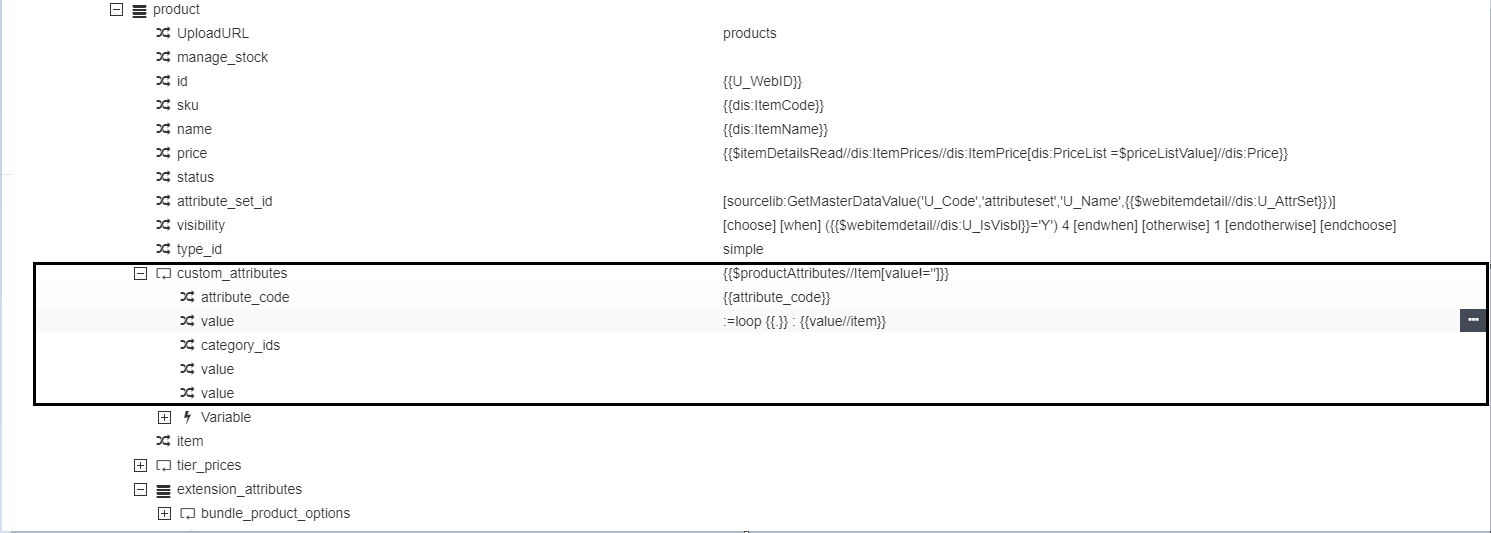
a. custom_attributes: This is an XPath provided to execute a loop for accessing the attribute_code. Through the Custom Attributes, details like description, short description, tax_class_id, color are also transformed.
b. attribute_code: This maps the attribute code in the magento2.
c. value: Performs a loop for getting value of the short description.
- Mapping for the ComplexObject
product_links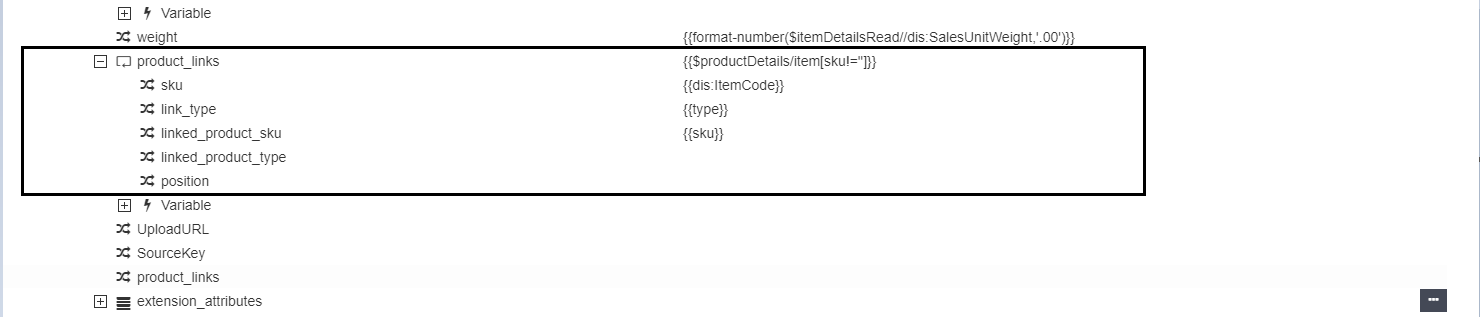
a. product_links: Xpath has been provided to implement loop for getting the details of the product. b. sku: This maps the products SKU with the item code of the product in Magento2. c. link_type: This fetches the Cross sell and Upsell Type. d. linked_product_type: This maps the SKU of the linked product in Magento2.
Executing the Workflow Integration
Note: Before integrating with Magento2 and SAP Business One, make sure all the Master Data Touchpoints are synced.
- Once the workflow is designed, Update the Configuration in agent for deploying the workflow in the agent.
- Navigate to the Workflow Panel in the agent and click on the Start Sync Button for executing the Process.
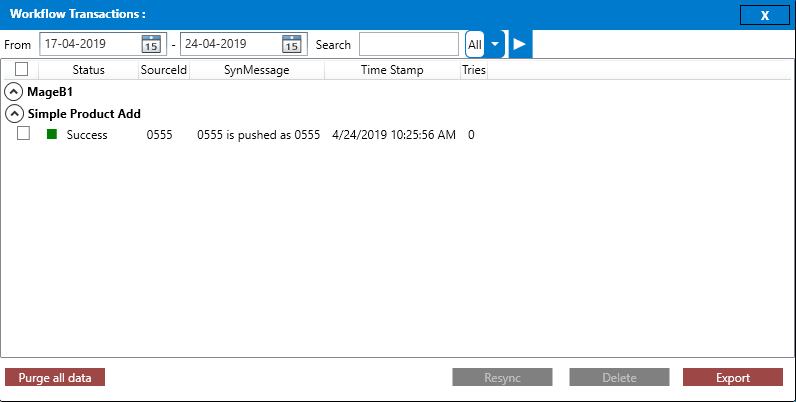
- Once the Execution is finished, click
Resync Button(highlighted in the image) in the agent. - The Resync Panel show the Success Result in the agent.
Integration Data Survey
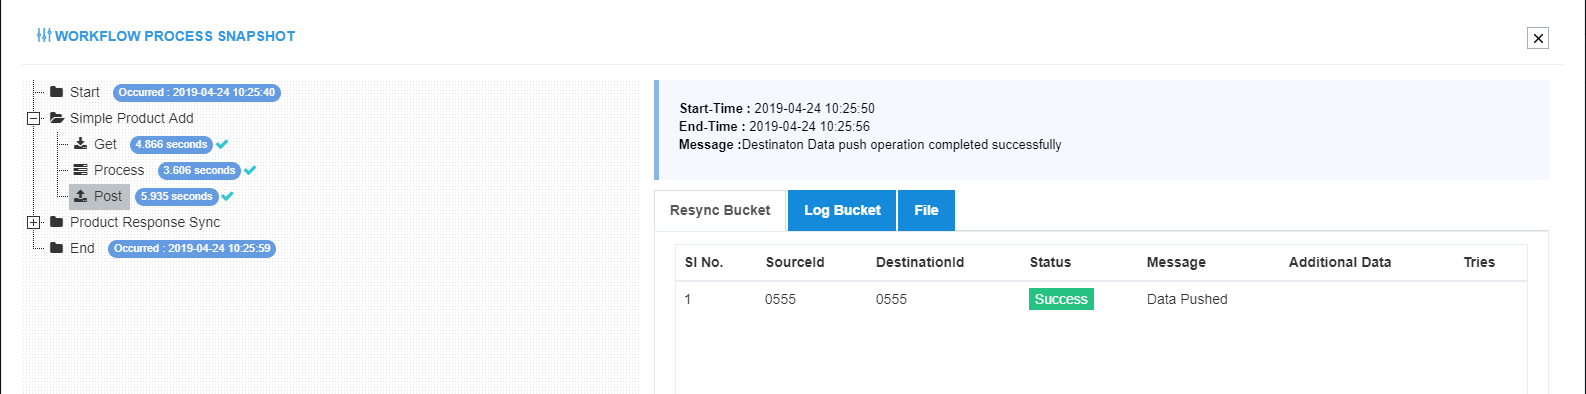
The user can survey the data by viewing the Processed Snapshot from the node level of the workflow.
This Snapshot View displays the successful execution of the workflow. The Simple Product with the source id 0555 is successfully synced to SKU 0555
in Magento2.
Post-Conditions
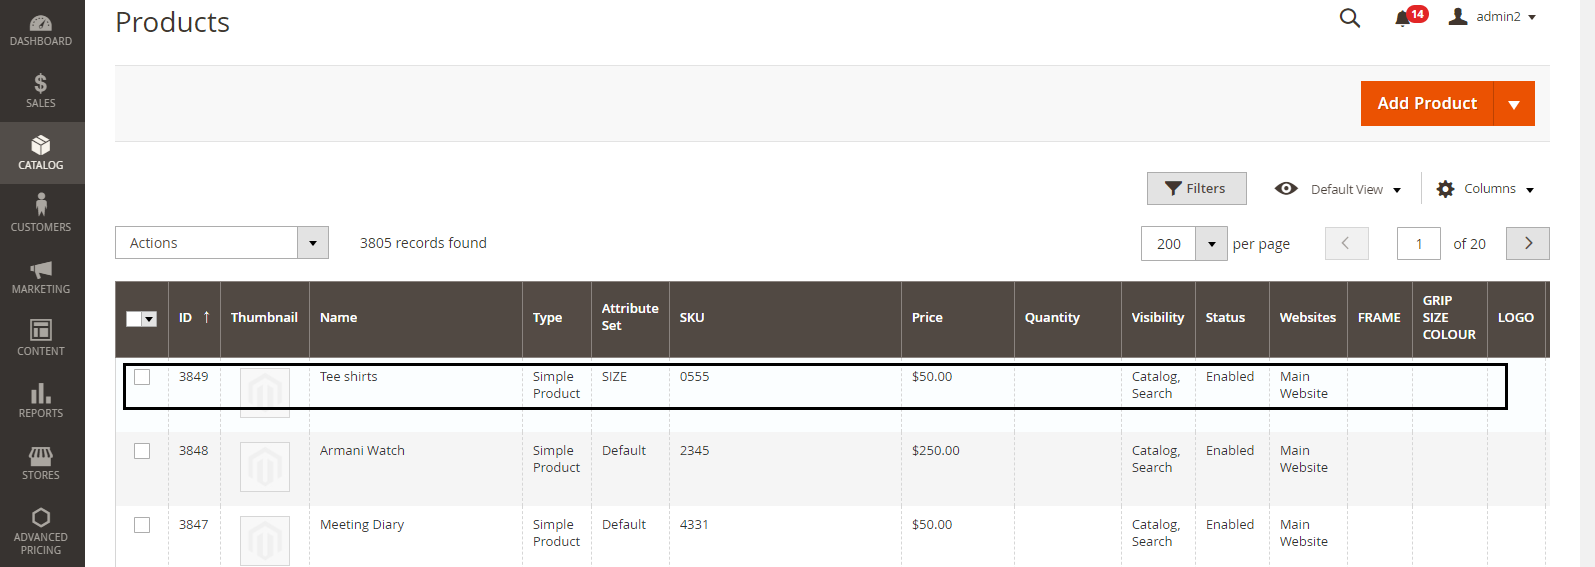
The user can view the product synced in the Magento2 by navigating to Catalog->Products
Frequency of Use
The user can execute the Integration through workflow as and when required.
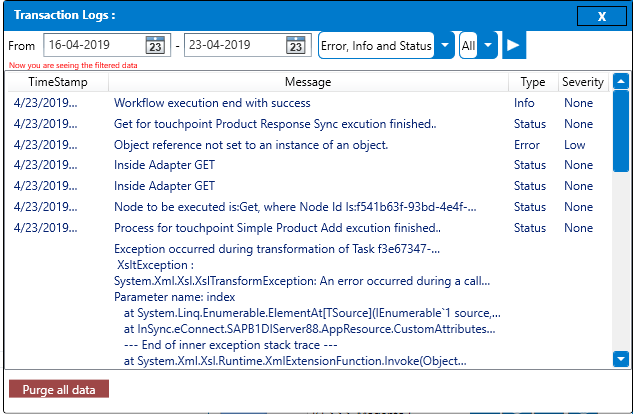
Troubleshooting
a. Error 1:
Exception occurred during transformation of Task f3e67347-adcf-48a5: XsltException : System.Xml.Xsl.XslTransformException: An error occurred during a call to extension function ‘Custom Attributes’. See InnerException for a complete description of the error. —> System.ArgumentOutOfRangeException: Specified argument was out of the range of valid values.
- For troubleshooting this error, Navigate to the Transformation page of the workflow in the portal.
- Analyze all the attributes, viewing whether its in the Activated Stage.
- Also, the Root Variable $webitemdetail has a User Defined Object (UDO) initialized naming SBOeConnect_UDO. Verify that the UDO has been successfully activated in the SAP Business One Client.
- For Activating the UDO, Navigate to Tools > Object Registration Wizard > Next > Update an existing Object > select SBOeConnect_UDO >
click on next until Finish.

- After all the changes done both in the portal and SAP Business One client, Reset Generate and Reset Publish the Connection in the Portal and Update the Configuration in the Agent.
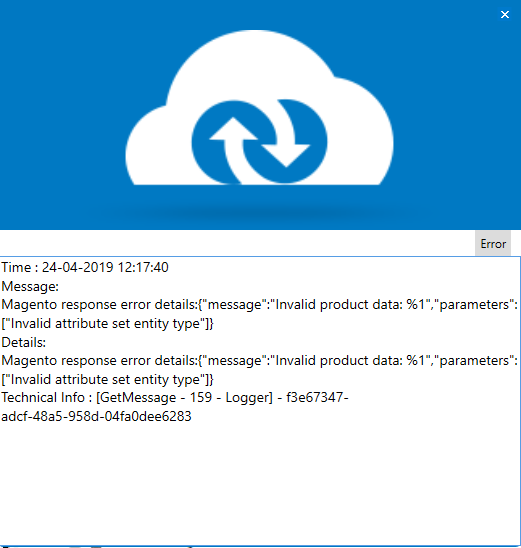
b. Error 2:
Magento response error details:{“message”:”Invalid product data: %1”,”parameters”:[“Invalid attribute set entity type”]}
- For troubleshooting this error, Navigate to the Transformation section for the Product Add touchpoint in the Workflow, and verify the mapping for the attribute attribute_set_id .
- Open the mapping for the attribute and rectify the error as required.
- Click on the Submit button, once the mapping is done.
- After all the changes done (in portal), Reset Generate and Reset Publish the Connection in the Portal and Update the Configuration in the Agent.
- And execute the Workflow again. Doing this, the user can successfully integrate this workflow.
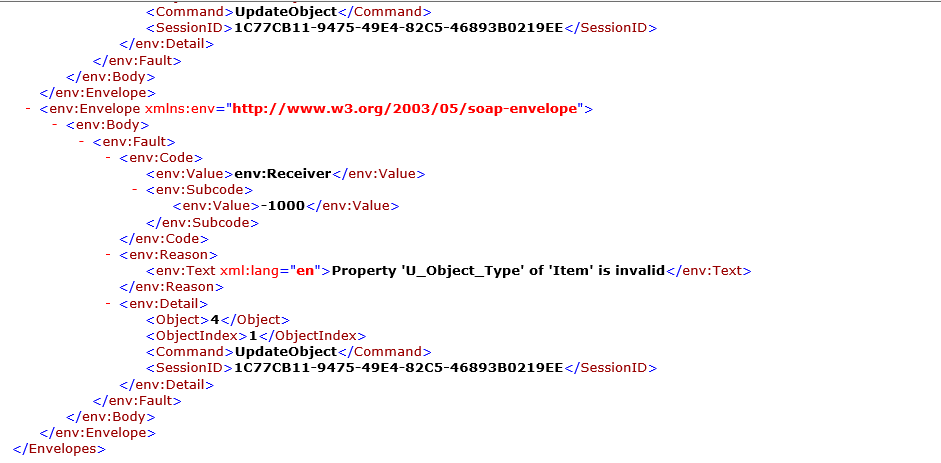
C. Error 3: Details
Property ‘U_Object_Type’ of ‘Item’ is invalid. The Error is displayed when the dependency touchpoint is synced as post acknowledgement task.
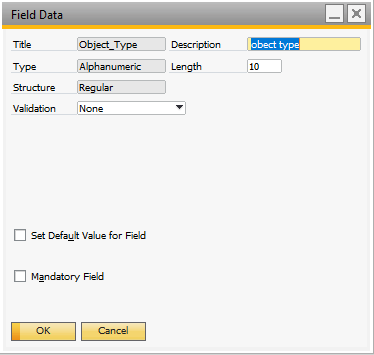
- For troubleshooting this error, an UDF is needed to be created.
- For creating the UDF, Navigate to Tools > Customization Tools > User - Define Fields - Management > Master Data > Items > Items.
- Create the UDF as shown below:
Doing this, the user can successfully integrate this workflow.

