
OAuth2.0 Authentication
Updated:
Process to Configure OAuth2.0 Rest Adapter - On Premise
To configure the OAuth2.0 Authentication type for Rest Adapter follow the steps given below:
1) Login to APPSeCONNECT Portal.
2) Create Technology Application using rest adapter. Choose REST option while creating technology application for REST based protocol.
Protip: You can use either both technology app or one tech app and one prepackaged app while creating a connection.
Also you need to click Configure Connector button for creating connection as your desired connection is made of custom application.
Protip: Here you will get a connection for lightspeed (which supports OAUTH 2.0 for authentication) where you can view the validation details as required
3) Once the connection is created, Login to the agent.
4) Go to the App Configuration page on your OP Agent, and Click on Update Configuration.
You can now view the REST based chosen applications in your agent.
Click Here, for deploying applications from Process Flow.
5) On clicking the + button beside your REST based application, the credential window for REST Adapter opens.
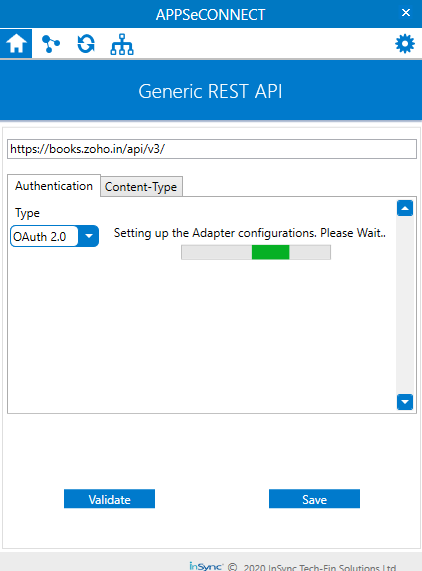
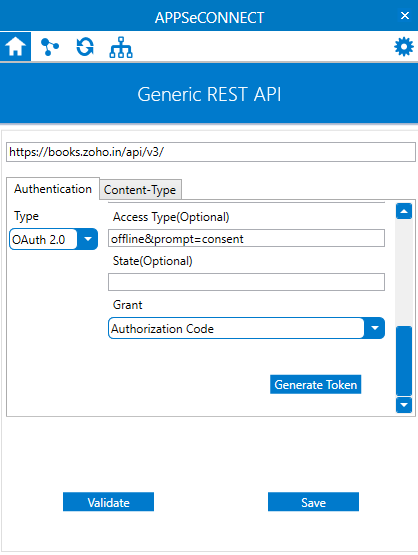
6) Provide the BASE URL of your application and select the Authentication Type as Oauth2.0. The adapter configurations will get downloaded automatically (within a time span), and then you can process with the credential authorization.
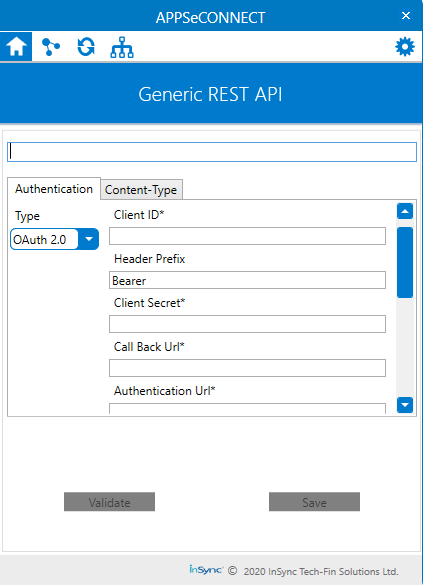
7) You can now provide the credentials for your applications. The following fields are required for validating the your credentials. The Authentication fields for OAUTH 2.0 are:
- Client ID – This is generated when the client logs into the Application.
- Header Prefix - This field authenticates your token provided for this validation process. By default, BEARER will be selected.
- Client Secret - This field is also generated by the REST supported Application.
- Call Back URL - This is the secondary URL required for data restoration.
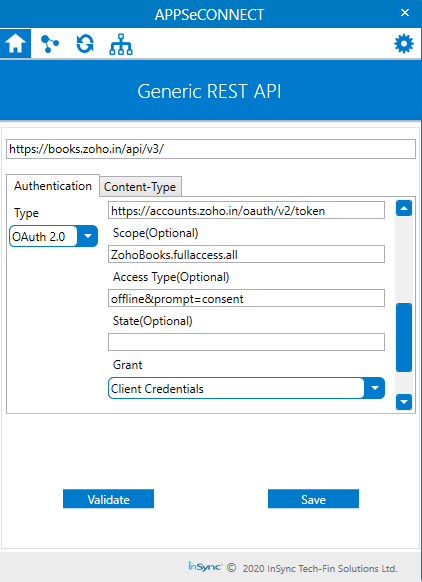
- Authentication URL – This URL is generated along with the Client ID and Client Secret in the REST application itself.
- Access Token URL
- Scope (Optional)
- Access Type (optional)
- Grant – Authorization Code
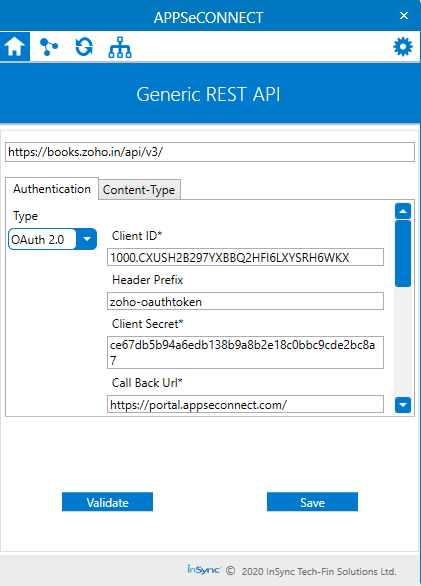
8) Provide your credentials as per the fields given.
Protip: By default, SCOPE , Access Type , STATE is an optional field in AEC Agent, but for some applications providing the optional field can be mandatory, you need to provide the SCOPE for those applications
9) Here, we need to generate token which can be done by clicking GENERATE TOKEN button.
10) A custom browser opens for validating and generating token for your chosen application. (In this case, ZohoBooks is being validated.)
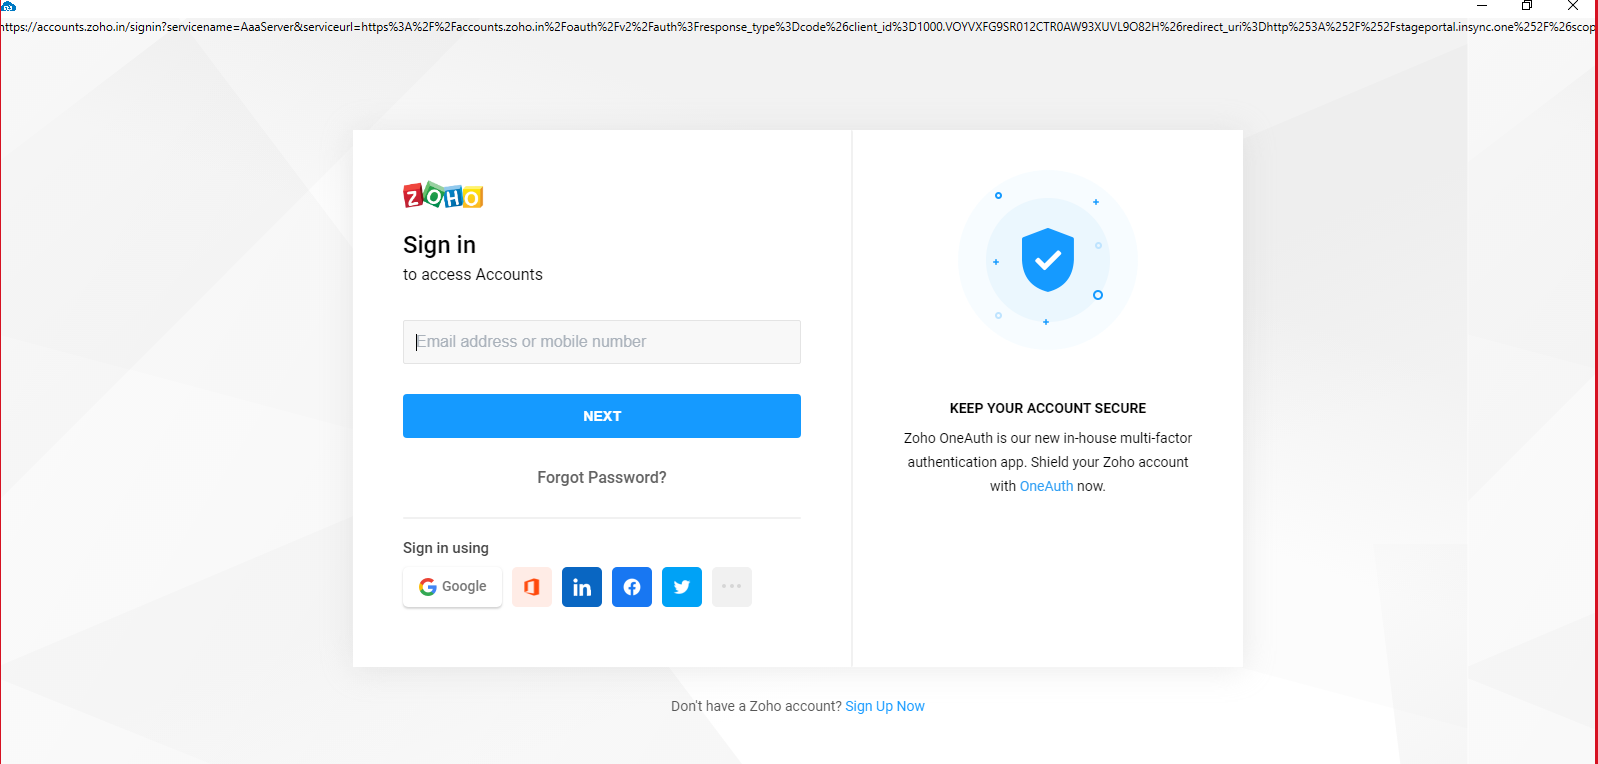
11) Provide your application credentials until the login page of portal.appseconnect.com opens.
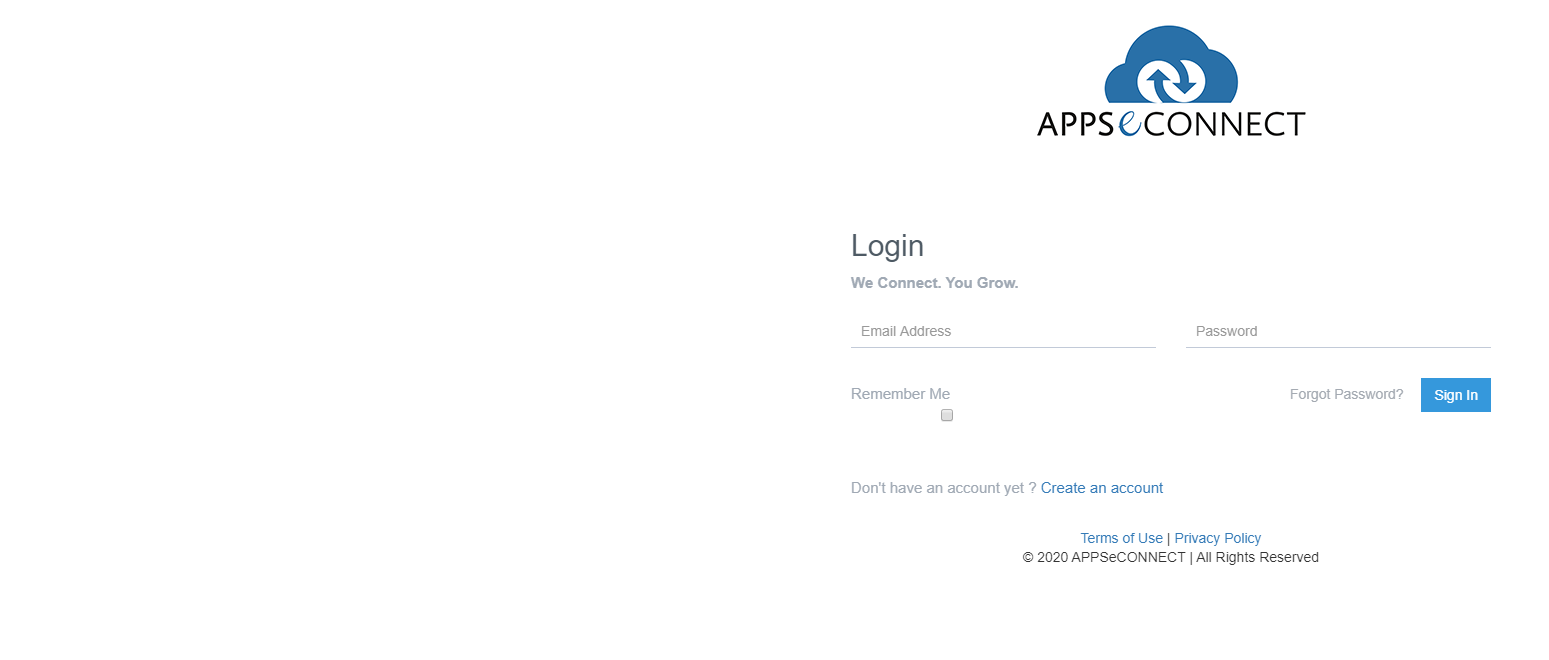
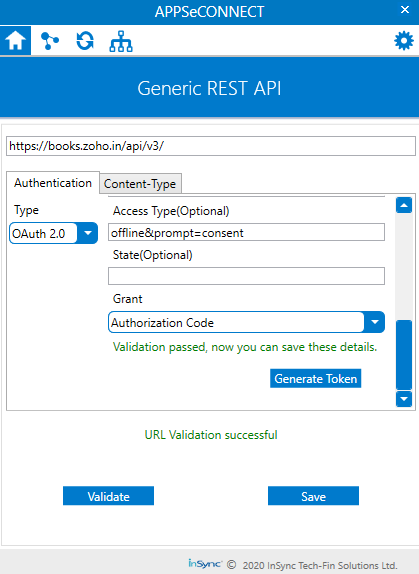
12) Keeping the browser opened, validate your credentials on your On-Premise Agent by clicking on the VALIDATE button.
- The above validation process is done taking the credentials of ZOHOBOOKS.
- By default the field Header Prefix remains as BEARER. If your application supports a different Header Prefix, you need to provide your application specific header prefix. For all ZOHO applications, Header Prefix should be Zoho-oauthtoken. You need to replace
BEARERwithZoho-oauthtoken. - On clicking the GENERATE TOKEN button, it will redirect you to the Application Specific Page on your custom browser, where you need to login with the credential that you have provided during the Account Creation.
- Make sure that you do not close the blank page. Once done, click on the VALIDATE on your OP agent.
- Select the Content-Type as JSON. Click on Validate and SAVE.
Protip: Similarly, for the other Authorization Type for REST APPLICATION as well, we have similar process of integration
Process to Configure OAuth2.0 in Rest Adapter - Cloud
Follow the steps given below to configure Oauth 2.0 in Generic Rest Adapter in Cloud Environment.
- Login to APPSeCONNECT Portal
-
Create Technology Application using rest adapter. Choose
RESToption while creating technology application for REST based protocol.
Protip: You can use either both technology app or one tech app and one prepackaged app while creating a connection.
Also you need to click Configure Connector button for creating connection as your desired connection is made of custom application.
Go to the App section of the portal and you can view the selected application as shown below.
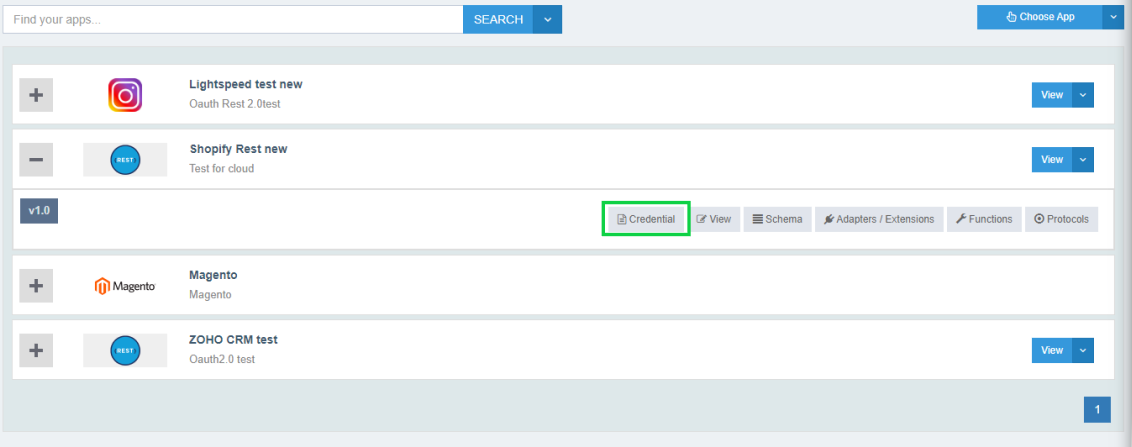
Click Credential button for the choosen application and the following screen appears
Note: If you don’t have a cloud environment created on your organisation, You will be getting this message Please create an cloud environment to Grant the credentials on clicking the Add new Credential button.
To know more about creating Cloud Environment, Click Here
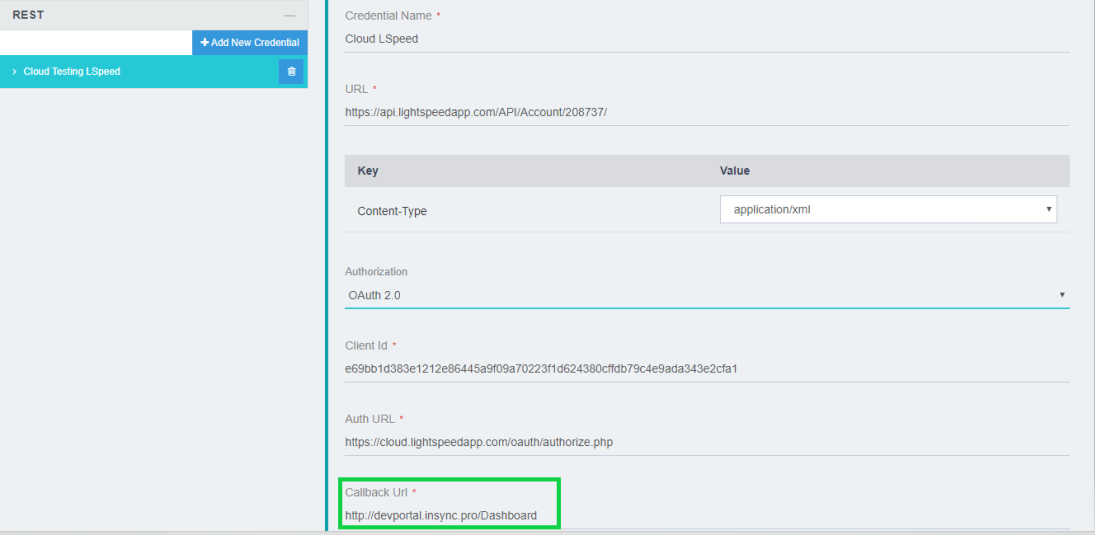
Here you need to enter the following details as shown:
- Credential Name: Enter the Credential Name.
- URL: This is the base URL, input the URL
- Key & Value: This is the content type section that includes the file format types like XML, JSON. Input the value from the drop down list of content type field.
- Authorization: Select OAuth 2.0 from the drop down list.
- Client Id: This is generated when the client logs into the Application. Input the Client Id.
- Auth URL: This URL is generated along with the Client ID and Client Secret in the REST application itself. Input the Auth URL
- Callback URL: This is the secondary URL required for data restoration. This url will be
https://portal.appseconnect.com/Dashboard.
NOTE: Use this url in the callback/redirect url field while generating client id and client secret for the new app
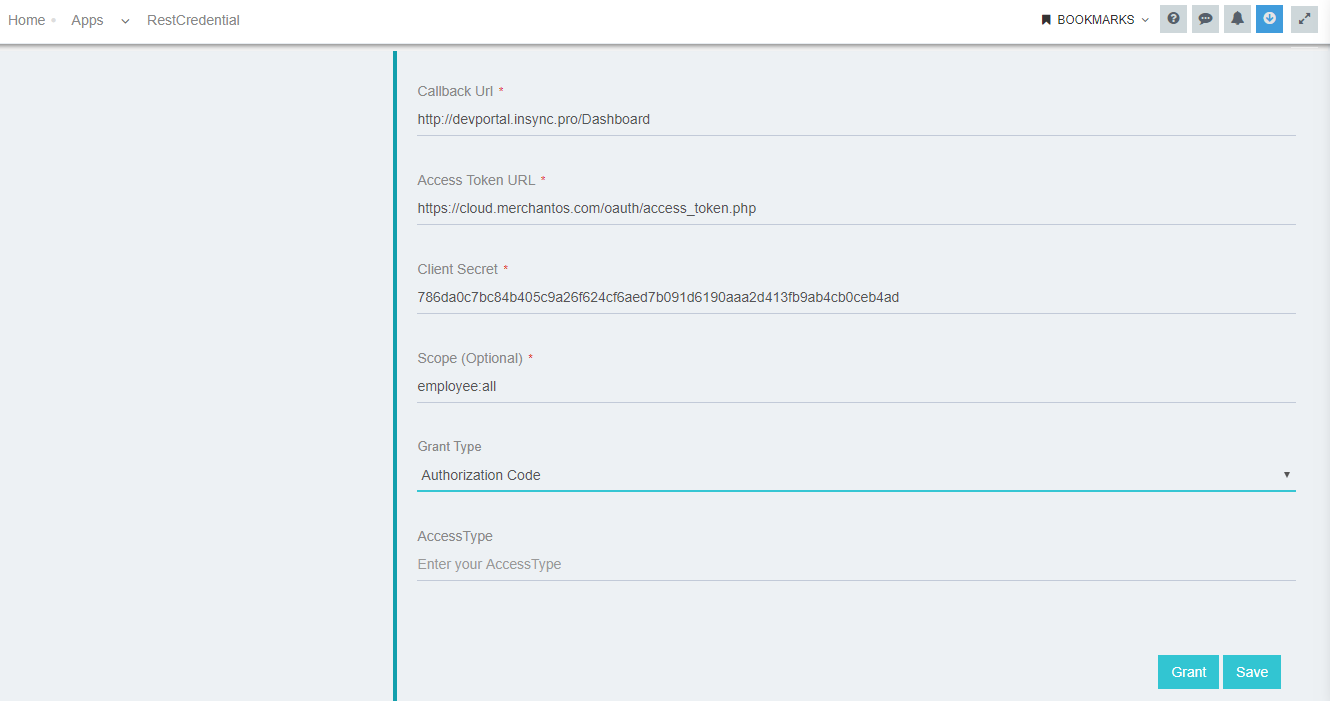
- Access Token URL: An Access Token is a credential that can be used by an application to access an API. They inform the API that the bearer of the token has been authorized to access the API and perform specific actions specified by the scope that has been granted.
- Client Secret: This field is also generated by the REST supported Application.
- Scope (Optional)
- Grant Type: This is the Authorization Code
- Access Type (optional)
Click Grant button, to authorize the application.
You will get success message for Oauth2.0 saying Tokens Generated when both Access and Refresh Tokens are generated.
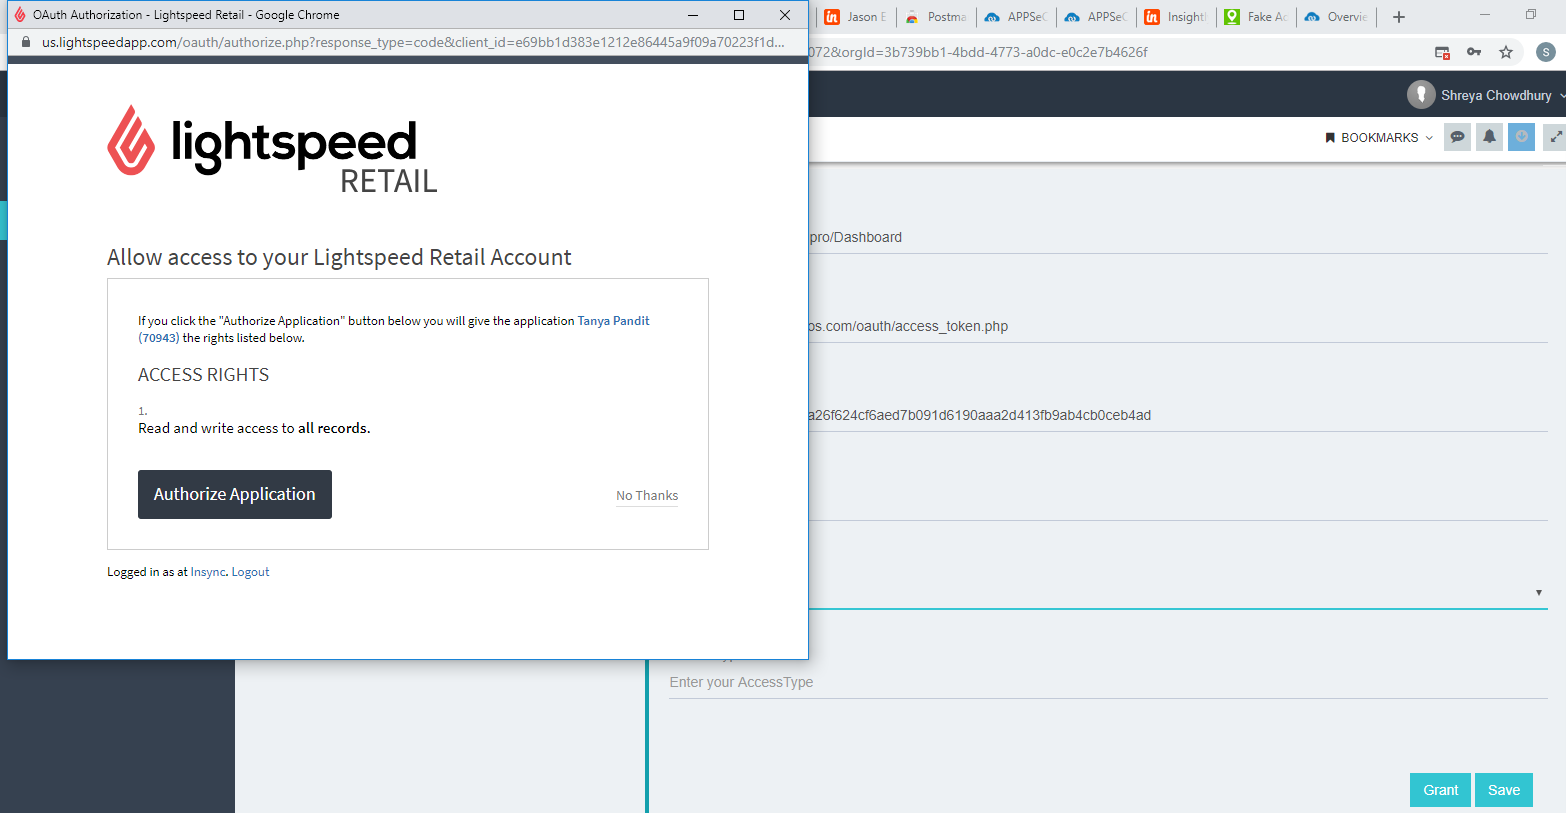
Now this will take you to the login page of the application.
Provide the login credentials. This will thereby allow you to access the application with a pop up message as shown below
Click Save button, to Save the Credential.
If the Authorization fails, you will get a failure message saying Failed to create tokens
Protip: In Rest Based Integration for Cloud Connection Use Portal URL as Call back URL
Protip: Note: By default, organisations will only be On-Premise enabled. Users of the organisation needs to contact the APPSeCONNECT team for enabling cloud hosted organisation so that users can integrate cloud application using the cloud agent.

