
Deployment Configuration
Updated:
APPSeCONNECT is of Hybrid Architecture and the data can be integrated through both CLOUD PORTAL
and OP Agent. This section of the document will enable you to know and configure the Cloud Agent and the OP Agent.
Cloud Agent Configuration
Protip : By default, organisations will only be On-Premise enabled. Users of the organisation needs to contact the APPSeCONNECT team for enabling cloud hosted organisation so that users can integrate cloud applications using the cloud agent.
Pre-requisites
- The Organisation should be cloud Enabled.
- The two applications between which data has to be synced should be cloud supported.
- All the apps present in ProcessFlow should be cloud supported.
How to enable Cloud Support for Organization
a. On the Dashboard of your cloud portal, click Projects > Manage Projects. Click on the Edit button of your project.
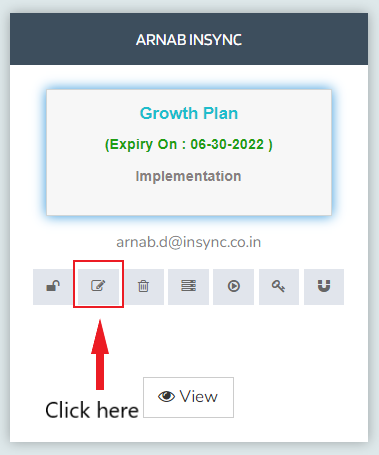
b. Enable the Check-Box for Cloud Hosting and click SAVE.
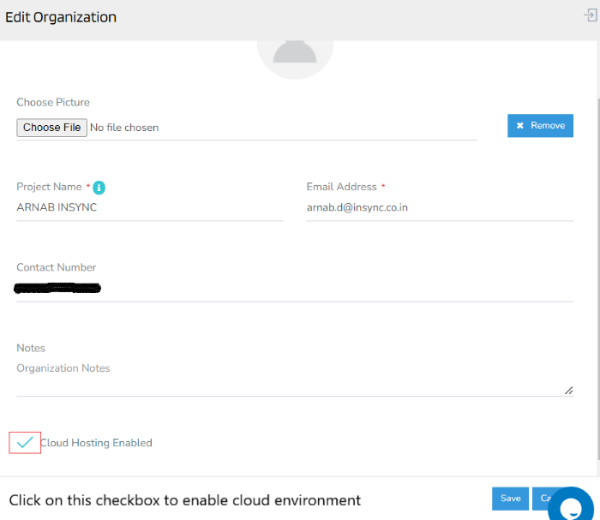
d. After enabling the organisation for Cloud Hosting, a new environment is to be created for CLOUD EXECUTION.
e. In the Environment section of the cloud portal, click on the HOSTED node. Click Here to know more on creating a Cloud Environment.
On-Premise Agent Configuration
Pre-requisites
- The user needs to have an active account in the APPSeCONNECT.
- The implementer/user needs to have a valid user name and password for accessing the APPSeCONNECT.
Installing Process of an On Premise Agent
a. Login to the portal. Download the Agent from the Downloads menu as shown below.
b. Execute the downloaded file (as administrator) by double clicking on it. The Setup wizard opens with a welcome message.

c. On clicking Next, a pop-up window will appear notifying you to start the Pre-Requisite Checking.
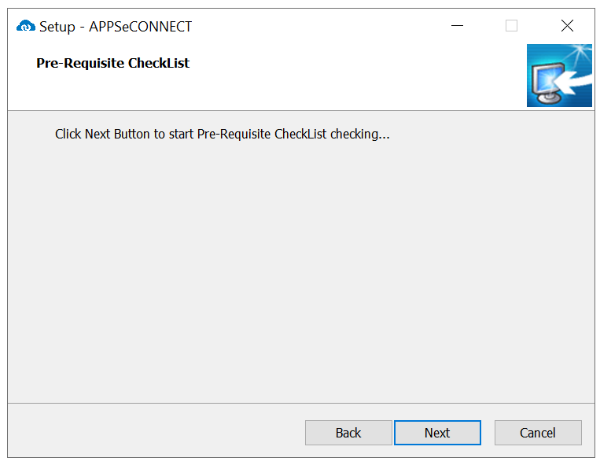
If you see all the checkboxes are checked, that means the system meets the minimum requirements set by APPSeCONNECT. In case you see any cross mark on any of the links, please note the link and ask your system administrator to exempt the URLs or Ports. These URLs needs to be accessible directly from the environment to ensure smooth execution of the processes.
d. On clicking Next, setup will open a new window as pop-up. This window will show the pre-requisite checklist. If all prerequisite checks are successfully completed, setup would proceed further for installation of APPSeCONNECT Agent, else it will mark the URLs which are not accessible in Red. Please contact your system admin to ensure all the URLs are accessible from the environment.
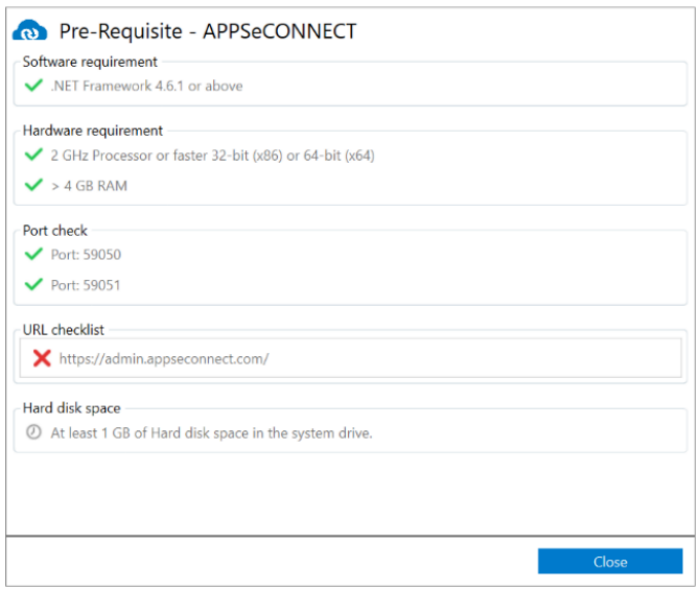
Note : The cross-sign under URL checklist denotes that the specified url is blocked in the environment. Either you need to unblock it from your local network, or you need to exempt the URL from your firewall.
e. After installation is complete, you will find the APPSeCONNECT agent icon on desktop. Double click on the icon to open Agent console.
f. Provide the Username and Password of your AEC Cloud Portal and click Login.
g. Once logged in, the Agent provides four set of tabs as shown below :
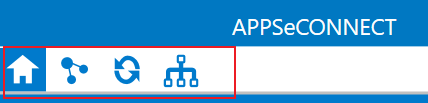
- The home icon shows the applications used for business integration which needs to be configured for credentials. An API Credential is used to create a communication channel between line of business application and APPSeCONENCT.
- The Connection icon (next to the home icon) allows to map credentials with Connections.
- The Sync panel displays the connections deployed on the environment. You can activiate this section by choosing
Enable sync checkboxin the Connections panel. - The last one is the Workflow Panel that displays the configured workflows in the project.
-
The home icon shows the applications used in APPSeCONNECT. A dropdown icon is provided corresponding to each Apps, which lets you manage Credentials for the apps.
Clicking on the + beside any application, opens the application credential window, where you can put the necessary information and save the credential. Once a credential is saved, you can assign it to various implementations.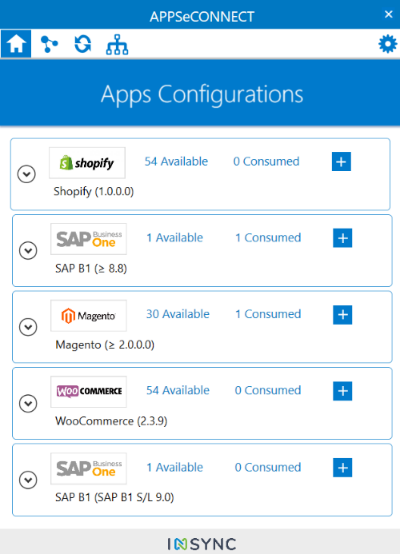 Points to Remember : **
- If you see, the
Points to Remember : **
- If you see, the Plusicon is disabled corresponding to your application, this means, your subscription does not have adequate permission to add more credentials. - The number shown corresponding to each app provides the information about how many credential for a particular app is allowed in current subscription. -
The Connections icon (next to the home icon) shows the all the Connections Present in the project. New connection if created in web portal, will reflect only by choosing Update Configuration menu in Agent. Click on the checkbox
Enable syncin for each connection to activate sync for a connection SYNC PANEL. Remember, you need to map Credentials to a connection to enable the checkbox.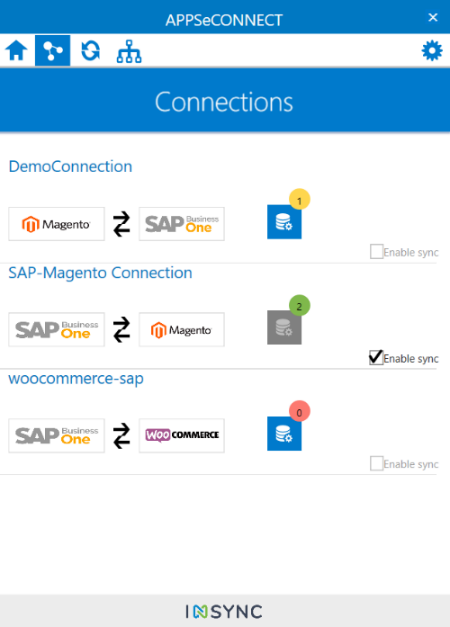
-
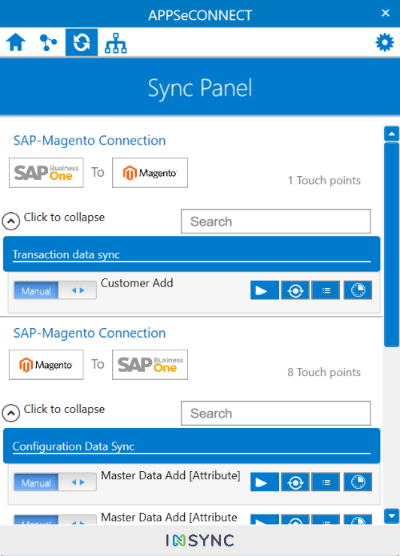
The Sync Panel displays the connections which are activated in Connections panel. The panel lists all the touchpoints which are active in the organization. You can check any activities performed through the platform here. Separate buttons for Logs, Resync Panel, or even manual sync option is available for each touchpoint which allows you to interact with it through this User interface.
-
The final section is the Workflow Panel which displays the workflows activated from the portal. This section allows you to execute a Workflow, view logs and resync data.
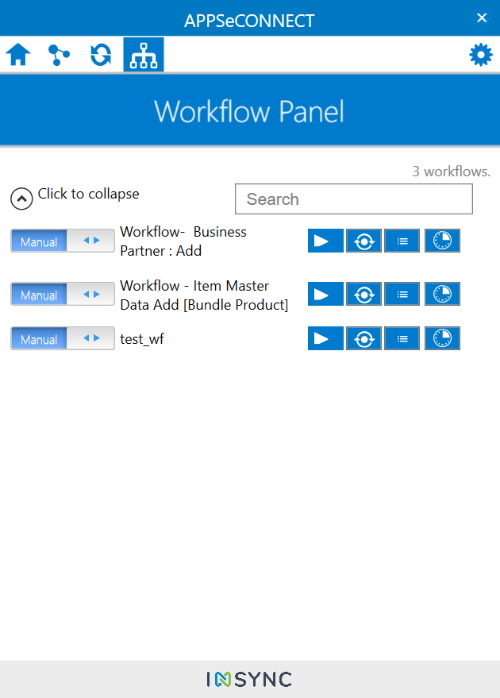
If you are using ProcessFlow, you do not need to use Agent UI for doing any activity. ProcessFlows are controlled from Web and it is highly encouraged to use our Web Portal to interact with the integrations.

