
Priority
Updated:
Application configuration is an integral activity prior to the process of integration. If your chosen application is Priority, such as generating the Company URL for Priority, valid credentials need to be provided for validating the agent. Here you will find the detailed description on how to configure the agents for the application of Shopify, attributes and action, and the Troubleshooting issues.
Pre-requisites for Priority Configuration:
- Must have a valid Priority Account.
- Login to AEC Agents with the valid credentials.To Know about Agent Configuration, Click here
- Add a connection Template for Priority and publish a touchpoint.
Configuring the Priority Application in Agent
- Publish a Touchpoint, Update Adapters and Update Configuration in the agent..
- In the app configuration panel of the agent, click on the + Button, beside the application Priority.
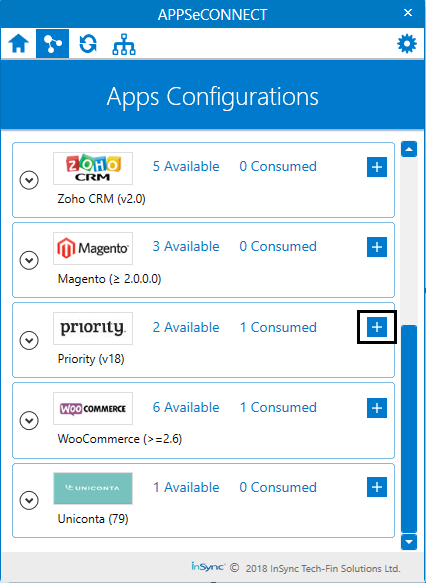
- On clicking the + button, the credential panel opens for the application Priority.

- Input the details in the fields:
a. Company URL: The company URL of the priority this is being used.
b. Username: The username of the Priority ERP.
c. Password: The password of the ERP.
Note: These are the Mandatory fields that is required for validating the priority adapter in the agent
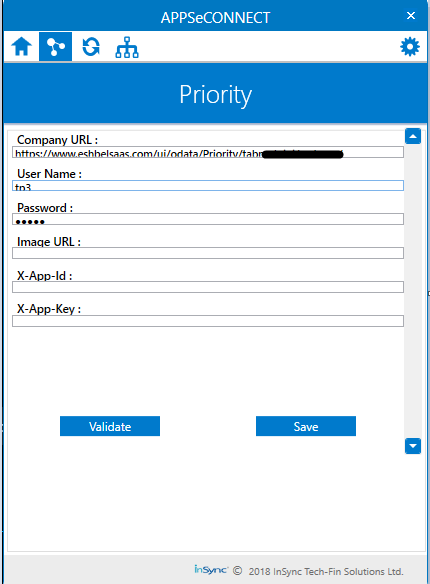
- Click on the Validate and the Save button once the credentials are provided.
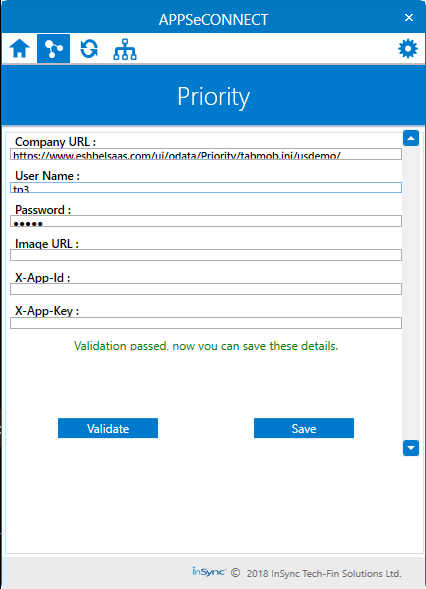
Follow the above steps, the adapter for Priority can be configured in the APPSeCONNECT agent.
Integration Techniques
For Integration process, you need to execute the necessary touchpoint in your connection as required while syncing.
- For an Instance: Suppose you need to add Product created in Priority to the application you need. Therefore, the Product Add Touchpoint is needed to publish, for syncing the customer from Priority to the other Application you are working with.
Troubleshooting
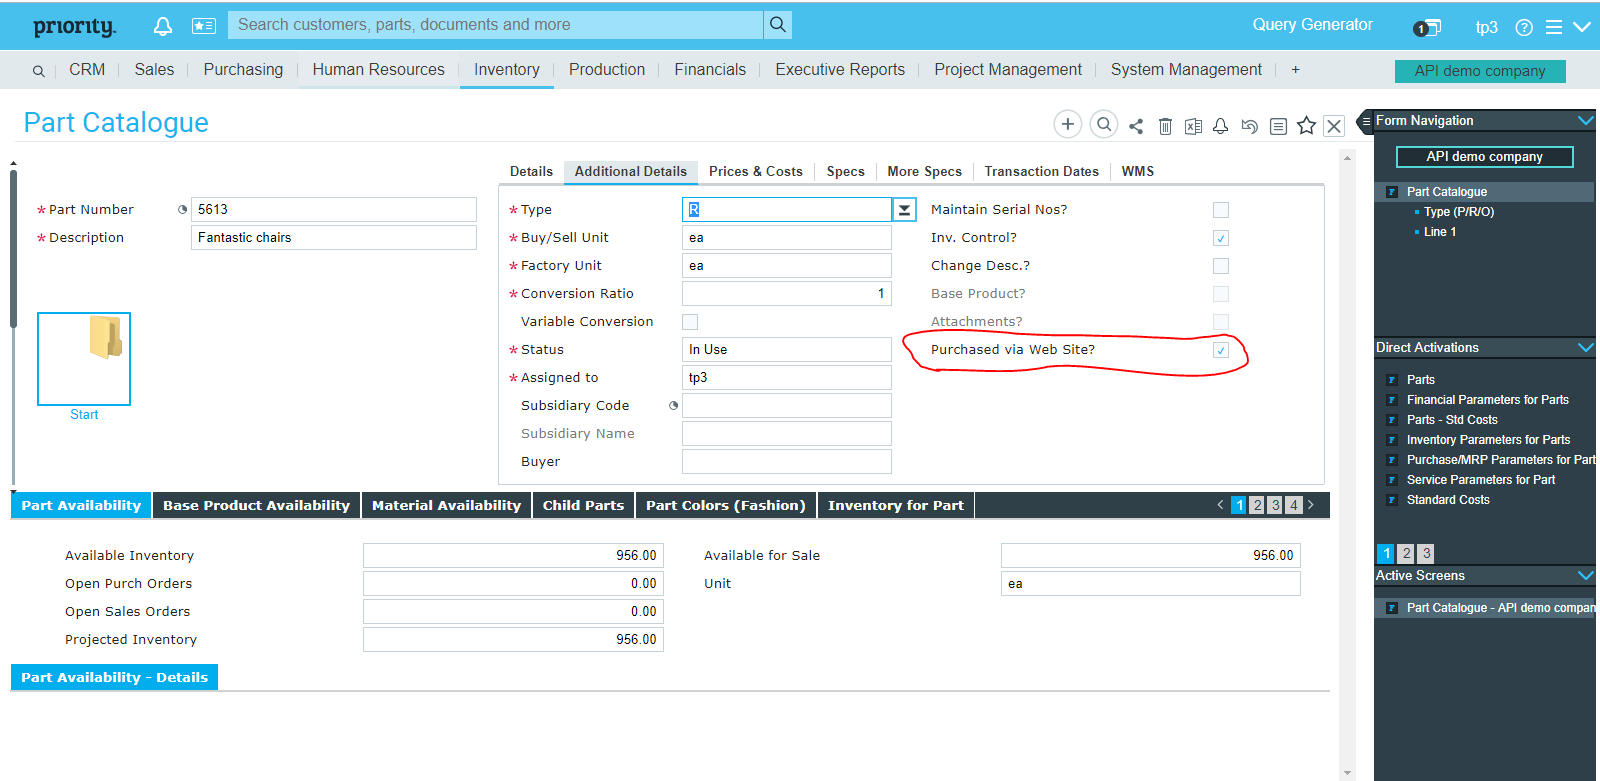
While adding product from priority to shopify, ensure that Show in web is marked Yes or the option Purchased Via Website is enabled.
Suppose you are updating inventory for 20 products but have not marked, show in web for those products, hence after integration your inventory will
not get updated. It will only get updated when Show in Web is marked as “YES”.
Attributes and Actions
While defining a connect to a particular API endpoint inPriority, you require clear understanding about the data requirements and endpoint configurations. You can refer to this document to find all the endpoint details of your Priority installation. To define the endpoint in APPSeCONNECT, you need to define Actions and Entities. Actions are specifically targeted for a particular endpoint while schema is the data needed to execute the API. Here is the list of some of the prepackaged API actions defined for you which you can easily plug and play while doing your integration.
| Endpoint | Action | Action Type | Schema | UI Path | API Path |
|---|---|---|---|---|---|
| Logpart | Get Updated Inventory | GET | Logpart | Get Updated Inventory from Priority | LOGPART |
| Logpart | Add Product | GET | Logpart | Add Product in Priority | LOGPART |
| ORDERS | POST | POST | ORDERS | Post Order in Priority from the source application | |
| CUSTOMERS | CUSTOMERS | POST | CUSTOMERS | Post Customer in Priority from the source application | |
Protip: You can do Inventory Update for products of last 24 hours.
Protip: If a new touchpoint is created, you have to specify the ACTION against the Schema for the business scenario as required or the user can utilize the pre-packaged touchpoints provided by APPSeCONNECT.

