Data-view process of workflow snapshot
Updated:
Snapshot in Workflow gives complete overview of the transactions made through it. A transaction in workflow means an an unique execution of the workflow at that instance. Every workflow might execute more than one integration, which depends on logic defined on the workflow, dependencies specified, or even based on data volume. The snapshot gives a detailed overview of the data that is being transferred through workflow giving you a complete picture of the data transformed through the process. The snapshot gives tracing over the data transferred through integration. You can investigate the data packet, process logs and even the data logs for each process execution.
After a successful execution of workflow the user can see the snapshot listing on the multiple time execution of the workflow and the latest listing is visible on the upper section of the list.
Pre-Requisites of Listing of Snapshot for a Workflow
- All the Pre-requisites to workflow execution has to be met.
- Agent should be set as Primary (as unlicensed agents will be not connected to APPSeCONNECT cloud)
- Autosync of the Agent should be turned
ON.
Steps to executing list of snapshot for the workflow
- List of Snapshot is present on the upper section of the workflow screen as shown below:

- Click on the
Snapshotbutton and the following execution of workflow data will be fetched.
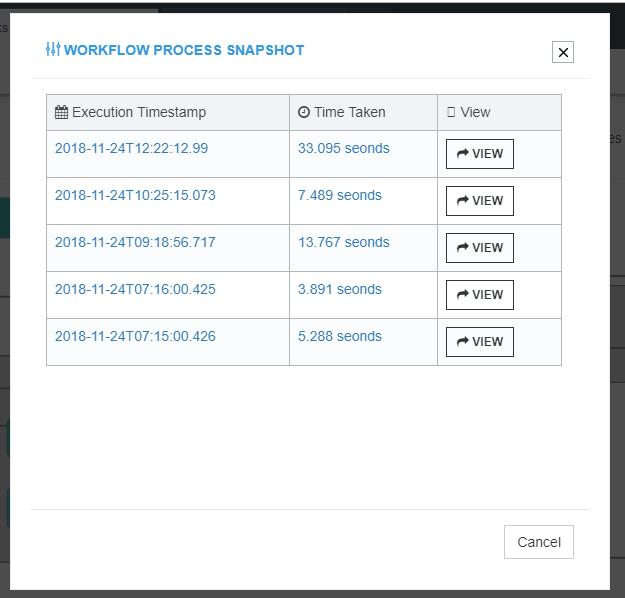
The execution screen contains the following details of the workflow snapshot- Execution Timestamp: This indicates the date, start and end time of the workflow.
- Time Taken: This is the time taken for executing the workflow.
- View button: This indicates the node level tree structure view of the workflow which shows the single execution details at the node level.
- Click on the
View buttonagainst a snapshot list of the workflow you want to view. The following screen appears. The screen above gives drill down node view of the workflow.
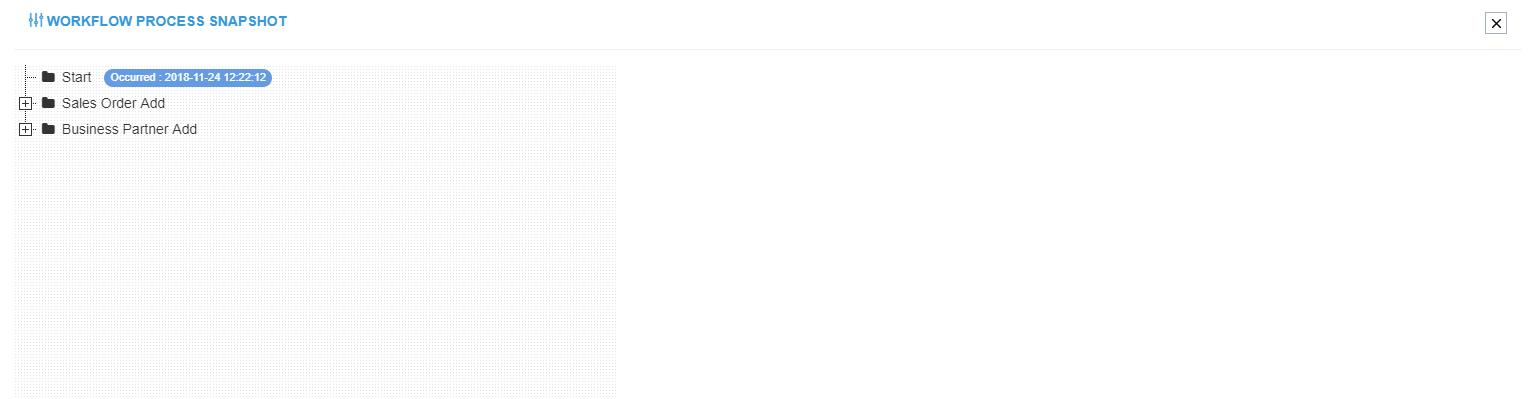
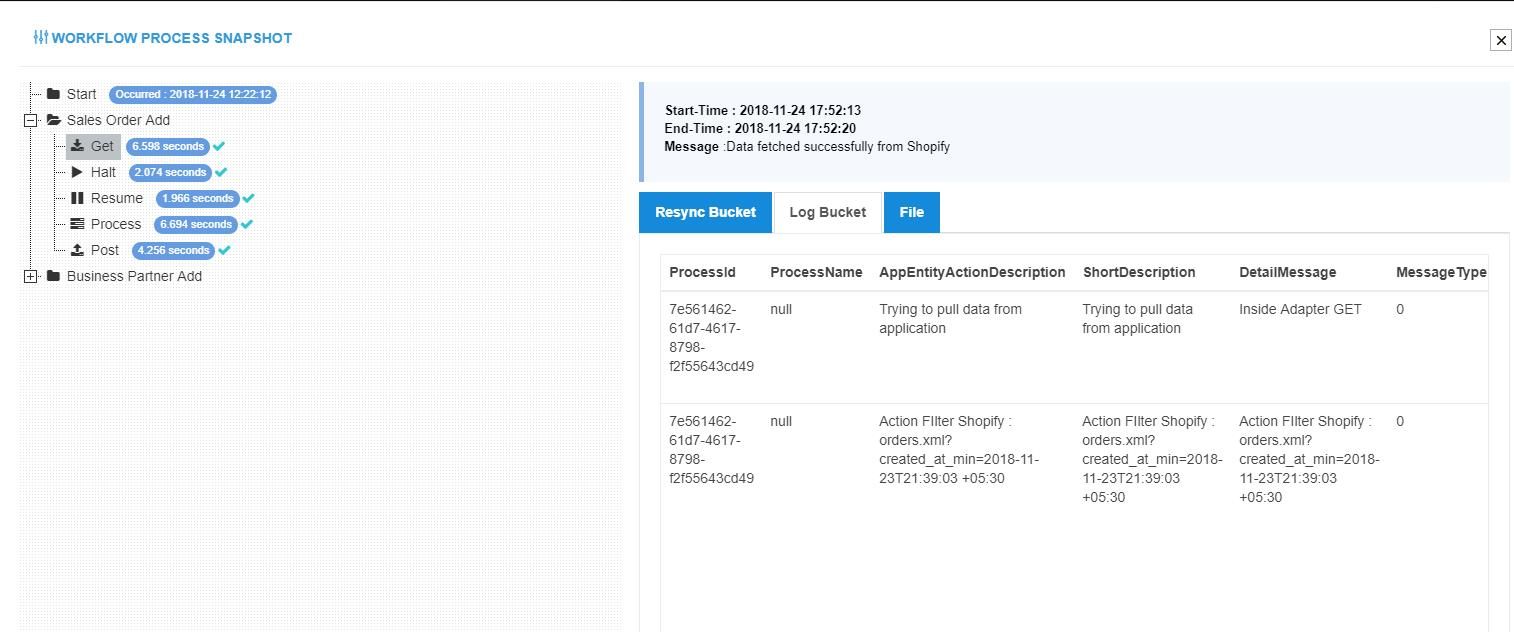
- Click on the Touchpoint (e.g: Sales Order Add/Business Partner Add) and this maximises and give details of nodes like
Get, Halt, Resume,Process, Post etc. as shown below
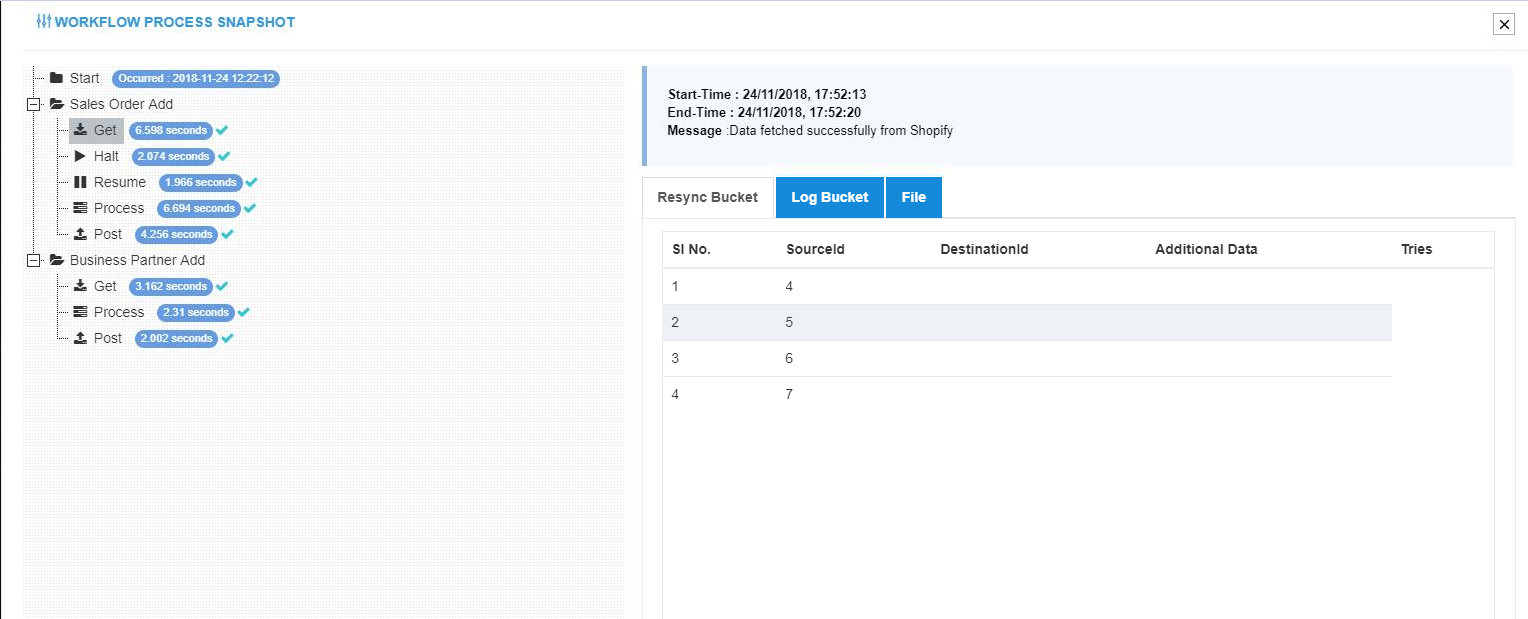
- Every node captures the following details as given below:
- Resync Bucket - This shows the status of the resync bucket wrt to the node. By default, resync bucket opens up wrt to the selected node of the workflow. Resync Bucket gives information of the node being processed and it captures information like source id, destination id, Additional Data and Tries)
Note: Resync Bucket for Workflow Snapshot will display only 10 data at an instance. However, if you have 1000 data after the execution is over, you will be able to view all the data by scrolling through the pages.
- Log Bucket - This shows the logs specific to a node/loop. The errors will be displayed, if any.
- File - This shows the XML File on our local systems,for the error will be shown directly in the FILE tab.
- By default Resync bucket tab is selected. Click on log bucket tab to view the Log bucket of the processed node as shown below.
- Click on File tab to view the XML File details.
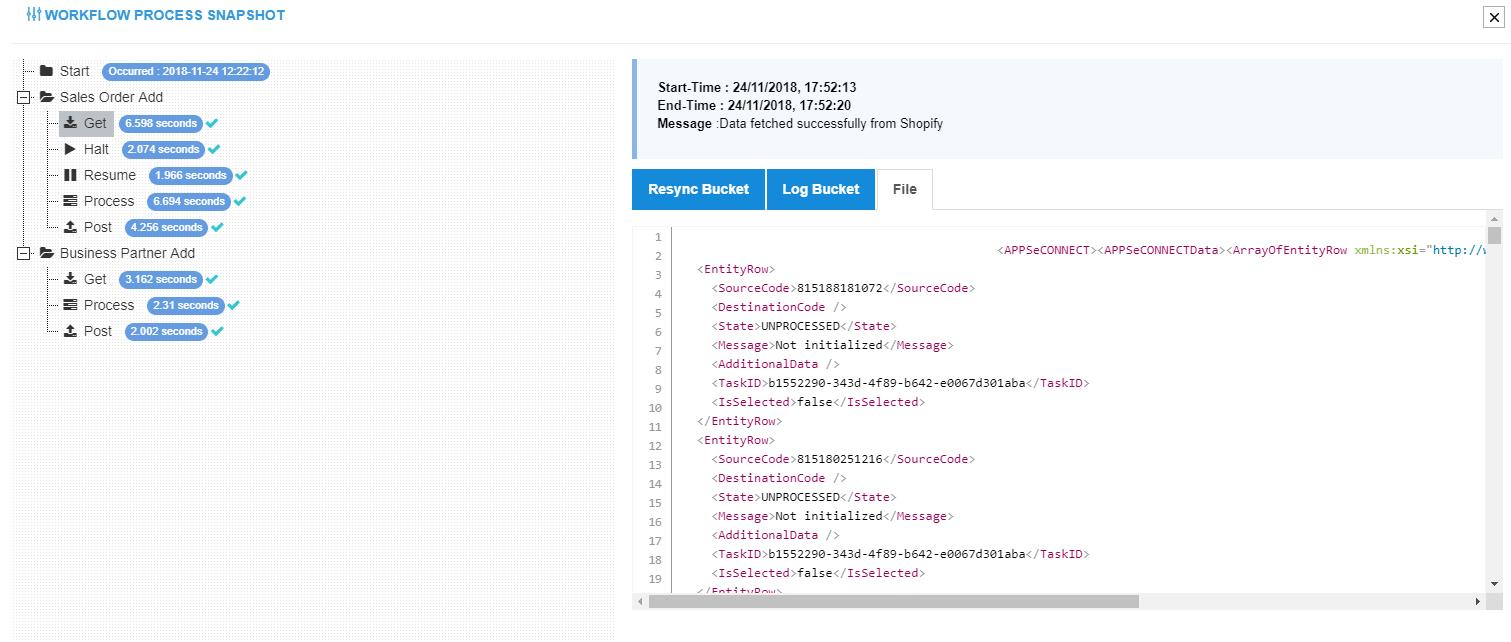
- Here you can view the output of the GET node in XML File.
- By default Resync bucket tab is selected. Click on log bucket tab to view the Log bucket of the processed node as shown below.
NOTE: Destination Response data is viewable under file option of POST node
The process of execution of every node can be changed as per user requirement and some of them are explained below:
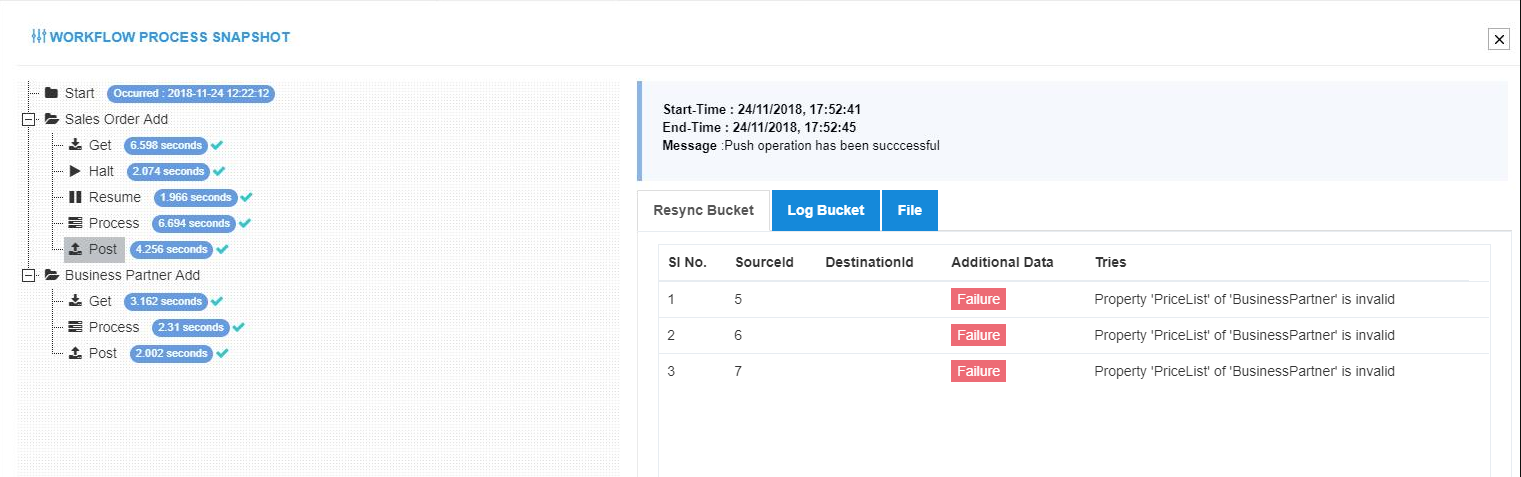
Scenario 1:
For POST node while, you can see that the resync bucket shows the message as Success/Failuredepending on the workflow
execution.
Protip For execution of action nodes (support ticket, storage, webhook, email) only log view is available.
Scenario 2:
Here we are executing a workflow with a DELAY element, where we are delaying the process by 10 seconds.
In the screen given below, you can see the Touchpoint Product ADD (with Variants) has failed and you can view the log bucket with errors.
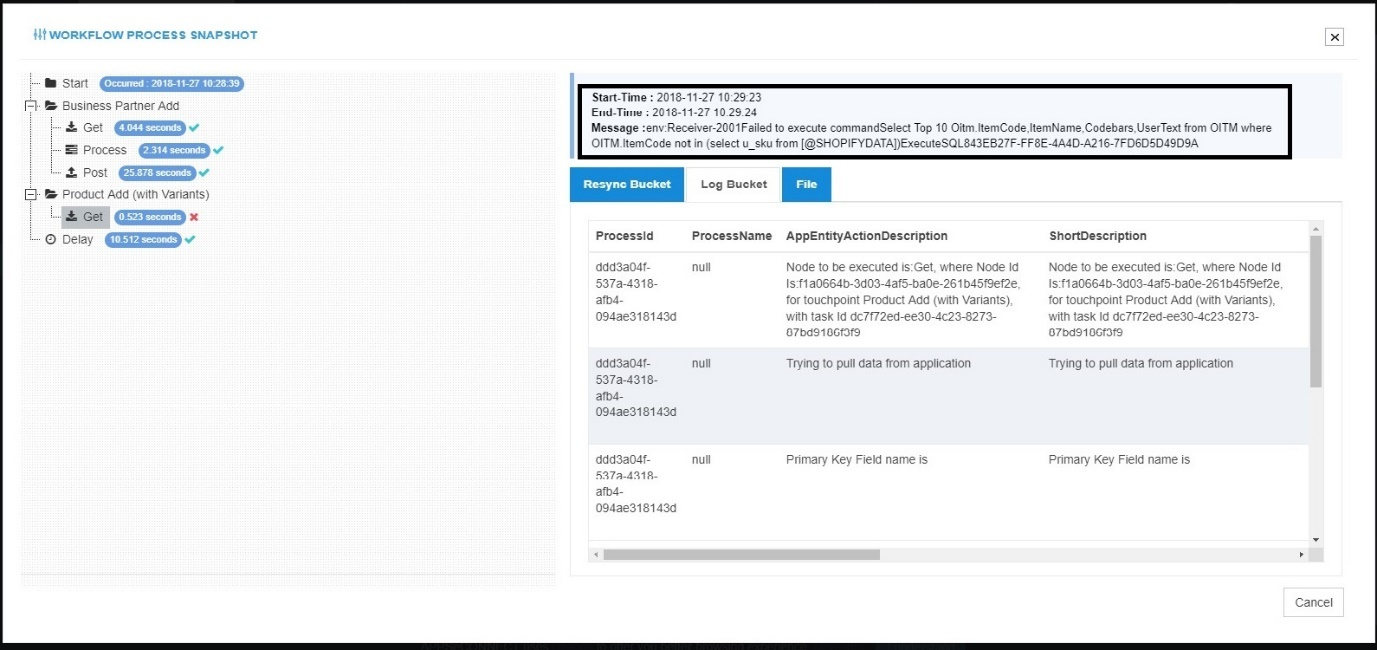
In the below screen, you can see the DELAY element has been successfully executed.
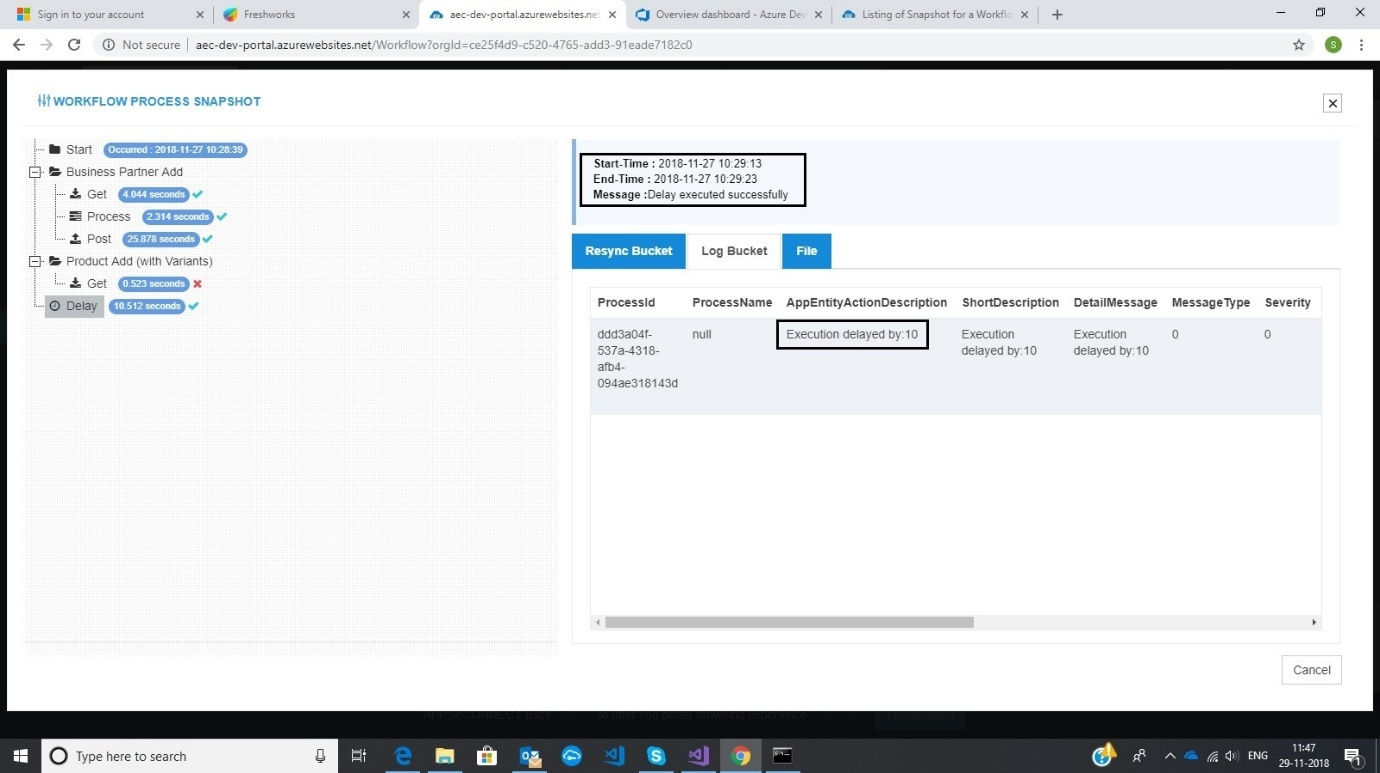
Protip For the DELAY node, only Log Bucket is generated.
Scenario 3:
Here we are executing a workflow with a Split Property. Here the output of the GET node is splitted into multiple file for load balancing.
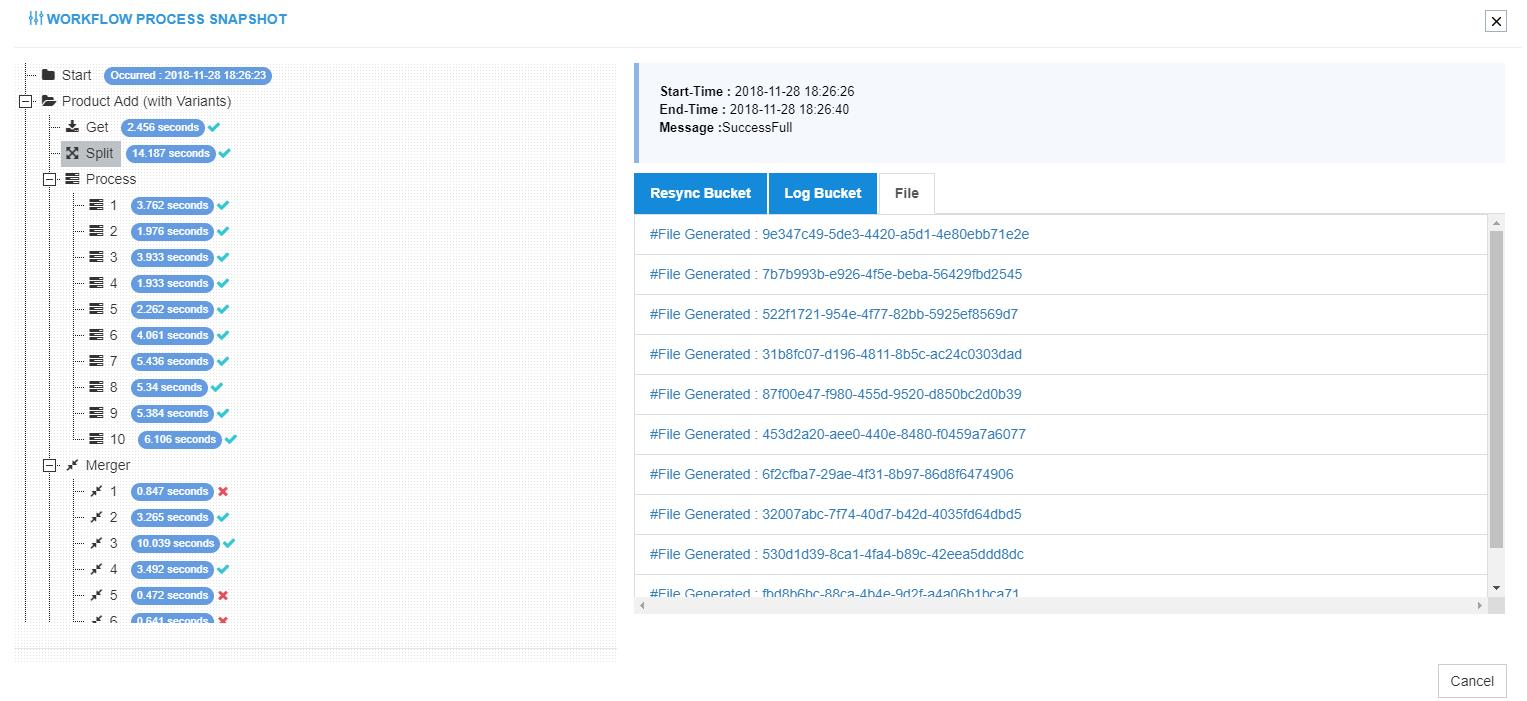
Protip For each split individual files are generated. You can double click on each of them to view the XML code inside.
Scenario 4:
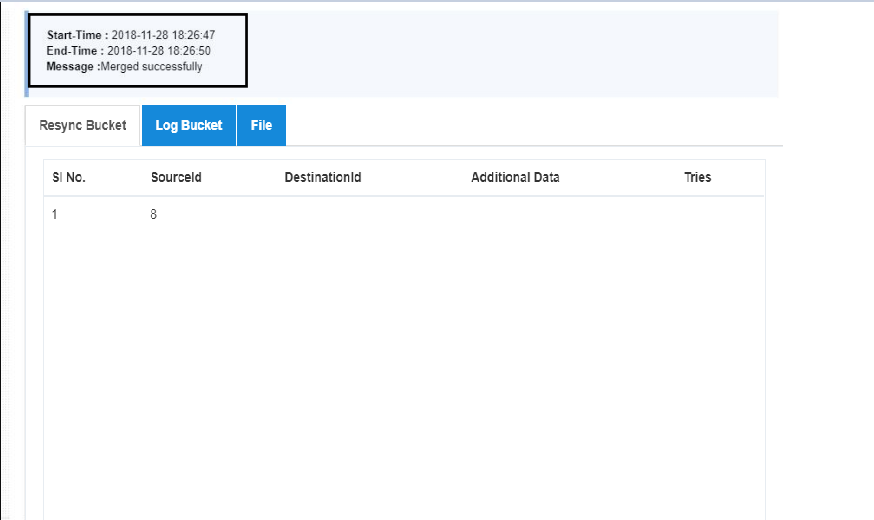
Here we are executing a workflow with Merge Process property. You can see the Resync Bucket, Log Bucket and File for each of the merged process.
In the Resync Bucket, you can view the Source ID, and the Message of the single merge process.
Protip Execution of Rule Process Property, Halt Node, Resume Element, Filter Element will give similar node
level view as explained above
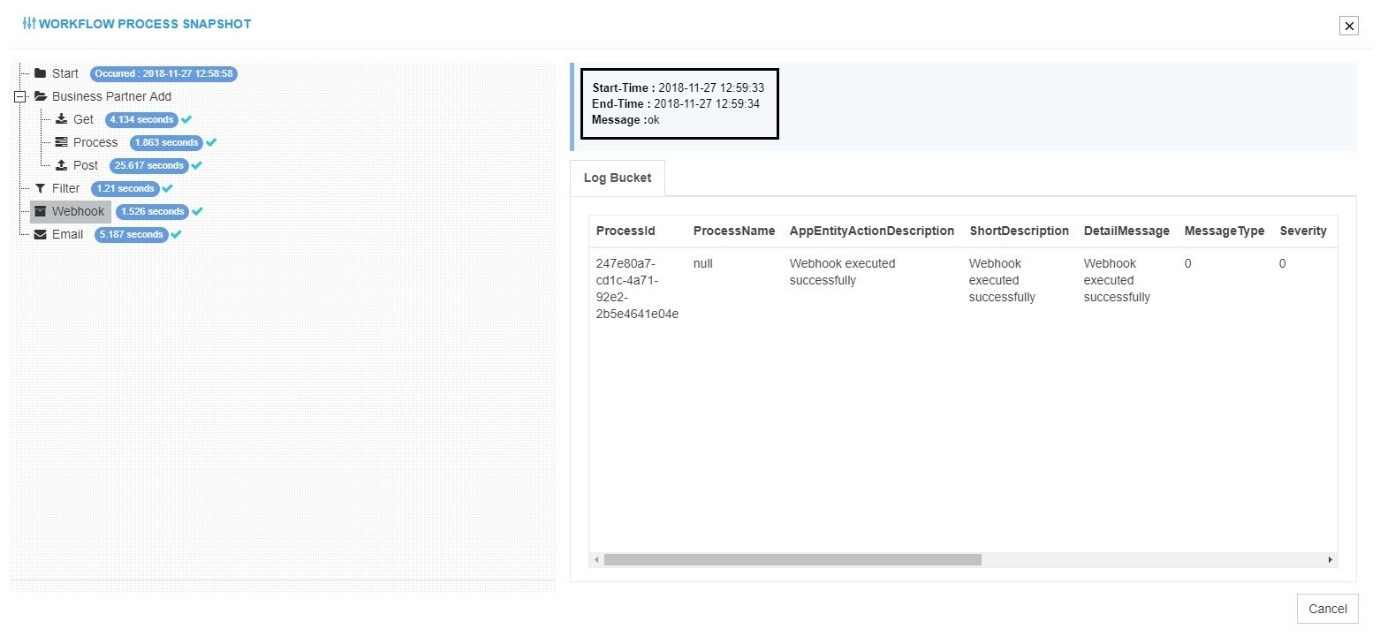
Scenario 5: Webhook is one of the Action nodes in workflow. Here, you will only be able to view the Log Bucket generated for webhook. Below is the Screen for Webhook Log Bucket.
Scenario 6: Email is another Action Node in workflow. Here, too you will only get the LOG BUCKET, generated. Below, is the screen of Email Action, Log Bucket generated.
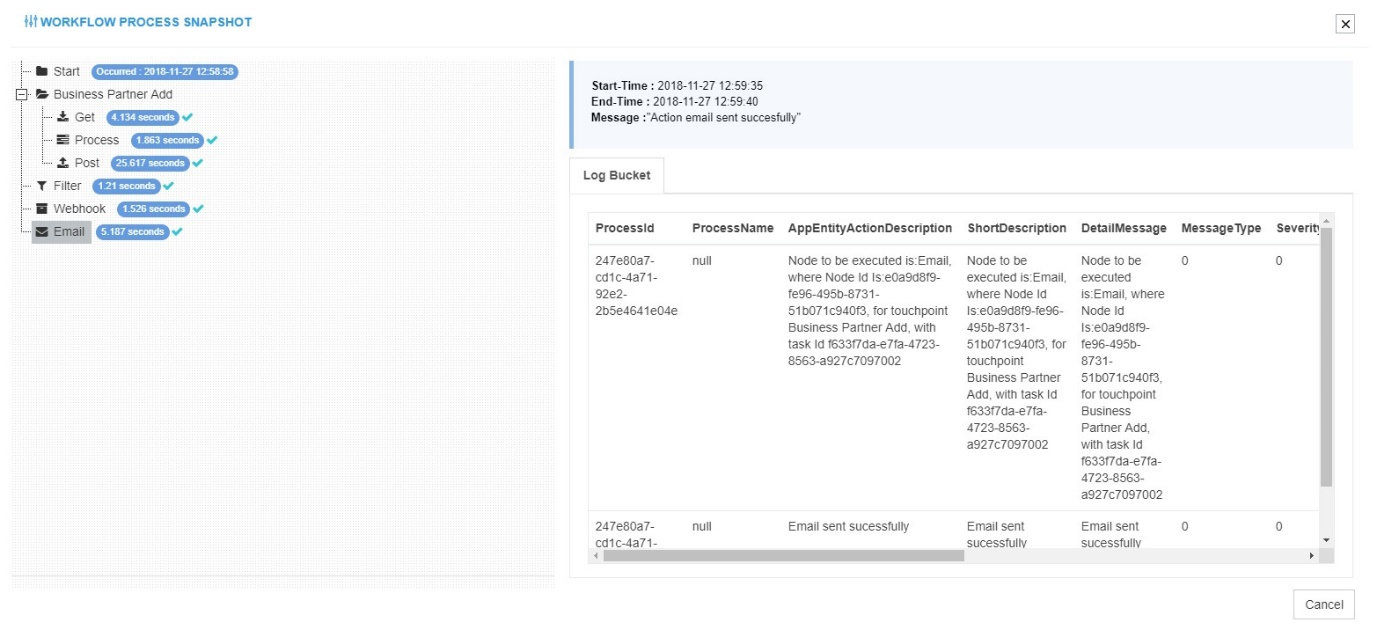
Protip For all the ACTION NODES, you will only get the View of the Log Bucket.
Protip Currently 7 days data can be viewed in the List of Snapshot and by default 10 snapshot view per screen is available
in single screen listing of snapshot.
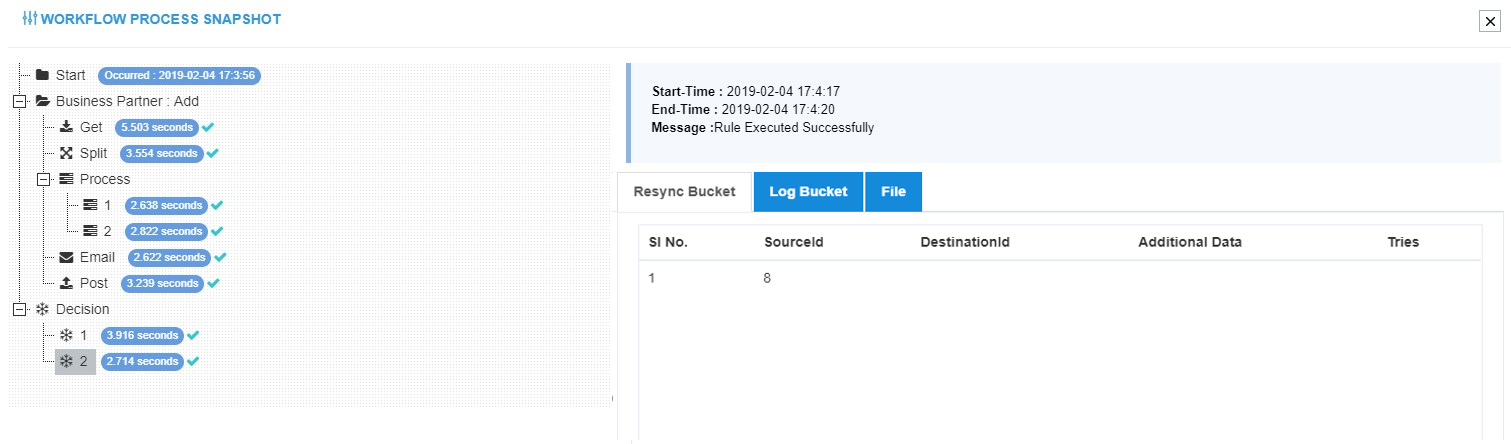
Scenario 7:
Decision is one of the process property in APPSeCONNECT workflow. Here the user will get to view the Resync Bucket, Log Bucket, and the File.