
Updating Inventory in Sage300
Tags:
developers
Updated:
Prerequisites for Updating Inventory in SAGE300
- Need a valid SAGE 300 account.
- Need the server access to SAGE 300.
- Need to have the item present in the warehouses of inventory.
Steps to Update Inventory in SAGE300
- Login to the SERVER of SAGE300.
- Open the SAGE 300 application and Navigate to
Inventory Control> I/C Transaction > Adjustments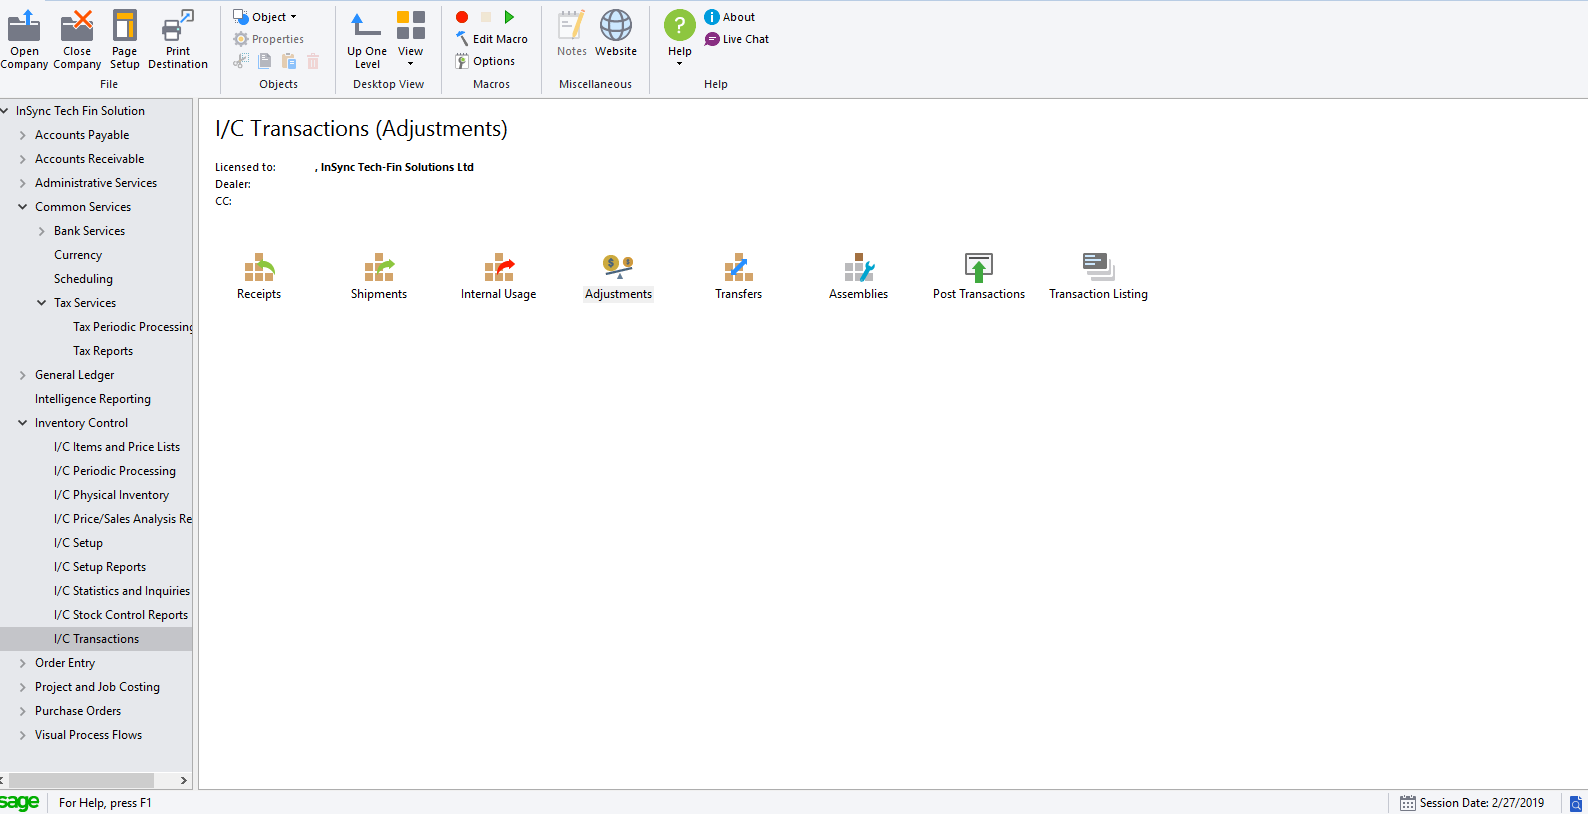
- The adjustments window opens. Click on the
Item Number taband SELECT an item from the list of the items, available.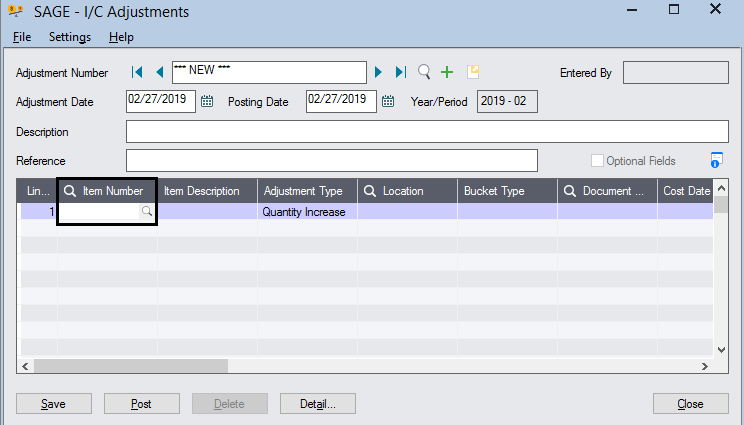
- Click on the
Adjustment Typetab and select the adjustment as per the requirement. The drop down has these following options. a. Quantity Increase - For increasing the quantity in Inventory. b. Quantity Decrease - For Decreasing the Quantity in Inventory. c. Cost Increase - For Increasing the Cost in the Inventory. d. Cost Decrease - For decreasing the cost in the inventory. e. Both Increase - For Increasing both the cost and the Quantity. f. Both Decrease - For Decreasing both the Cost and the Quantity.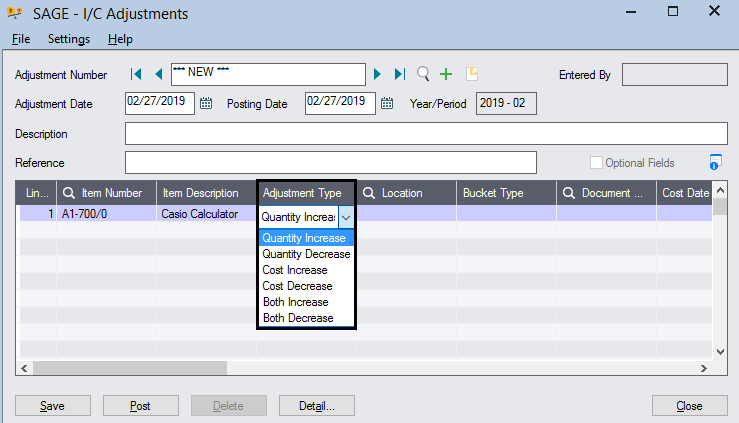
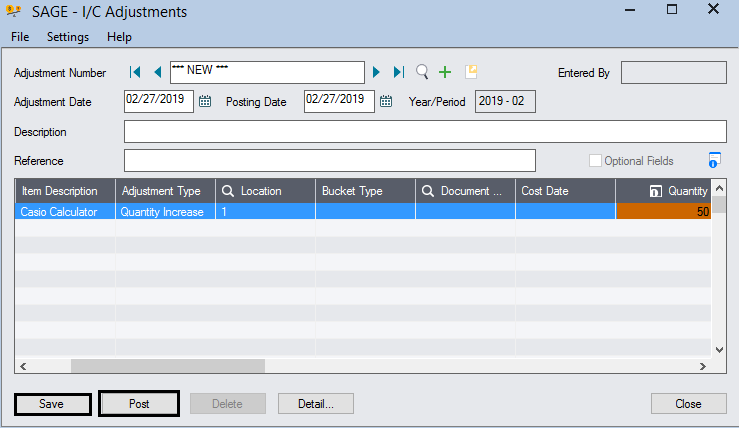
- Select the warehouse in the Location tab where the inventory is to be updated.
Note: The Quantity should be updated in the warehouse, where the item is created. Updating Inventory in different warehouse, will not fetch the products when integrated even if the inventory is successfully updated in the ERP. - Provide the Quantity that is needed to be updated. Click on
Post and Savebutton.
Protip: The Adjustment Date is the date, when the user is saving the updated quantity. The Posting Date is the date when the user wants to post the updated data in the ERP.
Protip: The Post is to be click, when the user wants to post it to the ERP. Or-else Clicking on SAVE without posting will save the updated data but the data will not be Posted in the ERP.
The above steps complete the process of updating inventory.

