
Generic NAV 2009R2 Extension
Updated:
Here you will get the step by step process to use NAV 2009R2 Extension as and when required in the data integration business scenario.
ProTip: Before installation of INS2.05 Extension please keep a backup of the NAV Database.
Installation of INS2.05 Extension for NAV2009R2
Installation of INS2.05 has been divided into two tasks as given below:
1. Importing of .fob files and web services XML file
2. Manual changes in base pages
Importing of .fob files and web services XML file
1) You need to import below listed .fob files
- table
- page
- codeunit
- xmlport
2) There is two option to import extension WebServices from XML file and they are provided below:
a) Run AEC WebServices Import xmlport. An import popup will appear. Specify a direction value import and click OK button.
Another popup will be shown where you need to select the Webservices of the XML file.
b) Run-ins import codeunit where we have called AECWebServiceImport function with a parameter datafilepath.
This datafilepath is webservices of XML file path. You will be provided with XML file in extension build.
You need to be changed function parameter path value as per your webservice XML file location.
This will insert data in Dynamics NAV Web Service table.
Manual changes in Base Pages
We have added some base table field and our extension page in base Page:
NOTE: After inserting the 1st part in each of the base pages, click on the left shift-arrow to make it distinguishable from the previous group
Changes in Customer Card Page
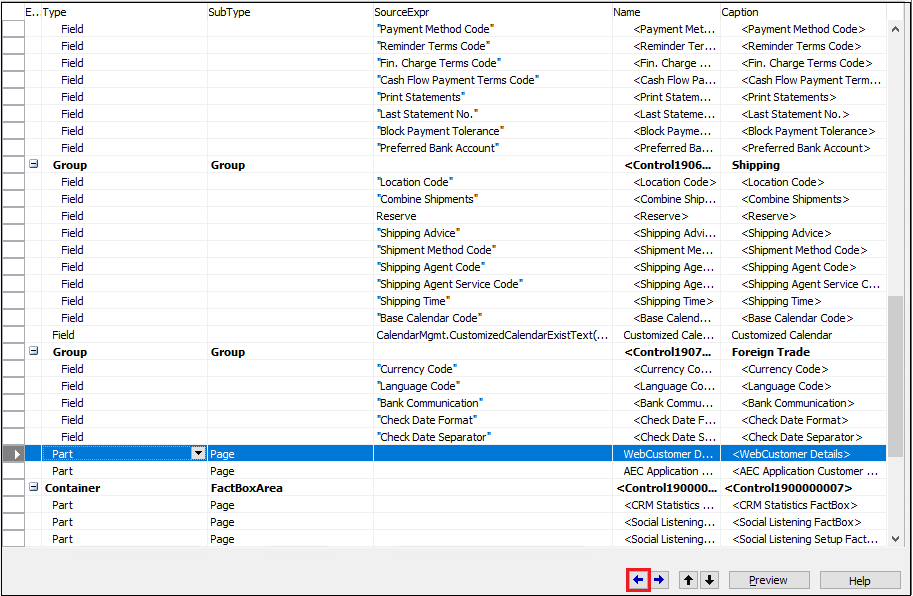
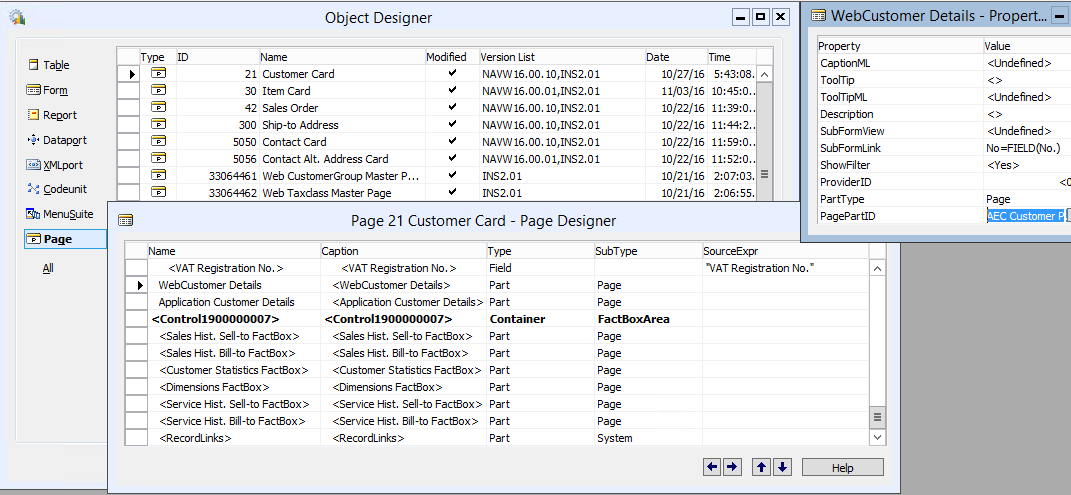
a) We have added our Extension page AEC Customer Page (33064472) as a part type with the name WebCustomer Details.
After the creation of the WebCustomerDetails, click on the property button. The WebCustomerDetails property window opens.
AEC Customer Page SubpageLink field is No. and base page SubPageLink field is No.
Child Link Page Details
| ID | Name | Type | SubType |
|---|---|---|---|
| 33064472 | WebCustomer Details | Part | Page |
The property value should be set
| Property | Value |
|---|---|
| SubPageLink | No=FIELD(No.) |
| PartType | Page |
| PagePartID | AEC Customer Page |
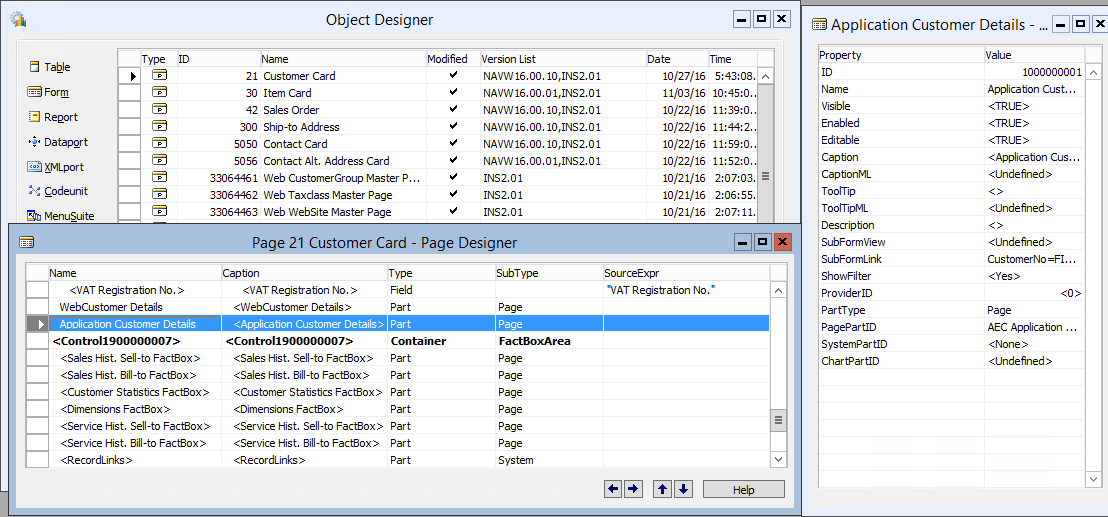
b) We have added our Extension page AEC Application Customer List (33064474) as a part type with the name AEC Application Customer List.
Click on Property button and Application Customer Detail page appears. Page AEC Application Customer List SubPage Link field is CustomerNo
and base page SubPageLink field is No.
Child Link Page Details
| ID | Name | Type | SubType |
|---|---|---|---|
| 33064474 | AEC Application Customer List | Part | Page |
The property value should be set
| Property | Value |
|---|---|
| SubPageLink | CustomerNo=FIELD(No.) |
| PartType | Page |
| PagePartID | AEC Application Customer List |
Changes in Item Card Page
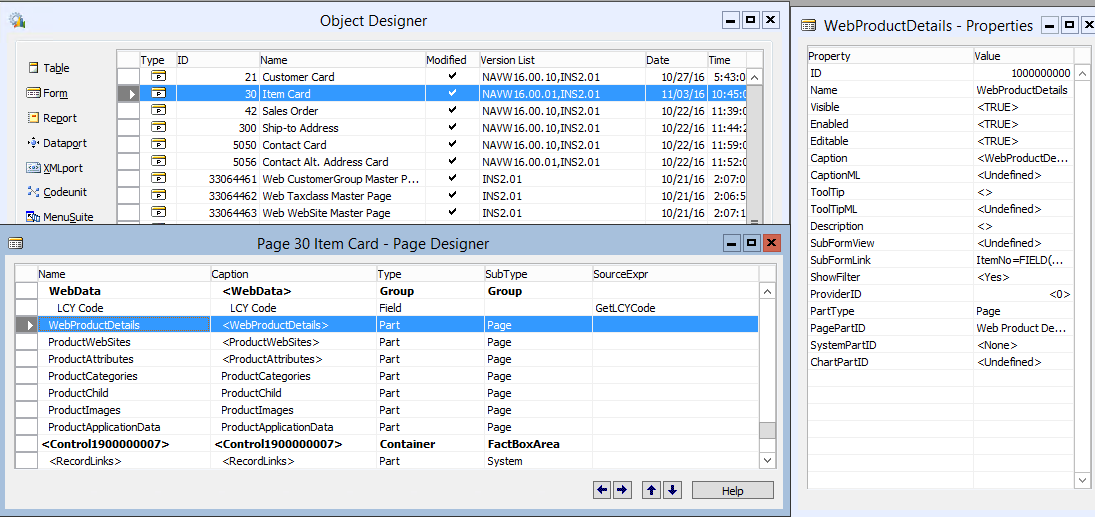
a) We have added our Extension page Web Product Details Page (33064469) as a part type with name WebProductDetails. Click on Property button and Web Product Details window appears.
Page Web Product Details Page SubPageLink field is ItemNo. and base page SubPageLink field is No.
Child Link Page Details
| ID | Name | Type | SubType |
|---|---|---|---|
| 33064469 | WebProductDetails | Part | Page |
The property value should be set
| Property | Value |
|---|---|
| SubPageLink | ItemNo=FIELD(No.) |
| PartType | Page |
| PagePartID | Web Product Details CP Page |
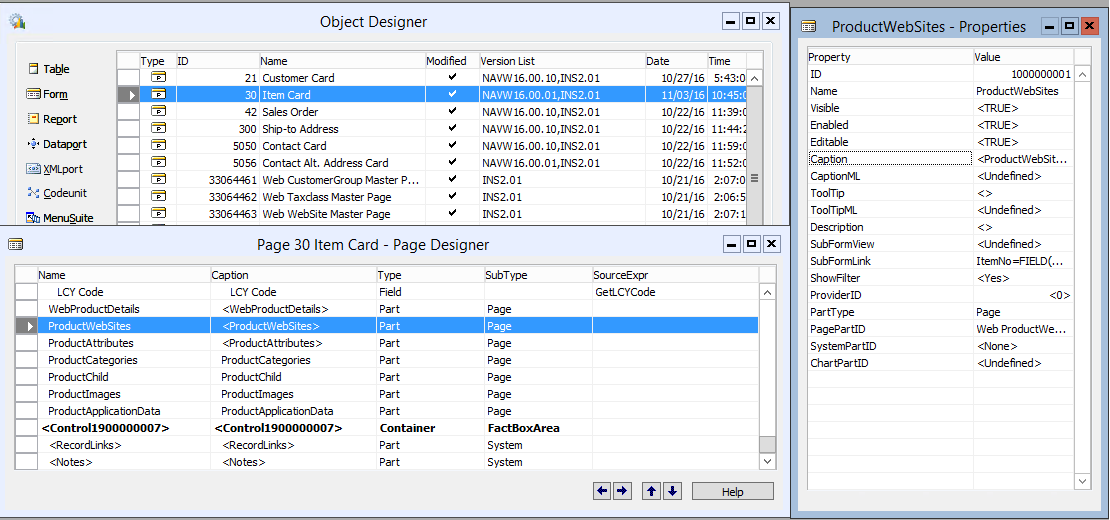
b) We have added our Extension page Web ProductWebsites Page (33064466) as a part type with name ProductWebSites. Click on Property button and the ProductWebSites window appears.
Page Web ProductWebsites Page SubPageLink field is ItemNo. and base page SubPageLink field is No.
Child Link Page Details
| ID | Name | Type | SubType |
|---|---|---|---|
| 33064466 | ProductWebSites | Part | Page |
The property value should be set
| Property | Value |
|---|---|
| SubPageLink | ItemNo=FIELD(No.) |
| PartType | Page |
| PagePartID | Web ProductWebsites Page |
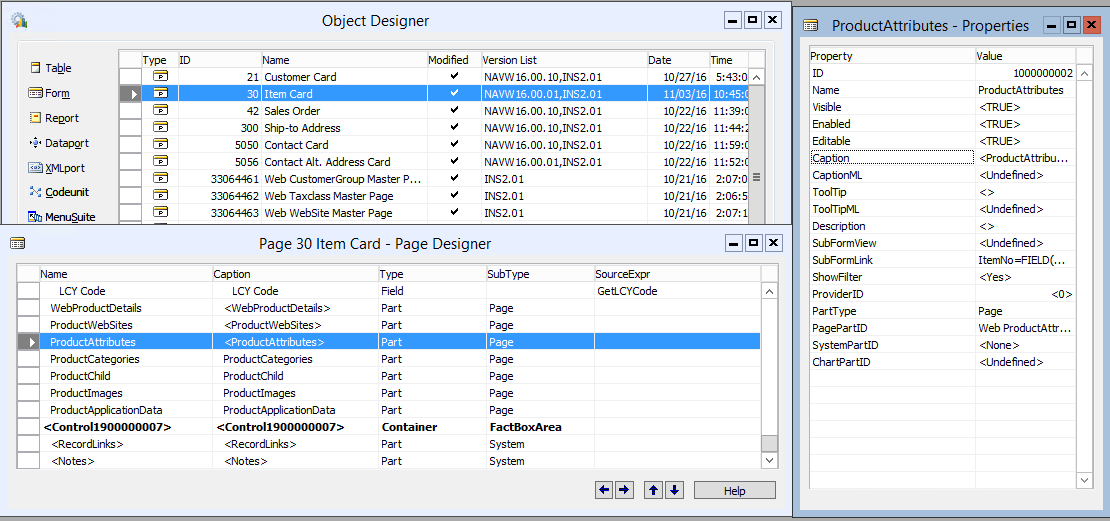
c) We have added our Extension page Web ProductAttribute Page (33064467) as a part type with name ProductAttributes.
Click on Property button and the ProductAttribute window appears. Page Web ProductAttribute Page SubPageLink field is ItemNo
and base page SubPageLink field is No.
Child Link Page Details
| ID | Name | Type | SubType |
|---|---|---|---|
| 33064467 | ProductAttributes | Part | Page |
The property value should be set
| Property | Value |
|---|---|
| SubPageLink | ItemNo=FIELD(No.) |
| PartType | Page |
| PagePartID | Web ProductAttribute Page |
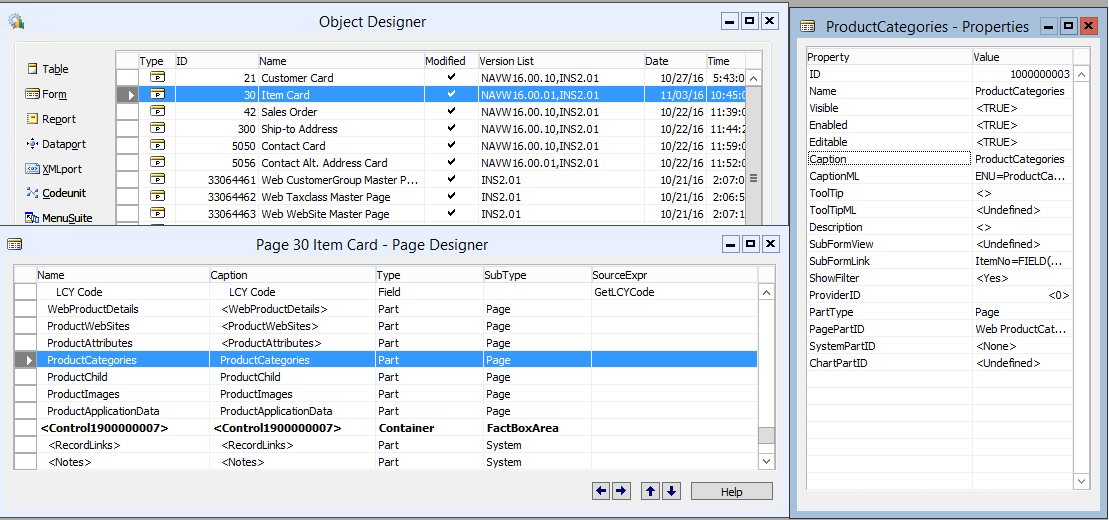
d) We have added our Extension page Web ProductCategory Page (33064468) as a part type with name ProductCategories.
Click on Property button and the ProductCategory window appears. Page Web ProductCategory Page SubPageLink field is ItemNo
and base page SubPageLink field is No.
Child Link Page Details
| ID | Name | Type | SubType |
|---|---|---|---|
| 33064468 | ProductCategories | Part | Page |
The property value should be set
| Property | Value |
|---|---|
| SubPageLink | ItemNo=FIELD(No.) |
| PartType | Page |
| PagePartID | Web ProductCategory Page |
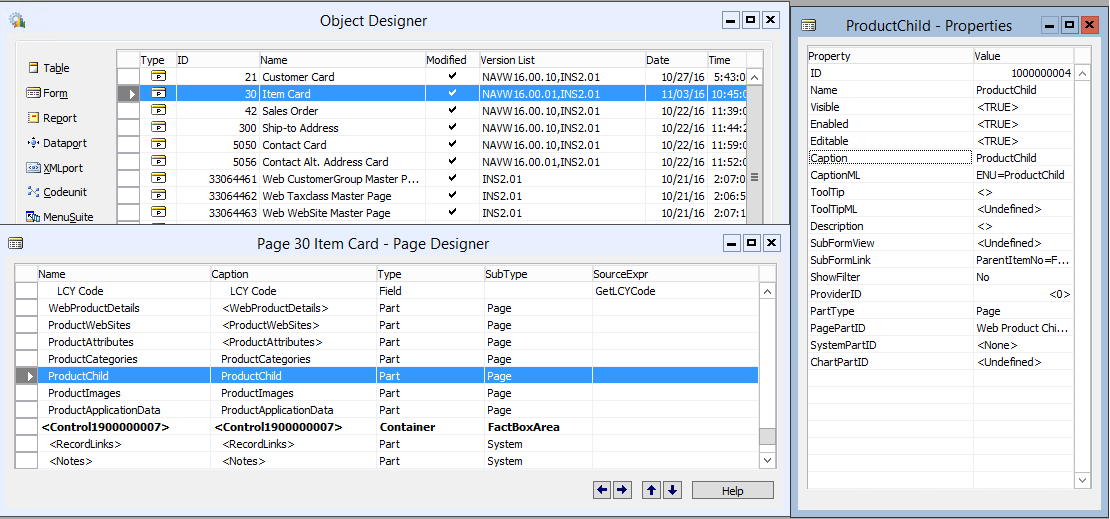
e) We have added our Extension page Web Product Child Details (33064471) as a part type with name ProductChild. Click on Property button and the Product Child window appears.
Page Web Product Child Details SubPageLink field is ItemNo and base page SubPageLink field is No.
Child Link Page Details
| ID | Name | Type | SubType |
|---|---|---|---|
| 33064471 | ProductChild | Part | Page |
The property value should be set
| Property | Value |
|---|---|
| SubPageLink | ParentItemNo=FIELD(No.) |
| PartType | Page |
| PagePartID | Web Product Child Details |
f) We have added our Extension page AEC Application Item List (33064475) as a part type with the name ProductApplicationData.
Click on Property button and the Product application data window appears. Page AEC Application Item List SubPageLink field is ItemNo
and base page SubPageLink field is No.
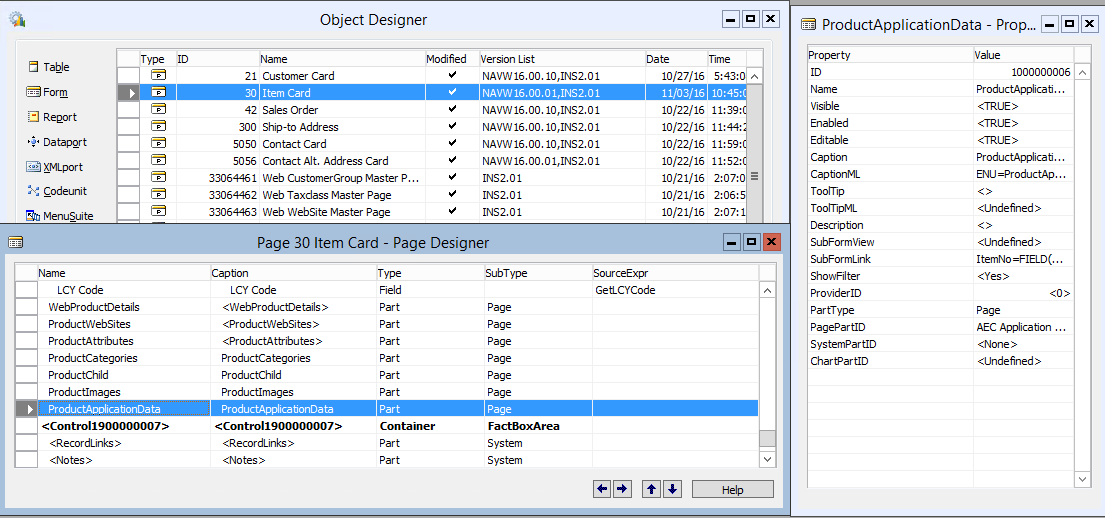
Child Link Page Details
| ID | Name | Type | SubType |
|---|---|---|---|
| 33064475 | ProductApplicationData | Part | Page |
The property value should be set
| Property | Value |
|---|---|
| SubPageLink | ParentItemNo=FIELD(No.) |
| PartType | Page |
| PagePartID | AEC Application Item List |
Changes in Sales Order Page
a) We have added our Extension page AEC Order Header Details (33064476) as a part type with name WebOrder Header Details.
Click on Property button and the weborder header details window appears. Page AEC Order Header Details SubPageLink field is OrderNo
and base page SubPageLink field is No.
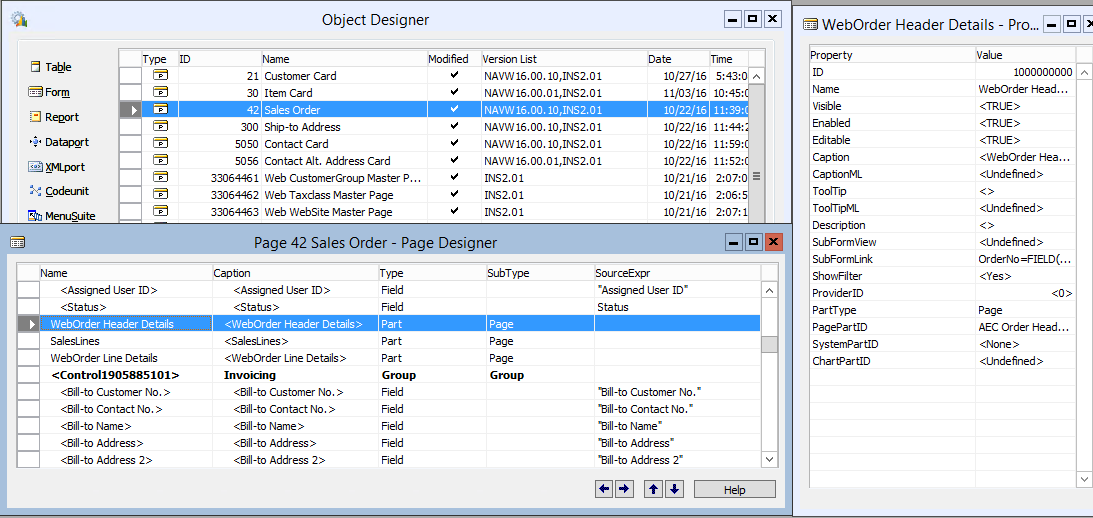
Child Link Page Details
| ID | Name | Type | SubType |
|---|---|---|---|
| 33064476 | WebOrder Header Details | Part | Page |
The property value should be set
| Property | Value |
|---|---|
| SubPageLink | OrderNo=FIELD(No.) |
| PartType | Page |
| PagePartID | AEC Order Header Details |
b) We have added our Extension page AEC Order Line Details (33064477) as a part type with name WebOrder Line Details.
Click on Property button and the weborder line details window appears. Page AEC Order Line Details SubPageLink field is OrderNo
and base page SubPageLink field is No.
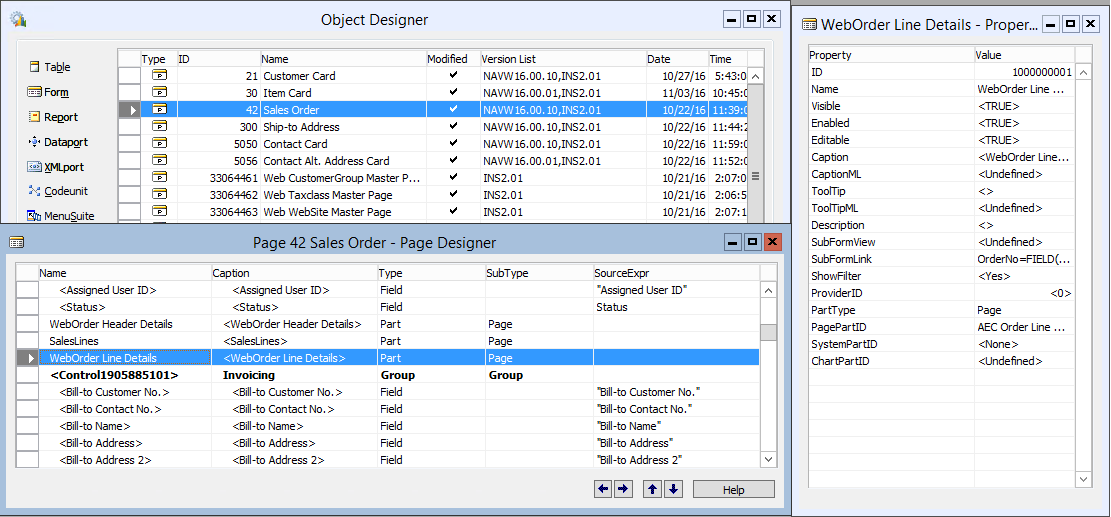
| ID | Name | Type | SubType |
|---|---|---|---|
| 33064477 | WebOrder Line Details | Part | Page |
The property value should be set
| Property | Value |
|---|---|
| SubPageLink | OrderNo=FIELD(No.) |
| PartType | Page |
| PagePartID | AEC Order Header Details |
Changes in Ship-to Address Page
a) We have added our Extension page AEC Ship-To Address Cart Part (33064478) as a part type with name WebDetails.
Click on Property button and the webdetail window appears. Page AEC Ship-To Address SubPageLink field is CustomerNo and Code
and base page SubPageLink field is CustomerNo and Code
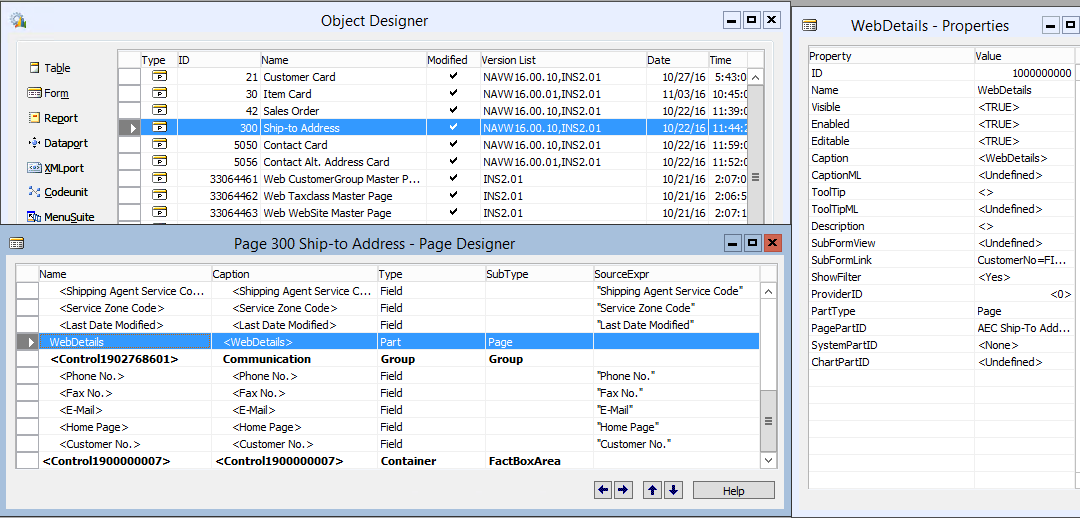
| ID | Name | Type | SubType |
|---|---|---|---|
| 33064478 | WebDetails | Part | Page |
The property value should be set
| Property | Value |
|---|---|
| SubPageLink | CustomerNo=FIELD(Customer No.),Code=FIELD(Code) |
| PartType | Page |
| PagePartID | AEC Ship-To Address CartPart |
Changes in Contact Card Page
a) We have added our Extension page AEC Contact Details CardPart (33064481) as a part type with name AEC Contact Details CardPart.
Click on Property button and the AEC Contact Details CardPart window appears.Page AEC Contact Details CardPart SubPageLink field is
No and base page SubPageLink field is No.
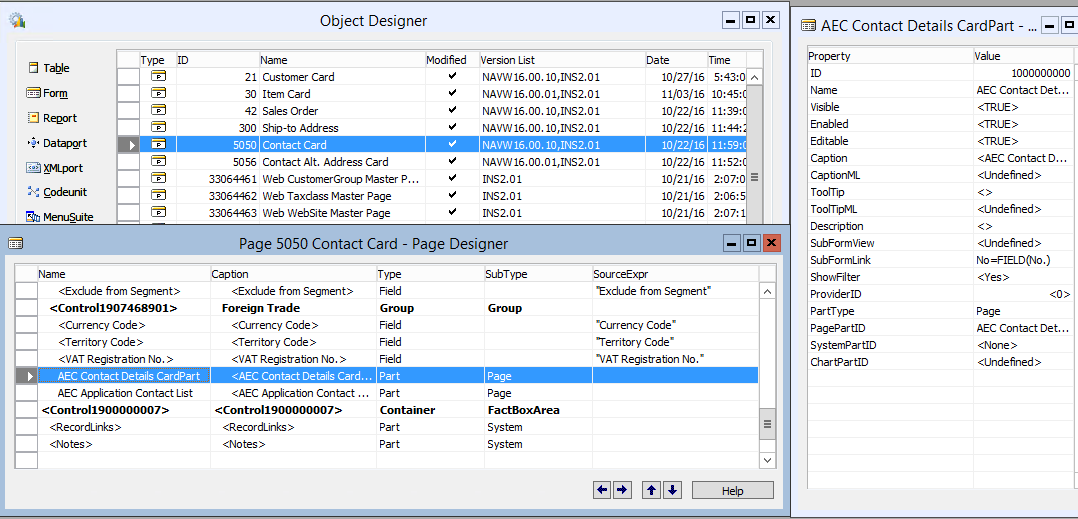
| ID | Name | Type | SubType |
|---|---|---|---|
| 33064481 | AEC Contact Details CardPart | Part | Page |
The property value should be set
| Property | Value |
|---|---|
| SubPageLink | No=FIELD(No.) |
| PartType | Page |
| PagePartID | AEC Contact Details CardPart |
b) We have added our Extension page AEC Application Contact LP (33064482) as a part type with the name AEC Application Contact List.
Click on Property button and the AEC Application Contact List window appears. Page AEC Application Contact LP
SubPageLink field is CustomerNo and base page SubPageLink field is No.
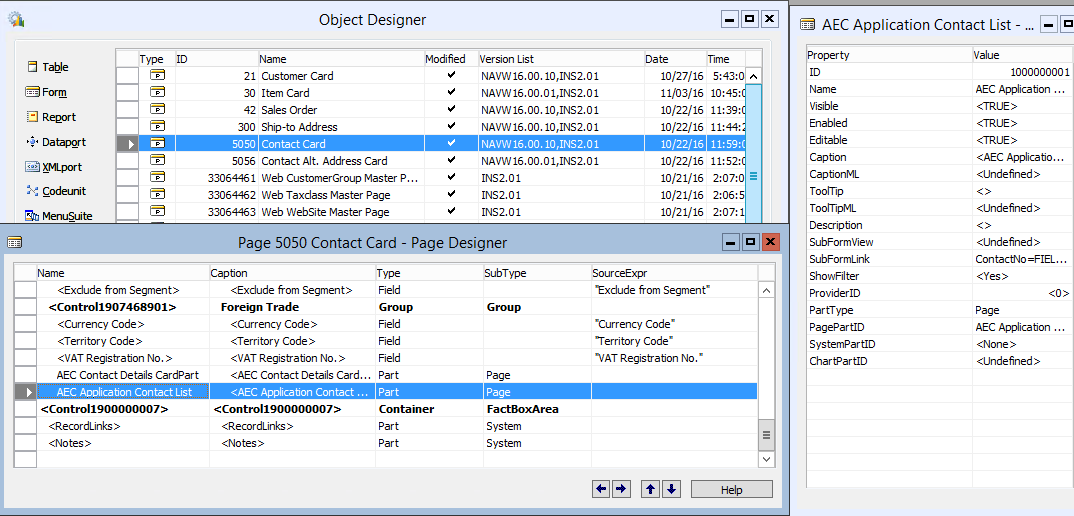
| ID | Name | Type | SubType |
|---|---|---|---|
| 33064482 | AEC Application Contact List | Part | Page |
The property value should be set
| Property | Value |
|---|---|
| SubPageLink | ContactNo=FIELD(No.) |
| PartType | Page |
| PagePartID | AEC Application Contact LP |
Changes in Contact Alt. Address Card Page
a) We have added our Extension page AEC Contact Address CardPart (33064483) as a part type with the name AEC Contact Address CardPart.
Click on Property button and the AEC Contact Address CardPart window appears. Page AEC Contact Address CardPart SubPageLink field is ContactNo and Code
and base page SubPageLink field is Contact No. and Code
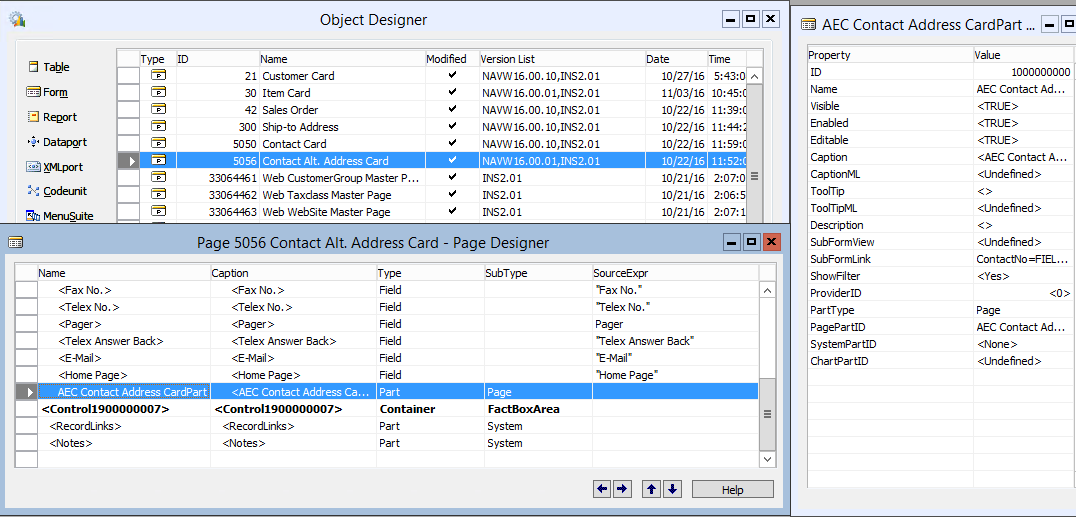
| ID | Name | Type | SubType |
|---|---|---|---|
| 33064483 | AEC Contact Address CardPart | Part | Page |
The property value should be set
| Property | Value |
|---|---|
| SubPageLink | ContactNo=FIELD(Contact No.), Code=FIELD(Code) |
| PartType | Page |
| PagePartID | AEC Contact Address CardPart |
b) Add a base table (Contact Alt. Address) field Contact No. with the name Contact_No.
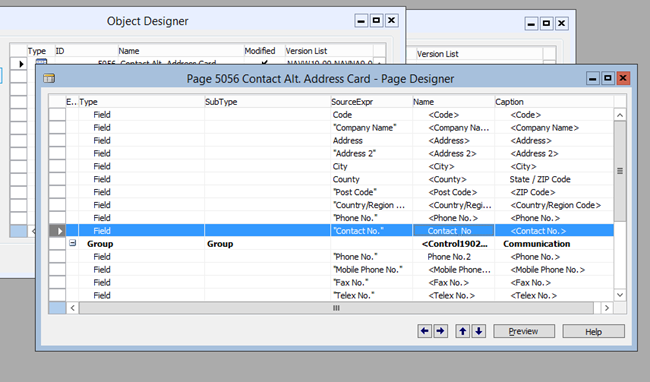
| Name | SourceExpr | Type |
|---|---|---|
| Contact_No | Contact No. | Field |
Log table setup information
In order to edit fields in the extension pages, we need to change the log table set up in NAV 2009R2 generic extension. For this we need to check the following steps:
-
Goto NAV client environment.
-
Choose the Administration option from the Departments column.
-
Goto IT Administration > General Setup> Change Log Setup.
-
A Change Log Setup window will pop up, check the ChangeLog Activated option and go to Setup > Tables option.
-
A Change Log Setup (Table) List window appears.
Now we can set the log table according to the following details:
| ID | Name | Log Insertion | Log Modification | Log Deletion |
|---|---|---|---|---|
| 18 | Customer | All Fields | All Fields | All Fields |
| 27 | Item | All Fields | All Fields | All Fields |
| 36 | Sales Header | All Fields | Some Fields | All Fields |
| 37 | Sales Line | All Fields | All Fields | All Fields |
| 110 | Sales Shipment Header | All Fields | All Fields | Some Fields |
| 111 | Sales Shipment Line | All Fields | All Fields | All Fields |
| 112 | Sales Invoice Header | All Fields | All Fields | Some Fields |
| 113 | Sales Invoice Line | All Fields | All Fields | All Fields |
| 222 | Ship-to Address | All Fields | All Fields | All Fields |
| 5050 | Contact | All Fields | All Fields | Some Fields |
| 5051 | Contact Alt. Address | All Fields | All Fields | All Fields |
| 7002 | Sales Price | All Fields | All Fields | All Fields |
| 7004 | Sales Line Discount | All Fields | All Fields | All Fields |
| 33064465 | Web Category Master Table | All Fields | All Fields | All Fields |
| 33064466 | Web Product WebSite | All Fields | All Fields | All Fields |
| 33064467 | Web Product Attribute | All Fields | All Fields | All Fields |
| 33064468 | Web Product Category | All Fields | All Fields | All Fields |
| 33064469 | Web Product Details | All Fields | All Fields | All Fields |
| 33064470 | Web Product Child Details | All Fields | All Fields | All Fields |
| 33064471 | AEC Customer Details | All Fields | All Fields | All Fields |
| 33064472 | AEC Ship-to Address | All Fields | All Fields | All Fields |
| 33064476 | AEC Order Header Details | All Fields | All Fields | All Fields |
| 33064480 | AEC Contact Address | All Fields | All Fields | All Fields |
| 33064482 | AEC Shipment Line | All Fields | All Fields | All Fields |
In order to call the AEC Manager codeunit function we need to define some methods in the Application Manager. For this we need to follow these steps
-
Open NAV Developer Environment.
-
Goto Codeunit> Application Management (ID-1) and click on Design option.

- Define Variables :
a. Goto View > C/AL Globals
b. Name: AECManager, Datatype: Codeunit, Structure: AEC Manager
For Modify and Rename we need to define two local variables (RecRef and xRecRef) while for Insert and Delete we need only one (RecRef)
a. Goto View > C/AL Locals
Under Parameters:
b. Name: RecRef Datatype: RecordRef
Name: xRecRef Datatype: RecordRef
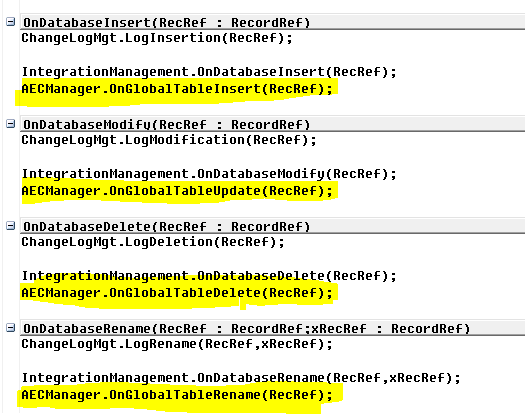
- Under the OnDatabaseInsert, OnDatabaseModify, OnDatabaseDelete and OnDatabaseRename define methods as follows:
Item variant
a. Inserting Item Variant
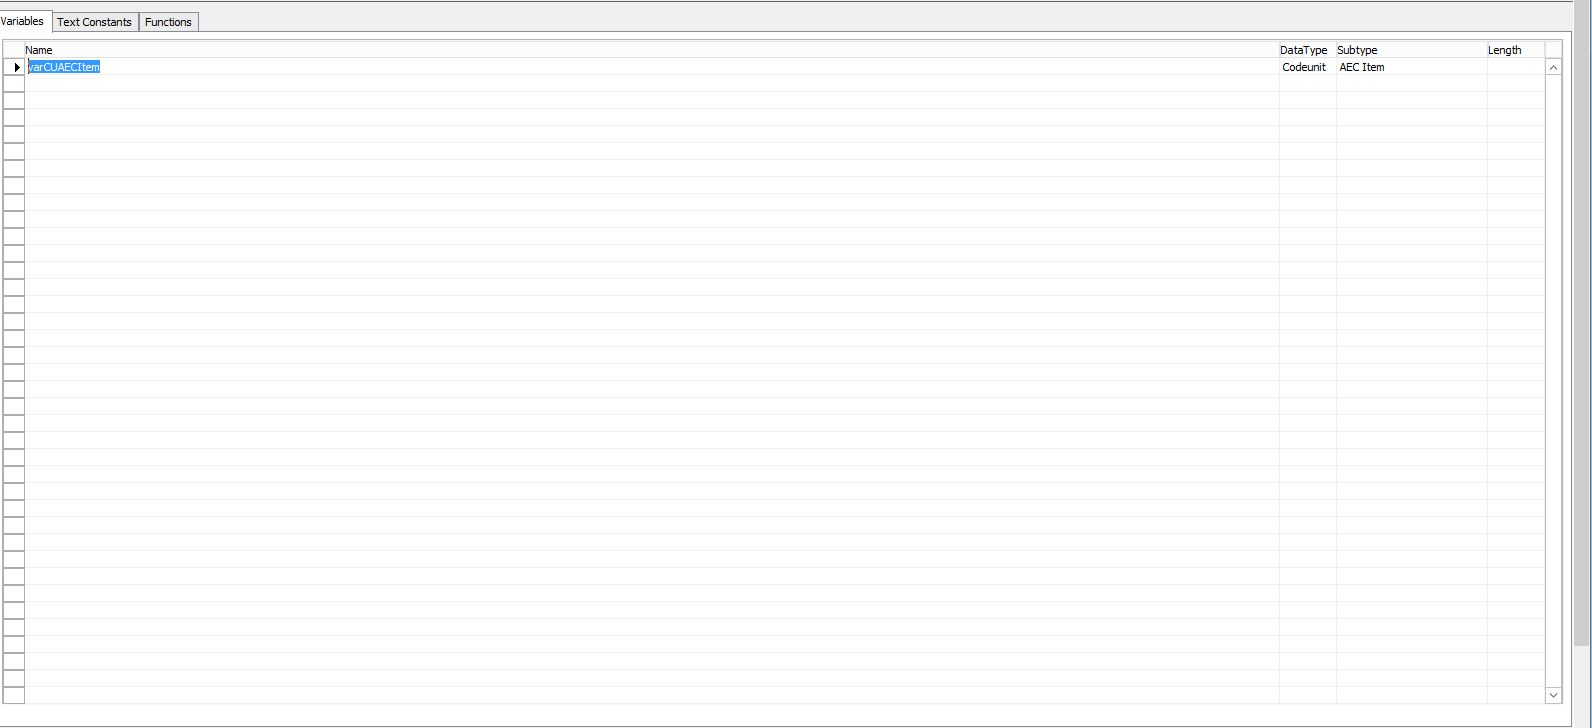
For inserting the Item Variant in the Web Product Child Details we have created a variable varCUAECItem on the Item Variant
table for calling the insert function.
At first we have to go to the C/AL globals of the Item Variant table to create the variable
varCUAECItem. The data type of the variable is CodeUnit & subtype AEC Item.
(The variable is linked with the AEC Item Codeunit).
- Then on the
OnInsertfunction of theItem Varianttable we have to call the insert function() - OnItemVariantInsert () with the help of the
varCUAECItemvariable for executing the variant insert.

b. Modifying Item Variant
To modify the item variant on the web Product Child Details page, we have to use the same variable varCUAECItem.
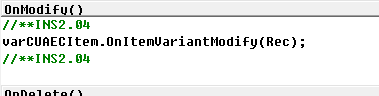
Then on the OnModify function of the Item Variant table we have to call the modify function() :
OnItemVariantModify() with the help of the varCUAECItem variable for executing the variant modification.
c. Deleting Item Variant:
For Deleting the item variant from the web Product Child Details page, we have to use the same variable varCUAECItem.
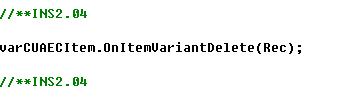
Then on the OnDelete function of the Item Variant table we have to call the delete function() :
OnItemVariantDelete() with the help of the varCUAECItem variable for delete the item variant.
Sales Price For The Item Variant
a. Inserting Sales Price For The Item Variant
For inserting the Item Variant price in the Web Product Child Details we have created a variable varCUAECItem on the Item Variant
table for calling the insert price function.
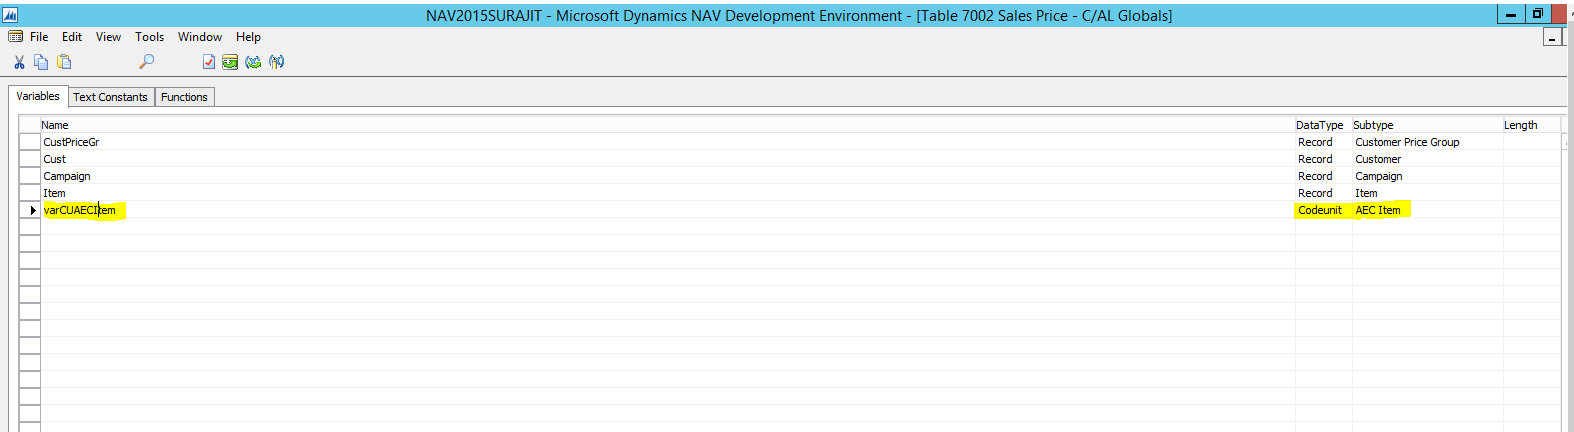
At first we have to go to the C/AL globals of the Sales Price table to create the variable varCUAECItem.
The data type of the variable is CodeUnit & subtype AEC Item.(The variable is linked with the AEC Item Codeunit.)
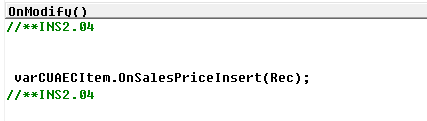
Then on the OnInsert function of the Sales Price table we have to call the insert function() :
OnSalesPriceInsert() with the help of the varCUAECItem variable for executing the variant price insert.

b. Modifying Sales Price For The Item Variant
For modifying the item variant price on the web Product Child Details page, we have to use the same variable varCUAECItem.
Then on the OnModify function of the Sales Price table we have to call the modify function() : OnSalesPriceInsert () with the help of the varCUAECItem
variable for executing the variant price modification.
c. Deleting Sales Price For The Item Variant
For deleting the item variant price from the web Product Child Details page, we have to use the same variable varCUAECItem.
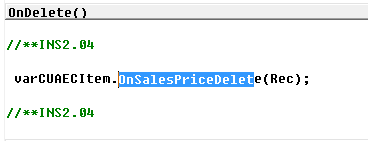
Then on the OnDelete function of the Sales Price table we have to call the delete function() :
OnSalesPriceDelete() with the help of the varCUAECItem variable for delete the item variant.
Quantity For The Item Variant
a. Inserting Quantity For The Item Variant
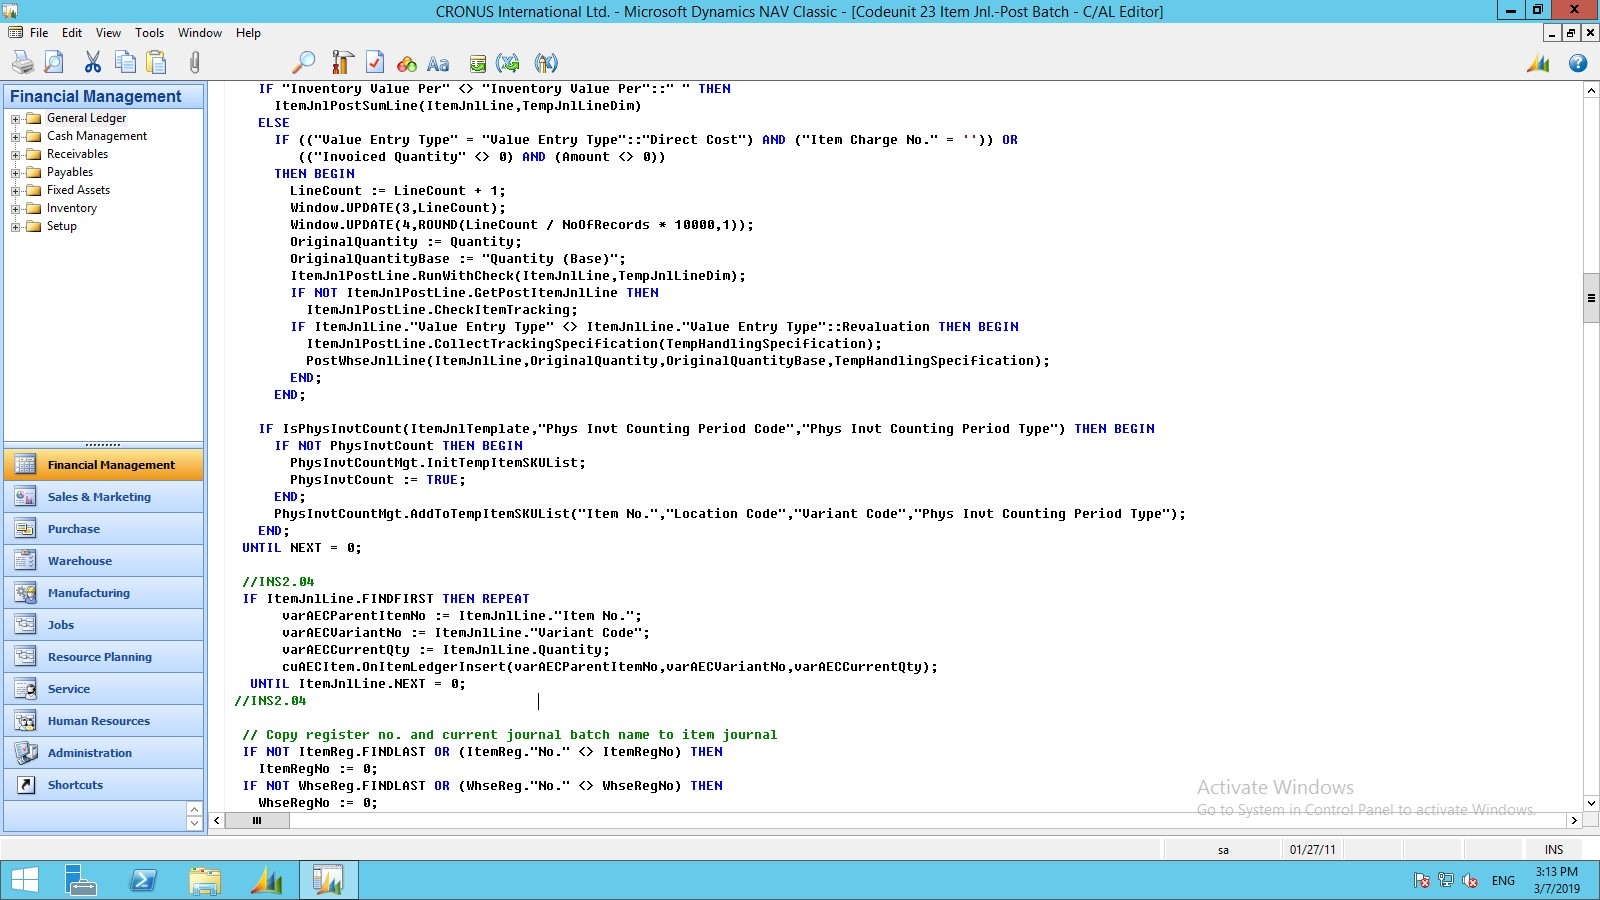
For inserting the Item Variant quantity in the Web Product Child Details we have created variable CUAECItem,
varAECParentItemNo, varAECVariantNo, varAECCurrentQty on the Item Jnl.-Post Batch CodeUnit
for calling the function.
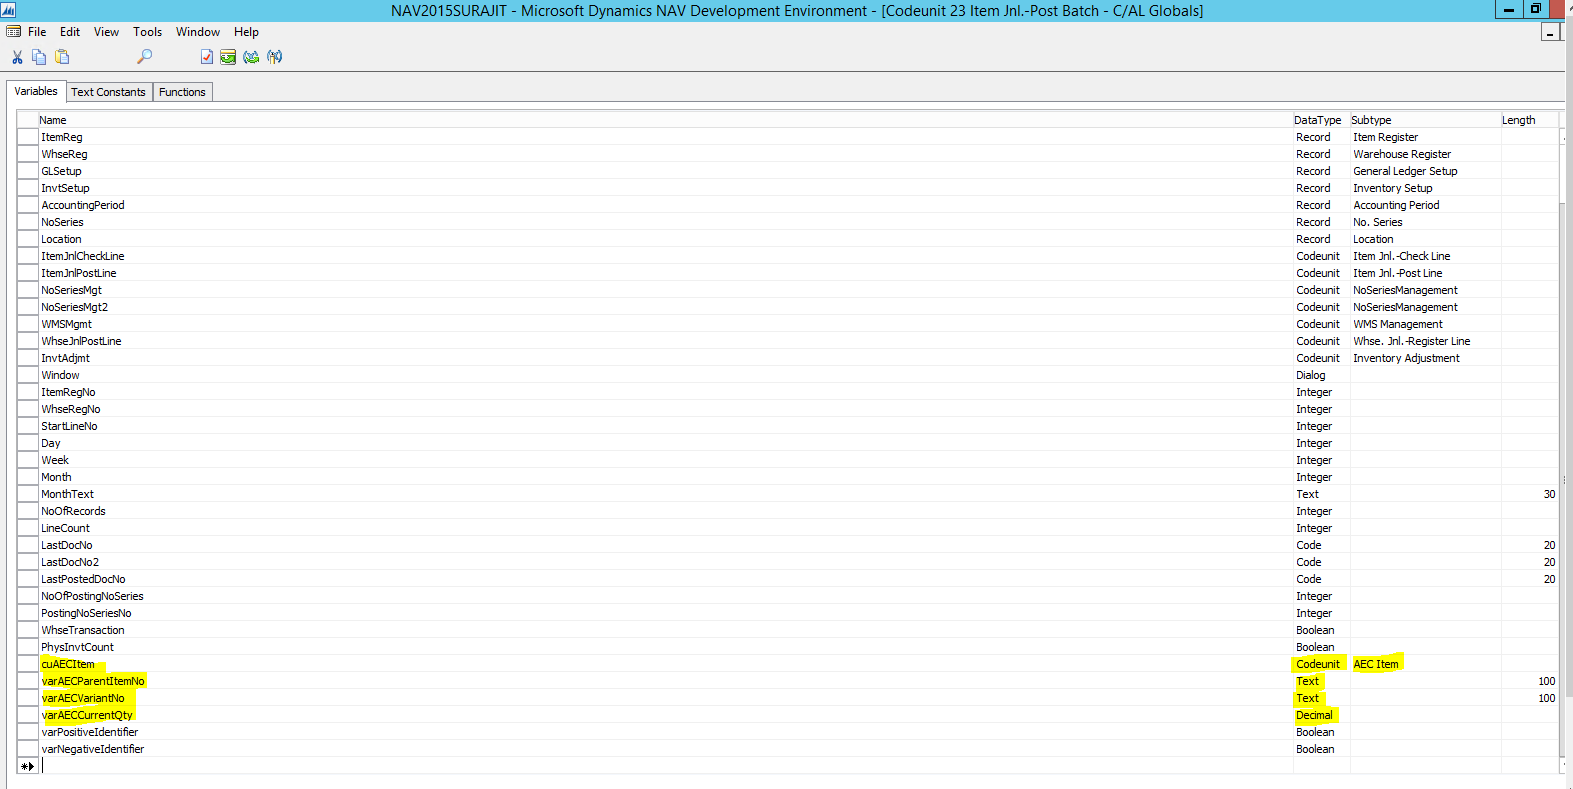
At first we have to go to the C/AL globals of the Item Jnl.-Post Batch Codeunit to create the variable CUAECItem. The data type of the variable is CodeUnit & subtype AEC Item,(The variable is linked with the AEC Item Codeunit), varAECParentItemNo
the data type of the variable is Text & length 100, varAECVariantNo the data type of the variable is Text & length 100, varAECCurrentQty
the data type of the variable is Decimal.
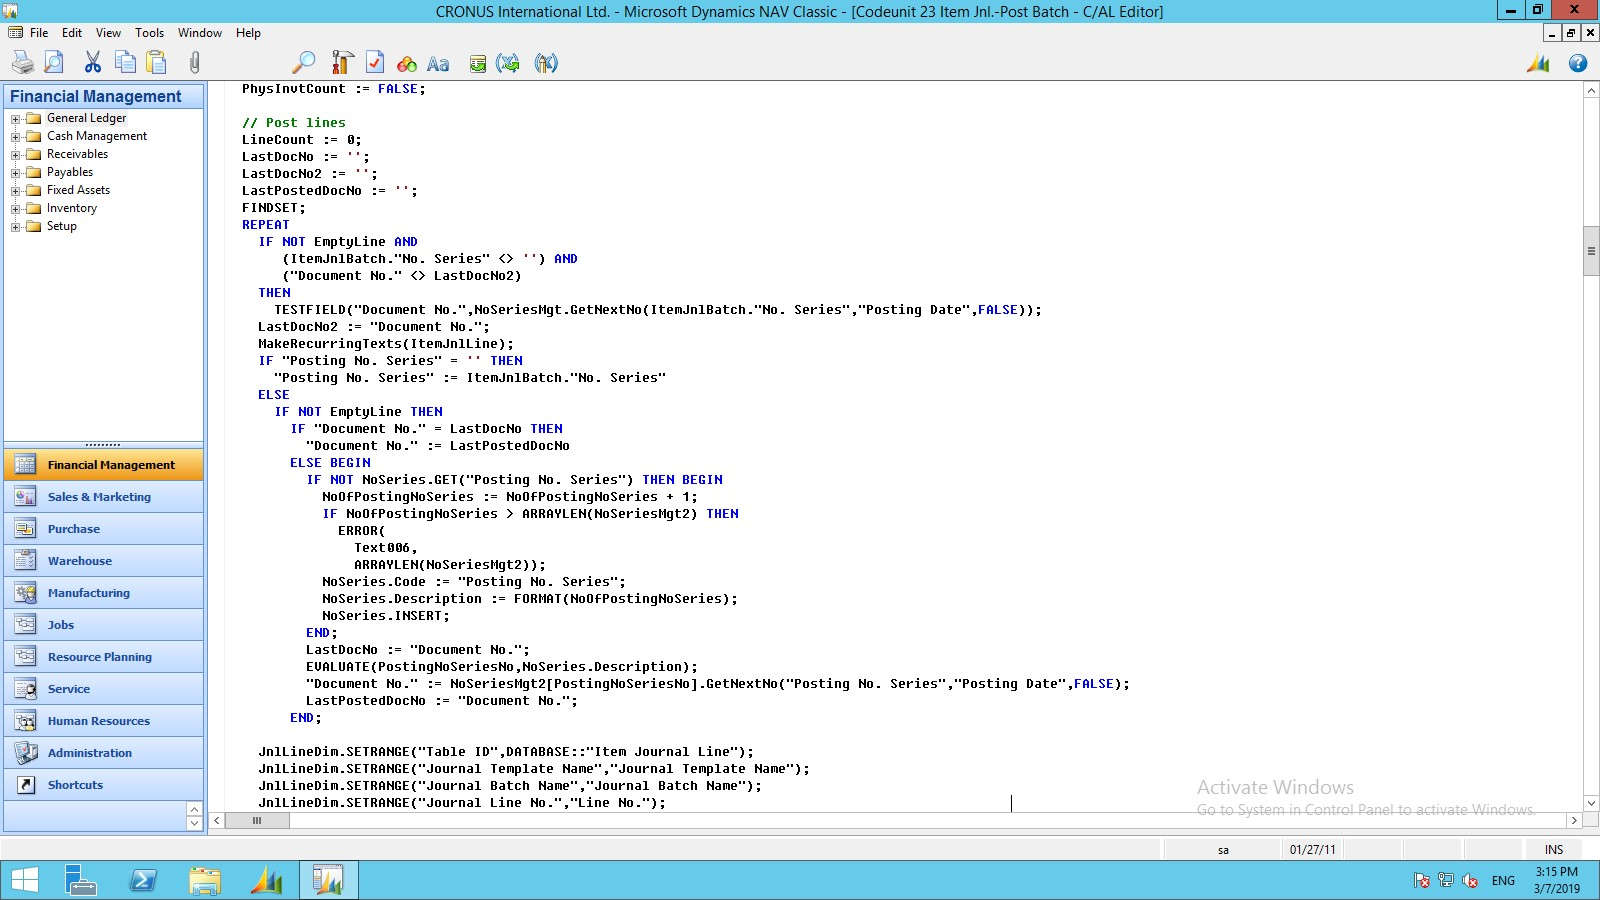
Then on the Code function of the Item Jnl.-Post Batch CodeUnit we have to call the insert function() :
OnItemLedgerInsert () with the help of the CUAECItem variable for executing the variant quantity insert.
We have to write the code on the Code function after //Post lines
The required changes for the extension NAV 2009R2 :
ProTip: While performing the sync process we need to set the web item flag as YES in the action filter option of admin.appseconnect.com
after installing NAV2015 generic extension.
- Compile the code.
Troubleshoot
Before installing the extension you always need to keep a backup of your existing database, as installation and uninstallation of extension may happen multiple times.

