Steps to Create a ProcessFlow
Updated:
APPSeCONNECT is a next generation integration platform that provides developers and partners an easy way to connect two or more business applications
together such that they can communicate with each other without manual interrogation. The duty of a developer is to create a bridge between these applications
such that datas can flow quickly,easily and on-time. These applications are totally different in terms of structure and interface. Hence forth, to integrate
between two disparate applications, we need a solution which gives right mix of tools and technology specialized to provide easy, free-flowing and seamless integrations.
ProcessFlow is the main workspace of APPSeCONNECT which lets you build an advance solution.
ProcessFlow is a visual representation of a business process integration, which helps you as an user to orchestrate a business process in such a way so that you can modularize and control the complexity of business integration properly. A processflow, under the hood creates a micro-service architecture that can run in cloud servers or on-premise fetching or pushing data directly to the applications in execution and generate both transactional and data logs. ProcessFlow gives the IDE which lets you develop integrations for your customers and partners, giving options for deployment and execution from the same UI. This enables you to choose different end-point filters, deployment environments and schedule for automatic execution.
This section of the documentation will guide you with the process of Creating & Saving new processflows. The steps for implementing the same is provided below :
Prerequisites for Creating processflows
- Should have valid credentials for logging in to the APPSeCONNECT portal.
- Applications should be chosen from the apps section, for proceeding with the design of processflows.
- You can also create a Package from the created processflow for sharing it to your other organisations. Click Here to know more about processflow Packaging.
Steps to create a ProcessFlow
1) Login to the Portal and navigate to the Designer > ProcessFlow module. The Process Flow listing page appears.
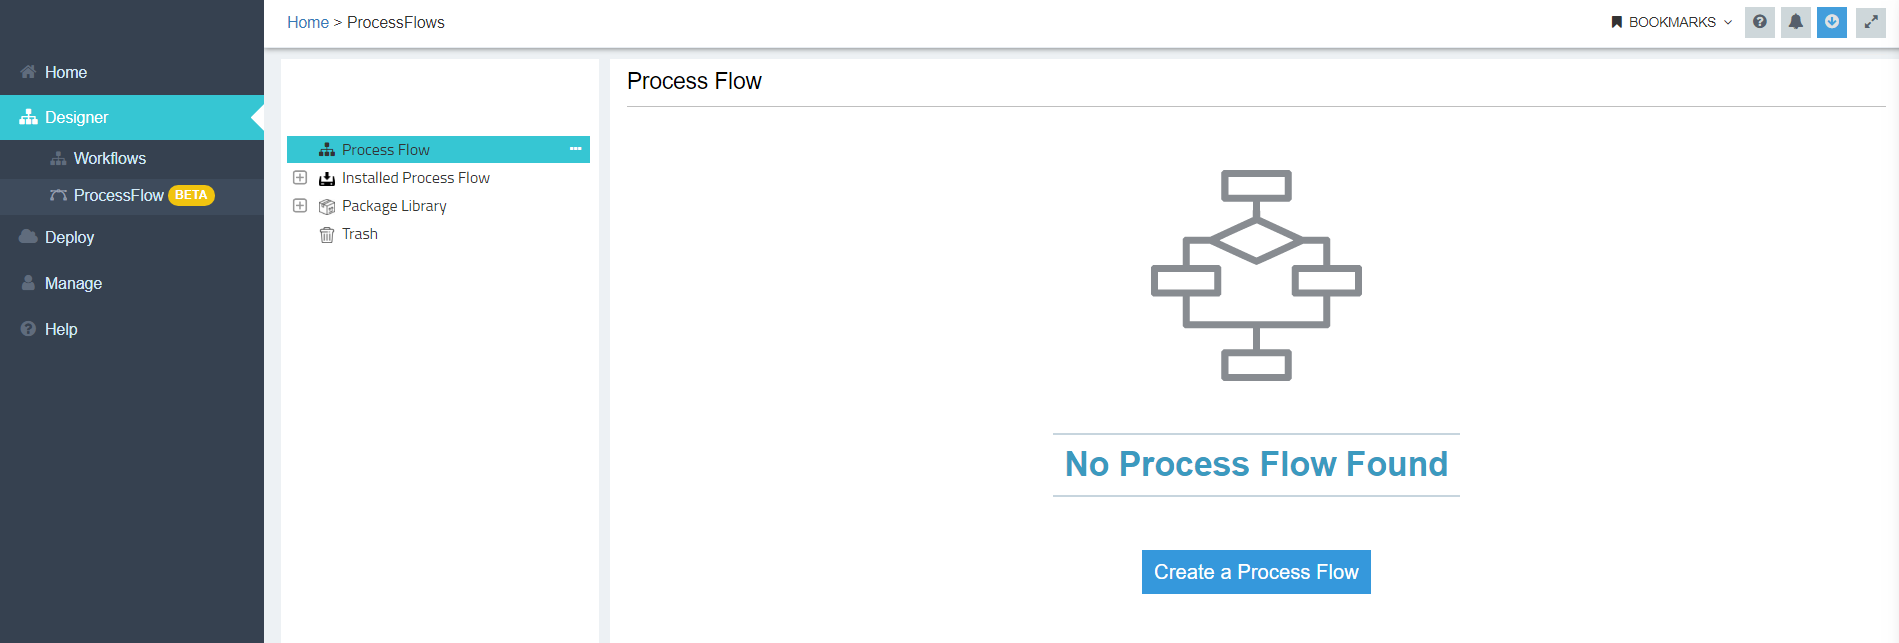
2) By default, Process Flow folder is selected, where you can create new processflows as well as you can also view and edit existing processflows.
3) Click on the new button for creating a new processflow.

Note : If the Folder is empty, you can view the button Create a Process Flow, that navigates
you to the processflow Designer Page.
4) A pop-up will appear where you need to put the ProcessFlow name. Select Ok, you will be navigated to the processflow Designer Page else you can abort the processflow creation by clicking on Cancel.
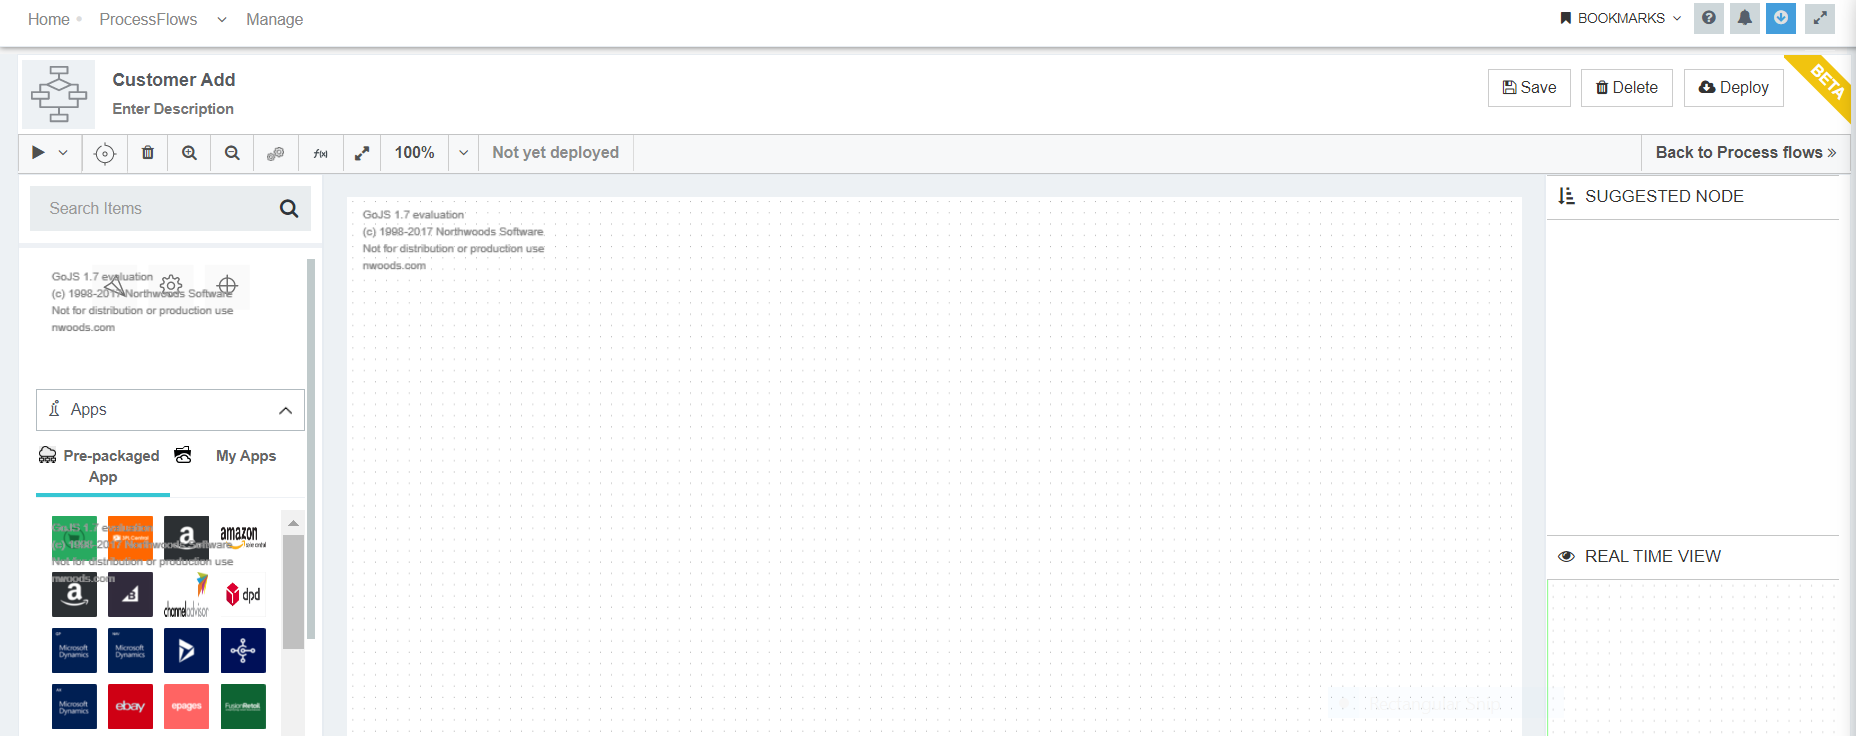
5) Provide a Description for the processflow in the processflow header panel.

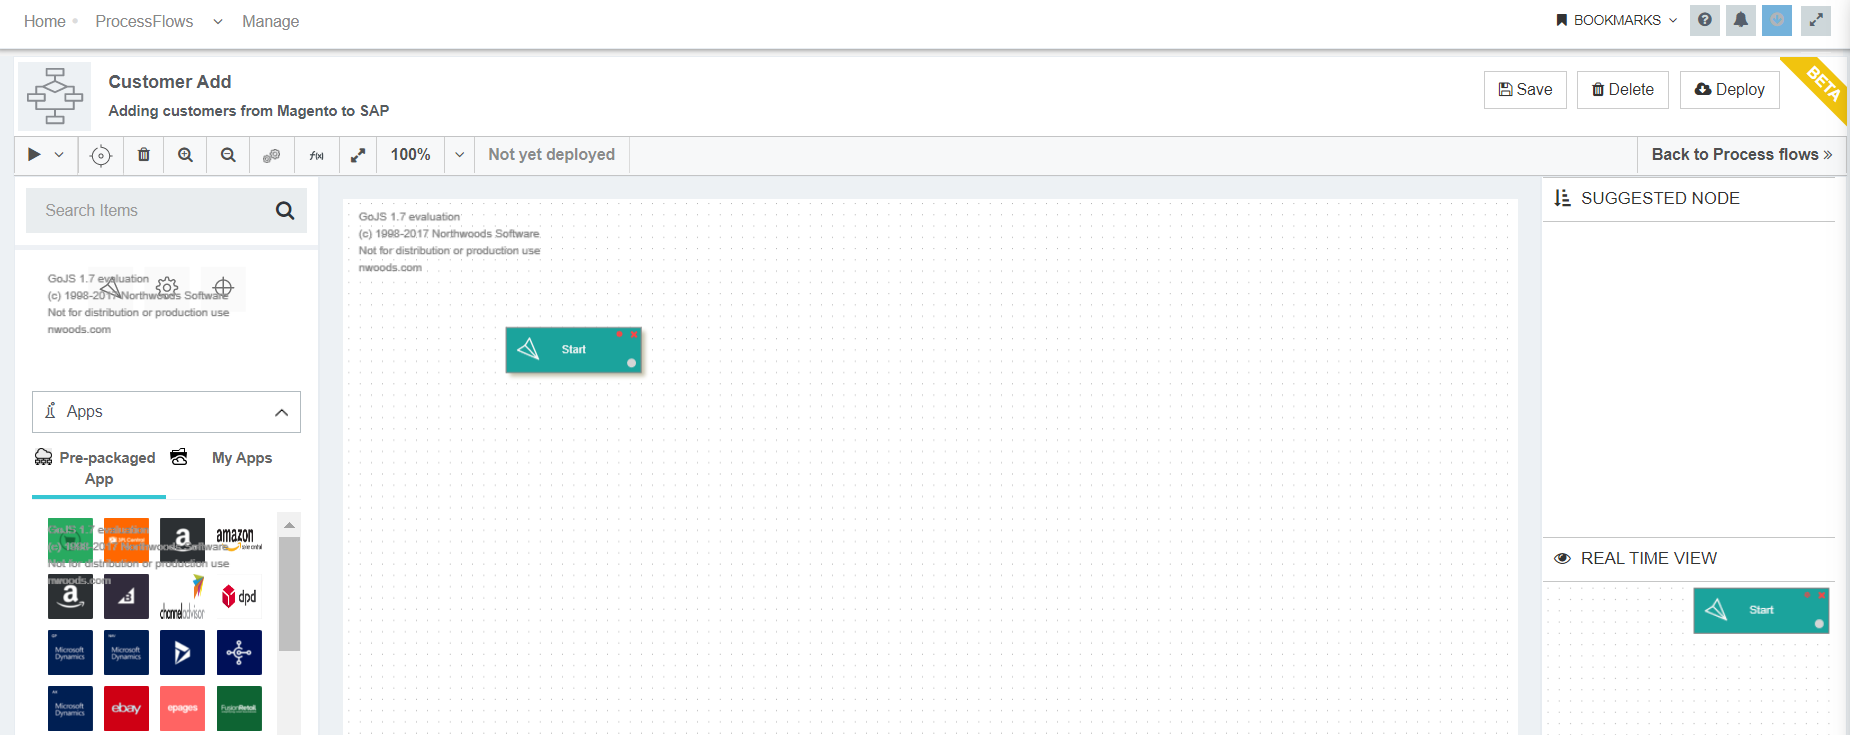
6) Drag and Configure the start node that signifies the start process of the processflow as per your business needs.
7) Expand the App menu. You can view all the Pre-packaged application and Custom application.
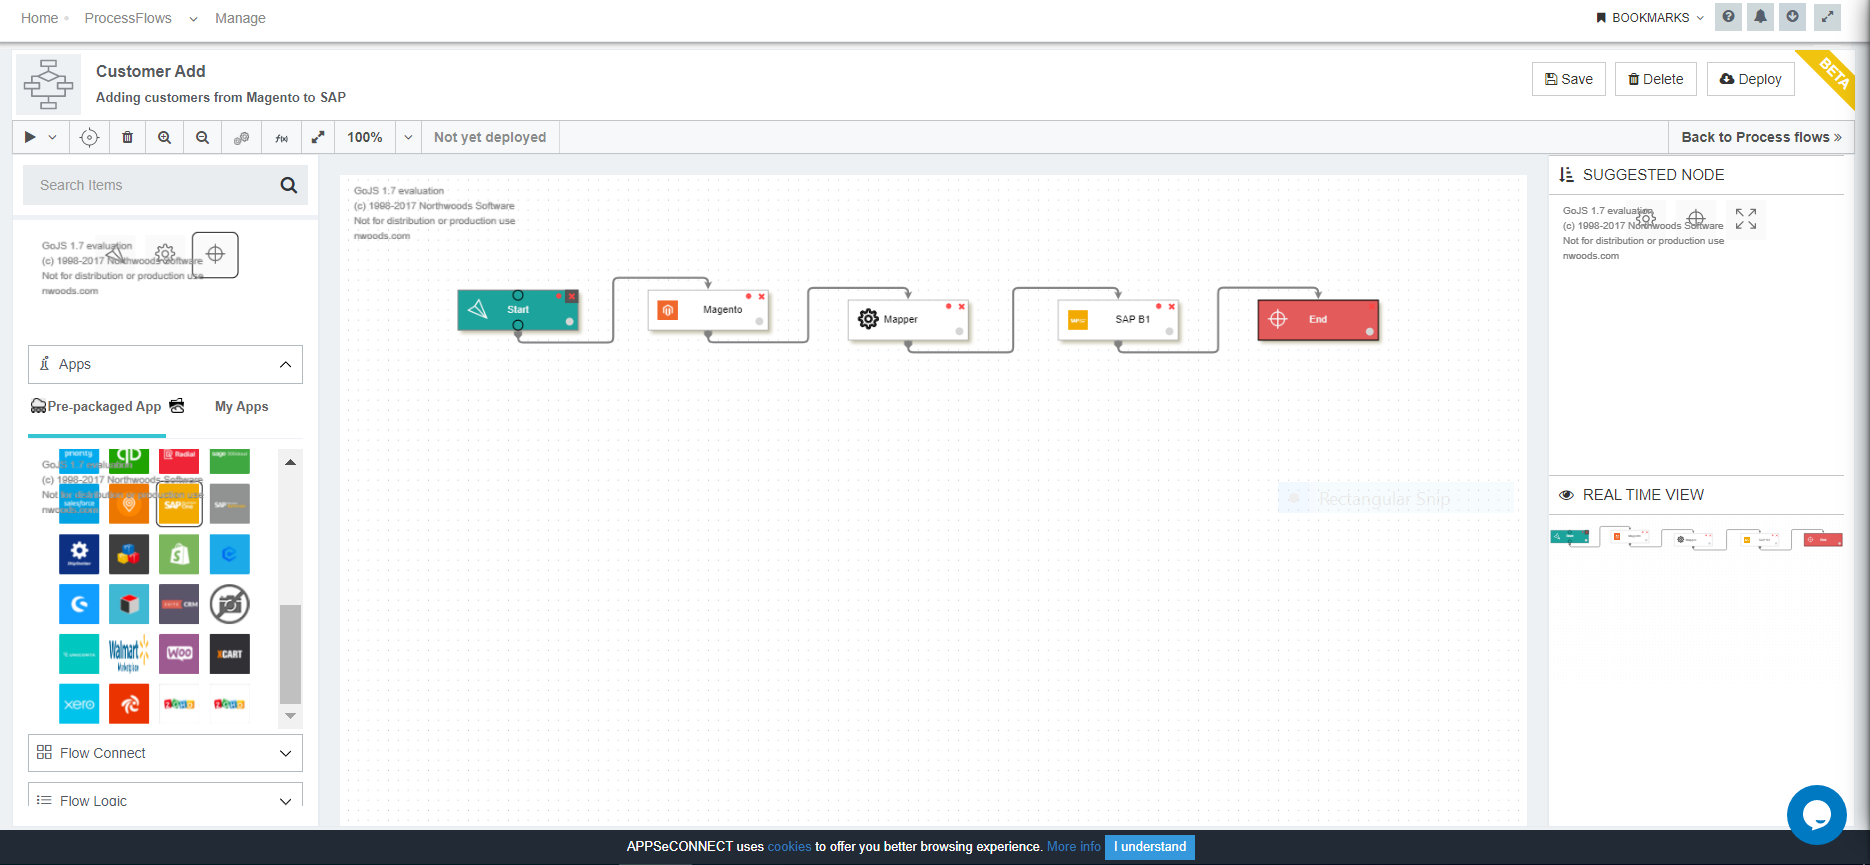
8) Drag an application to the designer panel that you want to integrate
(in this case Magento & SAP Business One ). On dragging the applications to the designer panel, the node configuration
slider would appear.
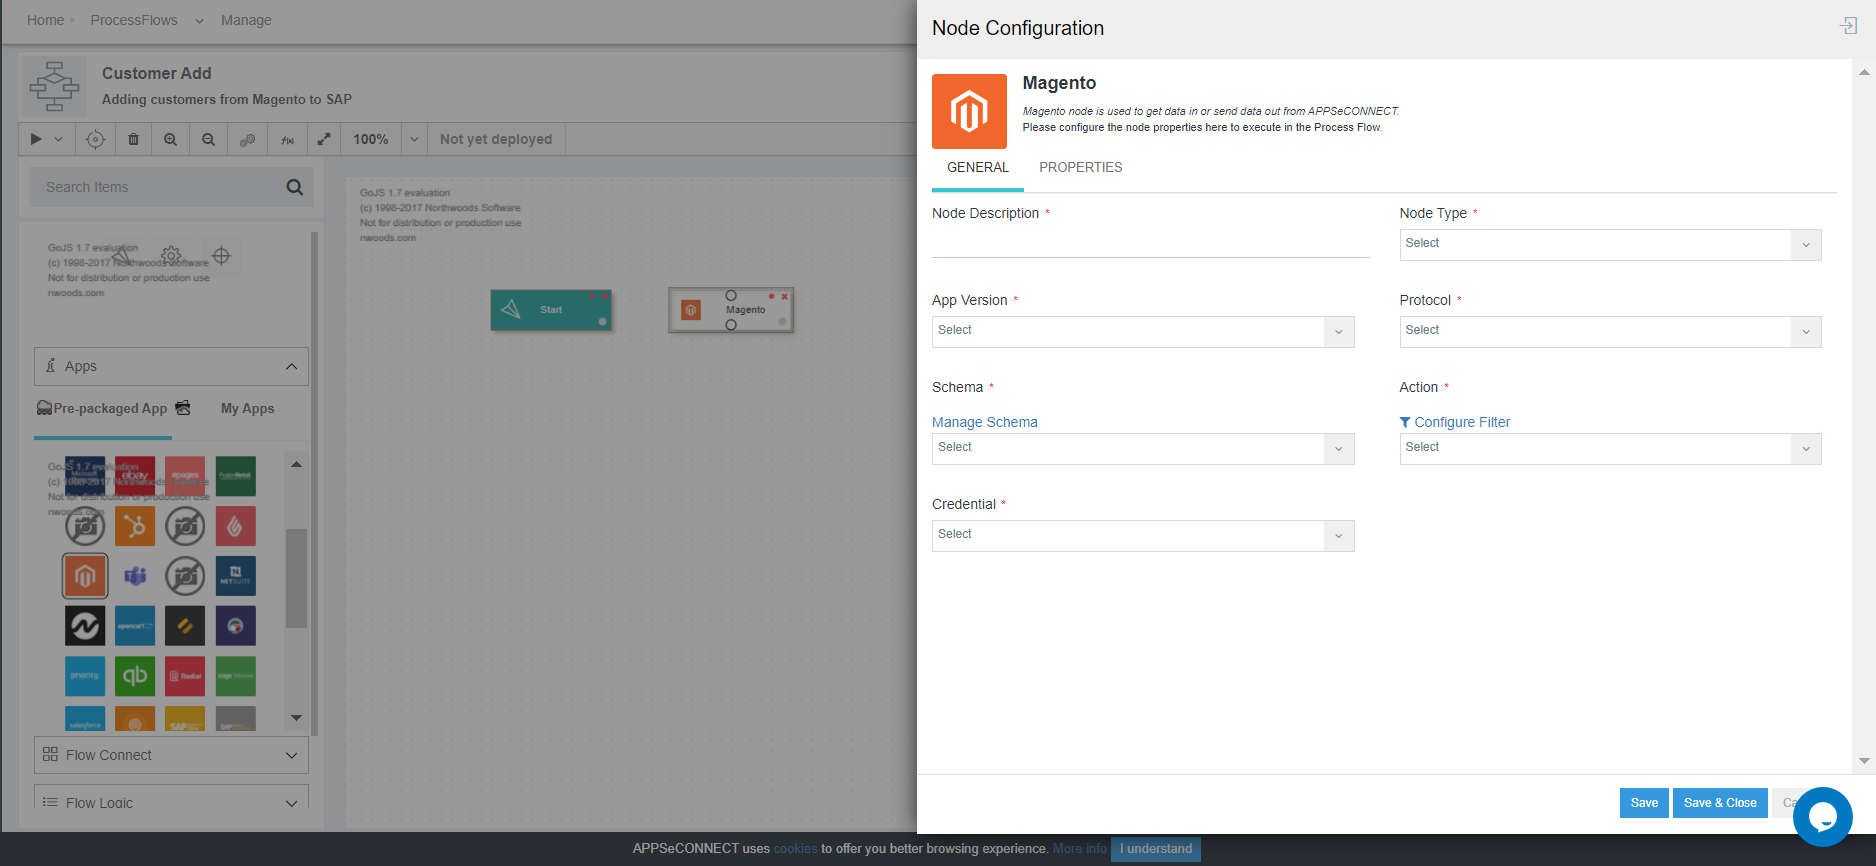
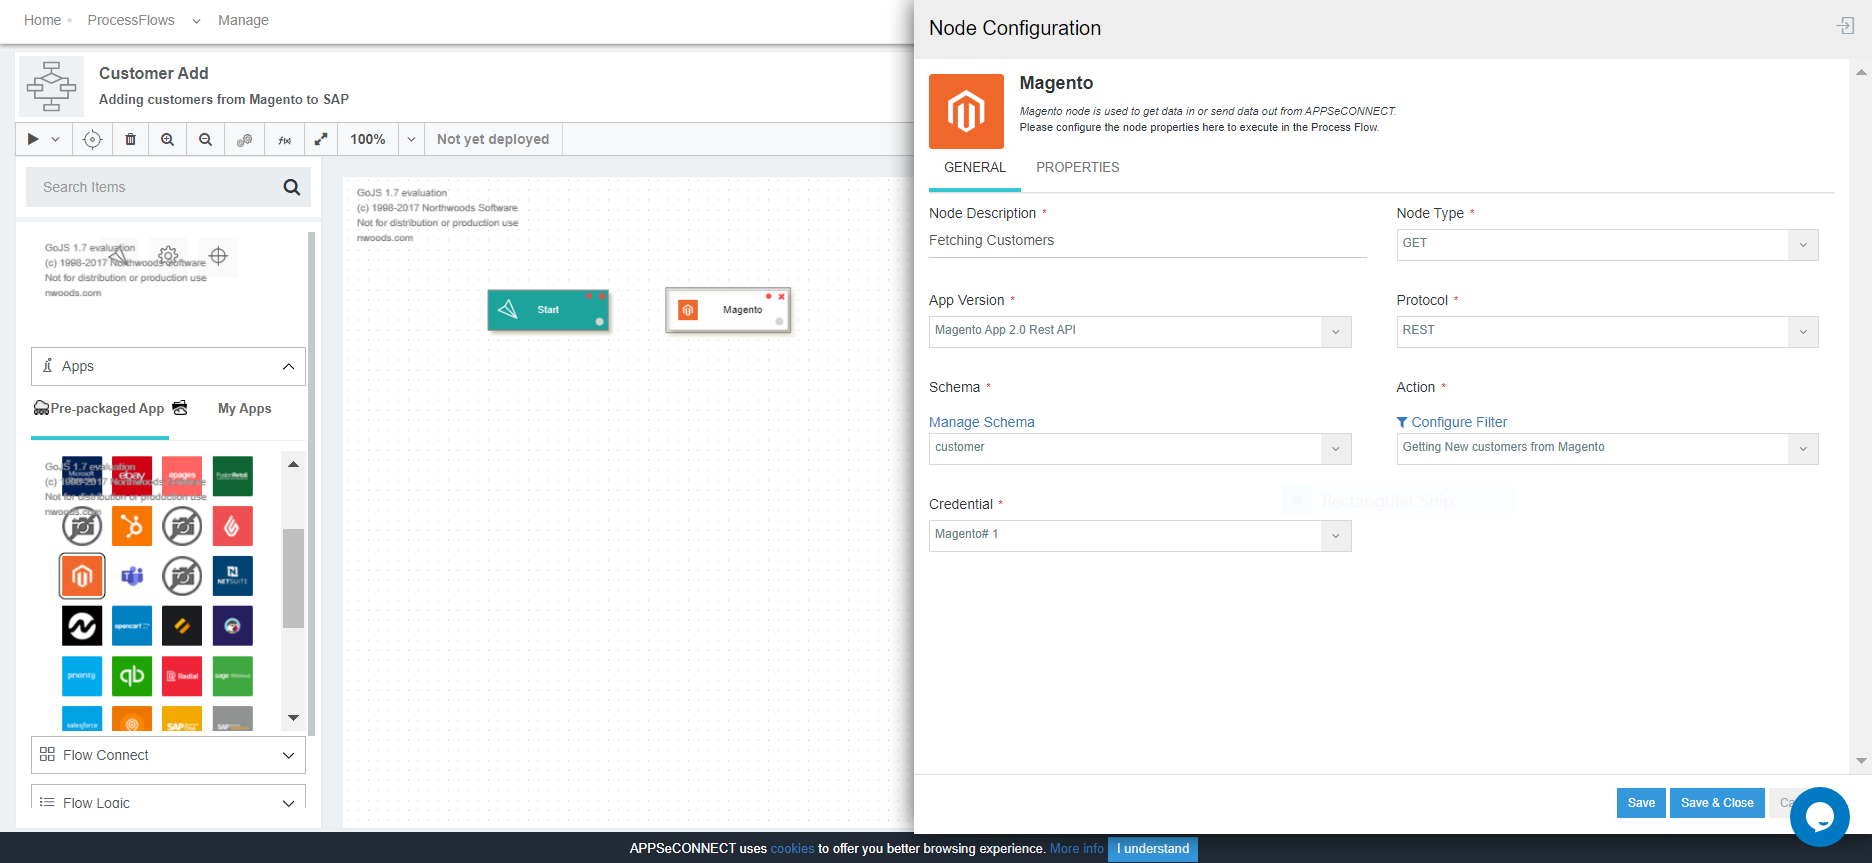
9) The following are the fields available in the Node Configuration Slider :
- Node Description : This denotes the description of the node.
- Node Type : This denotes the type of action that the node needs to perform GET or POST.
- App Version : This denotes the version of the Application. You need to select the version of the application you need for the integration.
- Protocol : The protocols would be listed for the application that is selected.
- Schema : The schemas for the selected application and protocol would be listed in the drop-down. Click here to know more about schemas.
- Action : All the actions based on the selected schema would be available. You can also modify Action filters by clicking on the Configure Filter button.
- Credential : You need to click the button Add, beside Credential to add token in the list. Select the Credential Token added for storing the credential provided for the application in the OP Agent and Cloud Agent.
10) Once all the details are the provided click Save & Close button.
11) Drag the mapper node and the destination application in the design panel.
12) Provide the node configuration details for the destination application and click Save & Close button. Drag the End node in the designer panel.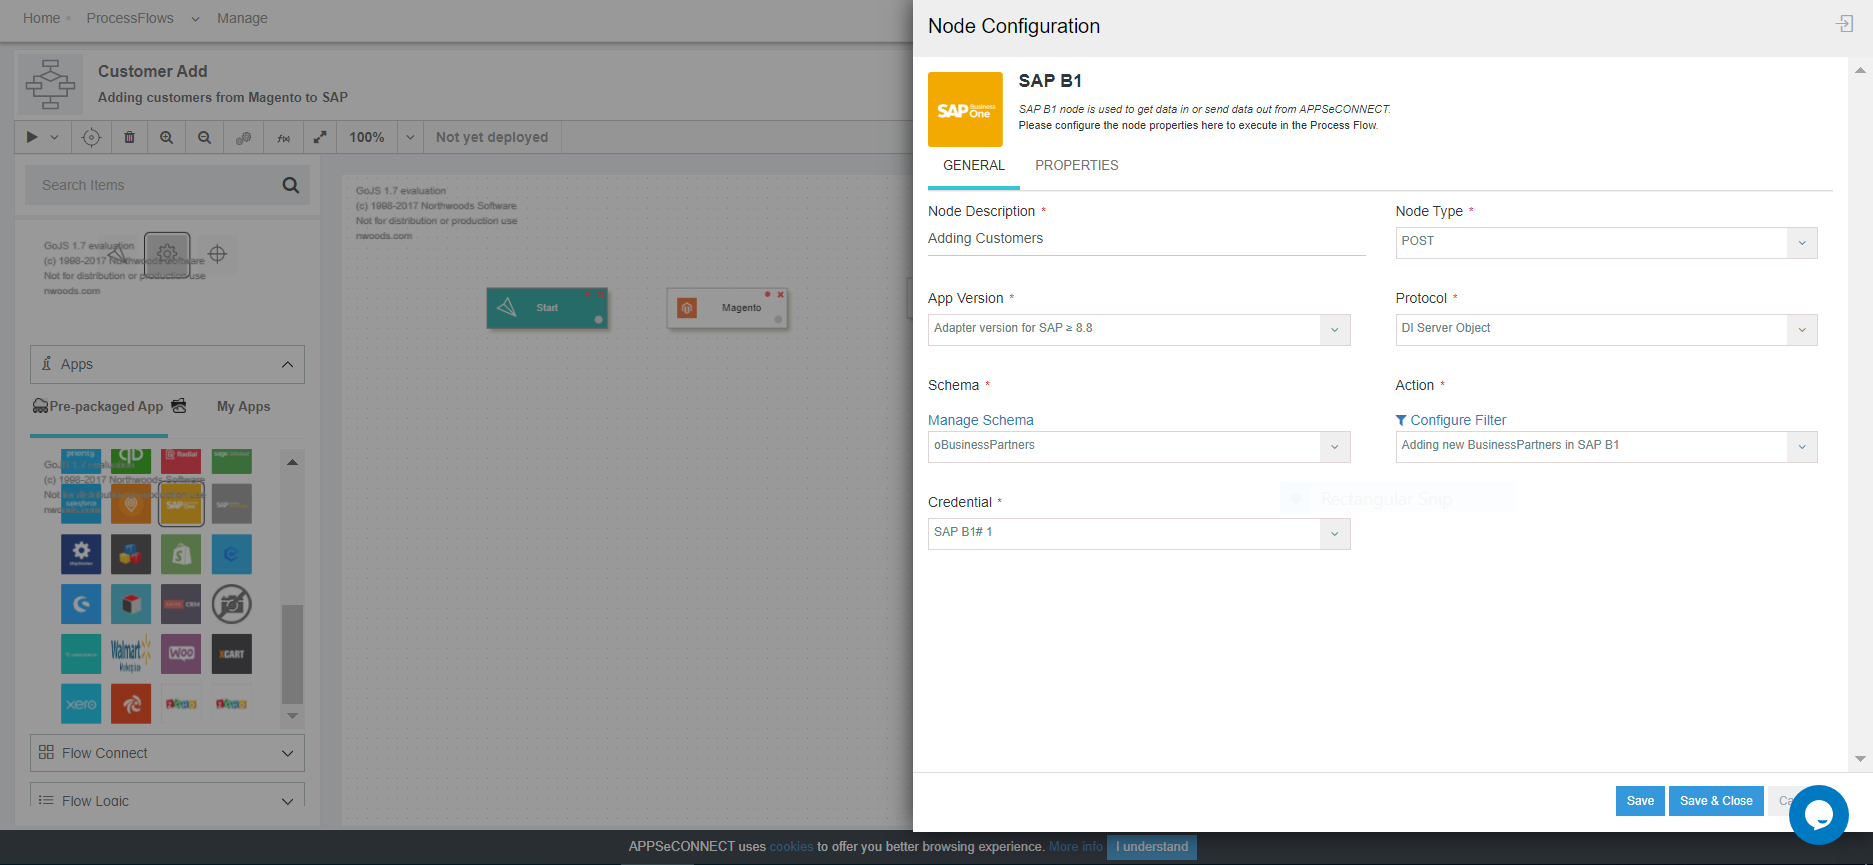
Note : The Node type for the destination applications is selected as POST as data would be posted to the destination application from Source.
13) Join the dragged nodes from Start to End. Click on the save button in the header panel of processflow deisgner page to save the links and node configurations.
14) Click on the Mapper Node Configuration, the transformation window opens. The user can perform the mapping for the choosen applications.
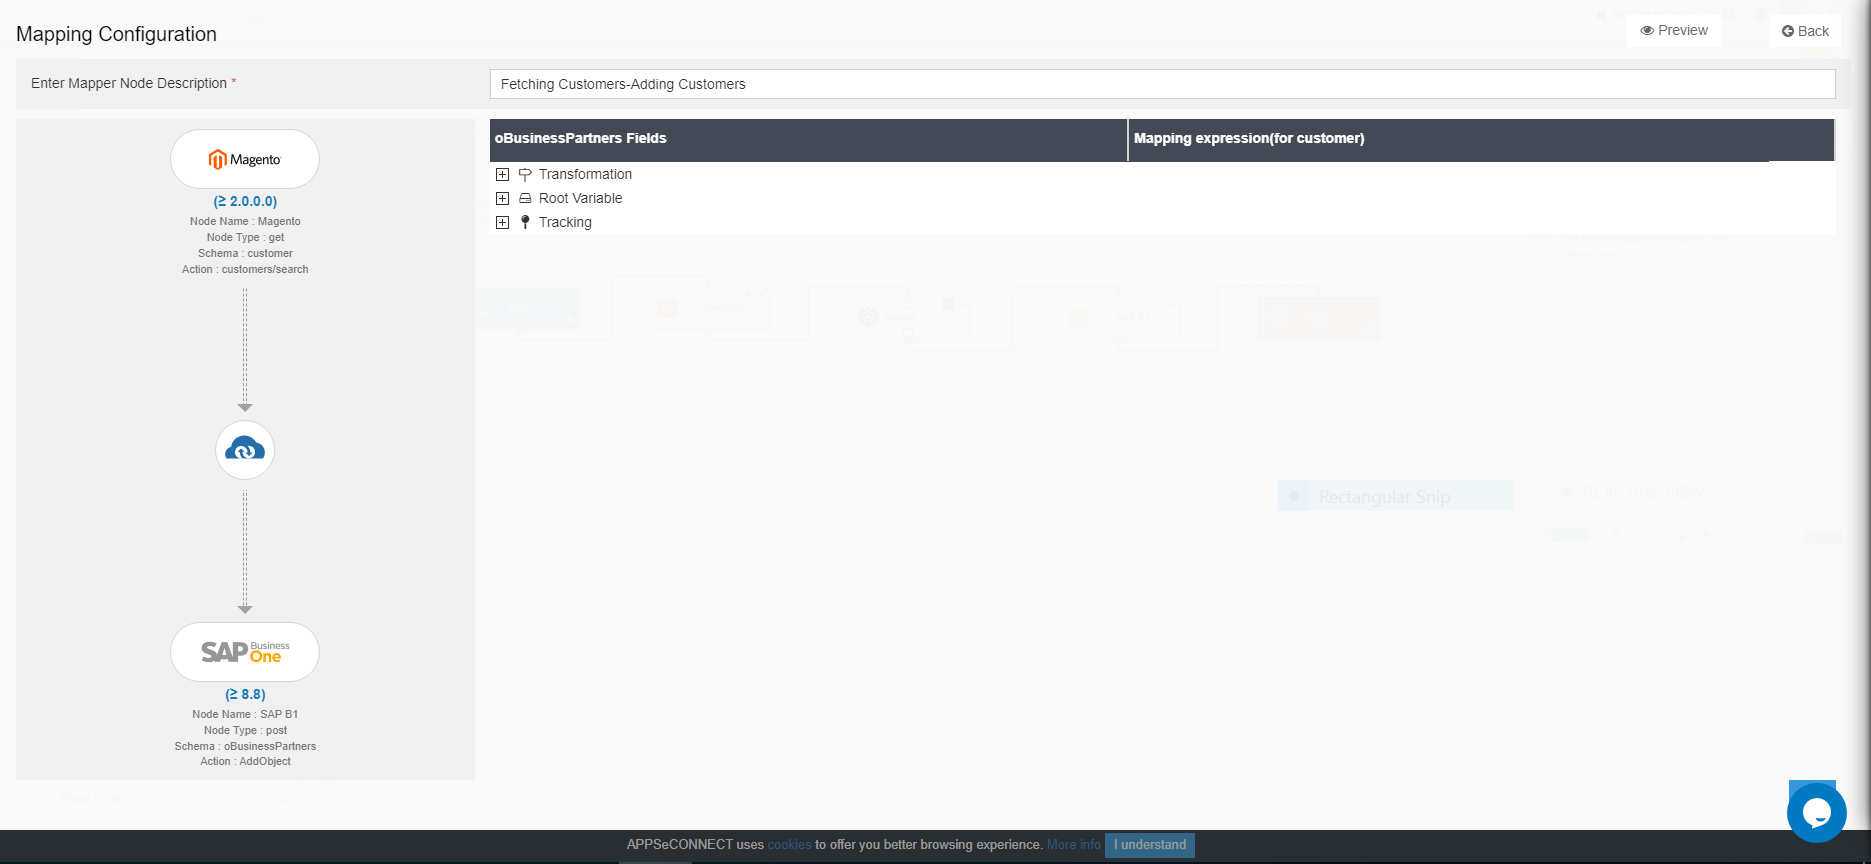
Note : You need to save the fully created processflow for opening the Mapper Node Configuration Window, after linking all the nodes from START to END.
15) You can edit the mapping anytime by clicking over the node configuration button, available on the Mapper Node. Clicking on the cross button will delete the node from the designer panel.
Note : Every node has a node configuration button except End, the configuration window opens when clicked on that button.
16) Once all the nodes are joined, the steps for creating a processflow ends. You can also add any other nodes as per the business requirement. The saved processflow would be listed under the folder you have created.

17) Clicking on the edit button against the created processflow, you will be redirected to the designer page.

Following the above steps, you can successfully create a basic processflow. However, business process will require other nodes for designing as per the requirement.
You can also create a Package out of your created processflows for sharing it to other organisations. Click Here to know more about processflow Packaging.
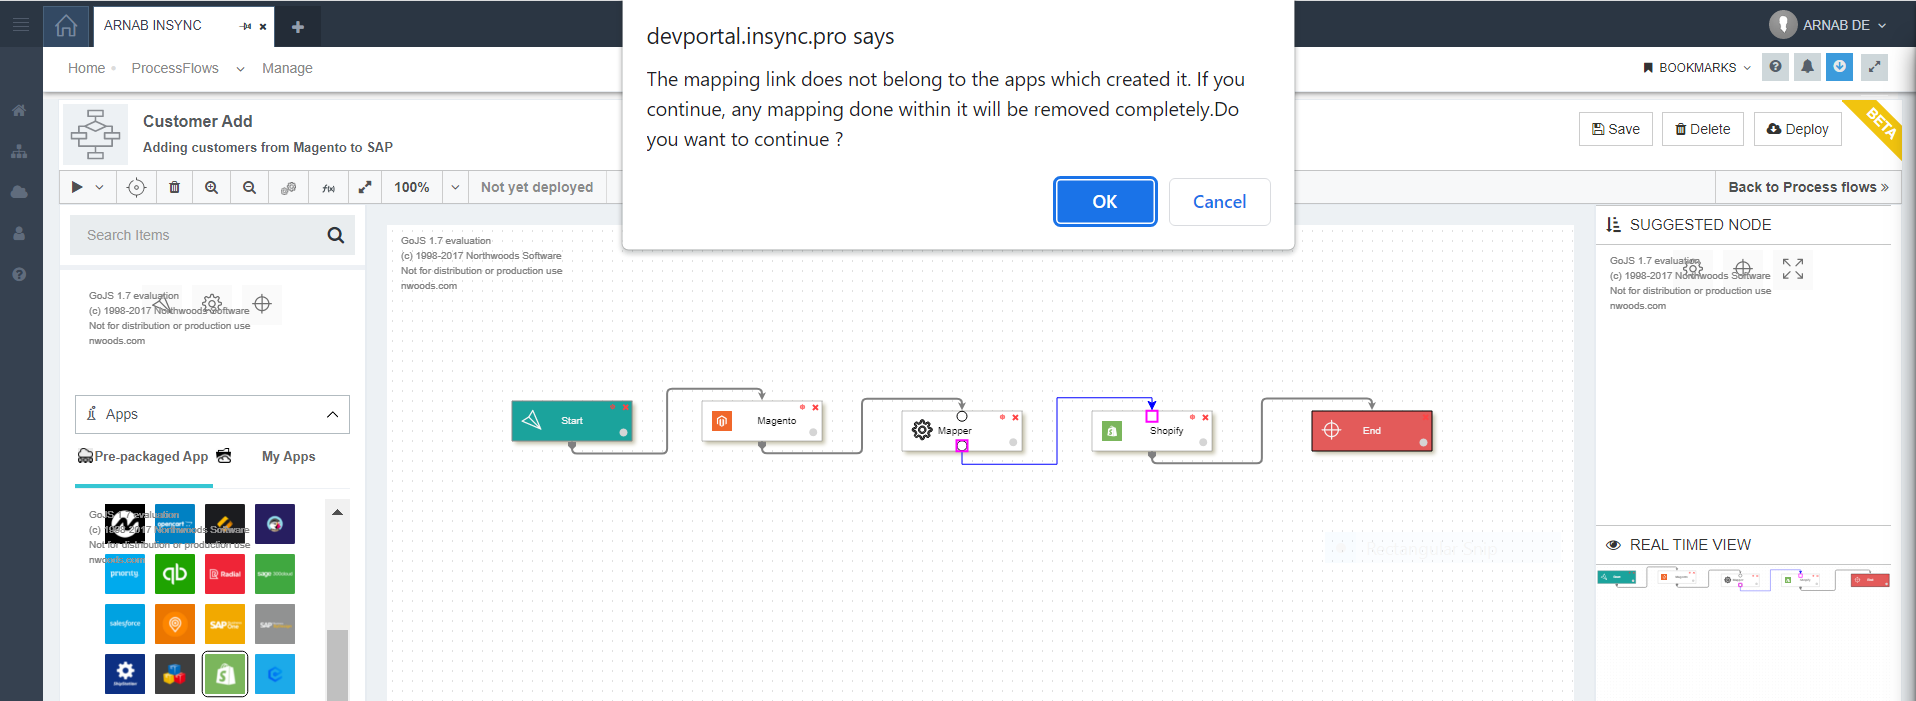
Note : Unlinking of the nodes will now not erase the mapping made inside the mapper node. If a different application is dragged and linked with the existing GET or Destination node, it will remove the existing mapping when saving the processflow.
However, you will get a confirmation message when implementing the same. You will be able to view the message in the below screen.