
Working with Apps
Updated:
This section gives the overall idea about choosing application, configuring your apps in Processflow, environment setup and execution of the sync process. Step by Step direction is given below : Login to APPSeCONNECT - View Home Page to get the details.
| Sections | Details |
|---|---|
| Searching Application | You can filter all your added applications by searching application. Visit the section to know more about searching application. |
| Choosing Applications | User needs to choose the applications as per the requirement of the user. This is the very first step while proceeding with the integration process. |
| Creating Applications | You can successfully create custom or technology based applications as per requirement. Follow the steps given here to create custom or a technology app. For Custom and Technology application, you can delete the application by selecting the delete option from the VIEW drop-down. |
| Providing Credentials | Working with cloud integration, you need to provide credentials on the cloud platform. This section will only be available for those application that supports cloud technology. Follow the process to know and understand the process to provide credentials on cloud. |
| Understanding Schema and Entity | Every application has its schema and entity for integrating with applications. |
| Understanding Attributes | Every schema has its attributes that are needed to be mapped with the destination application for the sync process. |
| Working with Schemas, Attributes & Actions | Every Entity is transformed after configuring its proper Schema, attributes and its actions. Follow the steps if you need to create Schema, its attributes and actions. |
| Adapters | On expanding each applications, you get to see the button adapters that informs you about the latest adapter available for your selected application. You will also get to know about the process to add adapter on your organisation. |
| Functions | This section will help with the functions that are available for your chosen application. You can also create more Cloud Appresource functions. |
| Protocols | This section will help to work with protocols for the technology and custom created applications with in an organisation. |
| Delete | You can easily delete your selected applications by clicking on the delete button. Visit the section to know more about the delete functionality. |
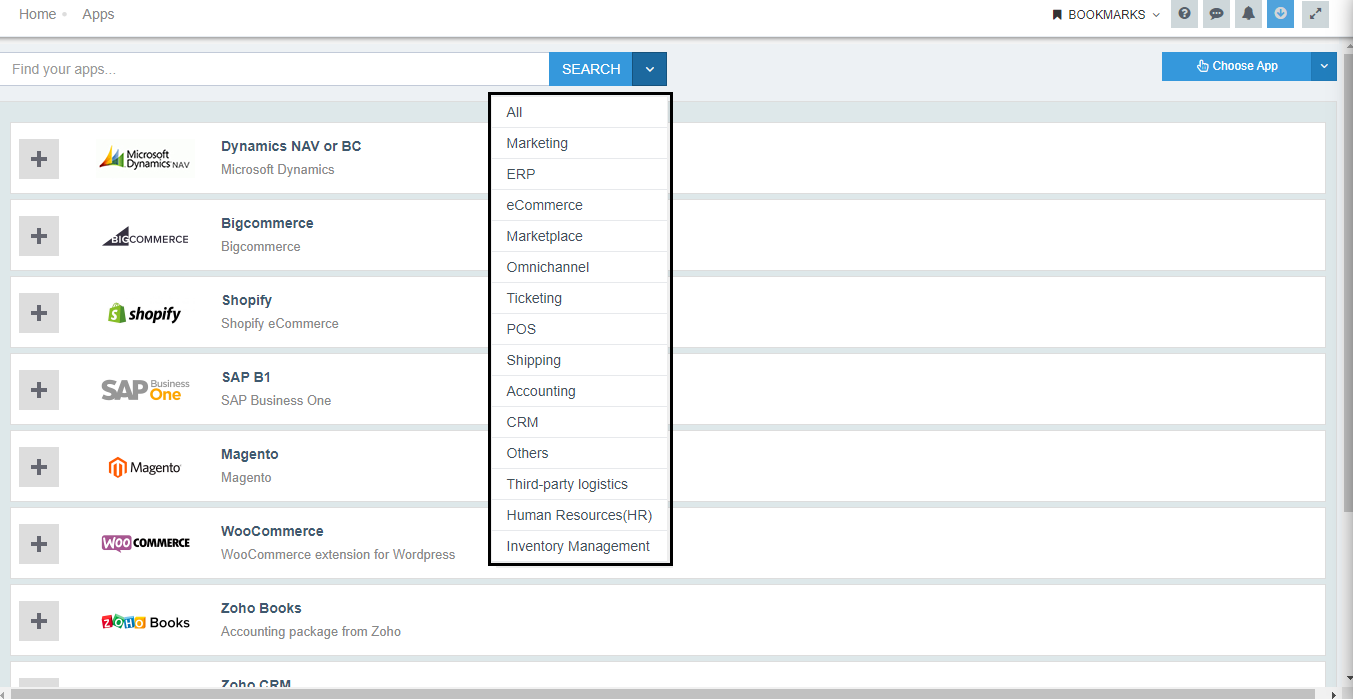
Searching Applications
You can eaily filter all your added applications by the SEARCH functionality. You can filter your applications as per the process given below :
- Search by Name : You can search your applications by typing its name on the search box.
- Search by Category : You can also search your application by selecting the category of your application. For Eg: Marketing, ERP, POS, Human Resource etc.
Process of Choosing App
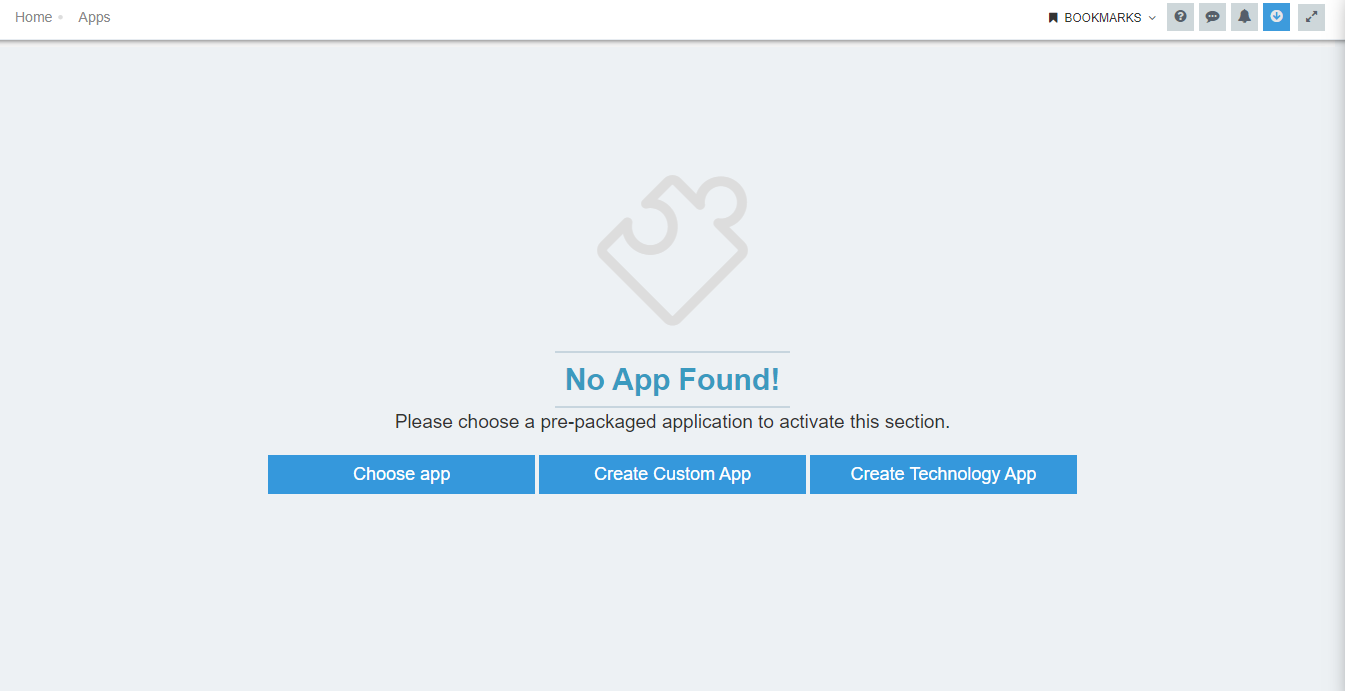
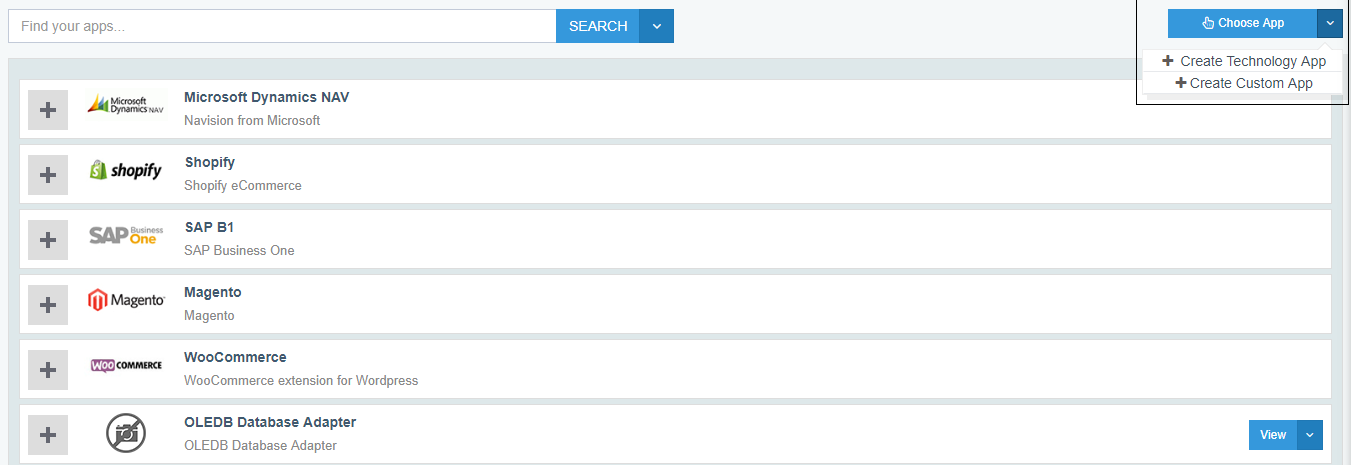
Choose App option enables the user to select applications from the list of pre-packaged apps on the portal. User can also get an option for creating a Custom application or Technology app.
- Naviagte to Manage > App. Clicking Choose App button, the user gets the view of the following window.
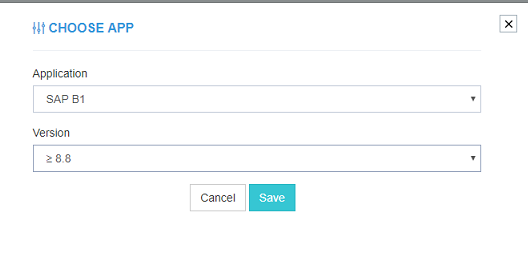
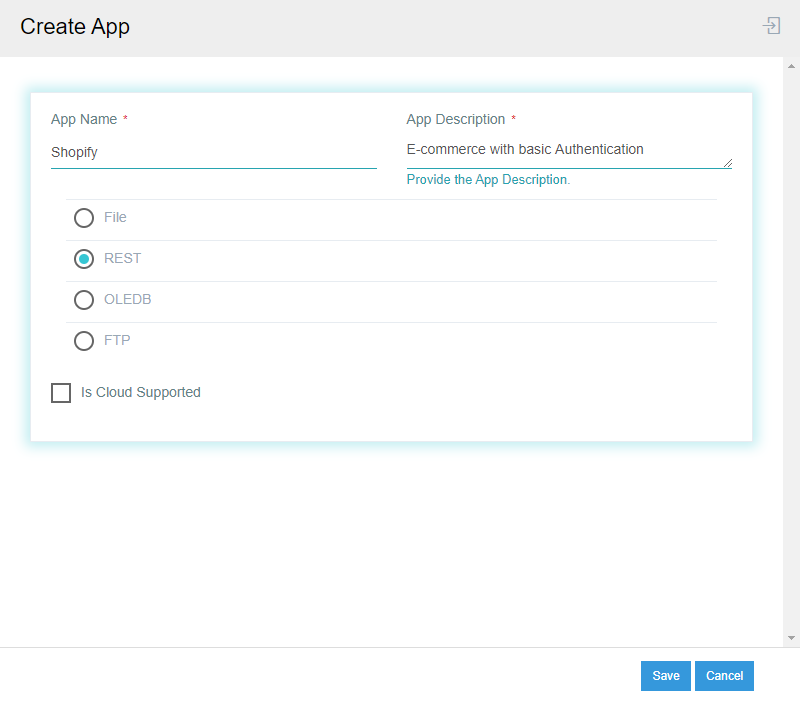
- A dialog box appears where you will choose the application and version number from the drop down list. Click SAVE to save the app.
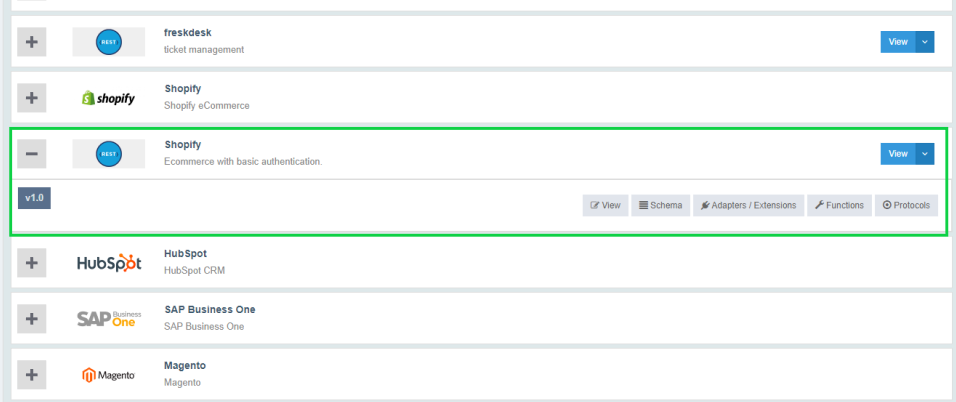
- The list of app you choose gets added and listed in the app section of the organization as shown below.
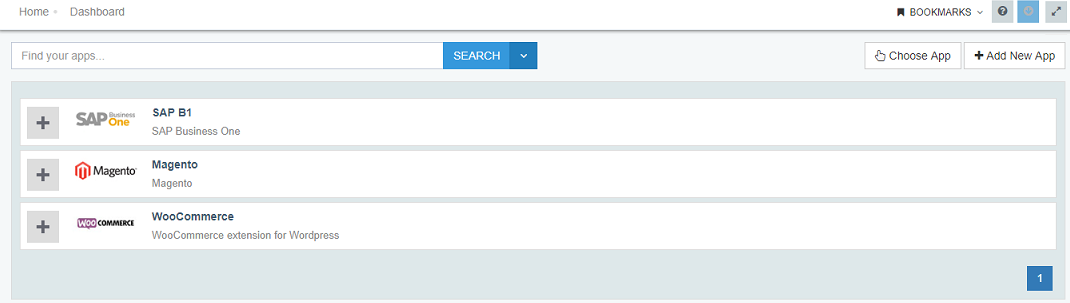
- Each
OP supported apphas four different functionality attached to it - Schema, Adapters, Functions & Delete.
- For Cloud Supported Applications the
Credential buttonappears along with the other functionality that are attached.
Click to view the configuration details of the Connectors.
Here you can view the details of the respective buttons Schema, Adapters & Function.
Create Application
APPSeCONNECT provides an option to Create Custom application and Technology application (as per requirements) for the users.
Any App once added is assigned to a particular category.
Both the process of application creation is given below.
(a) Create Custom App
The feature of custom app creation enables you to create a custom app with all the required credentials. The steps are shown below :
- Go to Manage > Apps > Choose App> Create Custom App. The following screen appears
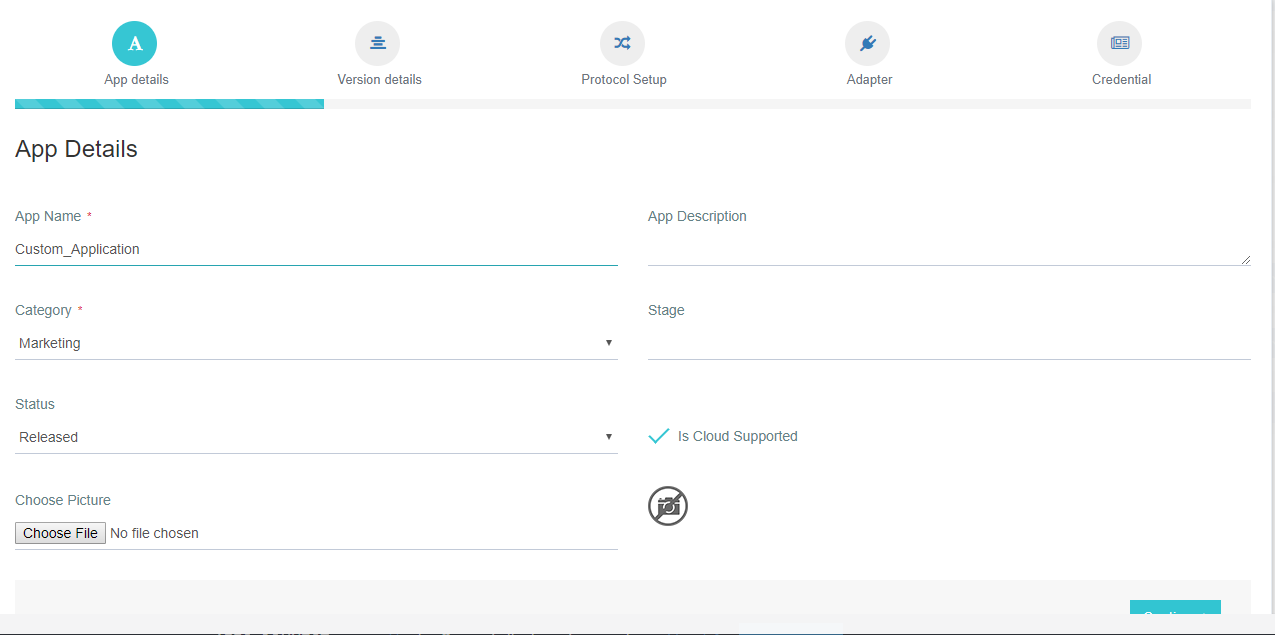
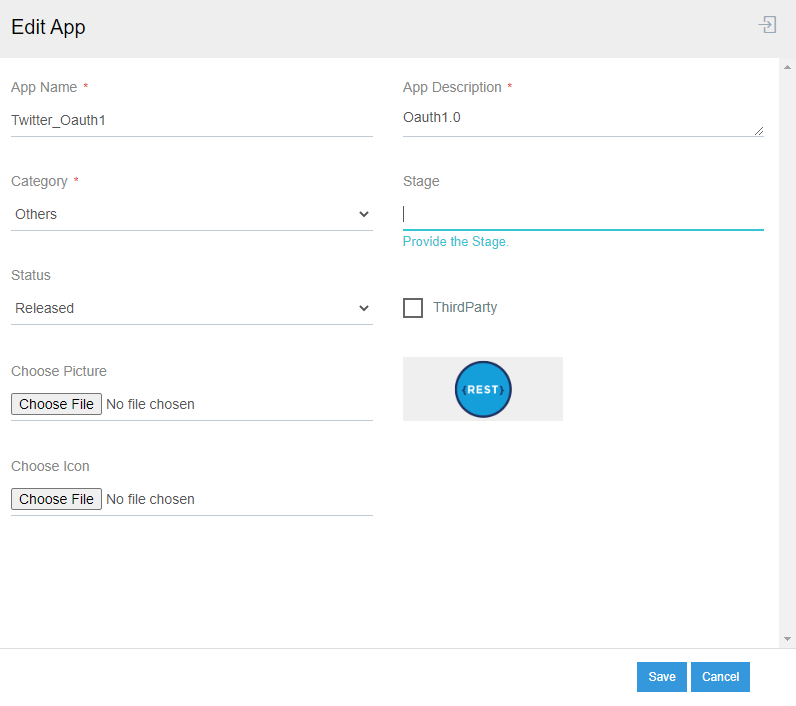
- In the Custom App Creation Screen the section are divided into - App Details, Version Details, Protocol Setup & Adapter
- Enter details like - App Name, Description, Category, Stage, Status, Is Cloud Supported, Choose Picture.
- Stage indicates, in what state the App is, for example, it might be in development stage or design stage.
- Some of the predefined categories are : ERP, ECommerce, CRM, Accounting, etc.
- The Is Cloud Supported checkbox is to check if the version of the App is cloud supported.
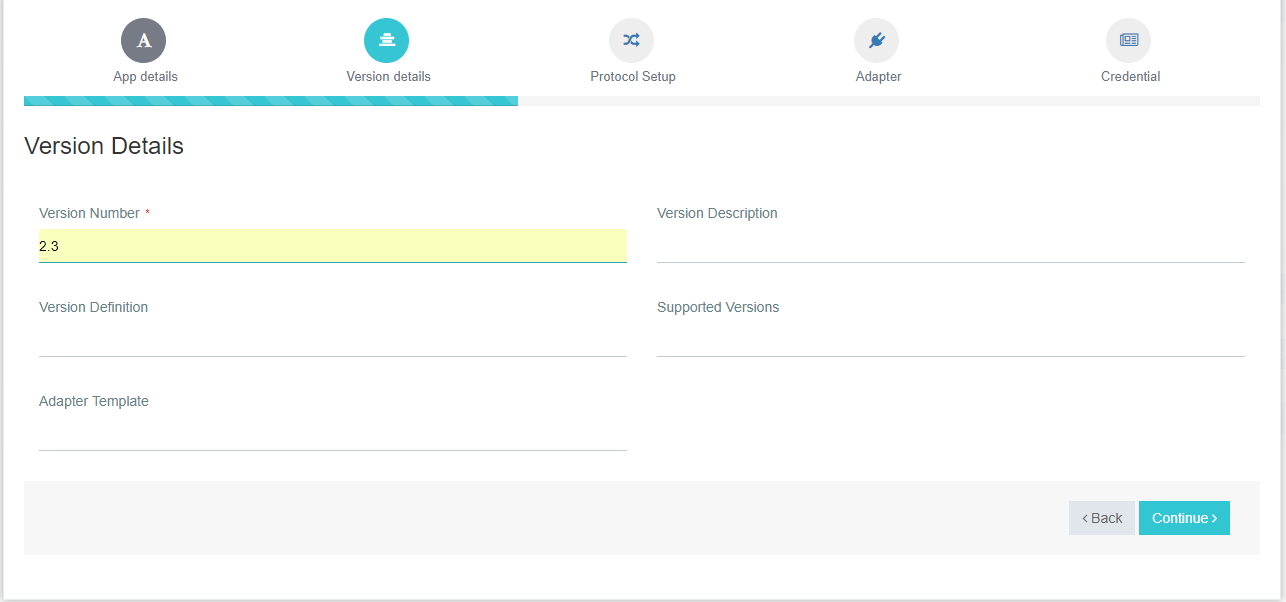
- Click Continue button, it will direct to the Version detail page. Enter the details of the version of the App.
The version screen will allow specifying the version number, version description, version definition, supported version, Adapter template.

- Click Continue button, it will direct to the Protocol Setup Page. Enter the mandatory field like Protocol Name, Protocol Method.
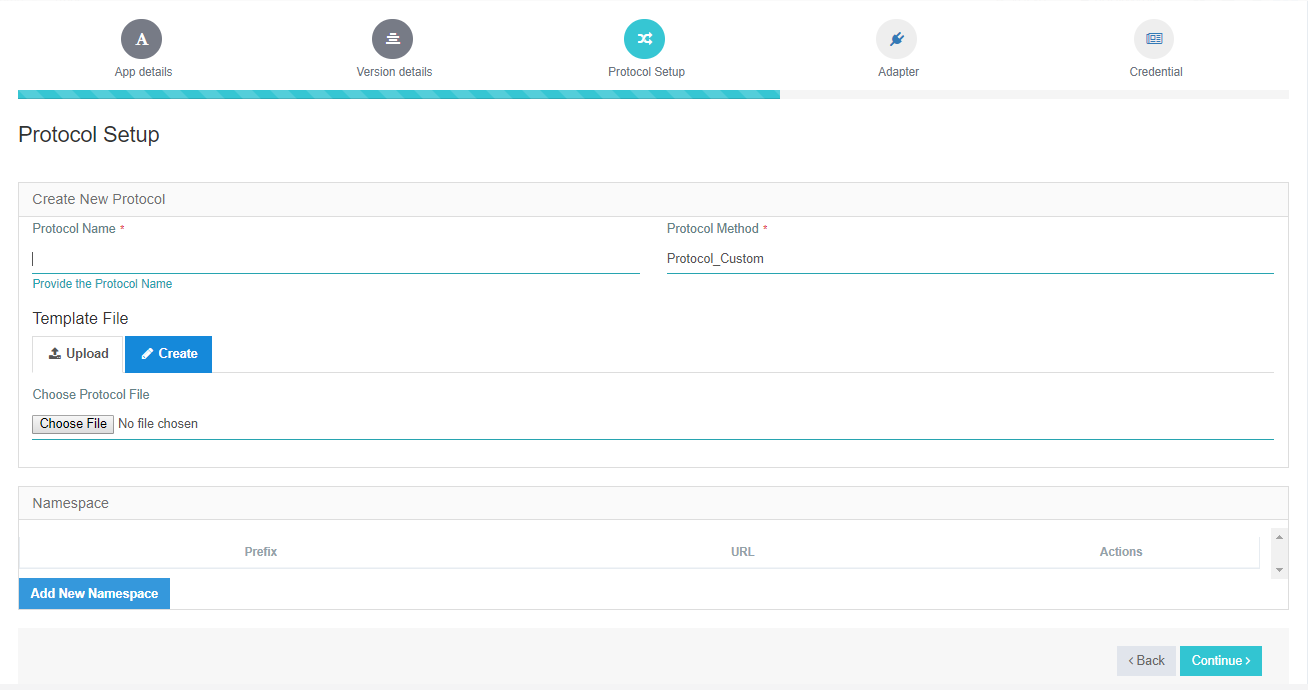
Protocol setup will have two sections :
- Either create new protocol on fly which will require them to create protocol file OR
- Select from the generic protocol. The generic protocol will generally have adapter assigned to it, if not the adapter needed to be uploaded to next screen.
You can upload/create a Template File. (If you upload a file then it has to be in XSLT format else an error message will be shown).

In the Add Namespace portion, you can add new namespace by filling Prefix and URL field.
The namespaces added to the template file will be applied to root node only during XSLT generation.
Click Continue button, it will direct to the Adapter page. Here you can Upload Adapter or Select Adapter.
 Click Continue button, it will redirect you to the Credential section. After execution of all the steps mentioned above you have created a custom App successfully.
The newly created app, can be viewed in the app listing section.
Click Continue button, it will redirect you to the Credential section. After execution of all the steps mentioned above you have created a custom App successfully.
The newly created app, can be viewed in the app listing section.
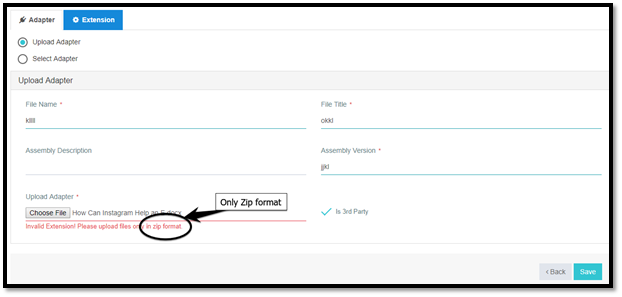
- You can also check the Checkbox in case it is a 3rd party adapter.
- If you try to upload Extension, follow the steps in Adapter.
The Upload adapter will allow either selecting generic adapter or upload adapter file specifically.
ProTip: 1. If the generic protocol is selected which already have an adapter specified, this section will show that adapter is already selected and only allow extension upload. 2. If the generic protocol does not have adapter uploaded, the upload adapter option will be enabled.
- Select Adapter provides you the option to select Adapter from the list

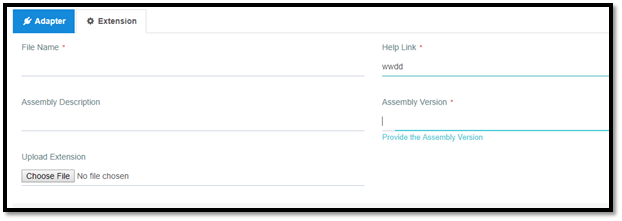
- In case of Upload Adapter, you must give File Name, File Title, Assembly Version and upload Adapter.
Protip App Name will take up to 30 characters and will not allow special character except underscore(_)and dot(.)
The Adapter needs to be in Zip Format else will show an Error message. Selection of the adapter is restricted to only one. The user can edit & delete the custom app & technology app
(b) Technology App Creation
The feature of technology app creation in APPSeCONNECT is to ease the process of adding Specific App as per your business requirement. Technology App Creation wizard provides a single screen where input details like Application Name, Description and the Adapter Technology for adding Specific App (a business requirement) can be provided in one go.
The steps are given below :
- Go to Manage > Apps > Choose App> Create Technology App. Click on the drop-down icon and select Create Technology APP.
- In the screen, provide the APP NAME and DESCRIPTION, choose the Adapter Technology and click SAVE.
- Now you can view the technology application name, successfully added to your List of APPLICATIONS with a default Image.
- You can edit and add image to your app anytime, by clicking on the VIEW button beside the application name.
- You can create processflows with both technology applications or one prepackaged and one technology application.
View Technology Apps section for more details.
Protip Currently we are using only these Technology Adapter - FILE, REST, OLEDB & FTP.
Viewing & Editing Custom & Technology Applications
-
Once your application is created, you can view the following interface of your Custom/Technology App. You can view a
VIEWbutton beside your created application.
-
Click on the view button, you will able to edit the following details as provided in the screen below.
-
You can also delete the created application if required by click on the delete button available under the drop-down of the
VIEWbutton.
Note : You cannot delete the application if it is associated with any connection.
Understanding Schema/Entity
An entity is defined as an object that has a real-world existence. An entity can be a single thing, person, place, or object. For an e-commerce website, Customer, Order, Invoice etc are entities.
- Data can be stored about such entities.
- Each entity has its own characteristics or attributes. For example,
customer id,address,phone numberare attributes to thecustomerentity. - Each customer record in the database serves as an entity item.
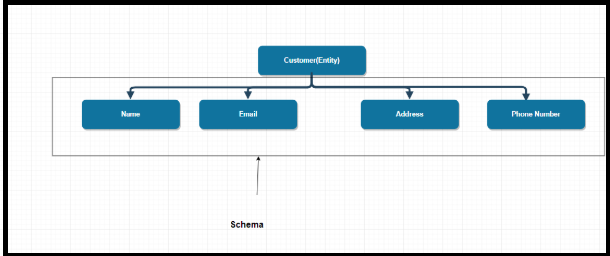
- The definition of an entity is called its schema. In other words, the structure of an entity is called its schema.
- If a customer is an entity then the complete set of the various fields associated with it is called its schema.
Schema Image is given below :
Understanding Schema Attributes
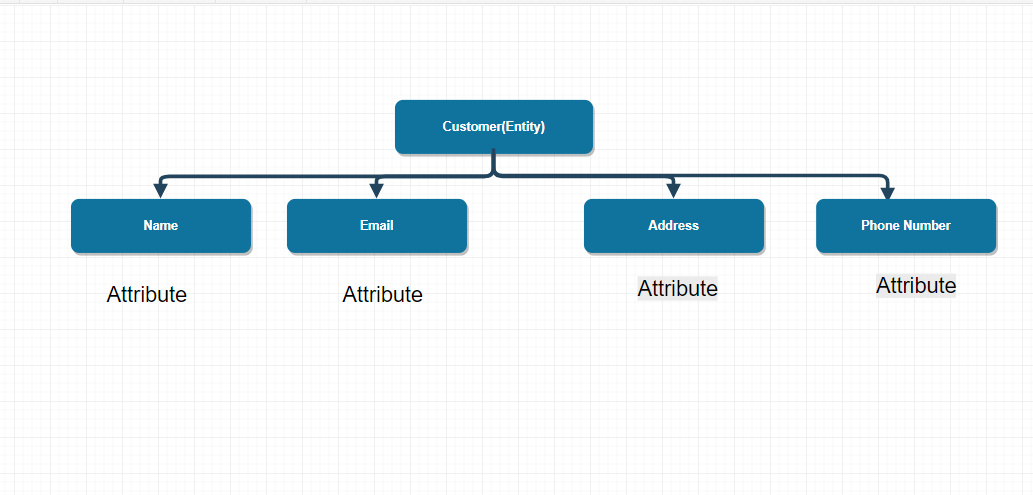
In APPSeCONNECT, an attribute is a property or characteristic of a schema. If customer is a schema,
then customer name, email, address etc. are defined as attributes. Before defining a schema you need to have a
proper understanding of the various data fetched via API so that you can define schema properly and provide the
required attributes.
The attributes can be of various types.
- String - This type of variable is used when you want to store a string value.
- Bool - This type of variable is used when you want to store a boolean value like true or false.
- Date Time - This type of variable is used when you want to store a date time value.
- Number - This type of variable is used when you want to store a numeric value.
- Double - This type of variable is used when you want to store a floating point or double value.
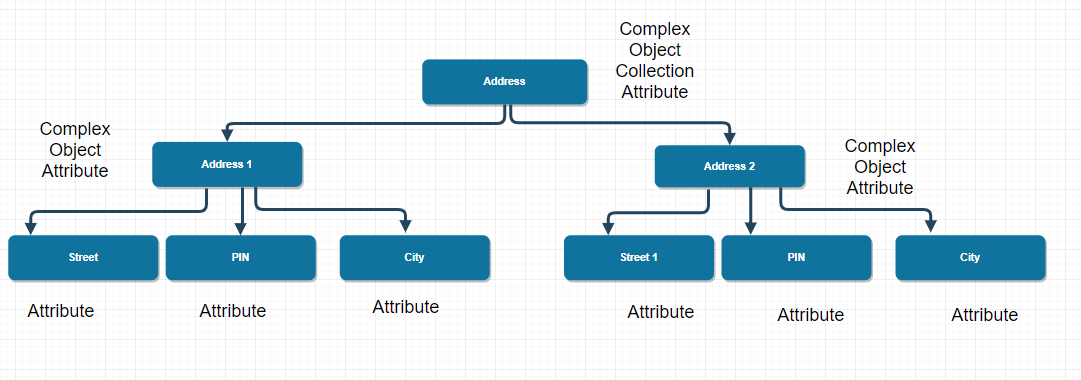
- ComplexObject - When you store an attribute as a collection of several child attributes it is a ComplexObject. For example, if
addressis an attribute, thenStreet line 1, Street line 2, City, Pinwould exist as child attributes thus makingaddressa complex object. - ComplexObjectCollections - A ComplexObjectCollection may be defined as a collection of complex objects.
Assume that a customer has two shipping addresses. The first address is based in Delaware and
the other in California. Each address contains the Street Name, Building name, PIN code etc.
Thus each address would be stored as a complex object attribute. Let the addresses be stored as
address1 and address2. Now these addresses would be stored as child attributes to the
parent attribute address. Thus address becomes a ComplexObjectCollection.
Understanding Custom Attributes
There might be business requirements to create Custom Fields during the creation of mapping where the base mapping does not provide an attribute that you are looking for. APPSeCONNECT allows you with a feature where you can add your own custom attribute and map that with the data coming from the attribute at the other end.
Understanding Actions
Actions are nothing but defining certain tasks like getting data from an application or sending data to an application based on certain conditions and these conditions are defined through an action filter.
For example, suppose you want to fetch customer(s) data from an eCommerce site and in APPSeCONNECT you define a Customer entity for that.
Now for getting data we can define an action name called GET. When you define an action for an entity you need to provide certain information.
- Action Name : Name of the action. In some predefined application many adapter logics are written based on this data.
- Action Description : This is the description of the action. At the time of node configuration actions are selected based on this description.
- Action Filter & Resync Filter Details : Action Filter & Resync Filter lets you define a filter criteria for an action which filters out the data from the API and rerun the integration for erronous data respectively.
Understanding Schemas and Actions of an Application
The user can view the schemas and the action present or can also add schema and add action for each application. This section enables the user to view and add the Schema and its Actions.
Click to know more about the process to add Schemas, attributes & Actions.
Prerequisites :
- The User needs to have a valid AEC account.
- An application is needed to be select for defining the Schemas and its Actions.
Process :
- Login to the APPSeCONNECT Portal with valid credentials.
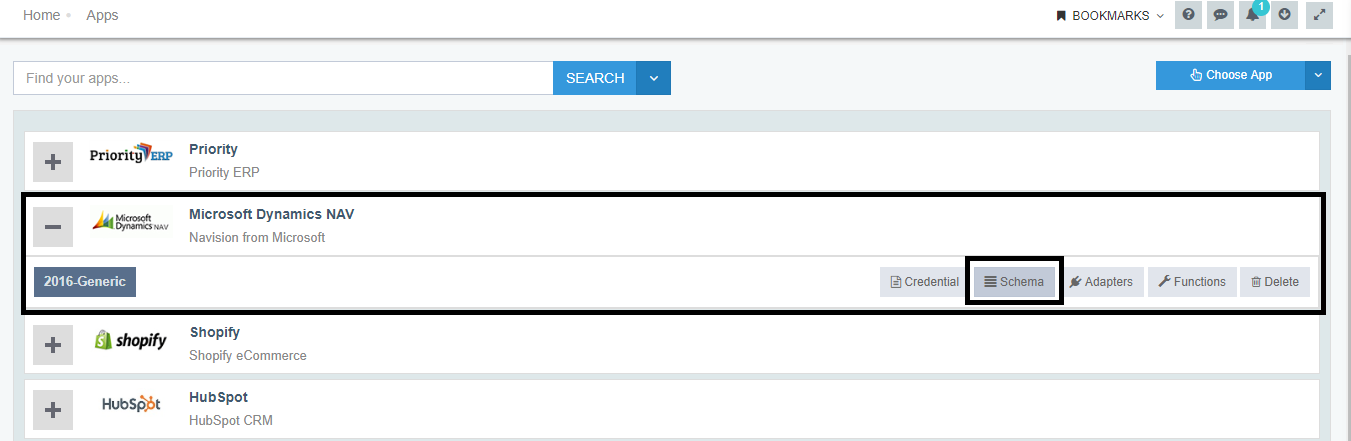
- Move into Manage > APPS Page and choose any application.
- Click on the + sign after adding the application and click on Schema. (In this case, MS Dynamics NAV has been taken for the instance).
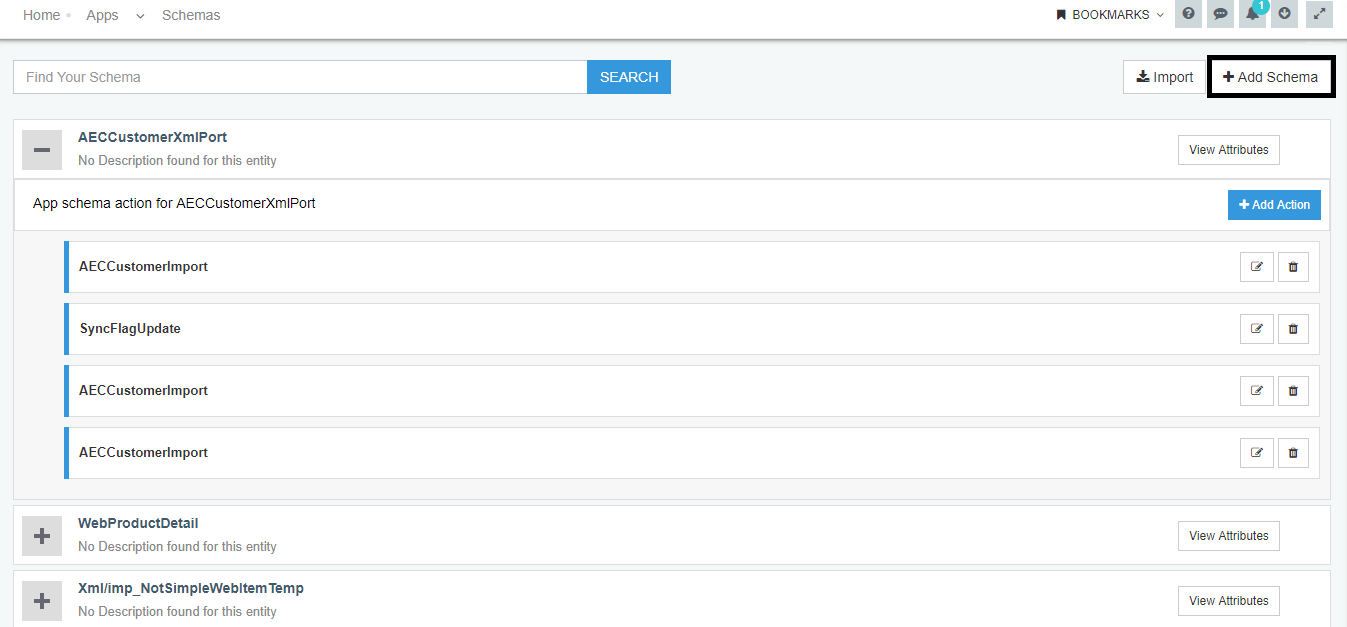
- On the Schema Window, the user can view the schemas present or can also add schemas present for the ADD Schema Option.
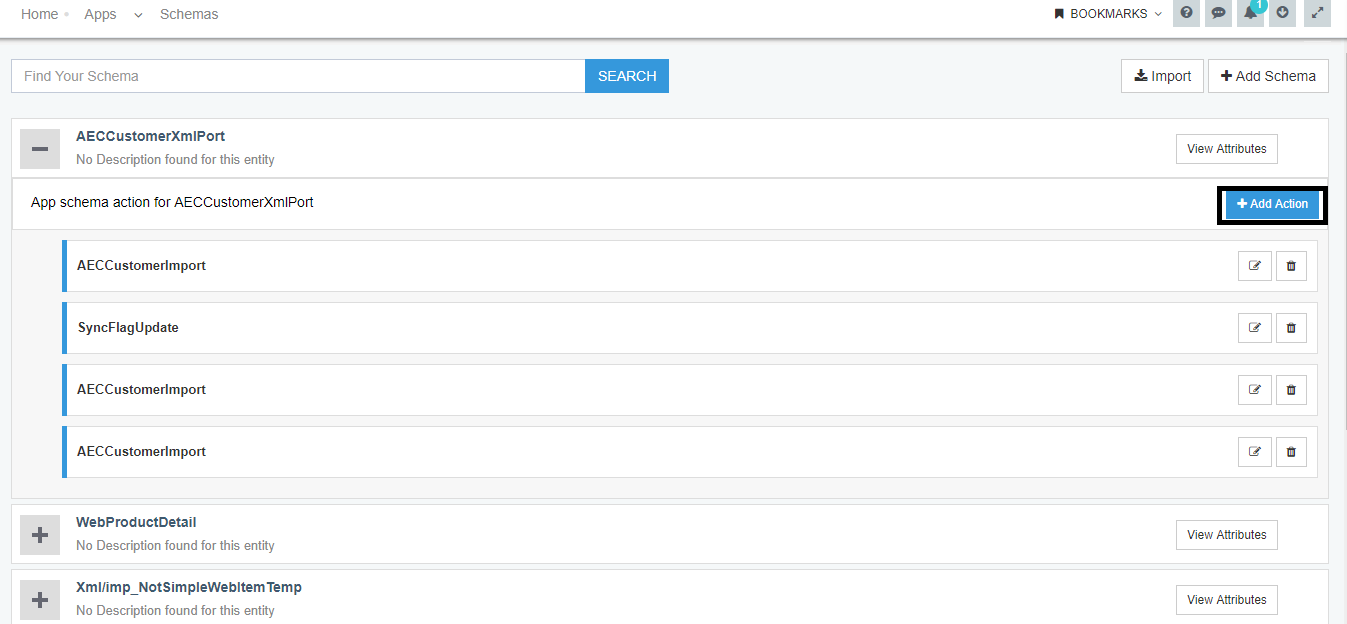
- The Actions inside a schema can be viewed by clicking on the + sign. The ADD ACTION option is provided for Adding Actions inside a Schema.
Protip : Default Schemas would only be present for the Pre-packaged APPS.
Adapter
Adapters helps in integration with other applications easy. Adapter represents an interface between an APP and APPSeCONNECT. An adapter is a component which connects your app with APPSeCONNECT. Click to know about the steps to Add adapter for an application in an organisation.
There are few responsibilities of an adapter which are defined as under :
- Create a credentials view which allows connecting to the respective APP where you want to connect.
- Create Push and Pull method inside the adapter which can send and receive data to and from the application.
- Add additional business behavior with respect to the corresponding app.
The Adapter is loaded dynamically by the Agent and calls some specific methods using a fixed contract defined as an interface.
Extension
Extensions, on the other hand, are the applications which add an extra feature into the E-commerce/ERP platforms making them capable to work with the APPSeCONNECT agent. When an app supports extension, it enables customization.
Functions
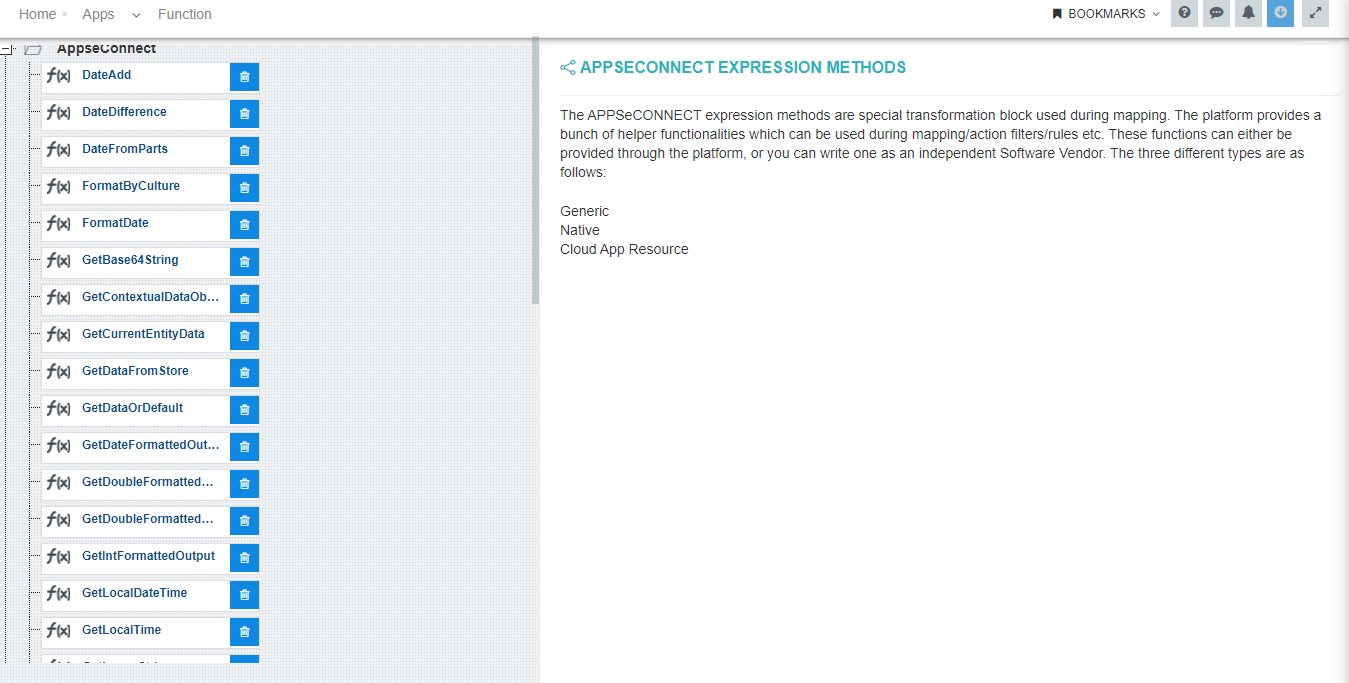
The APPSeCONNECT expression methods are special transformation block used during mapping. The platform provides a bunch of helper functionalities which can be used during mapping/action filters/rules etc. These functions can either be provided through the platform, or you can write one as an independent Software Vendor. The three different types are as follows :
- Generic
- Native
- Cloud App Resource
cust
Here you will get the details of Appresource Functions of APPSeCONNECT.
Protocol
This section is only available for the custom application and technology application. Follow the instructions below to create Protocol Methods for your application.
Prerequisites :
- You need to have valid credentials to the portal.
- You need to create a Custom app or a Technology app to access the protocol section.
Steps to work with Protocol Methods :
Protocol Add screen is for creating or updating the existing protocol. An user will be able to add more protocols to the existing app such that the same can be used for implementer’s connections. So, to Add or Update protocol you must follow the steps written below :
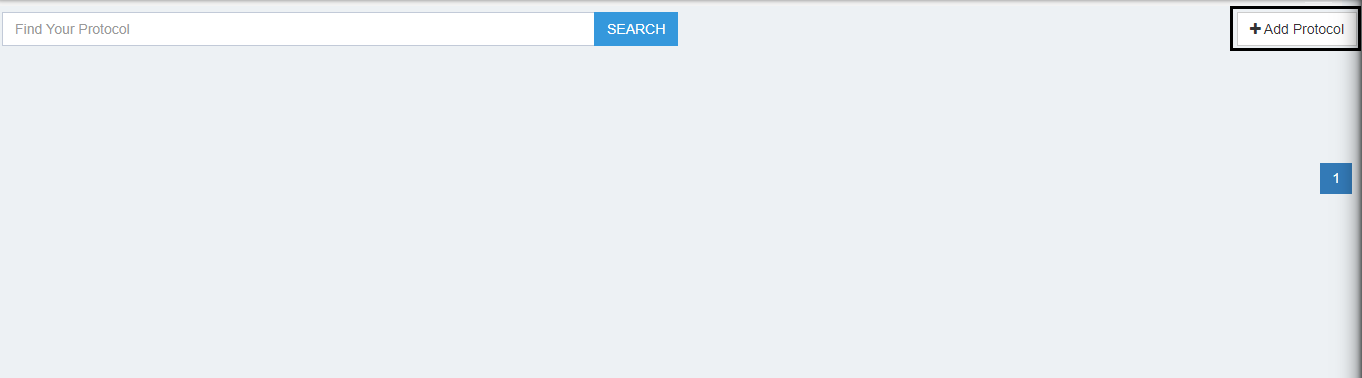
1) Navigate to the app section and expand the node of the created custom or tech app to view the Protocol button.

2) You can view the window that lists the prepackaged protocols if any. Click on the Add Protocol button.
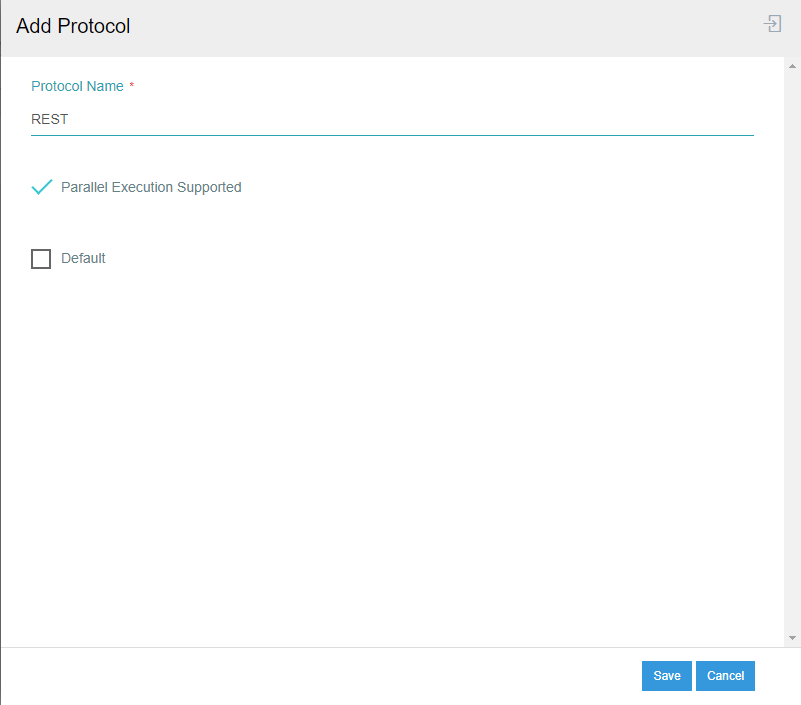
3) The Protocol add window opens. You will get the following fields in the window. Click on the SAVE button after providing the inputs. - Protocol Name (Mandatory Field). - Checkbox for parallel execution - Checkbox for default execution
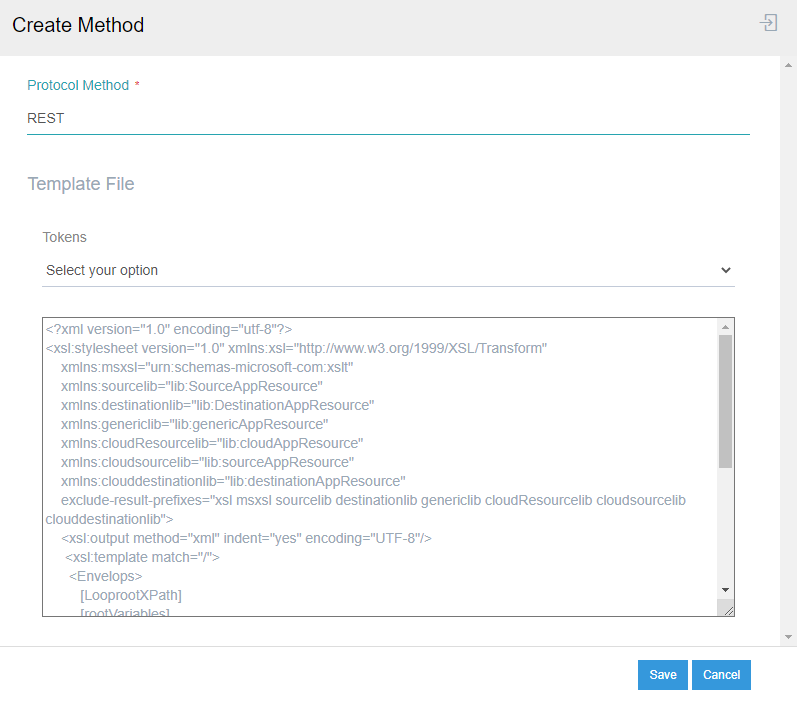
4) You can successfully view the created protocol in your window. Expand the node and click on the Add Method button.

5) On the method window, you need to provide the name of the protocol method and the token from the drop down. Once selected click on the SAVE button.
Following the above process, you can successfully create a protocol for an Technology or a Custom app.
Note :
- Each protocol can have protocol methods under them. You can create more than one method for a protocol.
- Multiple methods can be added to a protocol, each of which allows XSLT Templates.
- Protocol template can be defined.
- Protocol delete will not work if the same protocol is used in a touchpoint.
Delete
Clicking on the Delete button will remove the application from your application list. However, can anytime choose the deleted application from the Choose App list. Also for custom and technology application, you can delete the applications for the drop-down availble beside the VIEW button.
Note : You will be restricted from deleting the any application that is already in use.
ProTip : Please choose the category correctly because depending on your choice, you might be allowed to add Connectors. This portal do not support connectors between Apps in the same group (As that won’t process any business requirement). For instance, migration jobs from SAP B1 to SAP ECC will not be supported at this time.

