
LookUp Repositories
Updated:
Repositories in APPSeCONNECT provides the user to create and manage Lookups in form of reference tables for the organisation. Lookups enables the user to provide specific values to the application integration, such that when the source and destination application is integrated, the value in source application can easily be integrated with its value in destination application, corresponding to its field. Having independent repositories for lookups will help the users to create Lookup collections and manage them in separate refernce tables as per their need. Each Repository Collection created will multiple have reference tables that will enable the users to store and manage the collection of Lookup References.
Prerequisites
- Should have an organisation created in APPSeCONNECT.
- User should have valid credentials for login to the APPSeCONNECT Credentials.
Steps to Create Repository Collections
-
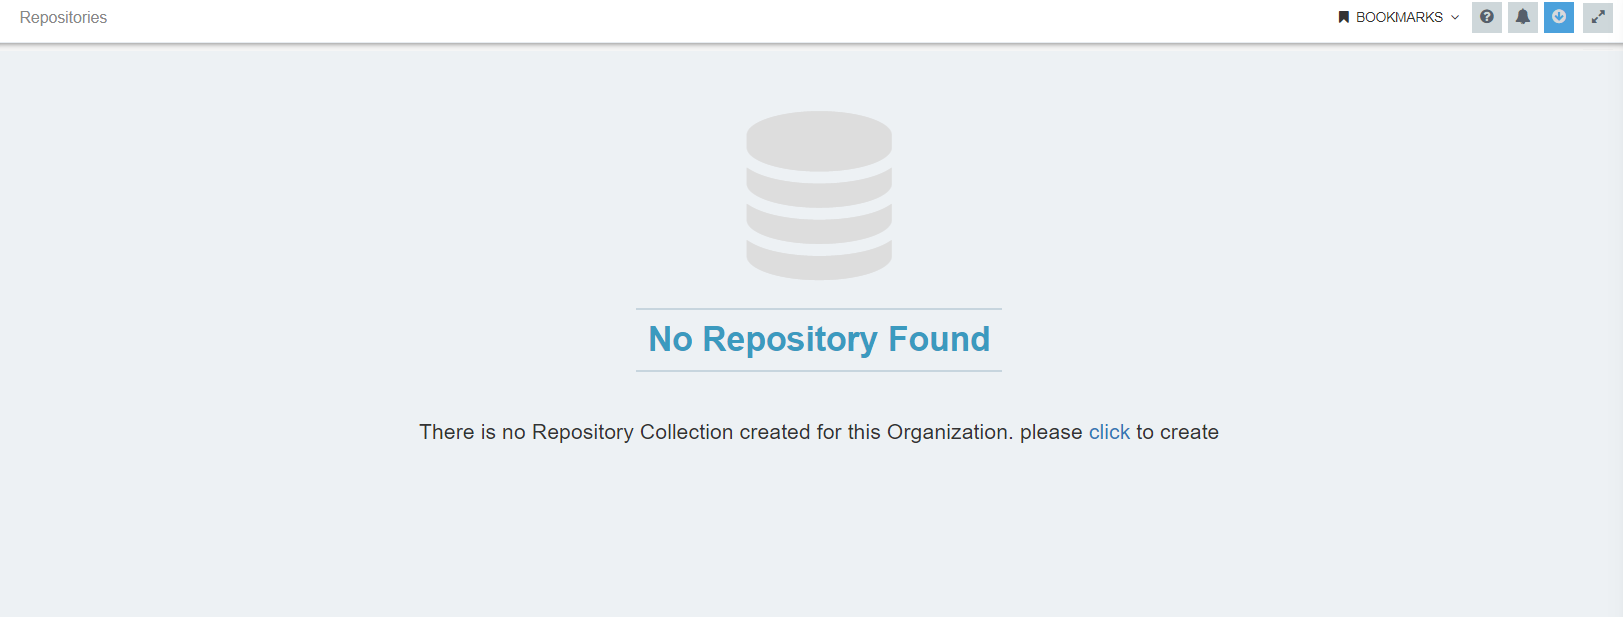
Login to the portal and navigate to Manage > Repositories. You can view Repository landing page, if creating for the first time.
-
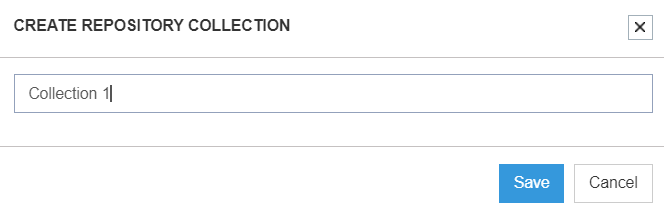
Click the button to Create a new Repository Collection. The window for providing the name for the Repository Collection opens. Enter the name for the Repository Collection and click on the SAVE button.
-
On clicking the Save button,you can view Repository page and the created Repository Collection will be present in the tree. You can also create another Repository Collection by clicking the
Newbutton.

-
You will get the same view of the window as given in the previous steps to create multiple repositories.
Note : You cannot create multiple Repository Collection with same name. Following the above process, you can successfully create multiple Repository Collection.
Reference Tables
Reference tables are the collection of lookup references which can be created under each Repository Collection. The steps for creating reference tables are given below.
Steps to create Reference Tables
-
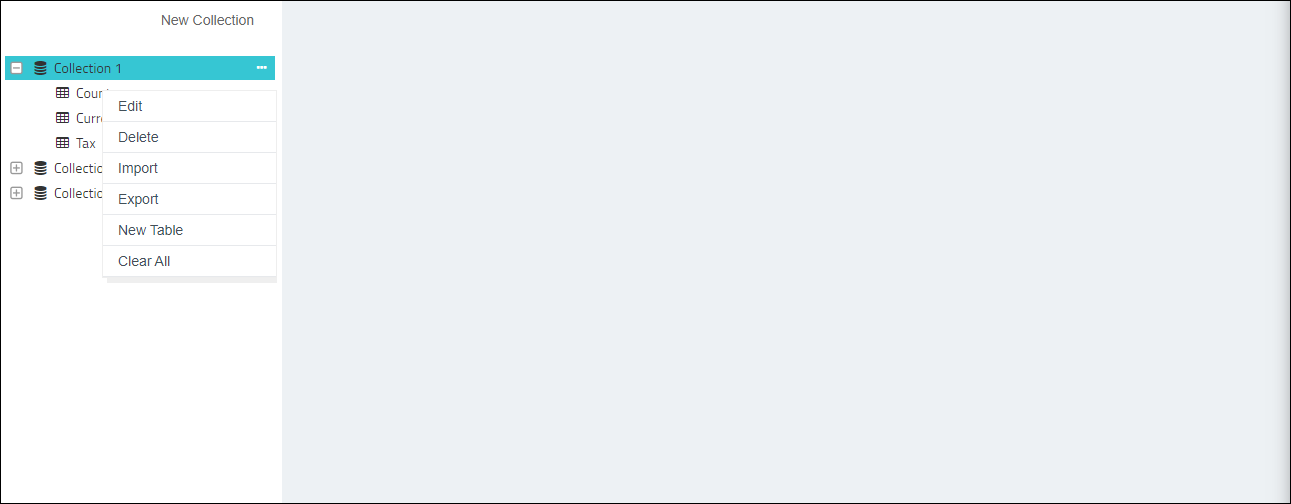
Login to the portal and navigate to Manage > Repositories. On clicking over the ellipsis icon (…) beside every Repository Collection, user gets the following options.
a. Edit : You can rename the collection by clicking Edit Button.
b. Delete : You can delete the whole Repository Collection including the tables inside it, by clicking on delete button.
c. Import : You can import an excel file for creating reference tables from your local system.
d. Export : You can export the created lookups to your local system.
e. New Table : You can create a new table under the selected Repository Collection by clicking on new table.
f. Clear All : You can clear all the data of the Repository Collection by clicking on this option. You will get a warning message,clickYesto proceed, else clickNoto cancel.
-
Click
New Tablebutton and you will get the window for naming the table. Input the table name and click on Save button.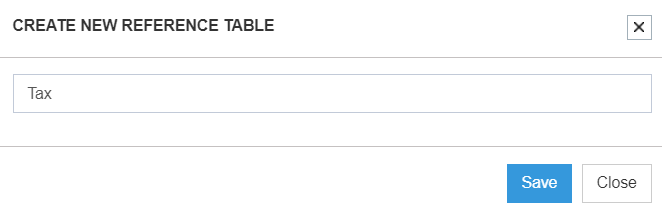
-
You can view the created table under the selected Repository Collection. Click over the table, you will view the following.
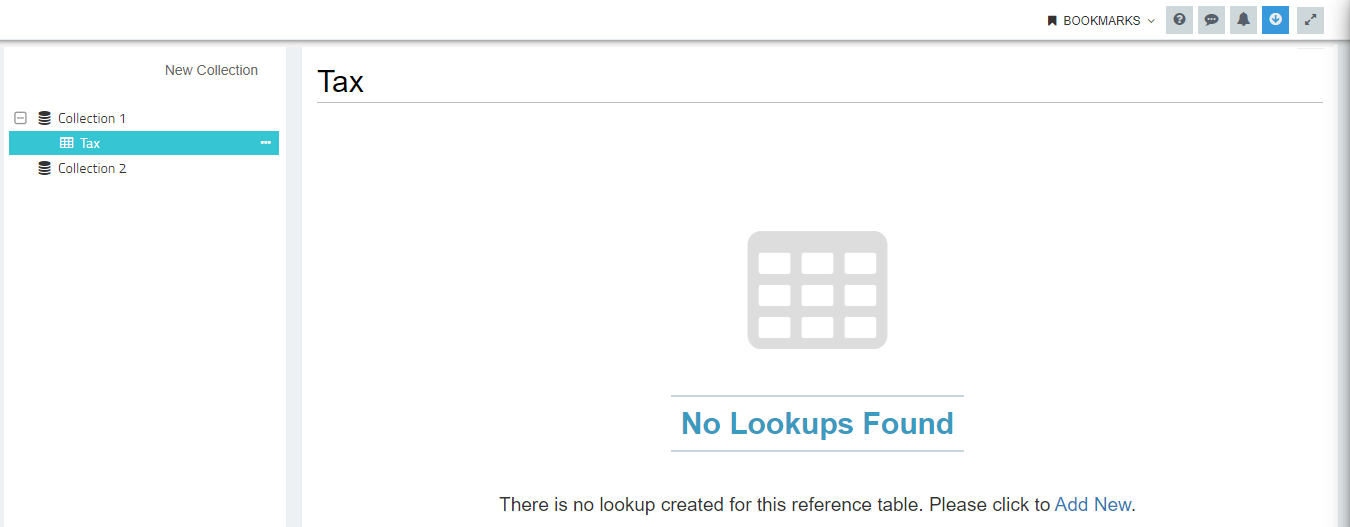
-
Click
Add Newbutton, for creating new lookups under the selected Reference Table. The Add New Lookup wizard opens up with the following fields. Click Save button once the details are provided.
a. Source : Need to provide the source value.
b. Destination : Need to provide the destination value.
c. Comments : You can provide short descriptions for identifying the lookups workaround.
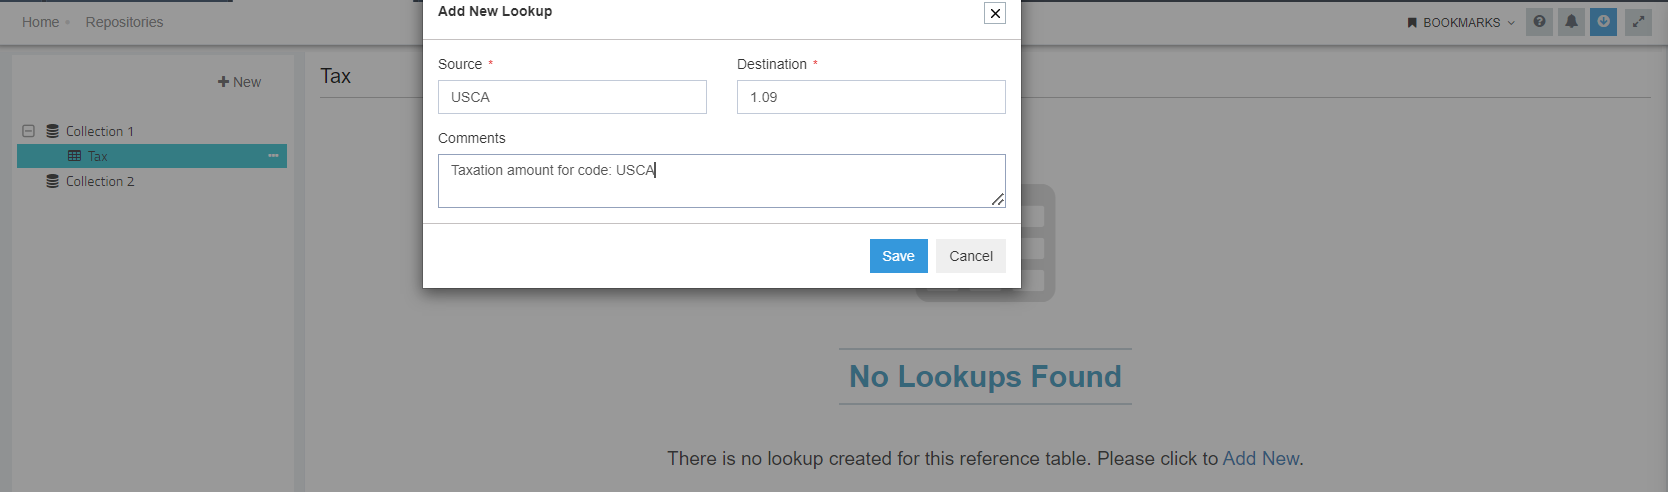 The Source and the Destination is a mandatory field for saving the lookup.
Maximum length for entering the Values in Source & Destination field is of 100 Characters.
The Source and the Destination is a mandatory field for saving the lookup.
Maximum length for entering the Values in Source & Destination field is of 100 Characters. -
You can view the lookup created under the selected Reference Table. The Reference Table page of the selected table will list all the lookups created in the form of Table Rows. The page will display these columns.
a. Source
b. Destination
c. Description

- Every lookup in table rows are editable. Clicking on each cells of the table rows will enable you to edit all the three fields. Clicking on the Tick icon will update the changes made for the lookup. You will get a confirmation message for updating successful. The Cross icon will cancel the operation. You will also get a Delete option, when clicked on the Ellipsis icon (…) beside each table rows.

- a)User can create multiple lookup rows by clicking on the New button available on the top right of the page.
Although User cannot create multiple Lookup Table Rows with same Source values under a single Reference Table.
b) You can filter rows by implementing search. The search function
will filter options available with the selected Reference Table.
Note: User cannot create multiple Lookup Table Rows with same Source values under a single Reference Table.

Following the above steps, you can successfully create multiple Repository Collections and Reference Tables inside it.

