
Steps to create your first workflow
Updated:
Introduction
This section will guide you through workflow creation & configuration in simple steps.
By reading this section of the document an implementer would be able to design the workflow for an organization and will execute it from the web portal.
In Workflow diagram panel there are some Template Touchpoints provided. A user can use these touchpoints to manipulate the Touchpoint execution as per their requirement.
If you are new to Workflow, then go through the below steps to know more.
Pre-Requisites
-
You have to choose the project in which the user will be added.
-
For execution of workflow using cloud agent you need to have
cloud to cloud connection,cloud agentandcloud supported app. -
Now Choose two generic app for integration & workflow creation.
-
Before executing the workflow for app integration, you should have a valid order on Magento 2 this means it should have valid items, Business Partner, and Sales Order.
-
The connection should be done in the Cloud.
-
When designing workflows, you may come across Nodes and Elements, or you may like get some Usecase examples that would help you build a workflow. Visit this section Quickstart to get more highlights on Workflow Nodes and Links , Scheduling and Deploying a Workflow , Workflow Snapshots , Usecases etc.
Steps to workflow creation
-
Logging in to the Portal, choose
Workflowssection under Account and a new page will open. -
Refer the steps Working with Workflow in APPSeCONNECT
-
Choose one project.
-
Go to Workflows section under Designer and a new page will open up.
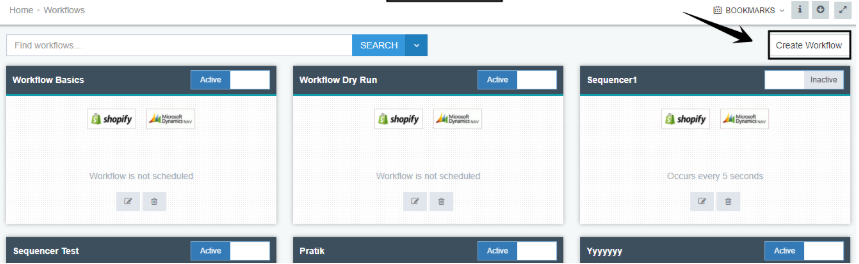
-
On the upper right corner you will get the
Create Workflowbutton. Click on it and the following page appears where you can create the new workflow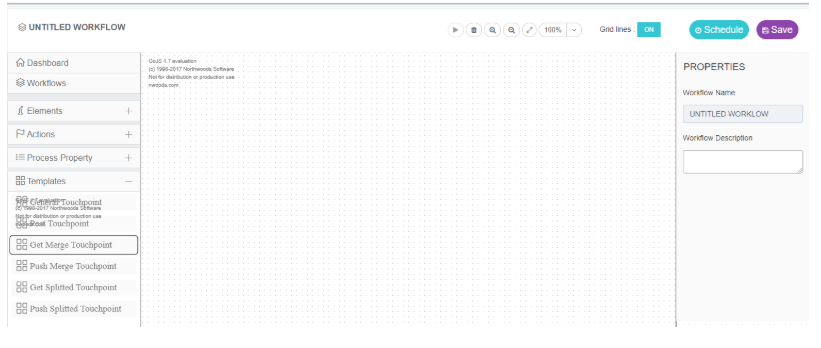
User needs to enter the Name and Description of the Workflow.
The name needs to be provided in the top left corner of the Workflow Design page and is then saved and viewable in right side panel.
The Description is required to provide in the properties section available at the Right side of the page.
-
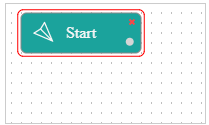
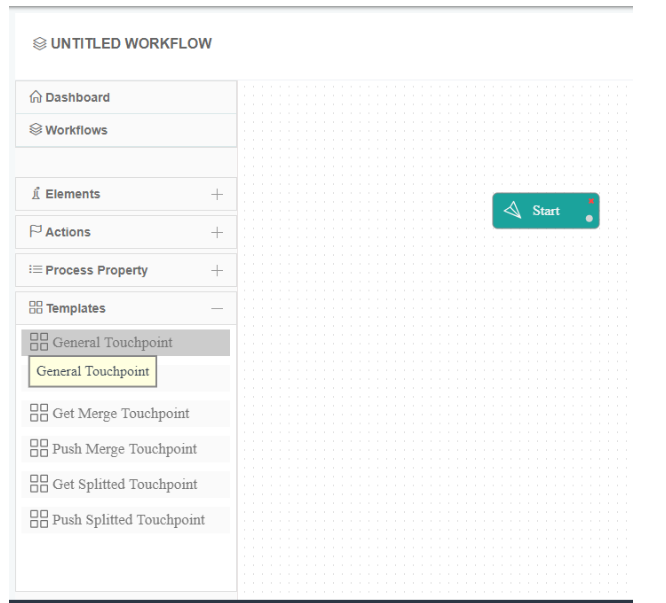
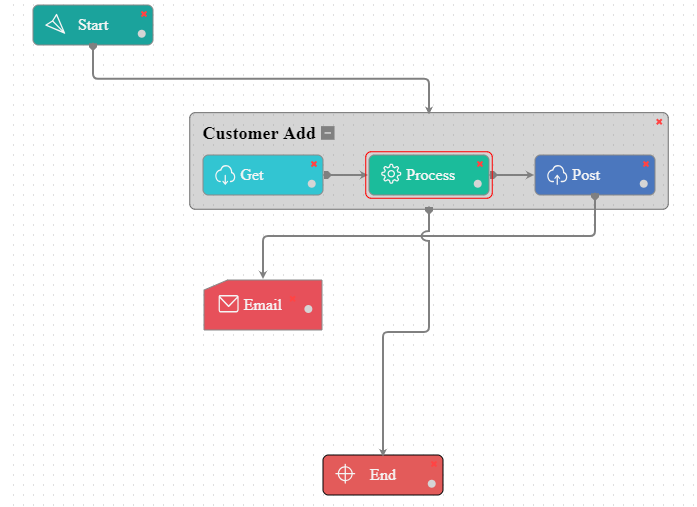
To start the workflow, Drag & Drop the Start node from the ITEMS section, on the blank/grid section.
-
Click the (+) sign beside Templates section, a list will open. Now select General Touchpoint and then drag it to the grid/blank panel.
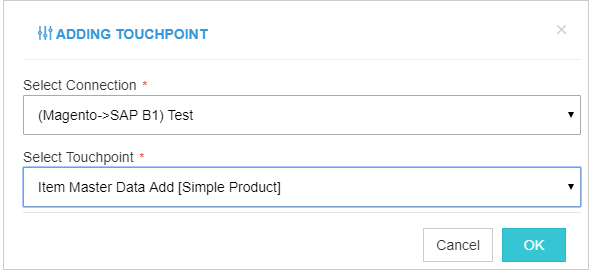
-
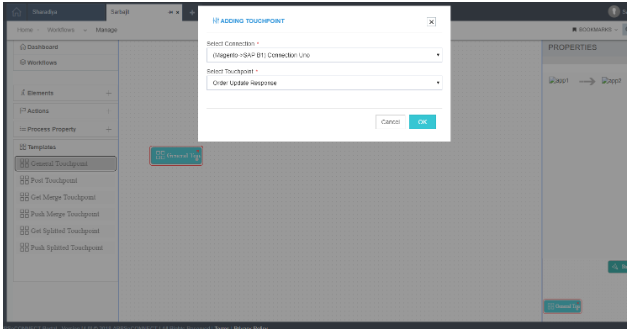
You have to select a connection and a touchpoint from the drop-down list of
Select ConnectionandSelect Touchpoint. Now click OK button, to confirm.The following screen appears
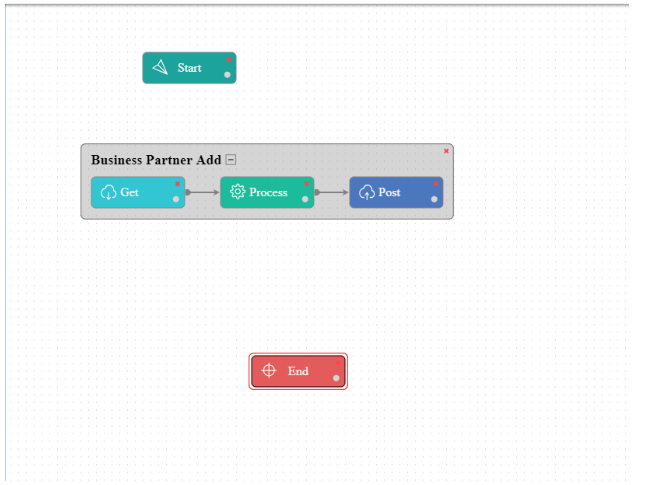
- Similarly, drag & drop more touchpoints to complete a cycle and generate different types of touchpoints.
- Drag in the general touchpoint to the workflow creation area
- Once you have provided the details, click OK. The touchpoint will be added. Also Add an ‘End’ node.
- Connect the
StartNode with the starting point of the touchpoint. Also Connect the End node with the touchpoint.
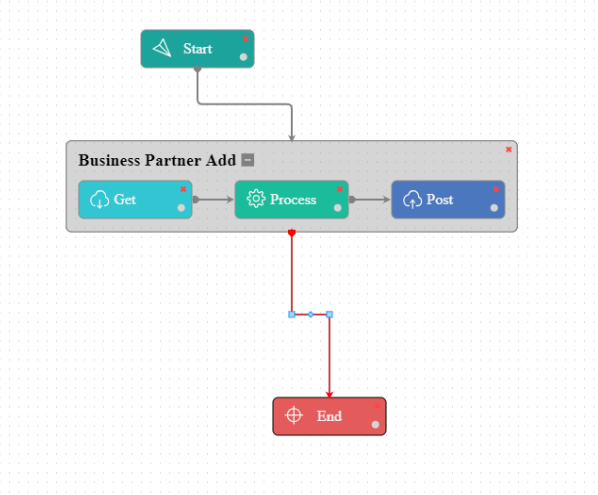
- Click on
Save. The workflow is now ready to be executed. - After all the steps have been completed - Agent & Cloud Configuration, the workflow is ready to be run.
NOTE - Initially the Run button will be in disabled state, you have to activate it following these steps:
Go to the APPSeCONNECT -> Settings Panel -> Check the Activate box.
If the RUN button is still in disabled state, you can do Troubleshooting to execute the same.
-
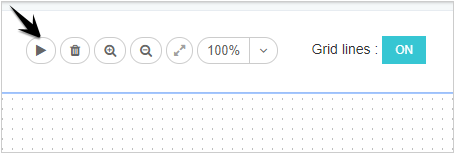
Now Run it and this will open another form.
-
In the above screen, you can see each step of the operation. The circle segments of the nodes will change its color according to the operation
Protip
Ongoing Operation= Yellow color
Successful Operation= Green color
Failed Operation = Red color
Note: When designing workflows, you may come across Nodes and Elements, or you may like get some Usecase examples that would help you build a workflow. Visit this section Quickstart to get more highlights on Workflow Nodes and Links , Scheduling and Deploying a Workflow , Workflow Snapshots , Usecases etc.
Protip For execution of workflow using cloud agent you need to have cloud to cloud connection, cloud agent and cloud supported app.

