
Magento 2
Updated:
Application configuration is an integral activity prior to the process of integration. Magento is one of the ecommerce platform and to configure the agent you need to provide API Path, User name and Password.
Here you will find the detailed description on how to configure the agents for the application Magento,
the Integration Techniques and the Troubleshooting issues.
Pre-requisites for Magento Configuration
- Create an account in Magento and Login into it.
- As Magento is a cloud-based application, therefore it can be accessed through URL. The API Path is your -
baseurl/rest/V1/. - Username and Password to access the application.
On-Premise Agent Configuration
Installation of On-Premise Agent
You need to install the agent on your local server. To Know about On-Premise Agent Configuration, Click here.
Configuring the Magento Application in On-Premise Agent
- Open the agent and click the checkbox in Settings Panel.
- Create and Deploy ProcessFlows in the cloud portal.
- Move into the App Configurational Panel of the agent and configure the details of the respective application.
- You can configure the magento application in the OP agent using any one of the way :
Uncheck the Show in Sync Panel checkbox before proceeding with the App Configurations.
Steps to Configure Magento Credential in OP Agent with Access Token :
-
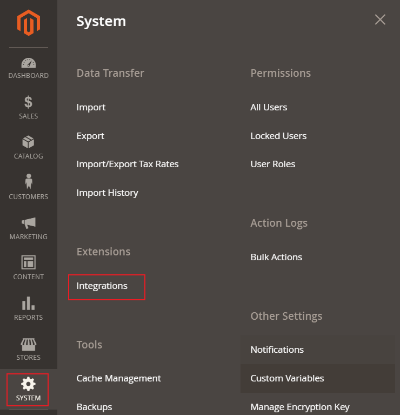
For generating the Integration Access token, login to the Magento Admin and Navigate to
System > Extensions > Integrations.
-
Click on the
Add New Integration button, in the Integration window.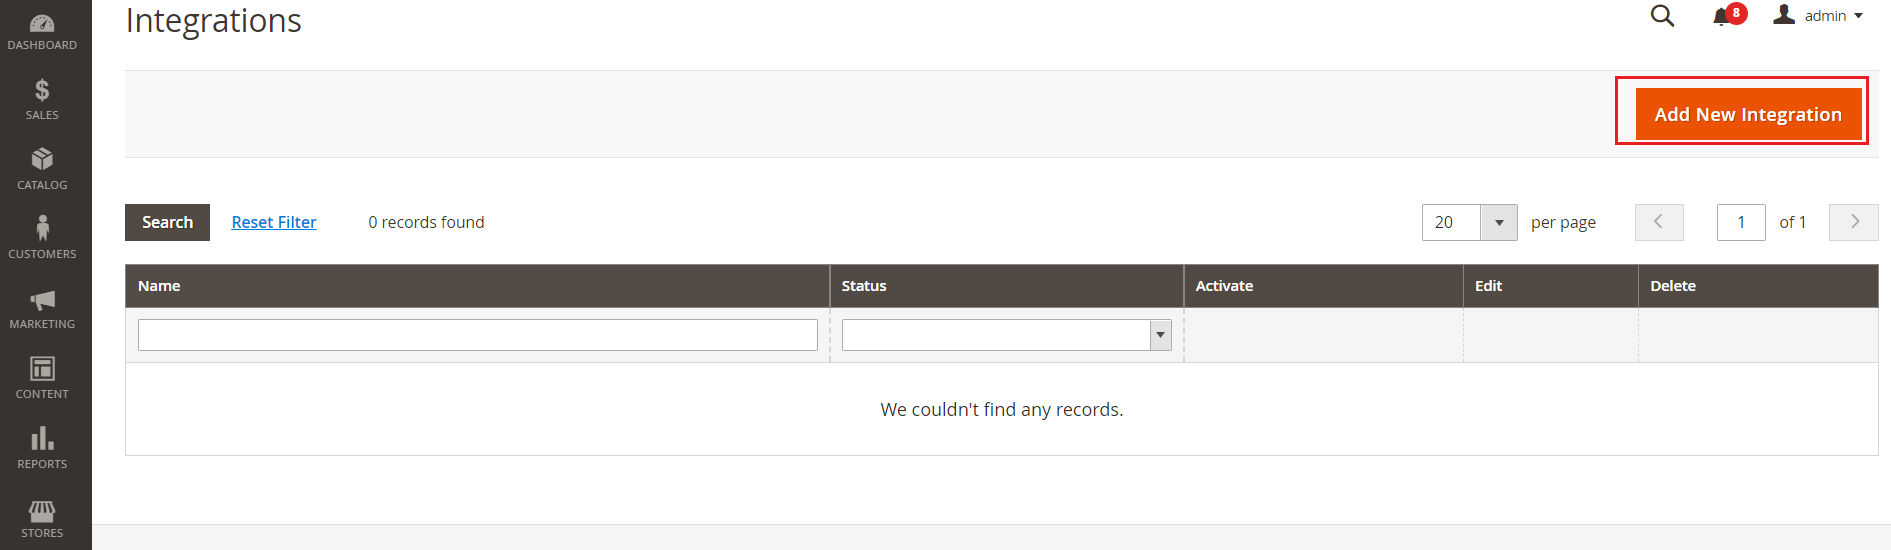
-
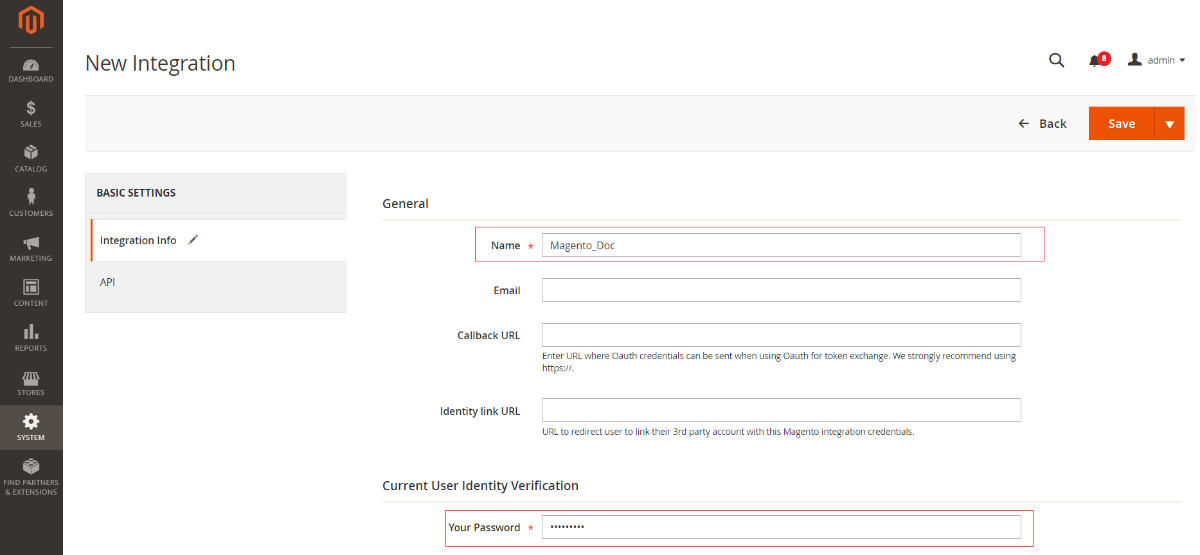
Provide the Name (name of integration) and your current store password in the respective field.
-
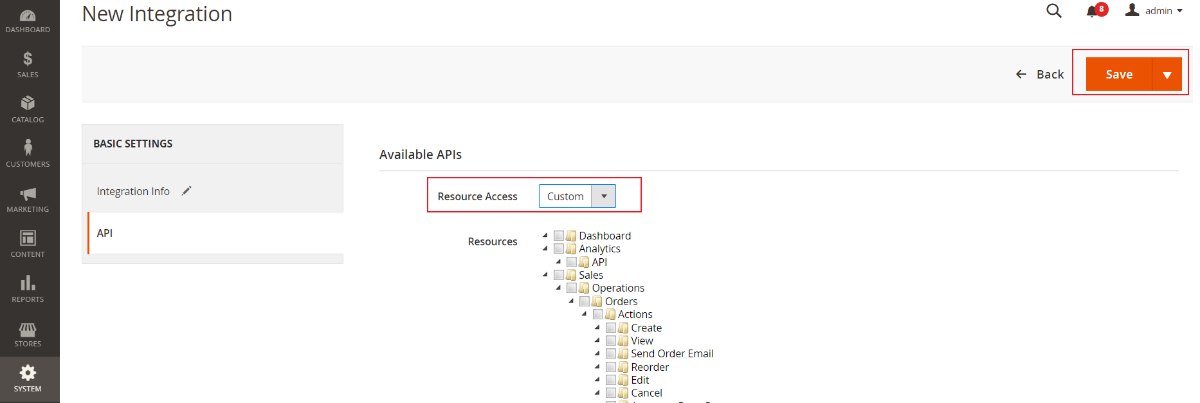
Click on the API tab and choose the Resource Access. You can select either of the two options provided, ALL & Custom. Once the resource access is provided, click on the SAVE button.
a. ALL : Selecting this will provide the access to all the resources of your Magento platform.
b. Custom : You can select only those resources for which you want to provide the resource access. You can select the modules from the tree provided below.
-
On saving, you can view a list menu, where you can view the name of the configuration you provided. Click on the Activate button available in the list menu.
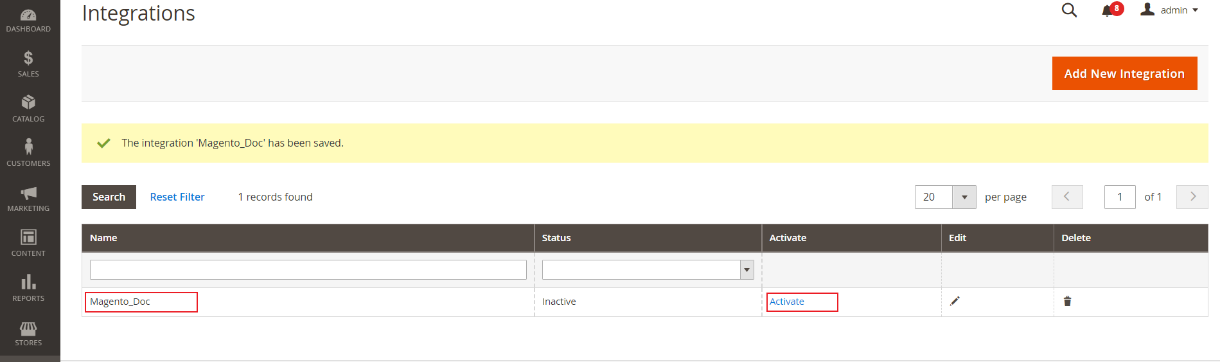
-
Click on the Allow button to allow the generation of the tokens. You can view the generated tokens after clicking the allow button.
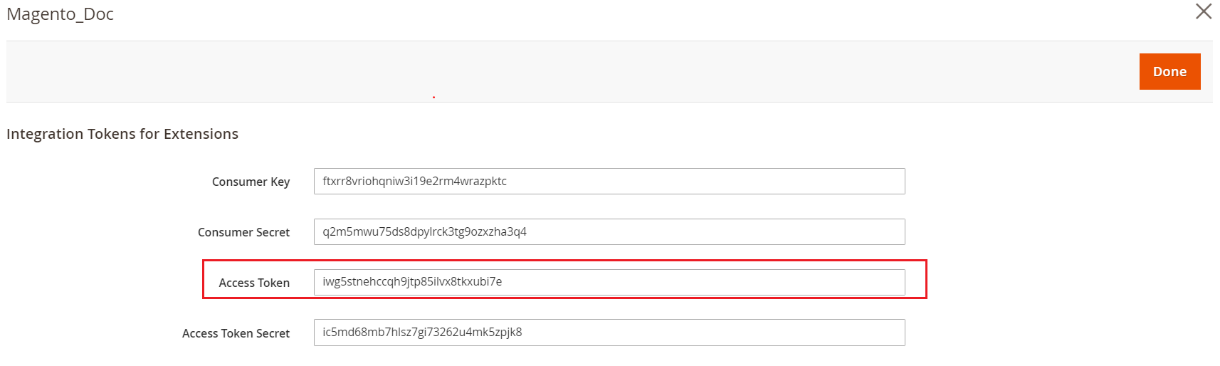
-
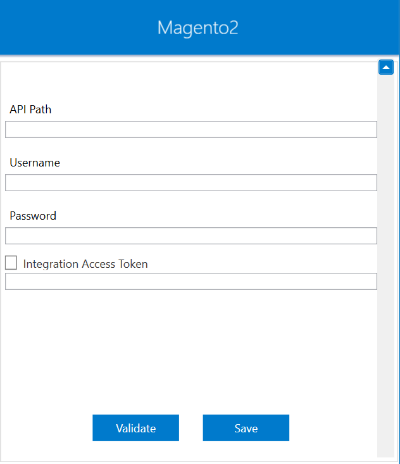
In the App Configurational Panel of the agent, Click on the + button beside the app Magento.
-
You can view the fields for validating the Magento adapter. The following are the fields for validating the adapter.
a. API Path : You need to provide the Base URL of your Magento store admin. Click Here to know about the API Paths in Magento.
b. Integration Access Token : The access token generated on your Magento store should be provided here.
-
Copy the generated Access Token and paste it in the OP Agent. Click on VALIDATE button. After validation, you will get the message Validation passed, now you can save these details. Finally click Save.
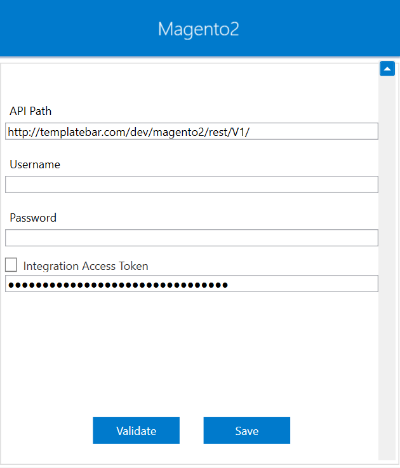
It is mandatory to enable the checkbox for Integration Access Token, while validating the Provided Token. Working with Integration Access Token, you can skip providing the username and password as the token validates with the API link provided.
Steps to Configure Magento Credential in OP Agent without Access Token
- You can also validate the credentials by providing only the API Path, Username and Password. After validation, you will get the message Validation passed, now you can save these details. Finally click on Save.

Following either of the above steps you can successfully validate your Magento adapter using Integration Access Token or without using the same.
Cloud Agent Configuration
Configuring the Magento Application in Cloud Agent
-
Login to APPSeCONNECT portal with valid credentials.
-
Navigate to Manage > App. Expand the magento application and click on
Credential. -
Expand the
RESTnode, click onAdd New Credential. -
Provide the necessary information
Credential Name,Magento Url,User NameandApi Password.
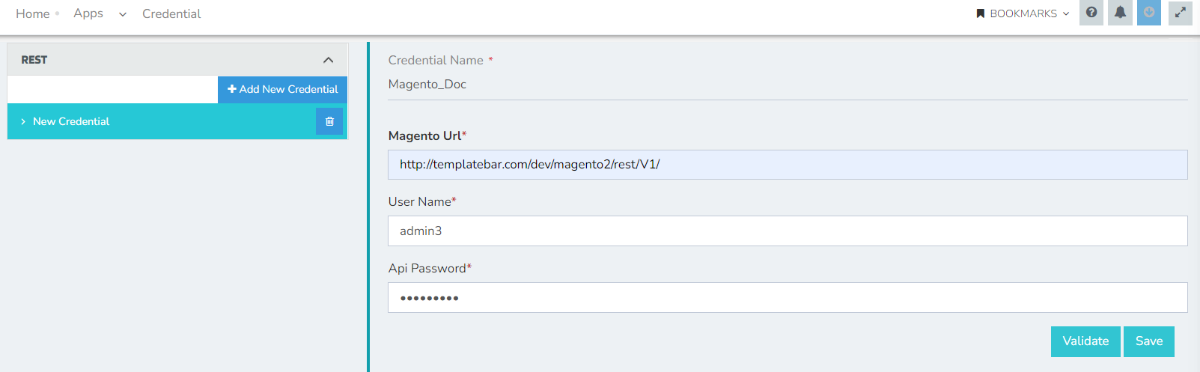
-
Click on Save and a toaster message will be displayed confirming the same.
Troubleshooting
ISSUE 1 :
Some of the basic troubleshooting issue happens due to improper validations or even if it is accurately validated but the processflows do not sync the data successfully. This basic issue resolves after removing the Temp and Cache files from the portal and from your system. Therefore, after clearing the Temp and Cache files, again deploy and execute your processflow.
For E.g. : If the Source Application Not Found appears in the log file, the probable cause is due to the presence of the Temp and Cache Files.
ISSUE 2 :
You have an API for Magento, but the API is not accessible from your server.
- You need to check that, correct APIs have been used. You can also check whether the API is accessible from your postman.
- Some integrations fails due to prevention of anonymous access to few endpoints. In this case, you might need to disable this feature. To disable this feature, log in to the Admin panel and navigate to Stores > Settings > Configuration > Services > Magento Web API > Web API Security. Then select Yes from the Allow Anonymous Guest Access menu.
ISSUE 3 :
Customer Address issue with sourcelib: SetCustomerAddressItems(addresses) - Magento2-SAP.
SetCustomerAddressItems(addresses) is creating an issue with customer address sync which has one address both as
bill to and ship to set as default. Checking the SAP address push scenario, this function was developed.
This function transforms extra node to push the address in ship to section of SAP. The structure is as below :
<item>
<default_shipping>true</default_shipping>,
<default_billing>true</default_billing>
</item>
After transform through sourcelib:SetCustomerAddressItems (addresses)
<item1>
<default_shipping>false</default_shipping>,
<default_billing>true</default_billing>
</item1>
<item2>
<default_shipping>true</default_shipping>
<default_billing>true</default_billing>
</item2>
This extra node is creating an issue in SAP with multiple Address Line which is not allowed and resulting in failure of the data.
Solution : - Simple mapping should be done. No need to call the method SetCustomerAddressItems(). This method is developed only for SAP B1.
Protip: While working with SAP B1 Integrations, SAP Business One DI Server ON/OFF is needed to be done for proper syncing if any errors like the above one persists.
Attributes and Actions
While defining a connection to a particular API endpoint in Magento, you require clear understanding about the data requirements and endpoint configurations. You can refer to this document to find all the endpoint details of your magento installation. To define the endpoint in APPSeCONNECT, you need Actions and Entities. Actions are specifically targetted for a particular endpoint while schema is the data needed to execute the API. Here are the list of some of the prepackaged API actions defined for you which you can easily plug and play while doing your integrations.
| Endpoint | Action | Action Type | Schema | UI Help | API Help |
|---|---|---|---|---|---|
| customers | POST.json | POST | customer | This will enable you to create a customer’s account in Magento 2. | Create Customers |
| products | POST.json | POST | products | This will create products in Magento 2 from Source Application. | product |
| orders | orders | GET | order | Magento gives user the privelage to add Orders from the front end of the application as well as backend of the application.Login to Magento 2.0 front end with the valid credentials of a contact person.Now select certain items and place an order as per requirement. After the order is successfully placed the order ID should be generated. This will get orders from Magento2 for posting in any destination application from the backend | order |
| stockItem | PUT.json | PUT | stockItem | This will update inventory in Magento2 from any source Application. | stockItem |
| invoices | invoices | POST.json | invoice | This will provide you a confirmation that a purchase has been made and your customers also have all the information about what they have bought. | invoice |
Action Filter Implementation
Data is fetched from source application using APIs, and as you are aware of, API provides filters which will allow you to specify a subset of data from the whole bunch of data created in the server, the same can be specified through Actions and Action filters. The Action is generally define the endpoint of the application which is being fetched, while the filters define the search criteria of the data.
If you consider any of the API of Magento, the request structure will look like :
{
  "search_criteria": {
    "filter_groups": [
      {
        "filters": [
          {
            "field": "created_at",
            "value": "2022-06-21",
            "condition_type": "eq"
          }
        ]
      }
    ],
    "sort_orders": [],
    "page_size": 2,
    "current_page": 1
  }
}
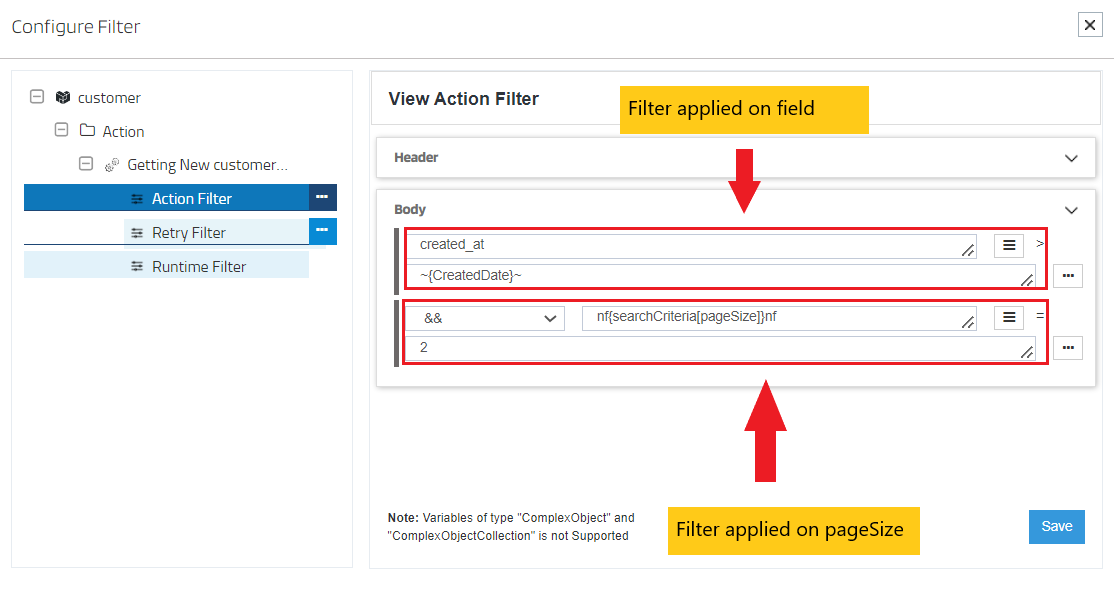
If you want to send this action filter, you have two sections in it.
1) General filters : It represents the overall filter criteria of the API. To define such filters, you do not need to specify anything special, just putting the field name and the value with the condition type is fine. For example, here we have used created_at with a specific value coming from storage to filter data in API.
2) Special Filters : But as you can see from the structure, if you want to specify page_size or current_page which needs to be defined outside the scope of filters, here the action filter is required to be specially decoated with
nf{...}nf filter structure. Hence you can see, nf{searchCriteria[page_size]}nf will specify page number of the API.
If you are a beginner, feel free to know more about
searchCriteriaused in magento api and click here to gather the knowledge regarding action filters.
While working with Magento2 B2C integrations, you can also use B2B extensions.
Customers and Orders can be created and placed from the Front-End also. For Placing orders from front end, visit the E-Commerce store and follow the generic steps for placing orders and creating customers.

