
Using Filters for OLEDB based Integration
Updated:
Users can define Filters for integration scenario as per business requirements for the GET,
POST and PUT operation. This section of the document provide details of these filters
and steps on how to initialize these filters.
Pre-requisites
- Require Valid APPSeCONNECT account.
- Create OLEDB Connection & validate the connection.
- Create Touchpoints for the required connection.
Note: If you have taken Pre-packaged apps and its connection templates, Touchpoints will also come pre-packaged
Operations
For GET Operation
The GET Operation is for fetching data from OLEDB. The configuration for the GET Operation is needed to be done in the Schema level of the OLEDB Application. The path way for configuring GET in Schema level is Login to the Portal -APP section-Schema of the APP (OLE DB).
- A Schema is to be created (similar to the Table name) to which you have to add data. The Below Window shows the Schema for the OLEDB App.

- Expand the Schema and Click on the
ADD ACTIONbutton. The Database Schema Window opens.
- In the Database Schema Window, The Action Name for the GET operation should be SELECT.
- The Query section should be provided with the ACTION FILTER that is to be provided in the
SQL Syntax as shown below. Click on SAVE after specifying the Action Filter.
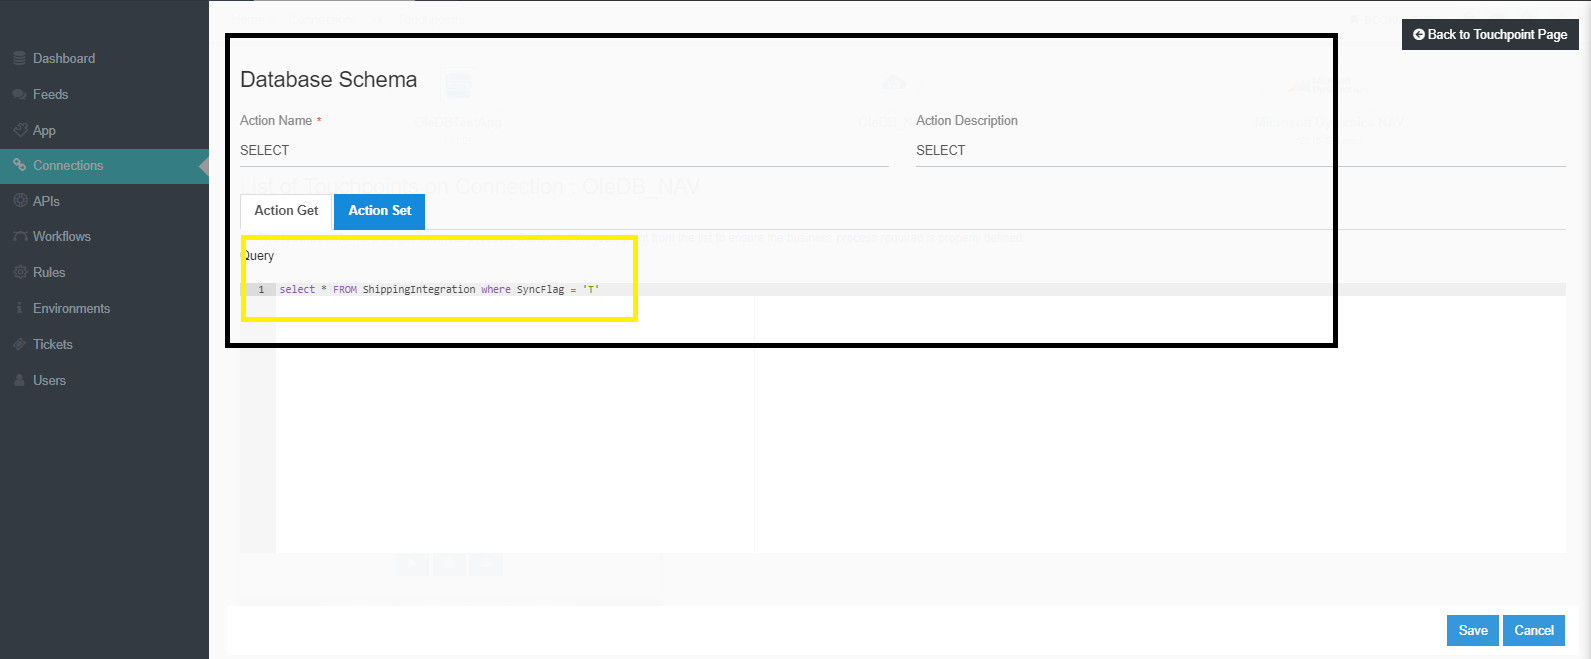
Note: Action Filters is needed to be given in SQL Syntax
For POST Operation
The POST Operation is for adding data to OLEDB. The configuration for the POST is to be done in the Schema level of the OLEDB Application. The steps for configuring POST in Schema level is given below:
Login to the Portal>APP section>Schema of the APP (OLE DB).
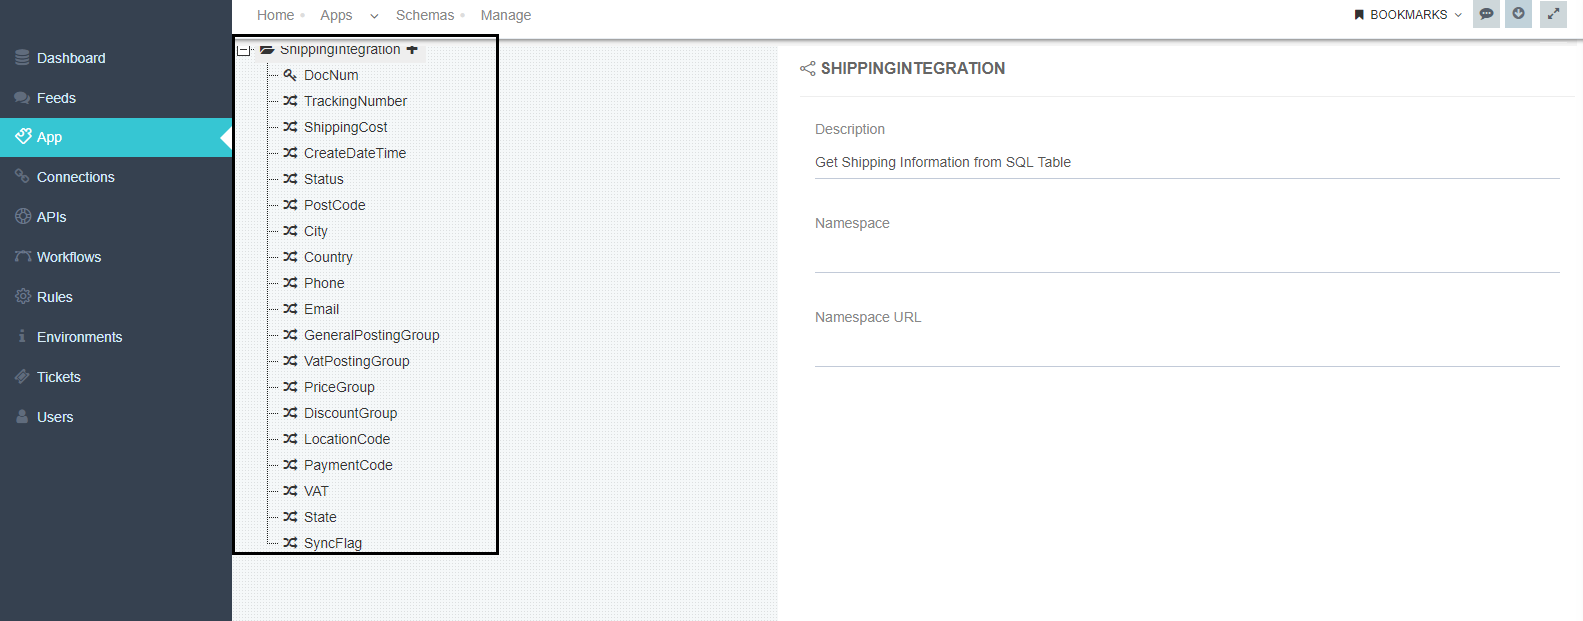
- A Schema is to be created whose name should be the Table name to which the data is to be added.
The window given below shows the Schema for the OLEDB App.

- Provide the Attribute names in the Schema level which will be the column names of the table.
- The below window shows all the column names of the table. The user can also add new attributes by
clicking on the + button provided beside the Schema name.
- Create a
New ActionwhoseAction Name should be POST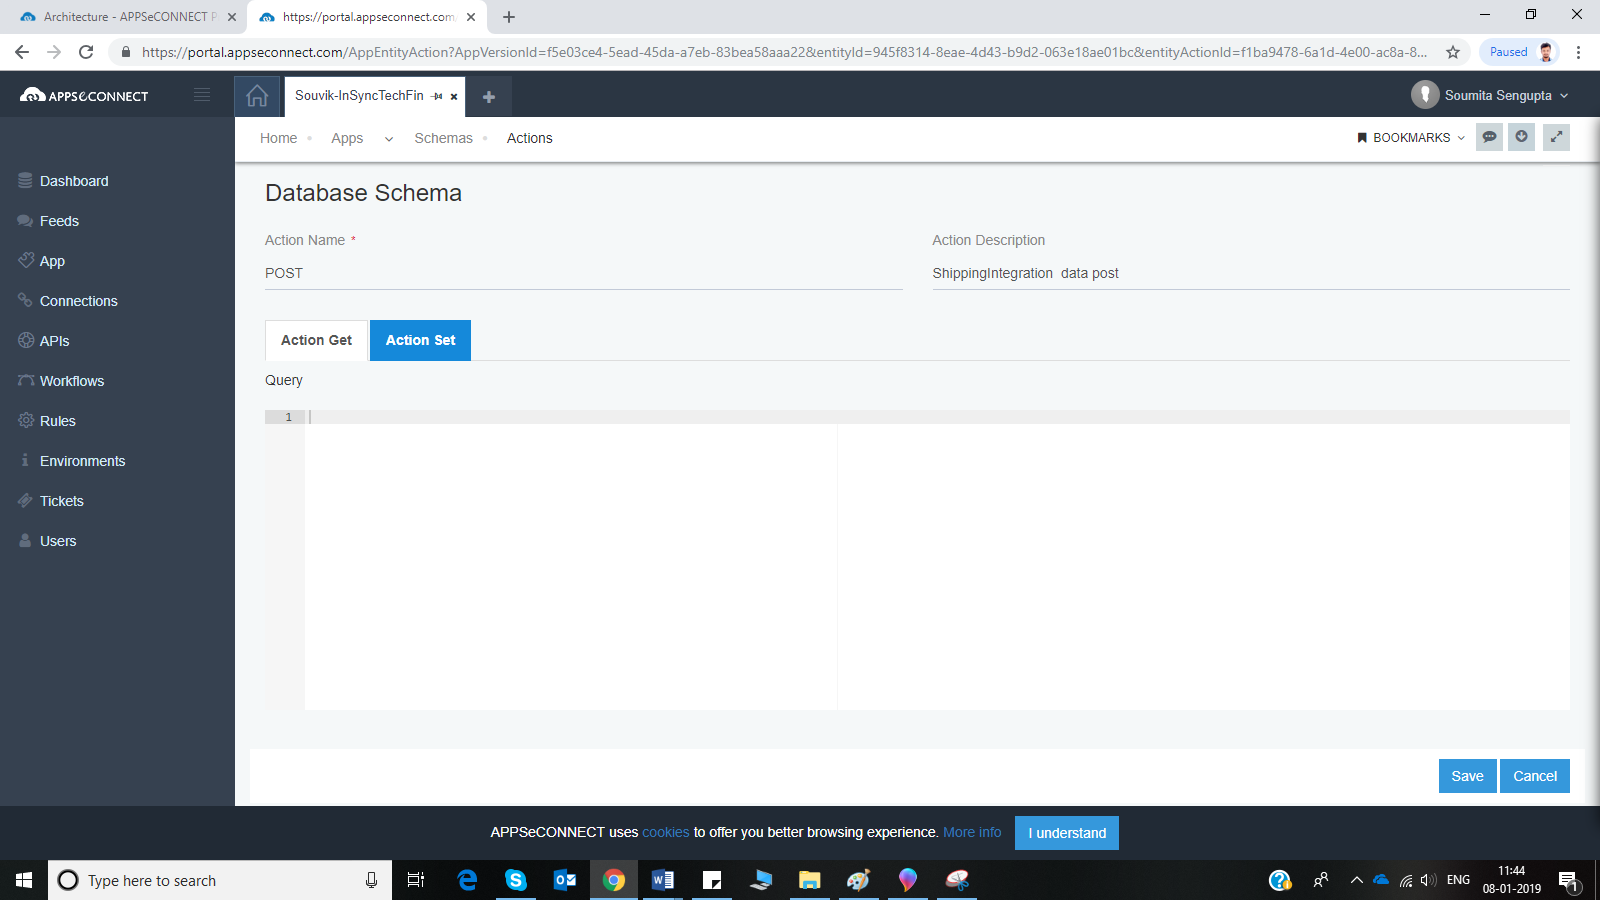 Note: For POST operation, no Action filters is required.
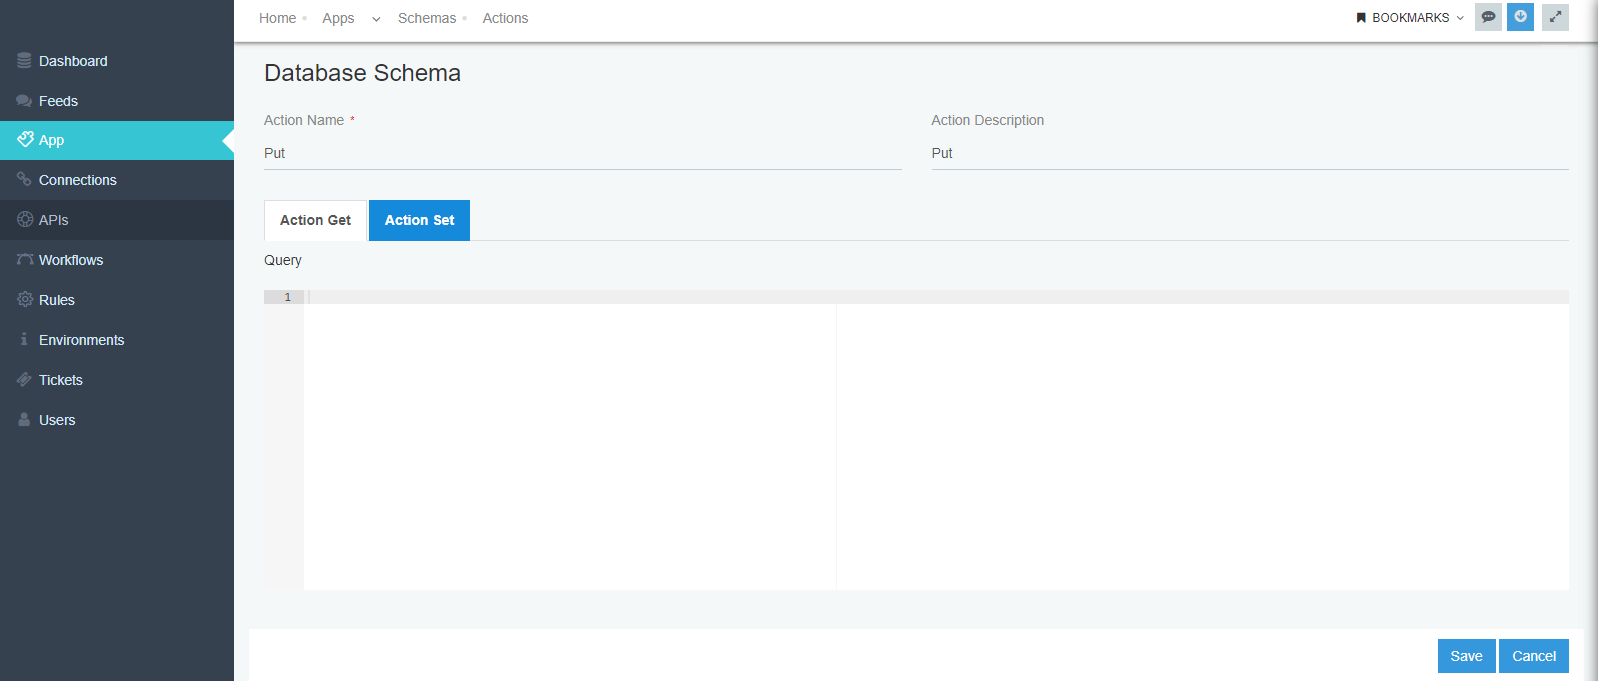
For PUT Operation
As a Pre-requisite for PUT operation Schema Attributes should be made as a primary property. The pathway for enabling attribute as Primary Property is.
Login to the Portal>APP section>Schema of the APP (OLE DB)>View Attributes.
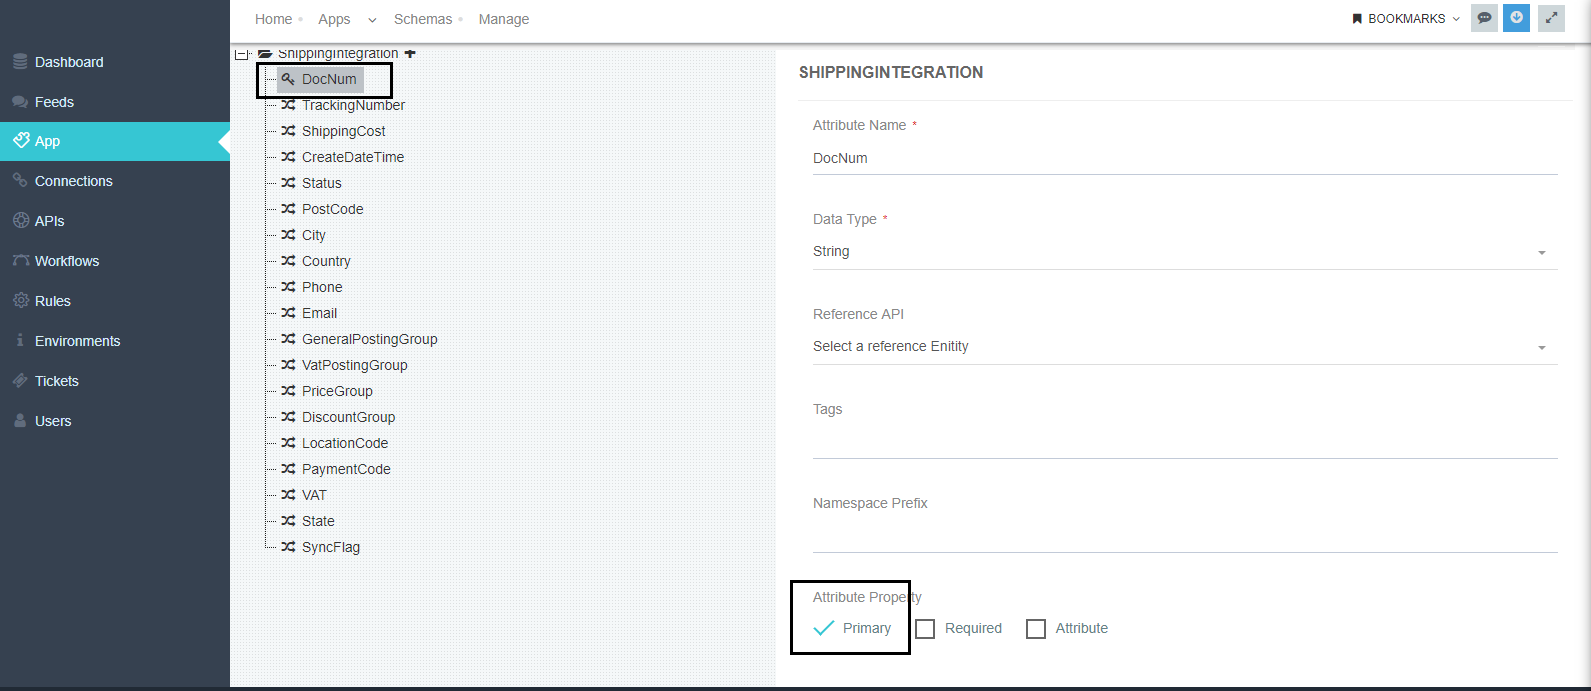
- Once the Attribute is enabled as primary map (Source and Destination Mapping) the primary attribute in the touchpoint level. Here the mapping should be done in the touchpoint that is using the PUT Operation.
- Create a new action in the Schema Level for the operation PUT.
- Specify the Action Name as PUT and click on SAVE.
Once the above action configuration is set, you are now ready to run the integration process between the applications.
NOTE: Action filters will only be used for the GET Operation and not for POST and PUT

