
Working with Schema, Action & Filter
Updated:
Knowing Schema, Actions & Filters
The user can view the schemas and the action present or can also add schema and add action for each application. This section enables the user to view and add the Schema and its Actions.
Click here to know more about the Schemas.
Prerequisites
- The User needs to have a valid AEC account.
- An application is needed to select for defining the Schemas and its Actions.
Adding Schemas in APPSeCONNECT Portal
- Login to the APPSeCONNECT Portal with valid credentials.
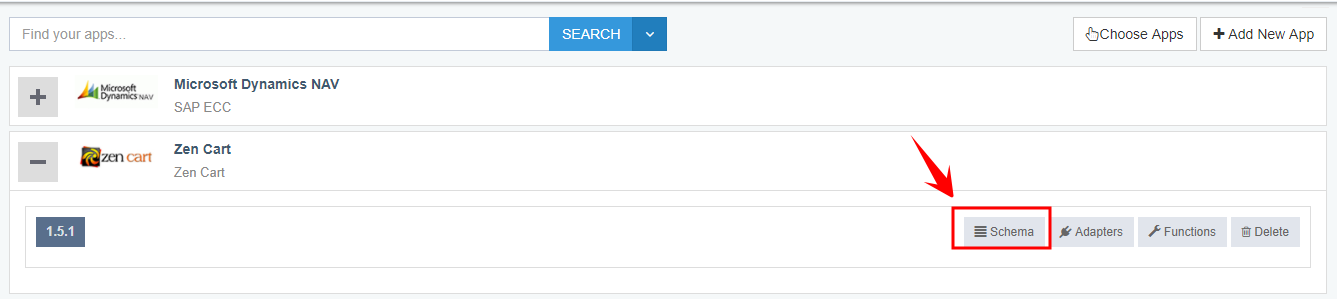
- Go to APPS Page and Choose any application
- Click on the + sign after adding the application and click on Schema (Here MS Dynamics NAV has been chosen).
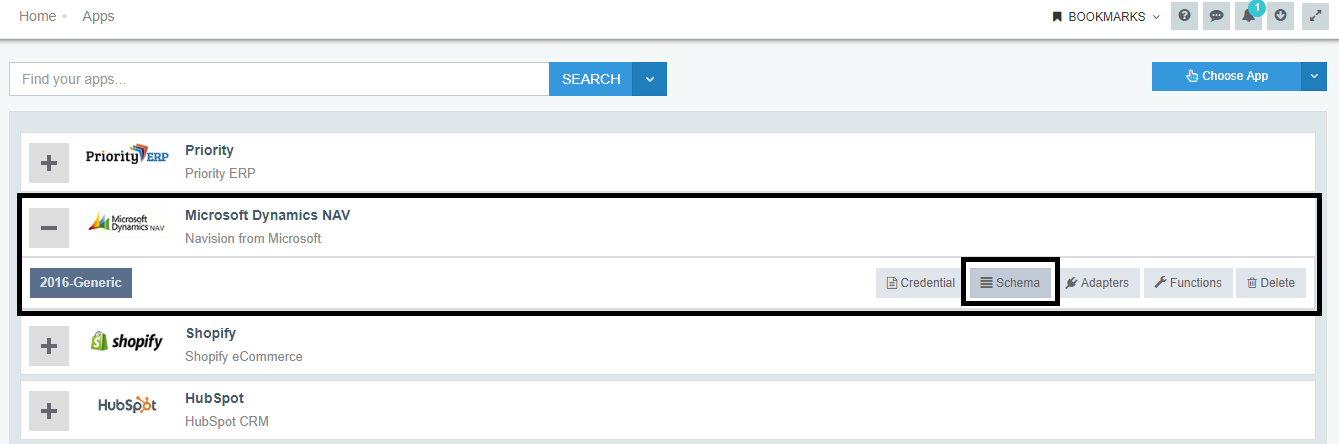
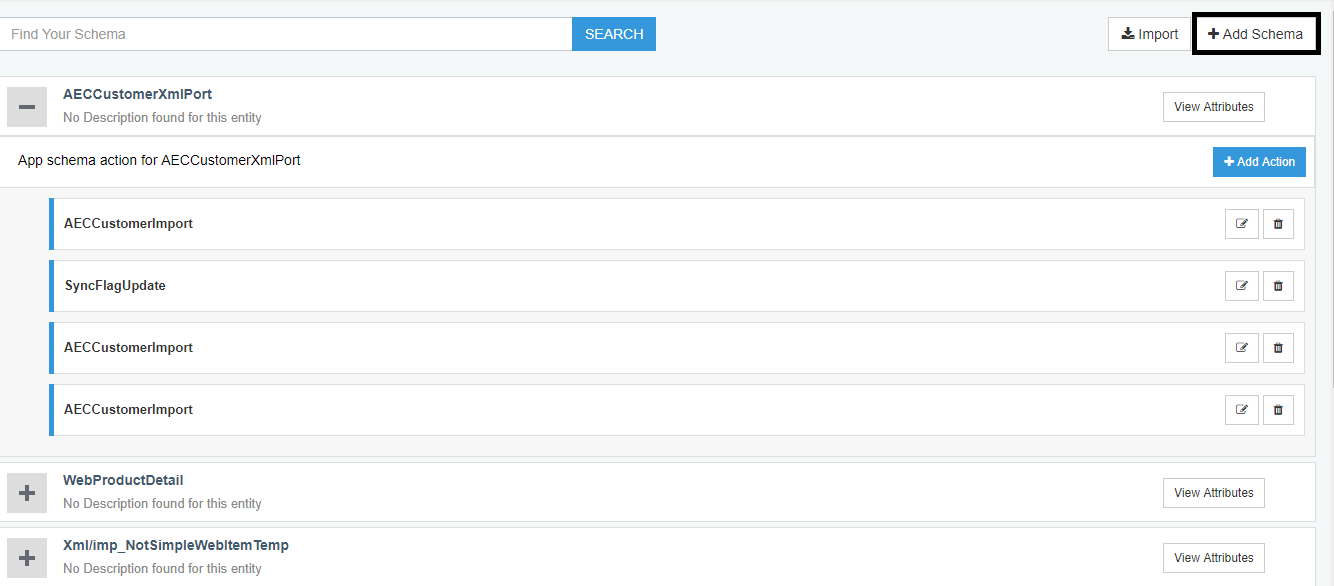
- On the Schema Window the user can view the list of schemas present or can also add schemas from the ADD Schema Option.
- A pop-up window will appear with the following fields.
a. Schema Name: This is a mandatory field and it needs to be provided with the schema name
b. Schema Description: The description for the schema is needed to be given here.
c. Schema Namespace: Differentiates between two similar schemas.
d. Schema Namespace URL: Differentiates between two similar schemas using URL.
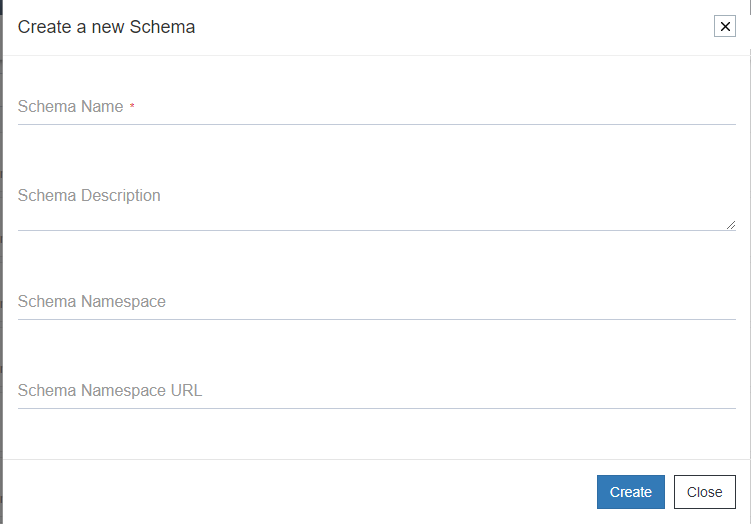
- Click on the create button for creating the schema.
Importing schemas in APPSeCONNECT portal
- Login to the APPSeCONNECT Portal with valid credentials.
- Go to MANAGE > APPS and Choose any application
- Click on the + sign after adding the application and click on the Schema button
- On the Schema Window the user can view the list of schemas present or can also add schemas from the ADD Schema
Option and Import Schema Option.

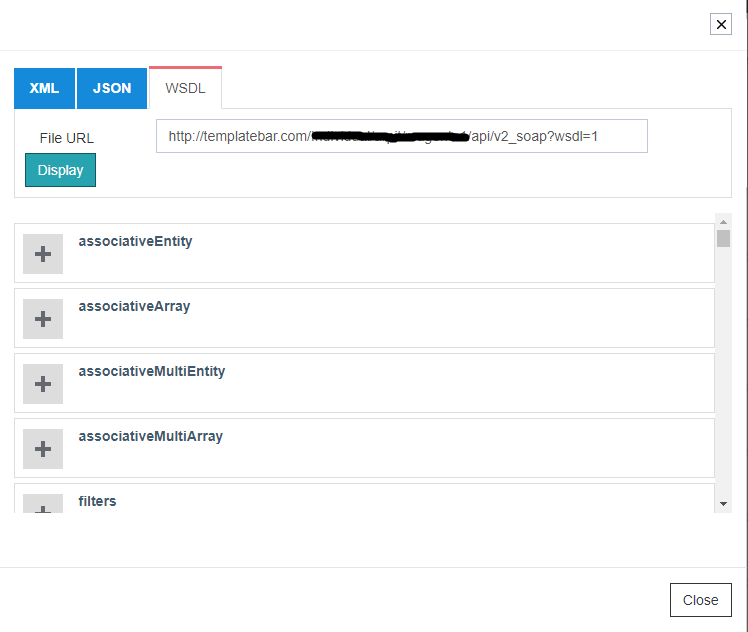
- Clicking on the Import button, a Pop-up will appear where the user can import XML, JSON, WSDL (Web Services Description Language)
file for the Schema.
- In JSON and XML format the user needs to choose the respective XML and JSON file saved locally, but in WSDL format the user needs to provide the WSDL file link for importing the schema
- For generic apps, WSDL option will not be available for import to any protocol other than SOAP.
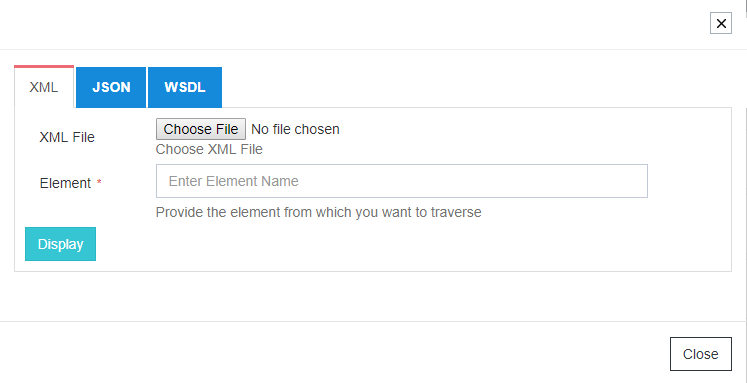
- For the XML/JSON format, the user needs to upload the file that supports the respective formats. For XML, the user needs to upload XML file and for JSON, the JSON file needs to be uploaded.
- The parent node of provided in the file is needed to be provided in the ELEMENT field.

In this case, the parent is items, therefore the Element should be items.
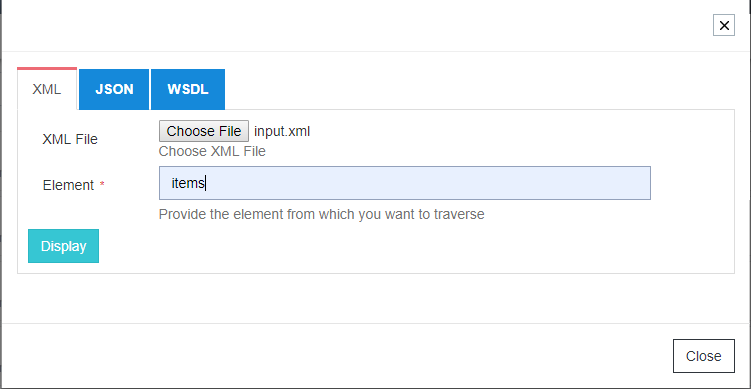
- Click on the Display button, to view all the complex object & complex object collection and its attributes.
Expanding the complex object & complex object collection will display all the attributes present.
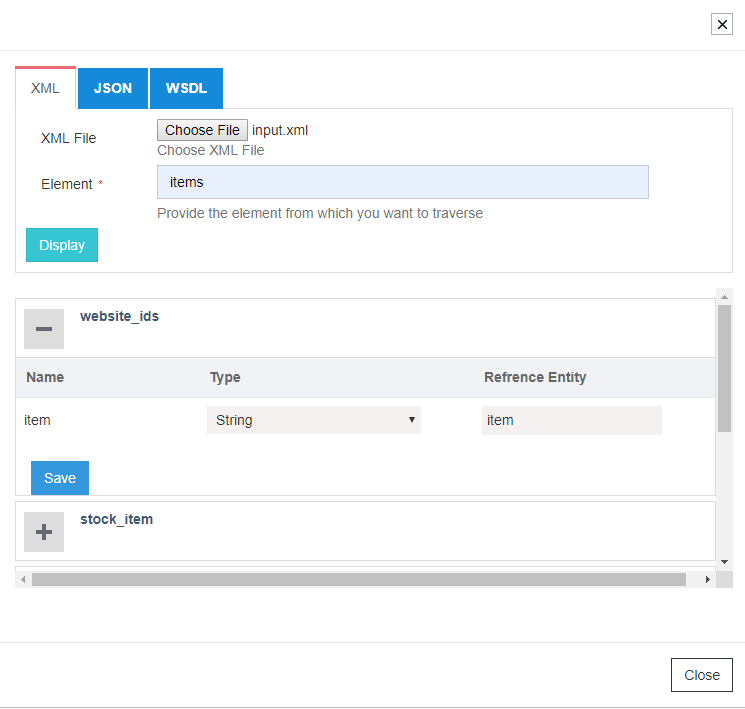
Note:- The user must save each node individually. There is no way the user can save it on the whole.
- This process is same for both the XML and JSON formats.
- For WSDL format, the URL File should be provided for extracting the complex object & complex object collection.
- Click on the SAVE button individually for the saving each of the nodes.
Creating and Editing Schema Attributes
Click here to know more about the Schemas and its attributes.
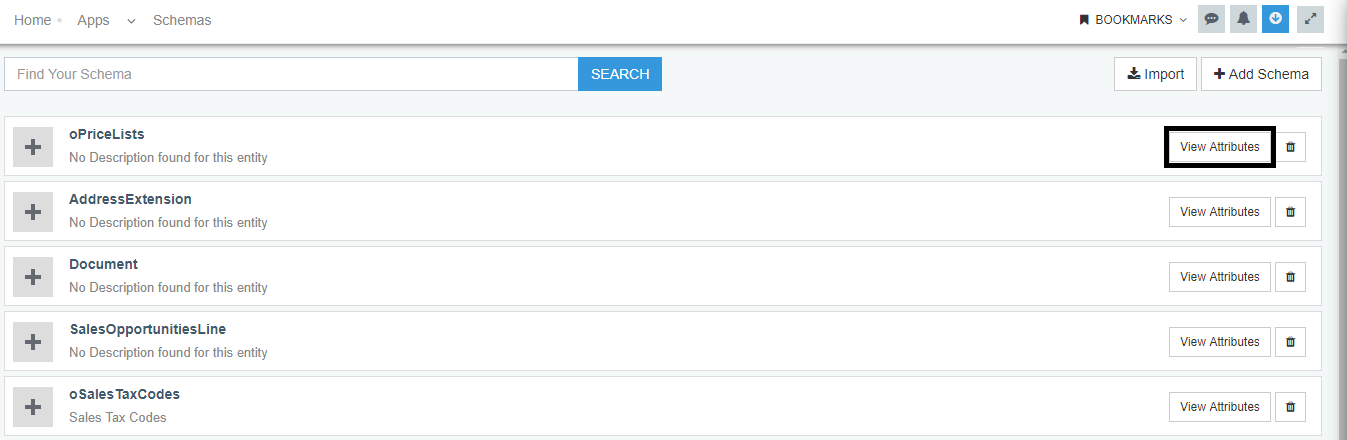
Steps to create Schema attributes in APPSeCONNECT Portal.
- Login to the APPSeCONNECT Portal with valid credentials.
- Go to APPS Page and Choose any application
- Click on the + symbol after adding the application and click on the Schema button. The Schema Window Opens.
- Click
View Attributesbutton available beside every schema.
- The Schema Attributes window shows up. Click on Plus (+) button to expand the schema, for viewing the attributes.
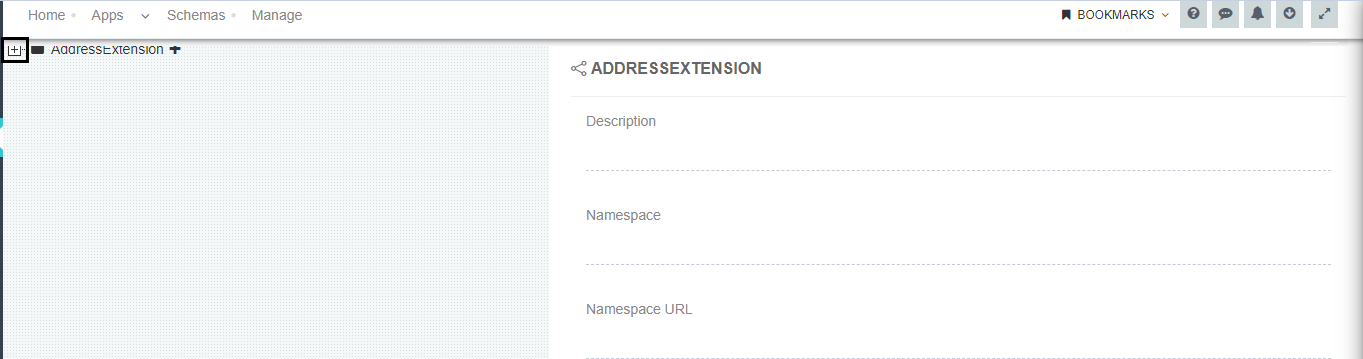
Note: The fields Description, Namespace and Namespace URL cannot be edited after the creation of the schema. - On clicking any attributes, its property window will be displayed beside.
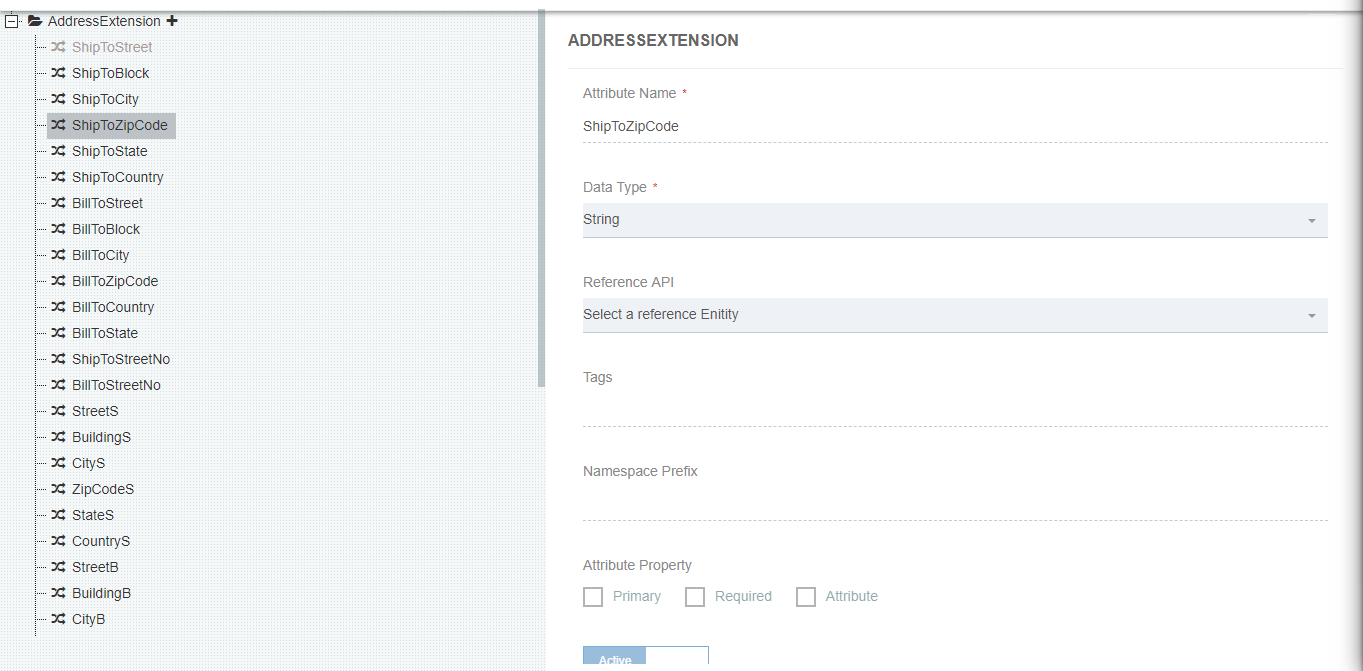
Note: For Prepackaged attributes, the properties cannot be edited. However, the users can create their own attributes if required. - Click on Plus symbol (In Bold) to add new attribute to that schema. A New Attribute will be available in the node.
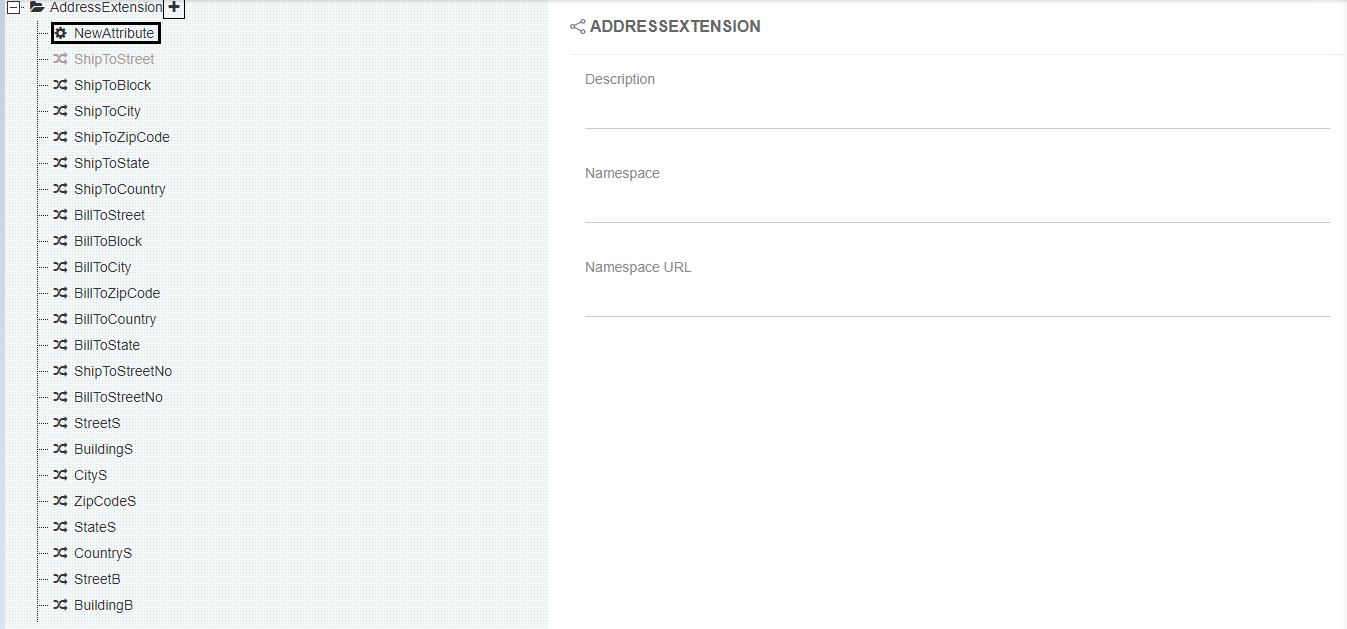
- Click on
NewAttributeto view the attribute properties that needs to be setup. The fields in the Property Window are: a. Attribute Name: It is a mandatory field, used for providing name to the attribute b. Data Type: Select the datatype from the drop-down as per the requirement. This is also a mandatory field. c. Reference API: If any schema needs to be referred for the transformation, that can be referred by selecting the Schema Name from the drop-down as a reference Entity.
Note: For adding Reference API, the created attribute must have the datatype Complex Object or Complex Object Collection. d. Tags: for providing specific tags to the attribute e. Namespace Prefix: Prefix could be added for this attribute while working with namespaces. f. Attribute Property: This section has 3 checkboxes - Primary, Required, Attribute.- Primary: for allotting this attribute as the Primary Key.
- Required: for making this attribute mandatory for the mapping purpose.
- Attribute: To add attribute in the XSLT
- The user can view a toggle button below for allotting this attribute with the Active/Inactive status.

- Click SAVE button, after all the details has been made.
- Right Click on the created attribute in the node structure, for Renaming and Deleting the attribute.
Actions
Actions are nothing but defining certain tasks like getting data from an application or sending data to an application based on certain conditions and these conditions are defined through an action filter.
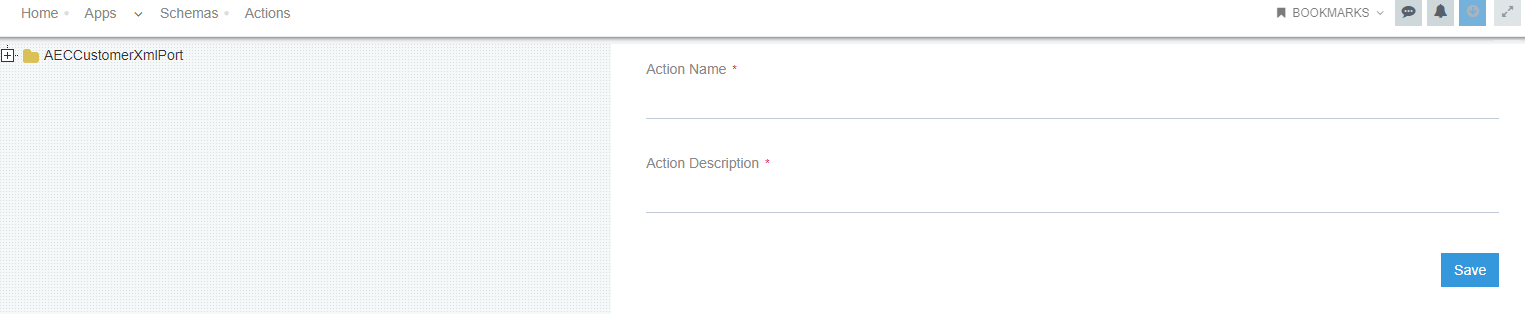
For example, suppose you want to fetch customer’s data from an eCommerce site and in APPSeCONNECT you define a Customer entity for that, now for getting data we can define an action name, called ‘GET’. When you define an action for an entity you need to provide certain information
- Action Name: Name of the action. In some predefined application, many adapter logics are written based on this data.
- Action Description: Description of the action. At the time of touchpoint creation, actions are selected based on this description.
- Action Filter & Resync Filter Details
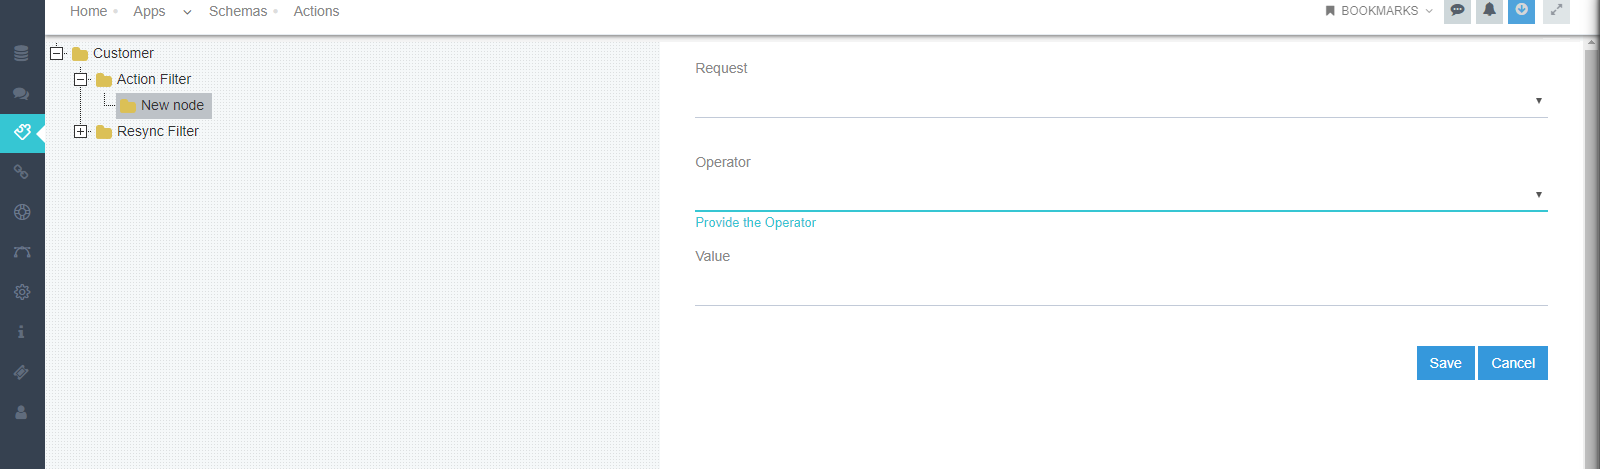
Action Filters
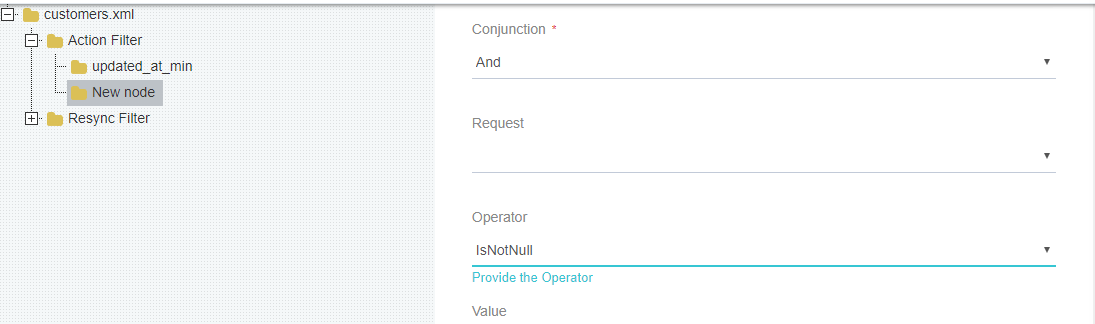
The important part of an action is defining an action filter where we can define the conditions based on which data will be fetched. The criteria we define here need to follow the filter parsing logic or the rules to read the specific set of information from source XML/json file. Action filters are added in a hierarchical node structure against an Action.
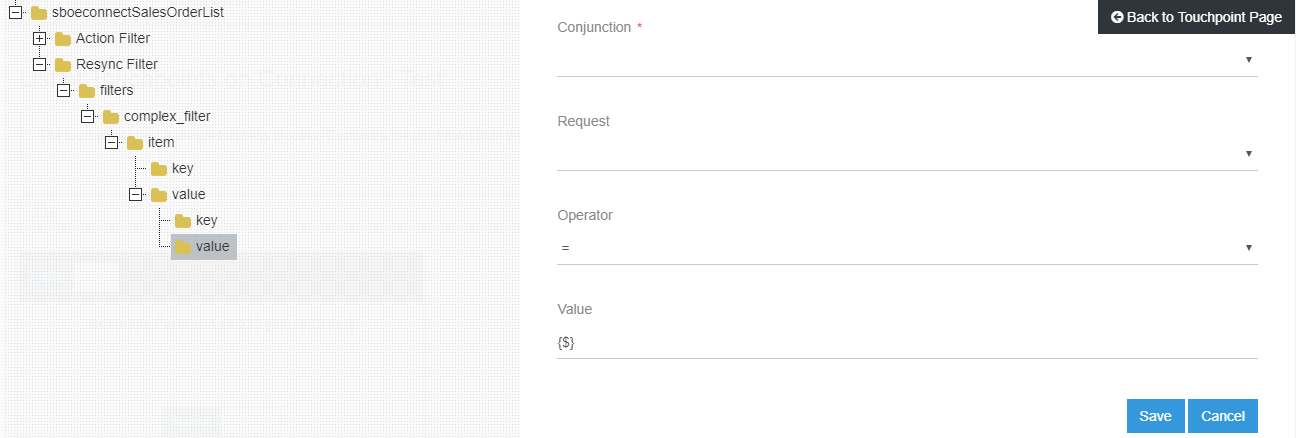
An example of defining action filter is; You want to fetch customers from eCommerce based on the creation date which is greater from a certain date range then action filter will be like this:
-
Request - Body/Header. If you don’t provide any value, it sends the information in the body. If we select the header then that information must be written within the adapter.
-
Operator - condition (greater than, less than, equal, not equal etc.)
-
Value - Based on which the condition will be evaluated. You can provide any string here. Also, you can use an Appresource function in filter criteria. The pattern of using it is like this ~{CreatedDate}~ . Here ‘CreatedDate’ is the function written in native Appresource. Here the CreatedDate value returns the last stored date time value for the currently executing touchpoint where that action filter used.
If you create multiple nodes or conditions then you will get an additional field:
Conjunctions - And/Or [$Node1 + $Node2]
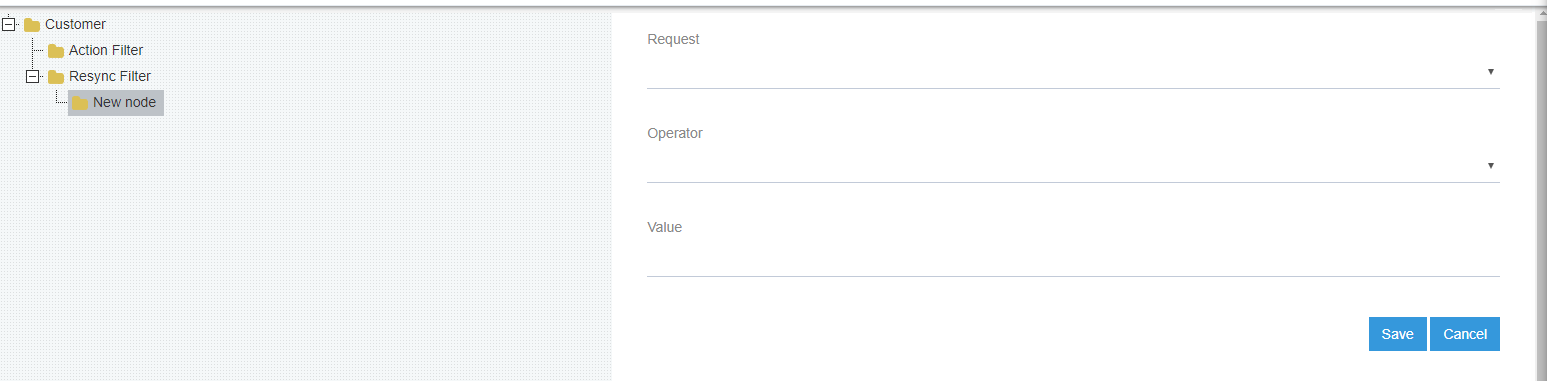
Error Filter
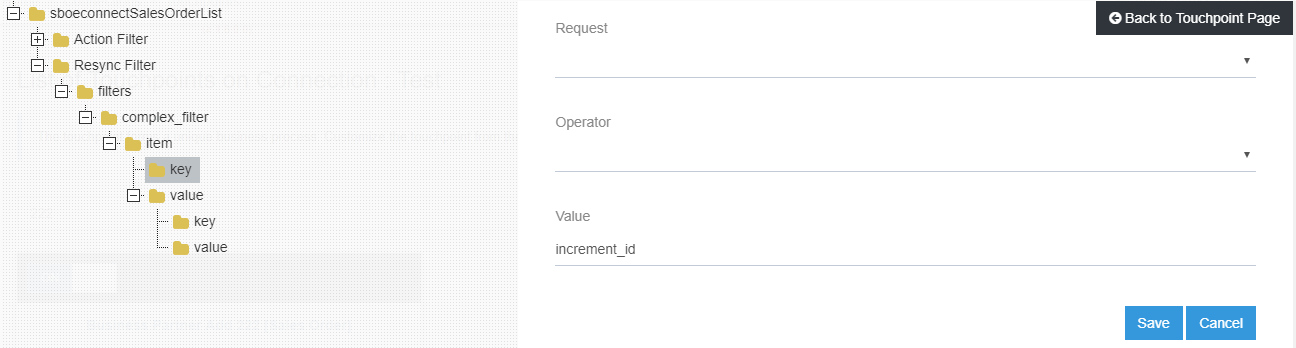
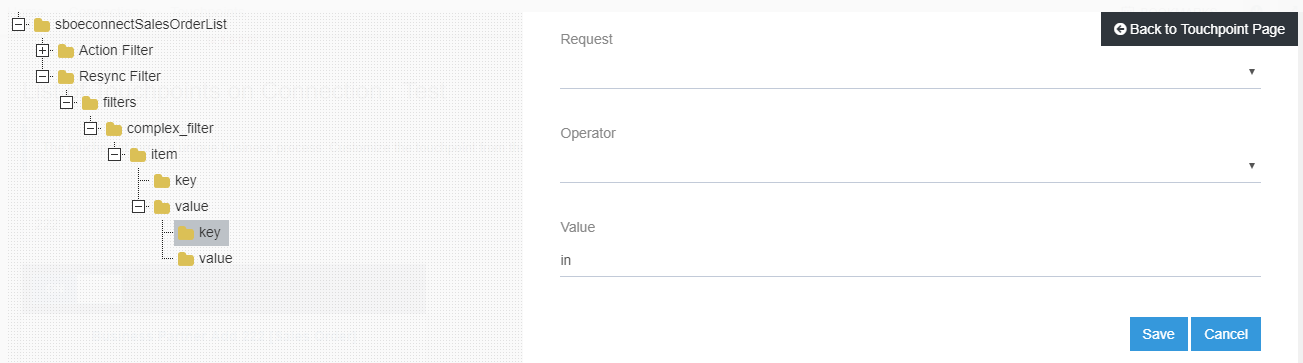
Error filters are the same as the action filters. They are written for syncing erroneous data which are present in APPSeCONNECT error log bucket or the resync bucket. Based on the logic implemented in adapter code you need to specify the error filter. For explanation purpose, sample filter for SOAP API has been taken, where a hierarchical node structure is maintained for filtration.
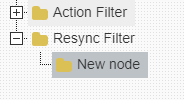
- Create a new node
-
After creating a new node, you will be able to do the following things
a) Create another node (as a child of the parent node). b) Rename the created node. c) Delete the created node.
-
As a sample filter for Order Add has been taken, you will get the information in a key-value pair. Fill in the details for the key-value pair & Complex filters as required.
Steps to Import Schemas and Actions of an Application
The steps to import schemas and actions of an application is given below:
Prerequisites
- The User needs to have a valid AEC account.
- An application is needed to select for defining the Schemas and its Actions.
Importing Schemas and Actions of an application
- Login to the APPSeCONNECT Portal with valid credentials.
- Go to APPS Page and Choose any application
- Click on the + sign after adding the application and click on Schema
(Here MS Dynamics NAV has been choosen).

- On the Schema Window the user can view the list of schemas present or can also add schemas from the
ADD SchemaOption.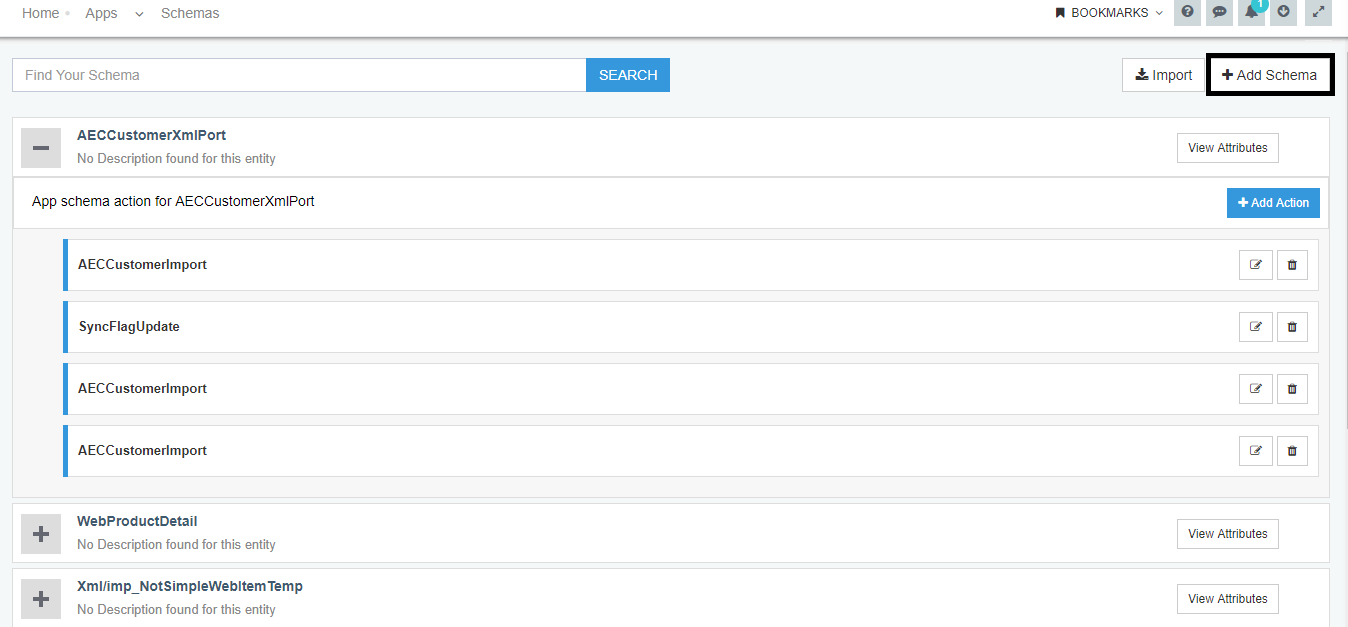
- The Actions inside a schema can be viewed by clicking on the + sign.
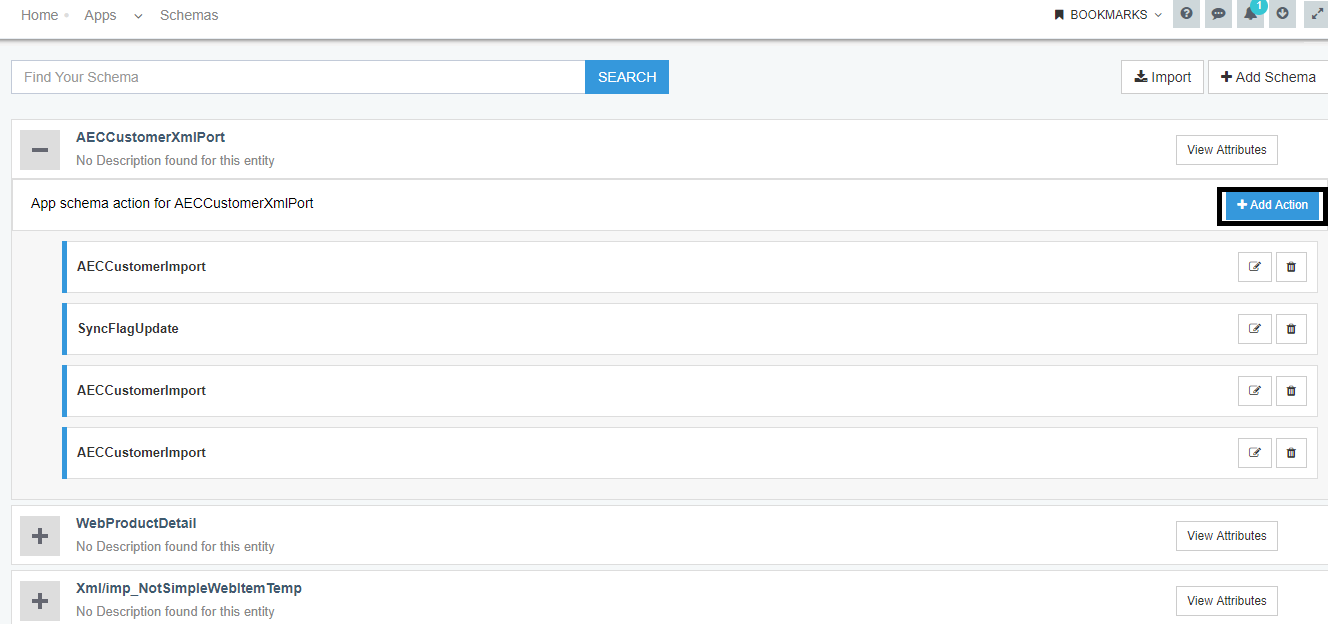
- Click on the
ADD ACTIONbutton for providing Actions in the schema level. Input the Action Name and the Action Description. The user can view the ACTION window below.
- Expand the nodes for viewing the Action Filters and the Resync Filters. Right Click on the Action Filter node to create its filters.
NOTE: Save the Action Name and the Description before creating action filters.
- Edit the name of the Action Filter node and input the details in the fields REQUEST, OPERATOR, and the VALUE.
- Similarly, for RESYNC Filter, Right Click to create its filter. Edit the Name, and input the details for the field REQUEST, OPERATOR and the VALUE.
- Once done with the configurations, click on the SAVE option.
Protip: Default Schemas would only be present for the Pre-packaged APPS.

