
Working with Decision Node
Updated:
What is Decision Node
Significance of Decision Node is implemented when fetching or synchronising data based on certain criteria or decisions. A decision can be applied on a single chunk of data based on the decision criteria defined in the decision definition window. After data passed through role node there can be two scenarios either the data matched the decision definition, or it fails and depending on success and failure user can configure his/ her next processing steps.
For example, a user wants to post a bunch of customer data from Shopify to SAP B1. After processing the Shopify data user can apply a decision along with a splitter node to check if a customer email address does not belong to a specific domain. If the decision is satisfied, then the data will be posted to SAP B1 otherwise we will store the data in our local storage.
Prerequisites for Implementing Decision Node
- User needs to have valid credentials of APPSeCONNECT Portal.
- Needs to create an Advanced Workflow before implementing Decision.
Steps to implement Decision Node in Advanced Workflow
- Login to the APPSeCONNECT portal and Navigate to the Advance Workflow Module of APPSeCONNECT.
- Create a workflow or edit an existing workflow. The Create & Edit page opens.
- Drag and drop the Decision node to the design section, from the Process Property drop-down.
- On releasing the node, the Decision node configuration window opens.
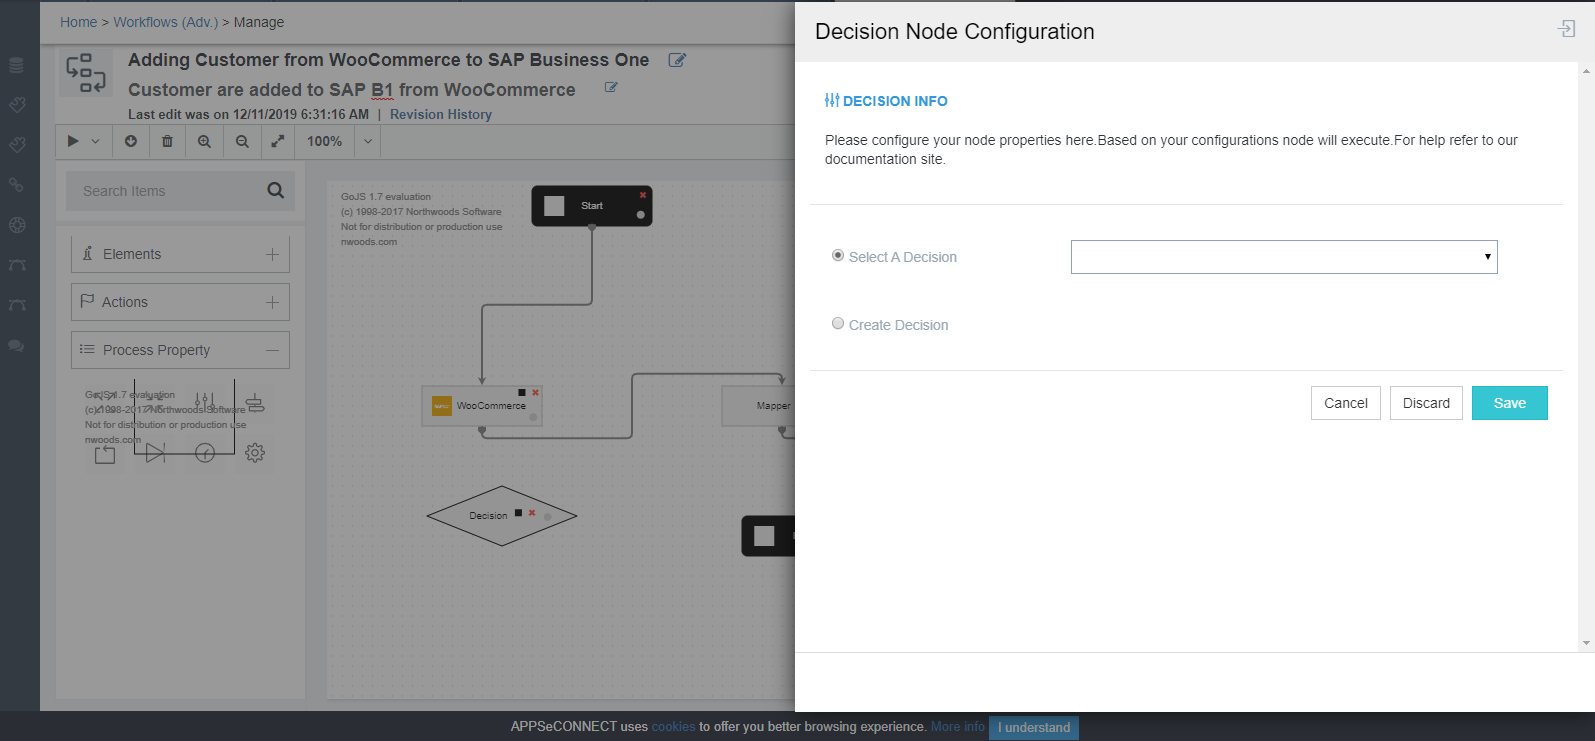
- The decision node has two radio buttons for providing the decision criteria:
- Select a Decision: All the decisions created or defined previously within the current organisation would be present in the drop-down.
- Create Decision: Enable its radio button, user/implementer would be able to create a new decision criterion.
- User/Implementers can either select either of the two options. On enabling the radio button for create decision, users will be able to
define the decision criterion.
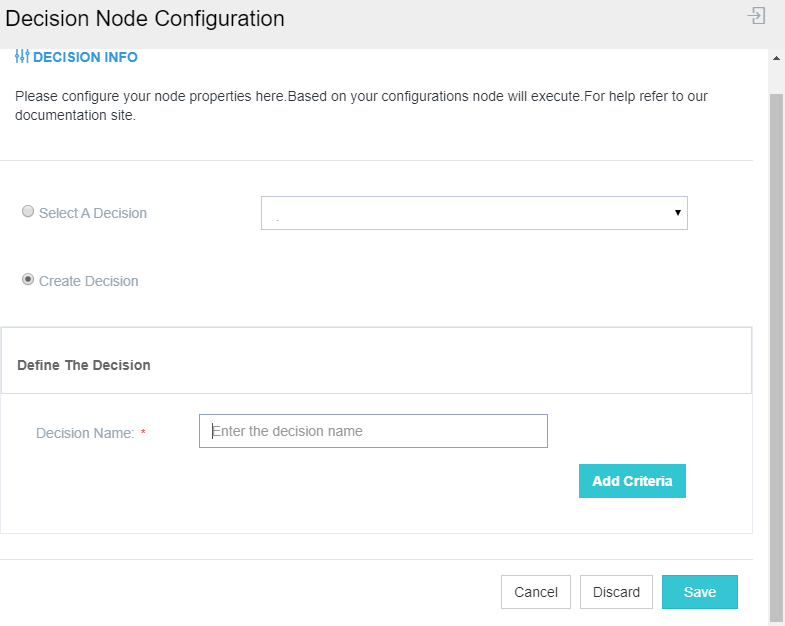
- Enter the name for the criteria and click on the Add criteria Button. The fields for entering the criteria appears. The fields are:
- Key : Specifies the tokens for implementing the decision.
- Select: These are the operators for implementing the decision operation. User/Implementer needs to select the operators from the down, for execution the decision node conceptually.
- Value: Specify the value for the decision that needs to be implemented.
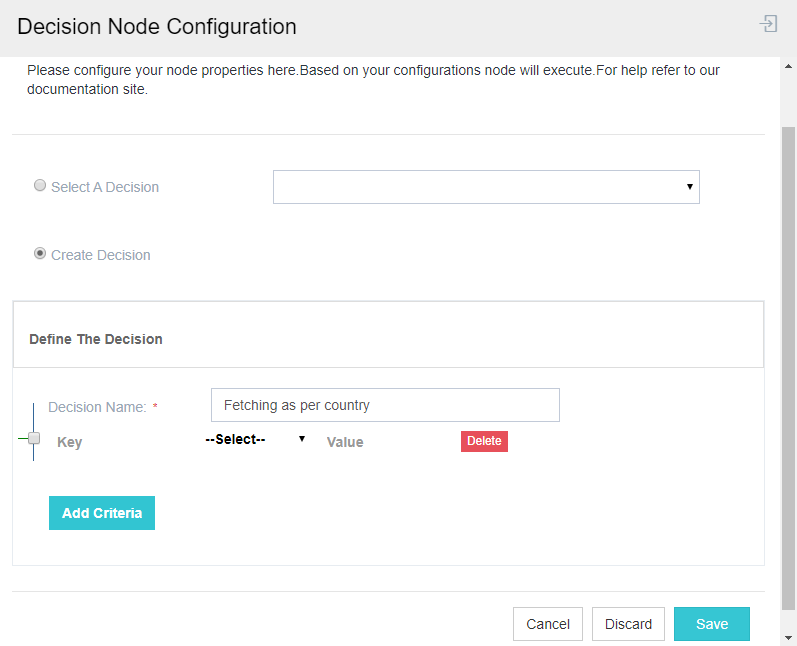 Note: By Pressing the button
 eon the fieldKey, user/implementer can view all the tokens that are available for implementing decision to workflow.
- Select the token from the list that appears and enter the respective value to the fields as per requirements.
- Once the criterions are provided, click on the SAVE Button. After saving the configuration window for Decision, user needs to attach the node with the other nodes as per the decision position with respect to GET or POST.
Note: When adding decision from the Select a Decision drop-down, user doesnot need to specify any tokens, the previously implemented token will be in use.

