
Listing of Advance Workflow
Updated:
Listing of Advance Workflow section provides the option of creating folders for organizing the advance workflows with respect to the business requirements for any organizations. Advance Workflows listing section helps you to organize your workflow in folder pattern as per the business requirements. Users will be able to drag and drop one Workflow from a Folder into another Folder.
APPSeCONNECT Users can create new groups by clicking on the Add Group button. The group would be added below the Home folder but would be on the same level as that of the group Home. Users will be able to drag and drop one Workflow from a Folder into another Folder.
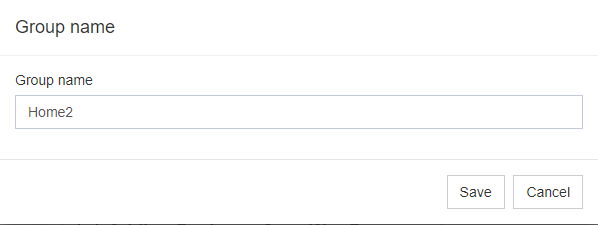
Add Group: Users can create or add group by clicking on the Add group button. On clicking the button,
user gets a window to specify the name of the folder. Now Click SAVE button and the folder gets saved.
Note: User can not specify a name that is already existing. The name should be unique.
(1) Home - This is the default folder available in the Workflow Listing section where the user can view the advanced workflows
available in your organization. Users can drag and drop the workflows from Home folder to any other folder available for your
organisation and vice versa.
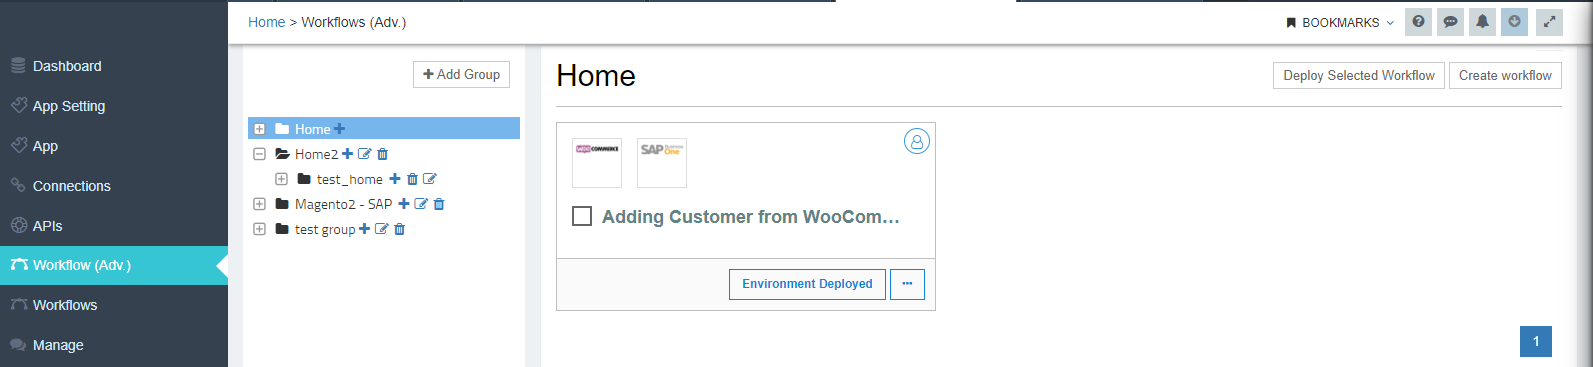
NOTE: Users will not be able to Rename or Delete the Home Folder.
(2) Sub Folders - This is next level view of the folders after Home folder, where the user can drop the advance workflows and can segregate workflows as per the business requirements. Each workflow can be easily dragged and dropped into any child folder and parent folder.
(a) Users will also be able to view the Workflows of the Packages added into their Organization.
(b) Users will be able to drag and drop one Workflow from a Folder into another Folder.
(c) Clicking on a Folder, the User will be able to view the Workflows present inside that Folder.
In the Folder list, for every Folder (Except Home), the options +, Edit & Delete icons will be present in the
advance workflow listing page. Any folders added in an existing folder, will be acting as sub-folder.
(a) Add icon - This icon present beside any folder helps to create a sub/child folder under the parent folder.
(b) Rename icon: This icon present beside any folder helps to rename the folder. For every Folder, the options + , Edit & Delete icons will be present.
(c) Delete icon - This icon present beside any folder helps to delete the folder.
By clicking on the Delete icon, the User will be able to delete the Folder and on deleting a Folder,
all the Workflows present under that Folder (if present) will be moved to the Home Folder.
On the top right side of the advance workflow Listing page, two buttons will be present
-
Deploy Selected WorkflowandCreate Workflow.
On clicking on the Create Workflow button, the user would be navigated to the Workflow Designing & executing page,
where the user can create a new Workflow which will be created under the current Folder.
The following are the characteristics features of a workflow in the Advanced Workflow Listing Page:
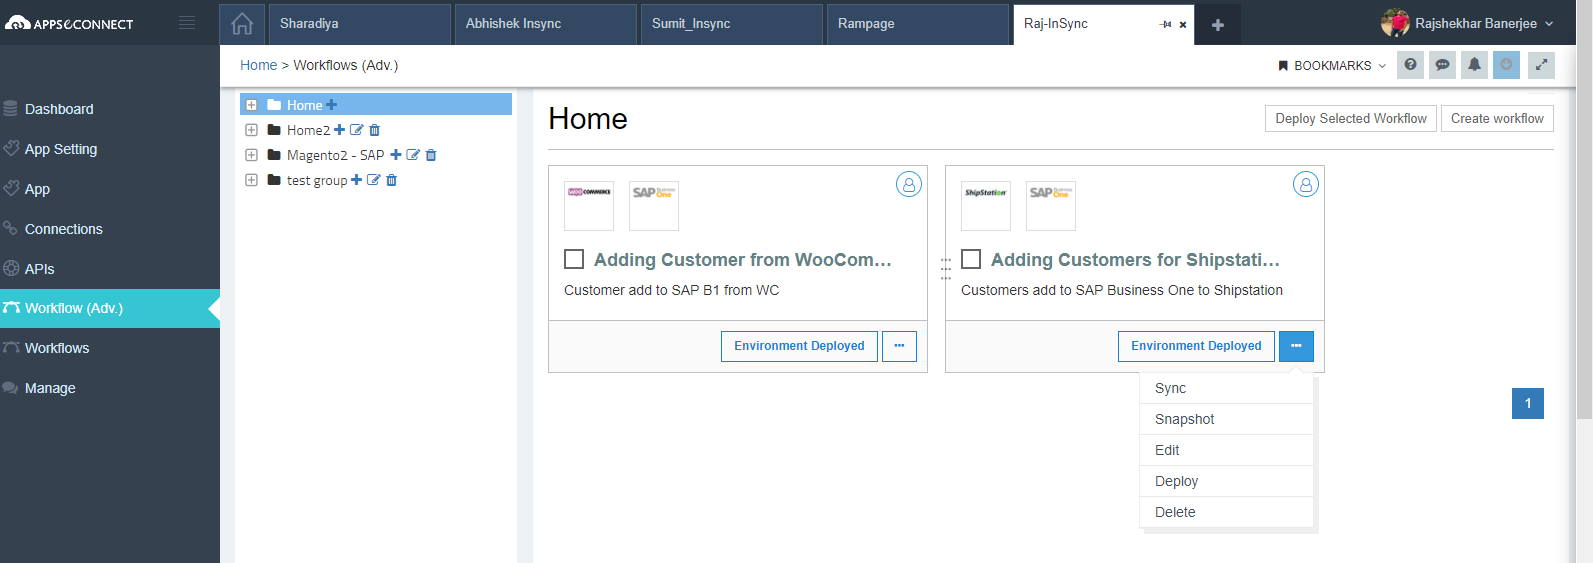
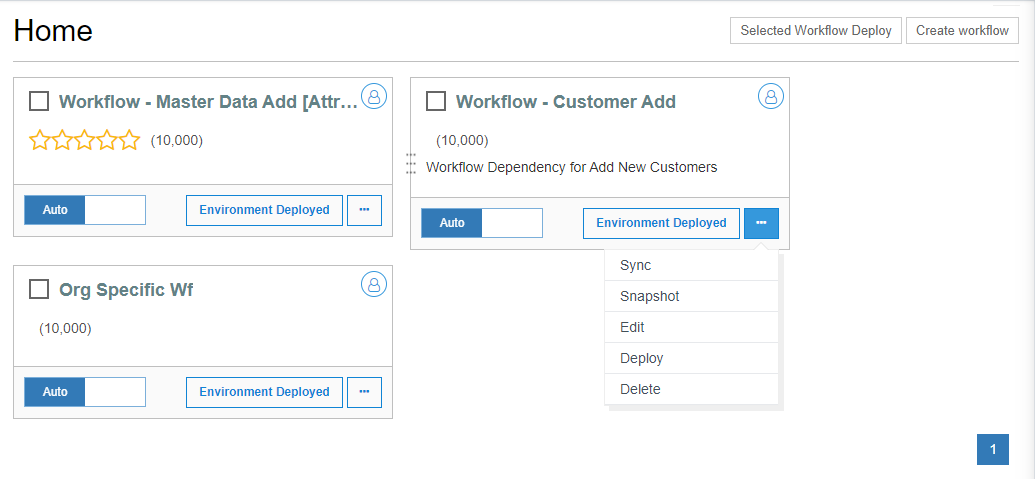
a. Apps used in the workflow would be displayed, for letting the user know about the apps used inside it.
b. Users can enable the checkbox for availing the functionality of deploying multiple workflows together.
c. Beside the checkbox, user would be able to view the workflow name.
d. The Workflow Description would be displayed beneath the workflow name, to let the user understand the purpose of the workflow in details.
e. An icon would be present in the top right corner of the workflow to identify that the Workflow is not a pre-packaged workflow and is created in the organisation
using the Create Workflow feature.
f. Clicking on the Environment Deployed button, users can view the list of the Environments where the Workflow has been deployed.
g. By clicking on the The Horizontal dots (...) button, user would get the following options.
- Sync - User can execute the workflow by clicking on the Sync button.
- Snapshot - User can view Snapshot details of the workflow executed.
- Edit - Clicking on this button, will redirect the user to the Workflow designing and executing page, for workflow editing.
- Deploy - Clicking on this button will compile & configure changes made in the workflow and will deploy those modifications to the environment for the sync process.
- Delete - Clicking on this button will the delete the workflow.

