Deploying Advance Workflow
Updated:
Created/Edited Advanced workflows needs to be deployed to the environment in order to execute the integration process.
Users of APPSeCONNECT, now need not have to update configuration every time for deploying every change made in the workflow.
Clicking on the DEPLOY button will automatically deploy the changes in the environment as well as assign the credential for the applications that is used in the workflow.
Prerequisites to Deploy Advanced Workflow
- Should have valid credentials for logging in to the APPSeCONNECT portal.
- APPS should be chosen from the apps section, for proceeding with the design of advance workflow.
- The designed advance workflow should be saved before deploying it to the environment.
Steps to deploy Advanced Workflow to Environment
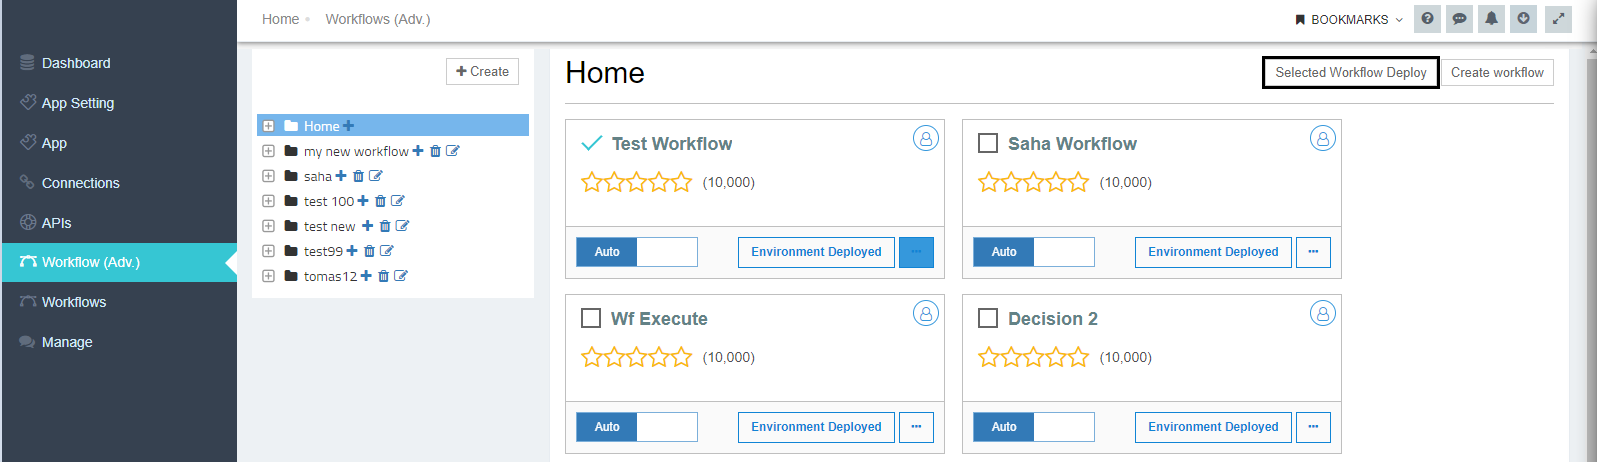
- Login to the APPSeCONNECT portal and navigate to the Advance Workflow module available on the left menu.
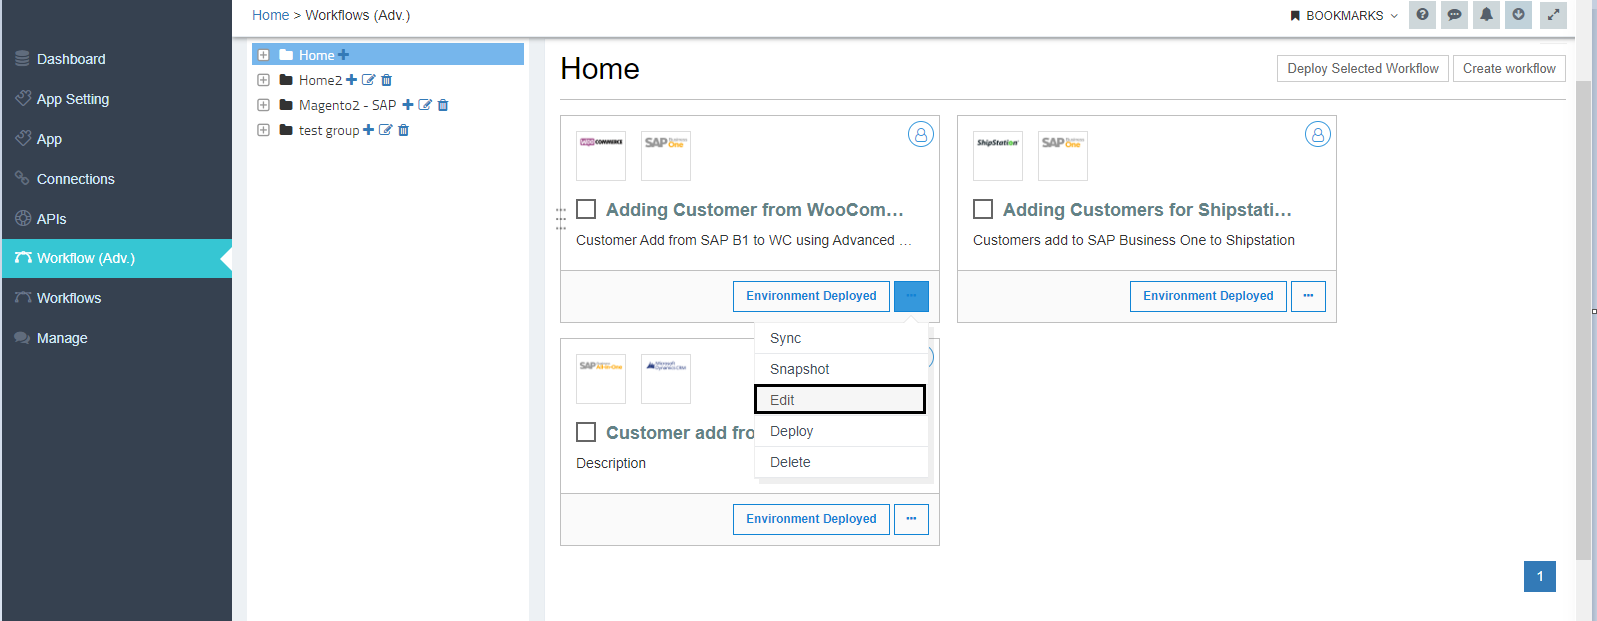
- If the workflow is already designed and was saved, click on the edit button available for the workflow,
which will navigate the user to the Workflow Designing & executing page.
- Click on deploy button in the Workflow Designing & Executing Page.
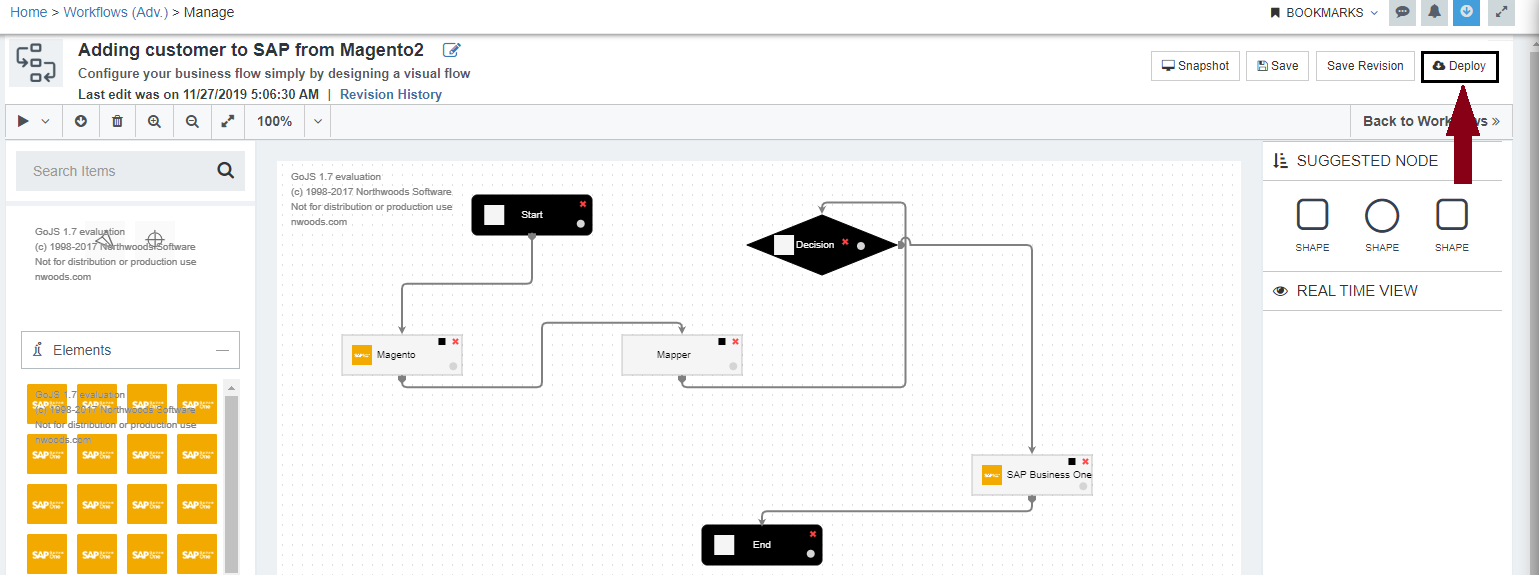
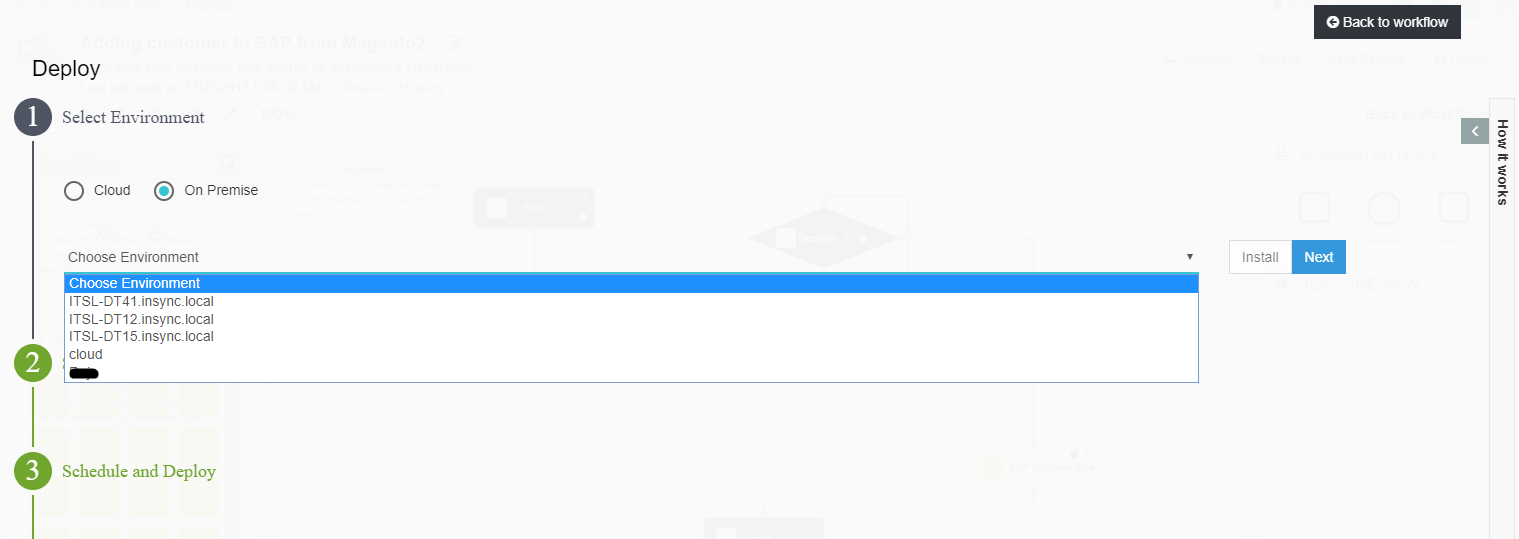
- The Deploy wizard opens on clicking the Deploy button.
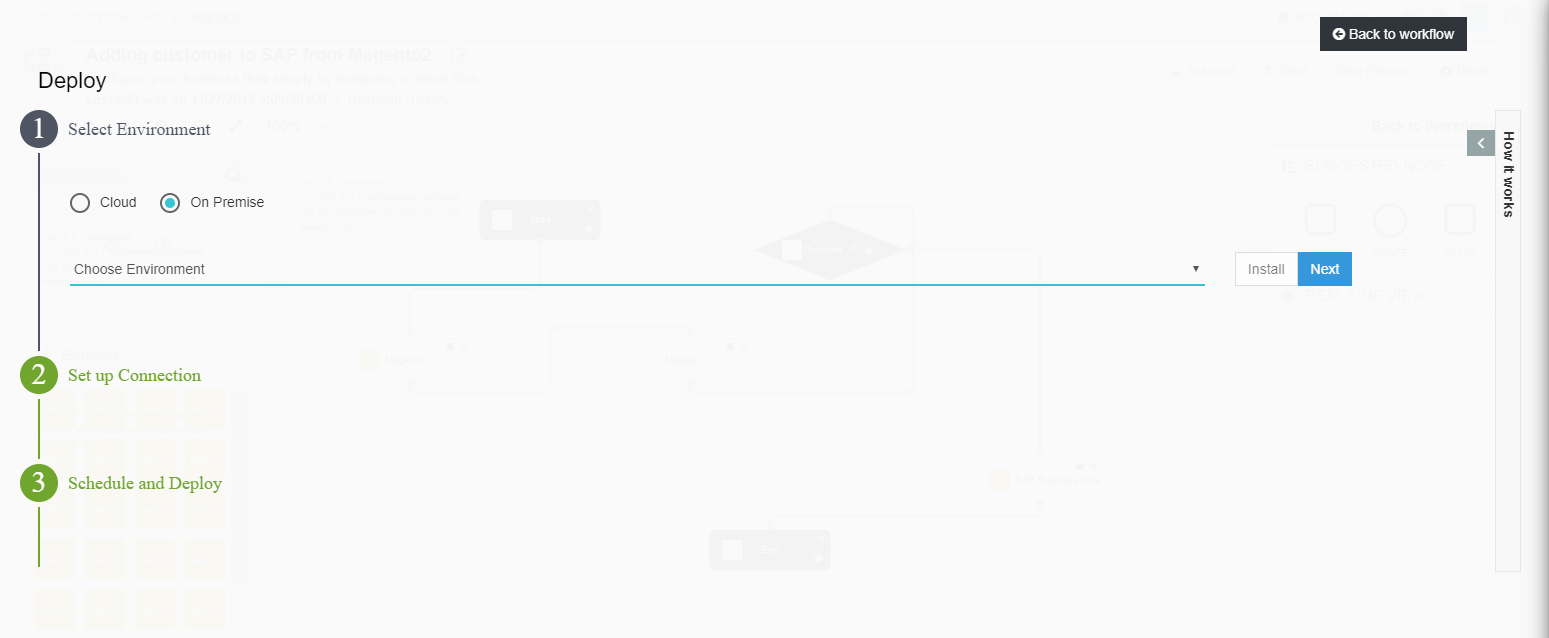
- User needs to select the type of environment (Cloud or On-Premise) by selecting the proper Radio button.
- As per the selected type of environment, user needs to select an environment from the list of environments
in the drop down. Click NEXT button.
For E.g. If the user selects On-Premise, the drop down will contain all the installed environments for your organisation.
- The screen navigates to the Set-up connection section of the Deploy wizard. User needs to select the credential
from the drop down, for the respective application used in the workflow. Click NEXT button.
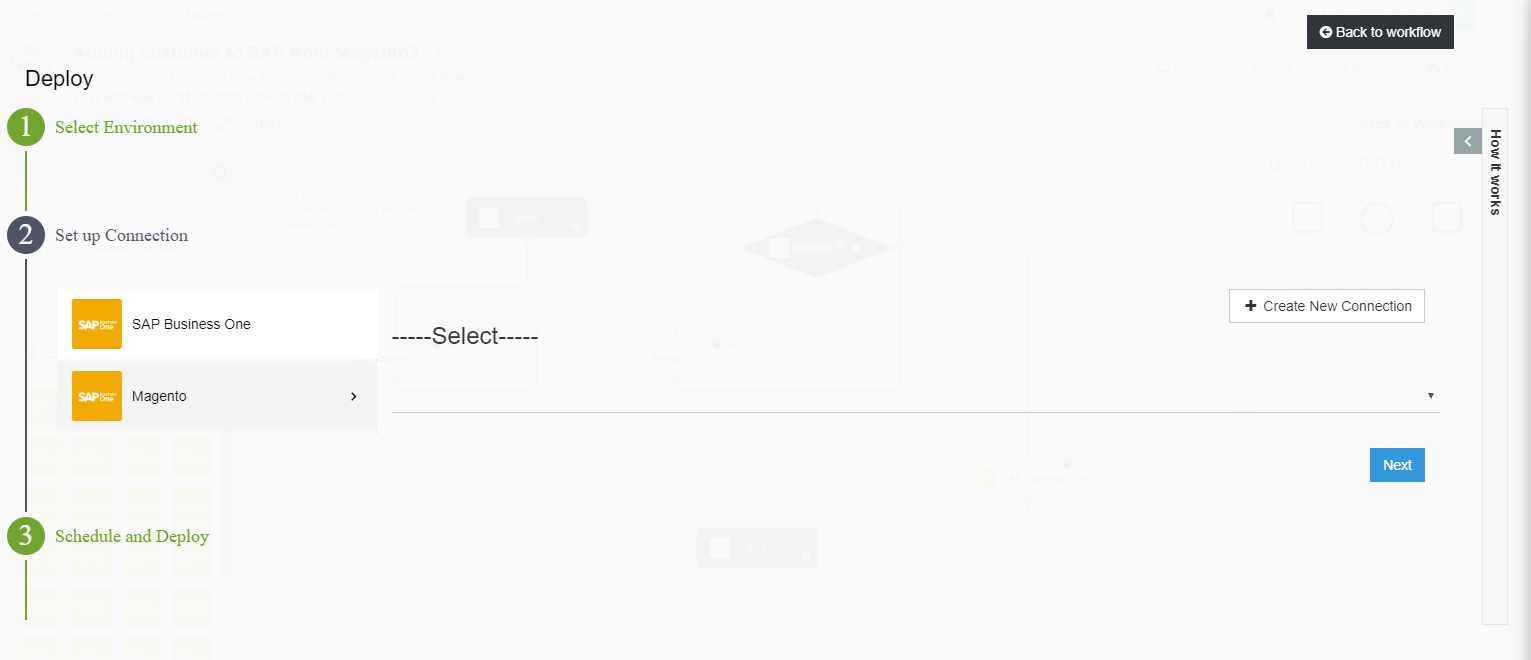
- Clicking on the applications, user gets a Refresh Connection button that refreshes the credentials added in
the OP agent.
 Note: The button appears only when the workflow is being deployed to the OP Agent.
- The screen navigates to the Schedule and Deploy section of the deploy wizard. User can configure the Manual/Auto
execution of the workflow and the Auto retry of the failed items.
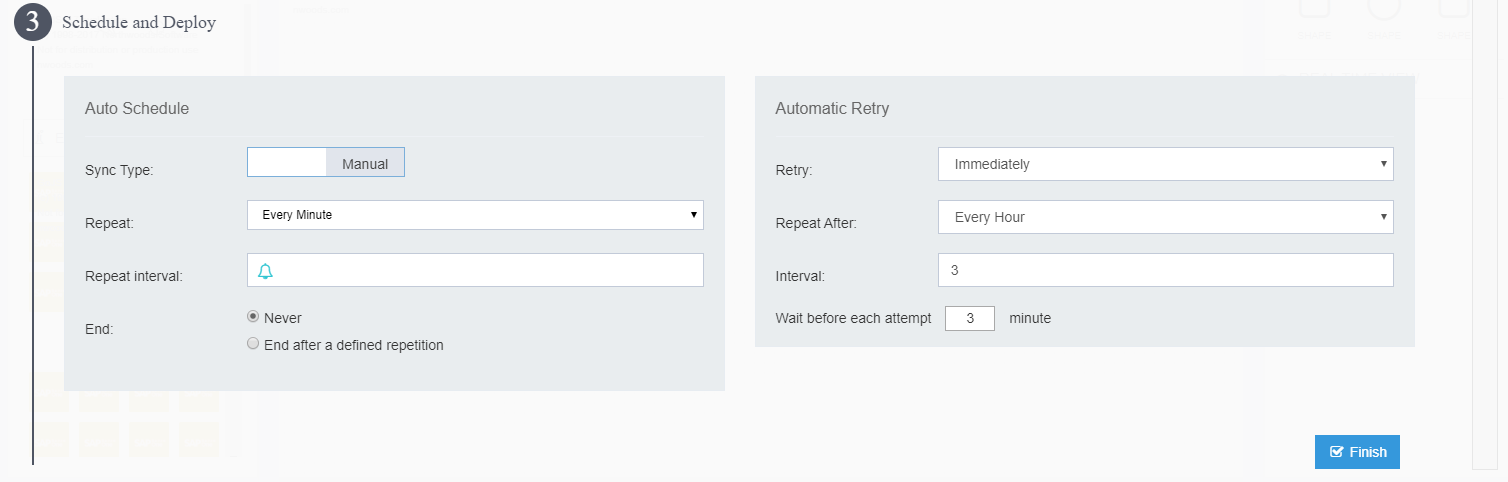
Note: Auto-Retry feature is the autosync of resync and is applicable for the data that have failed during the execution of the sync process. User can configure the Automatic Retry of Advanced workflows accordingly.
After configuring the Schedule and Deploy section, click Finish button. The workflow would be successfully deployed. Navigate to the Environment section in the portal, click on the respective environments, user can view the deployed advanced workflows in the Environment Details Page.
Note:
- Users can deploy workflows from the Advanced Workflow listing page too. The view and the flow will remain the same if deployed from the Adv. Workflow listing page.
- Deploying of workflow has no dependability on revision of the workflow, which means restoring a workflow from revision will not save any deployment history.
- Users can deploy multiple advanced workflows from the listing page, by selecting the checkbox of the workflows and clicking on the Selected Workflow Deploy button, provided the workflows are deployed to one single environment at a time.
- Presently Advanced Workflows will only be deployed on a single environment.
- To deploy multiple advanced workflows to different environments, users need to repeat the steps of deploying multiple workflows again.