
Inventory Update
Updated:
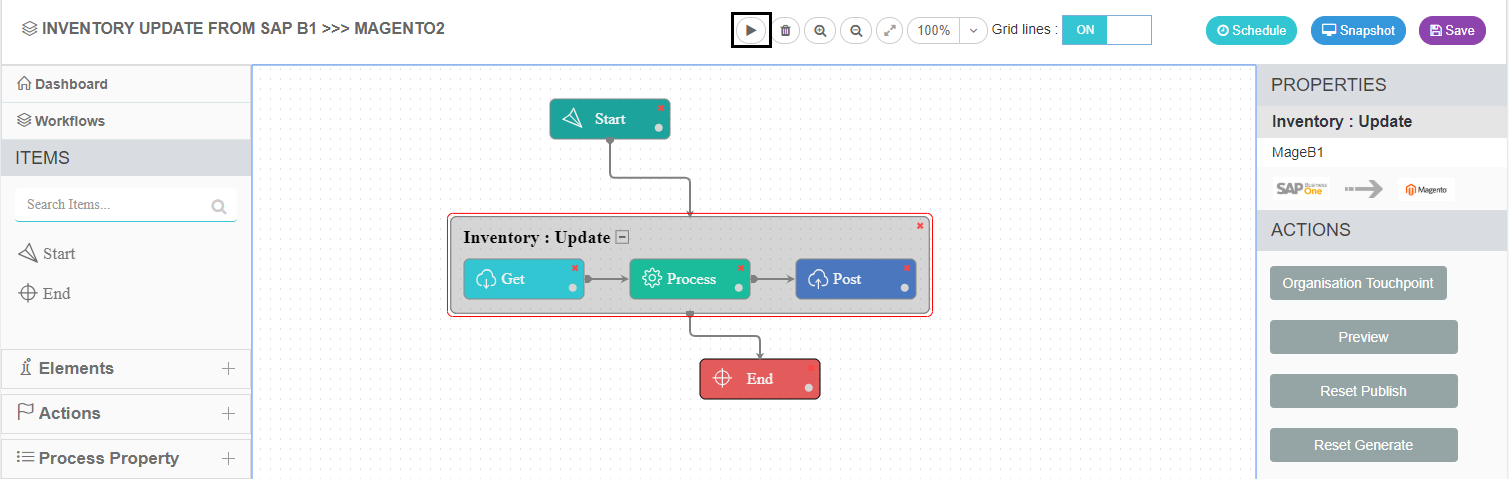
Executing the Process is a vital part when integrating any applications. This Document will let the users to understand how the integration process can be executed through workflow for
adding Updating Inventory from SAP Business One to Magento2.
Note: Before proceeding with any integration configuration, users are advised to view the pre-requites of the integration process.
Brief Description
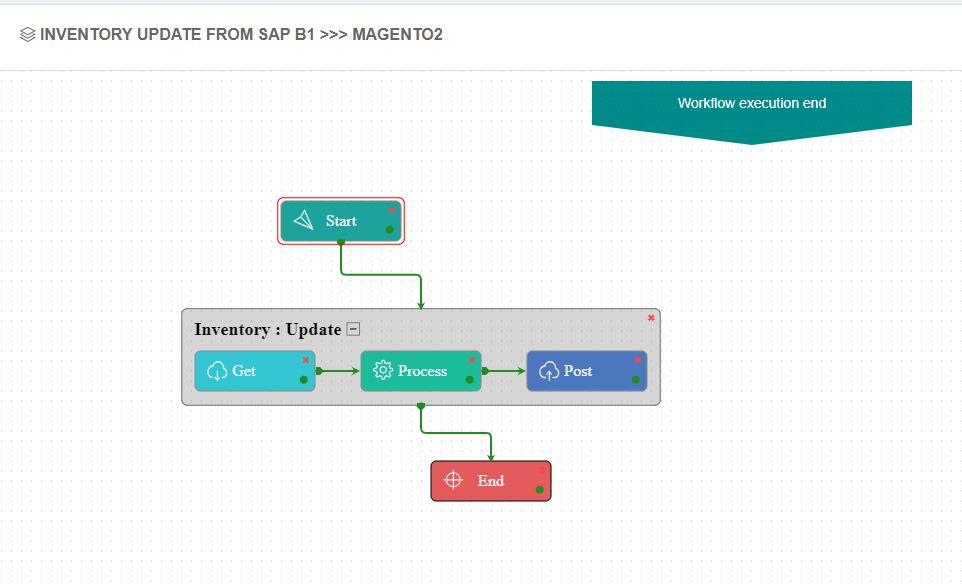
In this case, the quantity of the products is added by updating the inventory. Therefore, the above workflow is designed to Update the Inventory of the products added in SAP Business One and will posted to Magento2.
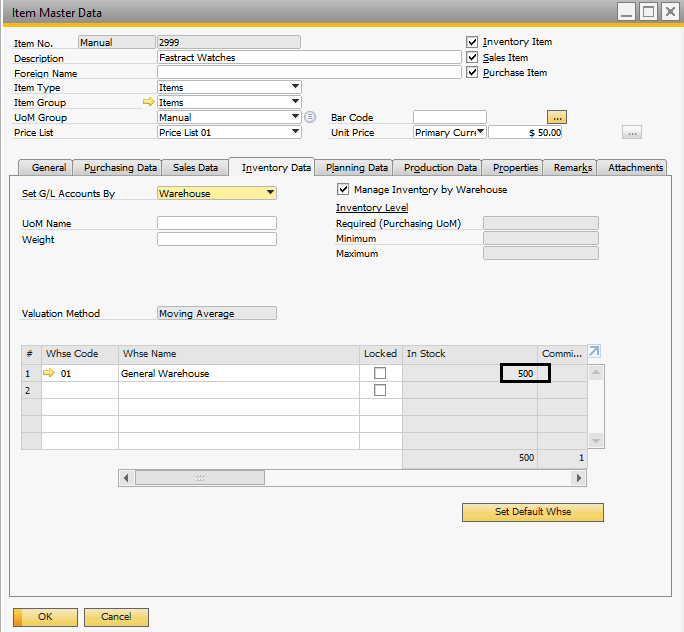
- For Updating the Inventory in SAP Business One client an item needs to be created first. After creating the item,
Navigate to Modules > Inventory > Inventory Transactions > Goods Receipt. - In the Good Receipt dialogue box, click on the Item No. field and select the item whose inventory needs to update.
- Click on the Quantity field for the selected item and enter the quantity that needs to be updated. Click on the Add Button after doing so.
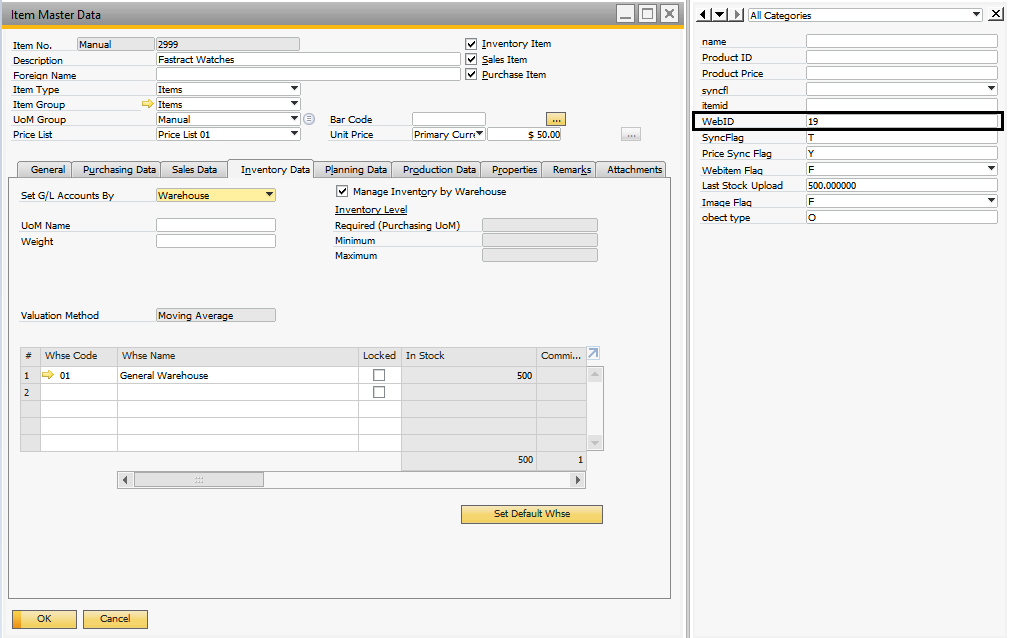
- After updating the Inventory, the user can check the InStock status of the product from the Item Master Data Module.
Note: Click on the links for knowing the agent validation process in Magento2 and SAP Business One.
Lookup Mapping
Not Required
Attribute Mapping/Transformation
Following the Provided Mapping, the user can sync the Simple Product Add from SAP Business One to Magento2. To know more, see Mapping & Transformation Techniques.
Mapping for the Inventory Update
- Mapping for the ComplexObjectCollection stockItem
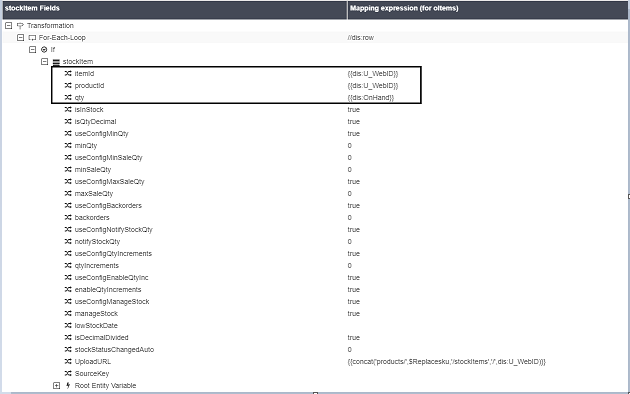
a. Itemid – This is mapped with the WebID of the product present in SAP Business One.
b. productid - This is also mapped with the WebID of the product present in SAP Business One.
c. qty – This attribute is mapped with the quantity OnHand present in the SAP Business One.
d. UploadURL – This defines the route to the Magento2.
Mapping of the Root Variable
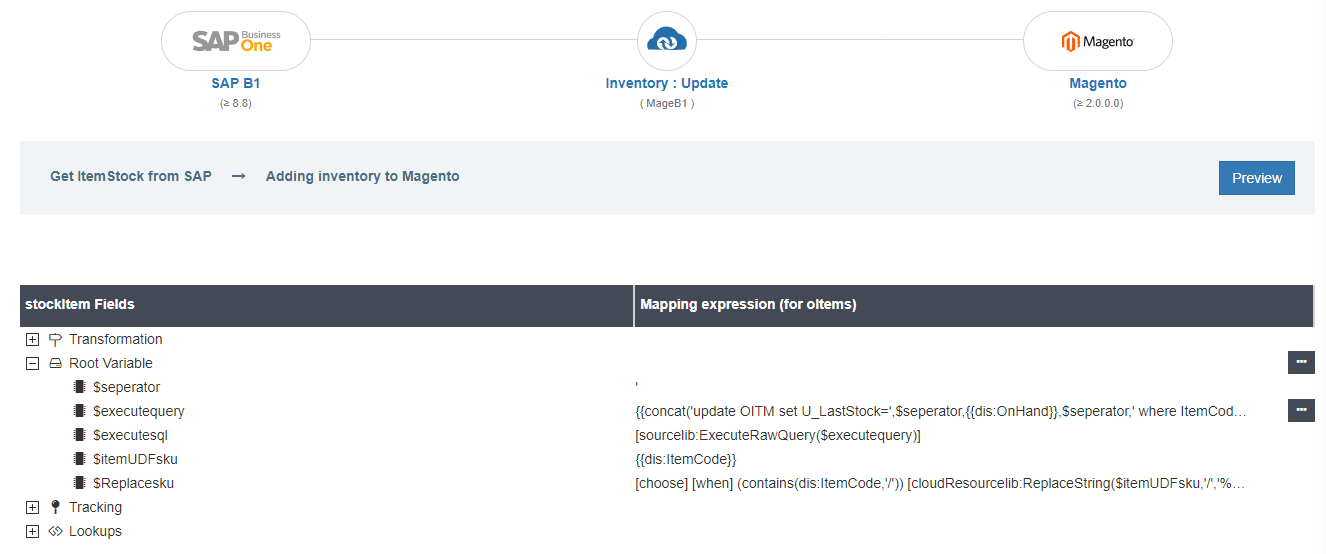
a. $seperator: This variable is a pre-packaged variable mapped with a single quote.
b. $executequery: This variable is mapped to execute the given query in SAP Business One database.
c. $executesql: This is also a pre-packaged variable which is mapped to call the variable $executequery.
d. $itemUDFsku: This is a string type variable created to map with the itemCode present in SAP Business One.
e. $Replacesku: This variable is mapped to maintain the SKU in database.
Note: After the mapping changesReset Generate and Reset Publish the Touchpoint. After Republishing,
Click on the Update Configuration button in the Agent.
Executing the Workflow Integration
Note: Before integrating with Magento2 and SAP Business One, make sure all the Master Data Touchpoints are synced.
- Once the workflow is designed, Update the Configuration in agent for deploying the workflow in the agent.
- Click Run button in the workflow panel in the cloud portal.
- Once the Execution is finished, click
Resync Buttonin the agent. The Resync Panel shows the Success Result in the agent.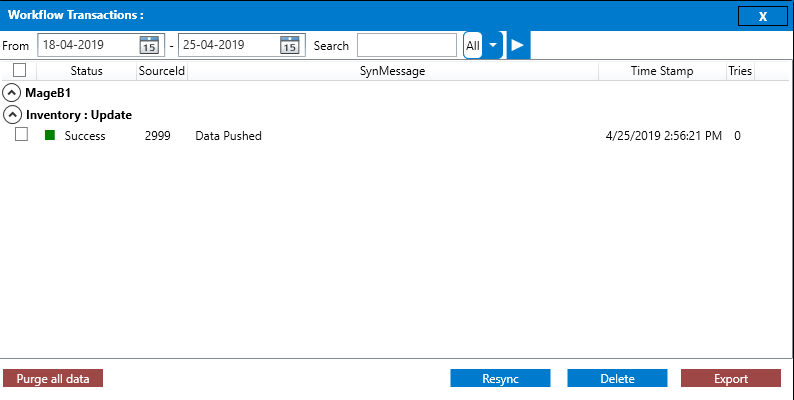
- The User can also trigger or deploy the workflow from the cloud Portal by clicking on the run button.
Integration Data Survey
The user can survey the data by viewing the Processed Snapshot from the node level of the workflow.
 This Snapshot View displays the successful execution of the workflow. The Inventory with the product source id 2999 is successfully synced in Magento2.
Post-Conditions
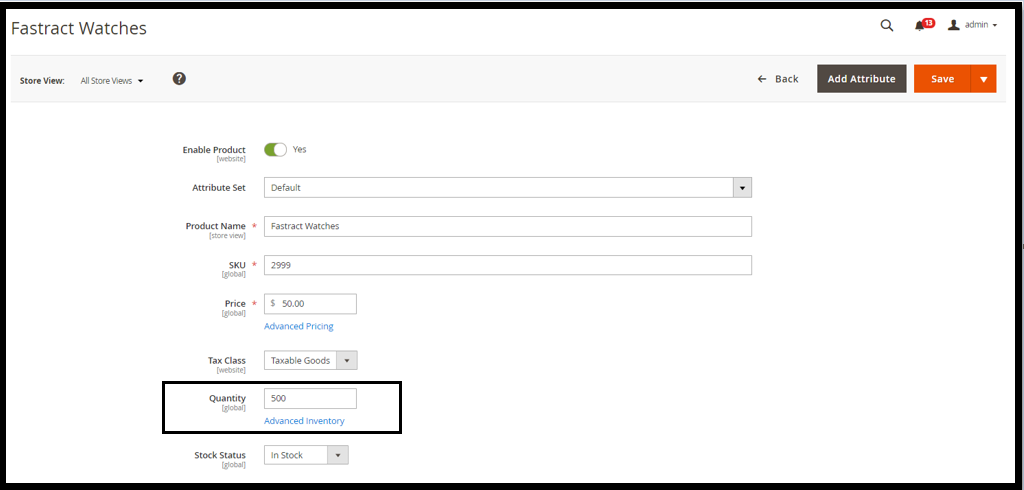
The user can view the Quantity of the product synced in the Magento2 by navigating to Catalog ->Products.
Frequency of Use
The user can execute the Integration through workflow as and when required.
Troubleshooting
a. Error: Details:
{“message”:“Request does not match any route”.}
- For troubleshooting this error, Navigate to the transform section in the portal.
- The mapping for the UploadURL needs to be altered. Read the Attribute Mapping/Transformation portion of this document to know about the mapping of the UploadURL.
- Also, verify that the U_WebID of the Product is present in the UDF that is created in SAP Business One Client.
- To view the U_WebID of the Product, Navigate to Modules -> Inventory -> Item Master Data -> Choose the Product -> CTRL + Shift + U.
Doing this, the user can successfully integrate this workflow.
b. Log Bucket shows Source Application Returned False even when applications adapters are properly validated.
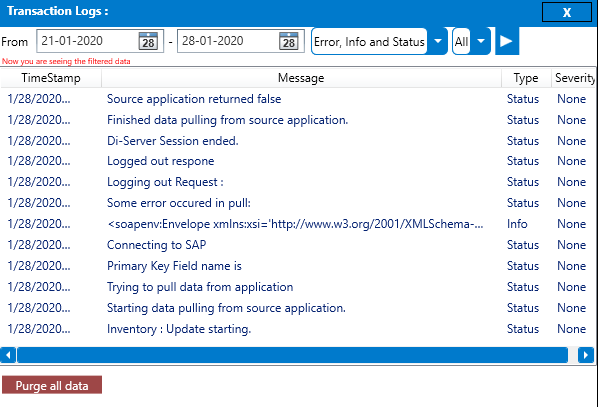
Solution: Source Application Returned false may not be the error, only for adapter validation. Users also needs to ensure that the action filter provided is correct.
As SAP Business One follows a Query based filter, Users are advised to run the query for action filter in the database first for ensuring that the query fetching the required data.

