Creating proxy endpoint
Updated:
Proxies are the full REST (Representational State Transfer) services which allows to create proxy
over a set of existing data source. As applications in real world are diverse in nature, it is the
ask of every consumers to have a uniform API layer in place which will allow the external consumers
to have same kind of API system in place in spite of having varied range of Application APIs. As the name
proxy suggests, it is just a wrapper over an existing data source or APIs, thereby providing time
tested layers to handle Authentication, Policies and also Documentation. In this article
we will see how can we develop a proxy API over a set of existing service and execute the same through
APPSeCONNECT Portal.
Prerequisites
As per requirement, before you start creating a new API Proxy, you need to make sure you meet all the prerequisites. Here are some of them :
- Getting a new account for APPSeCONNECT
- Choosing and Configuring Backend APPs
- Connecting to your data sources
- Configuring Environments, installing / deploying Agent
- Feeding Credentials for applications and data sources
- Configuring/Importing Schemas and Actions
After all these steps are done, make sure the environment is kept running and credentials are properly updated.
Steps to create Proxy Api
To start creating a Proxy API, login to APPSeCONNECT and move to API Management section. You will see sections depicting Proxy, select the section to navigate to it.
- Click on
Add Newbutton to create a new API. -
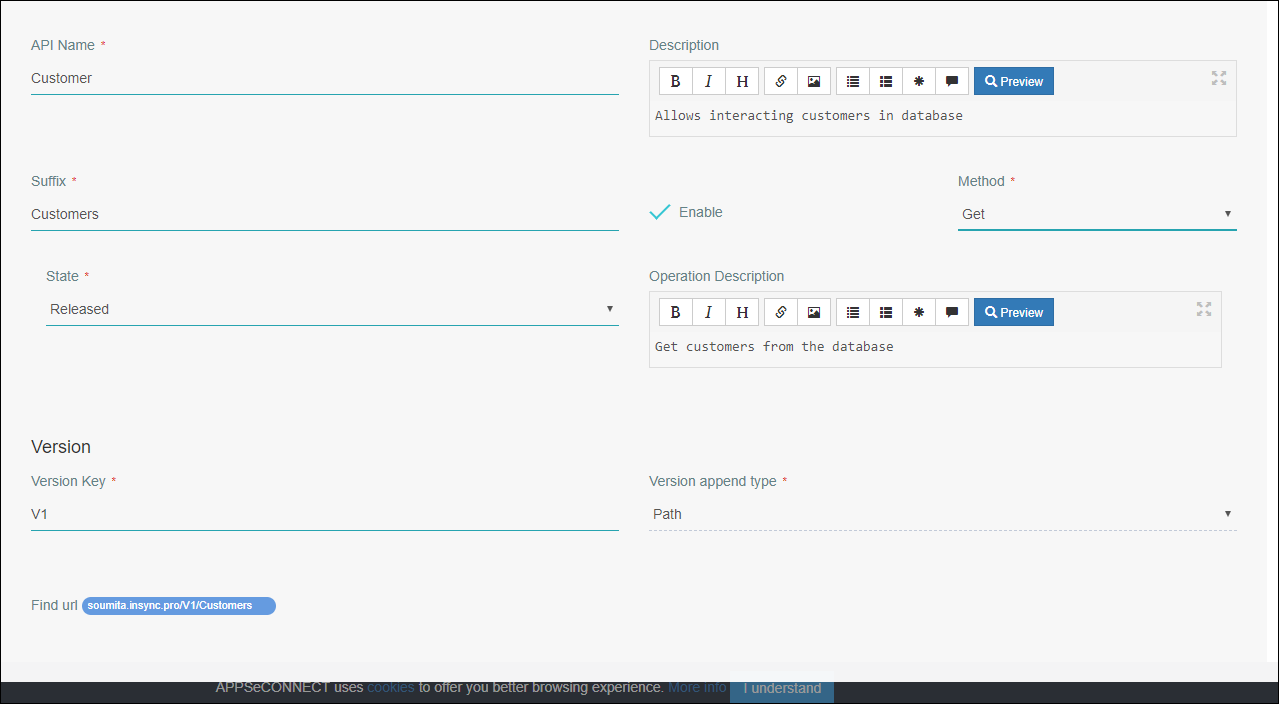
Put basic information, such as
API name,Description,URL Suffix,HTTP methodetc. These details are important to create the face of the API.- API Name - Enter the API Name
- Suffix - This signify the actual API Endpoint that needs to be specified. E.g: Filter, Delete, Fetch.
- Method - This signify the API Operations like GET, PUT, POST, DELETE.
- State - This signify the API state weather it is released, obsolete or in WIP. By default, Released is set in state, you can choose per business requirement.
- Version - This signify the API Version Number
- Version Append Type - This is set as ‘Path’
- The Frontend of the API also requires you to mention Versioning of the API such that the initial version
of the API can be considered. The API version is important as maintainance of API is a challenge, and if you do
not specify the version element in the API, you will face lot of challenges in future.
- Once all the data is provided on the screen, move to the next screen. The next screen lets the user
to specify policies which will be executed before the execution of Backend Action.
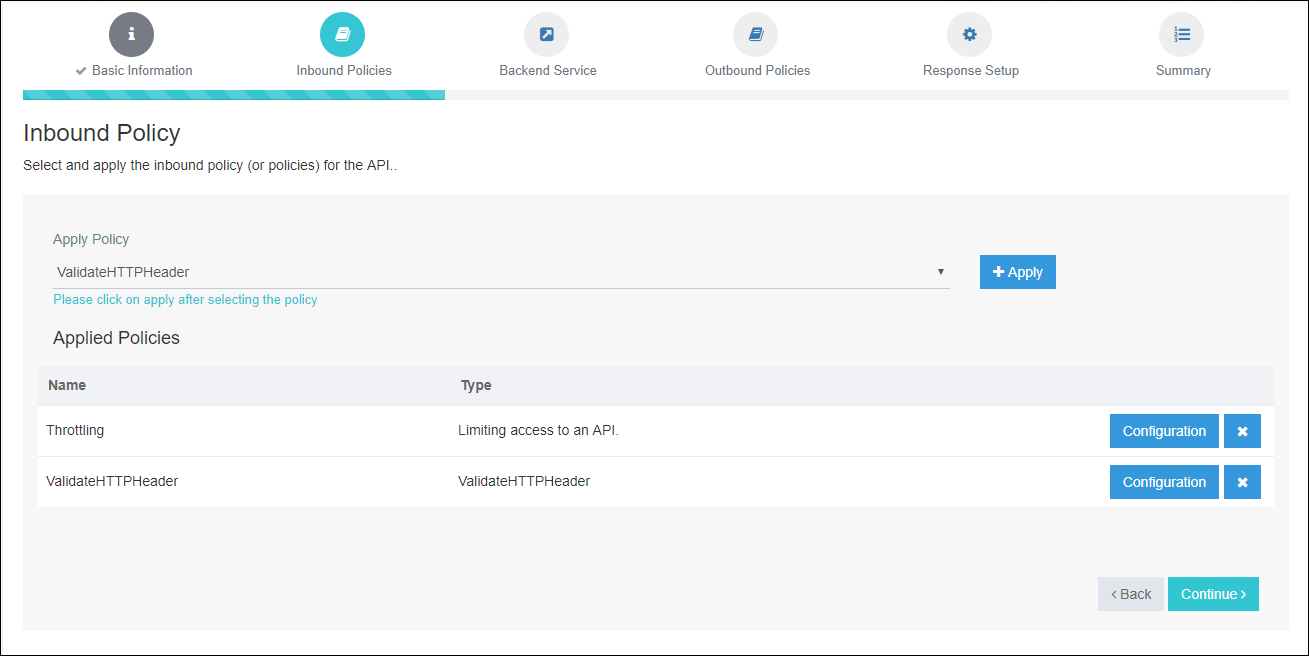
Protip In the figure above, you can see, you can add more and more policies from the screen to be applied to an API. Each of the policies applied here needs to be cofigured with specific data. Once all the policies are configured correctly, you can continue the wizard. For Policy Configuration, Click here.
- The next screen is where you specify the backend. This section is very important because this section
provides the actual data source for that particular API.
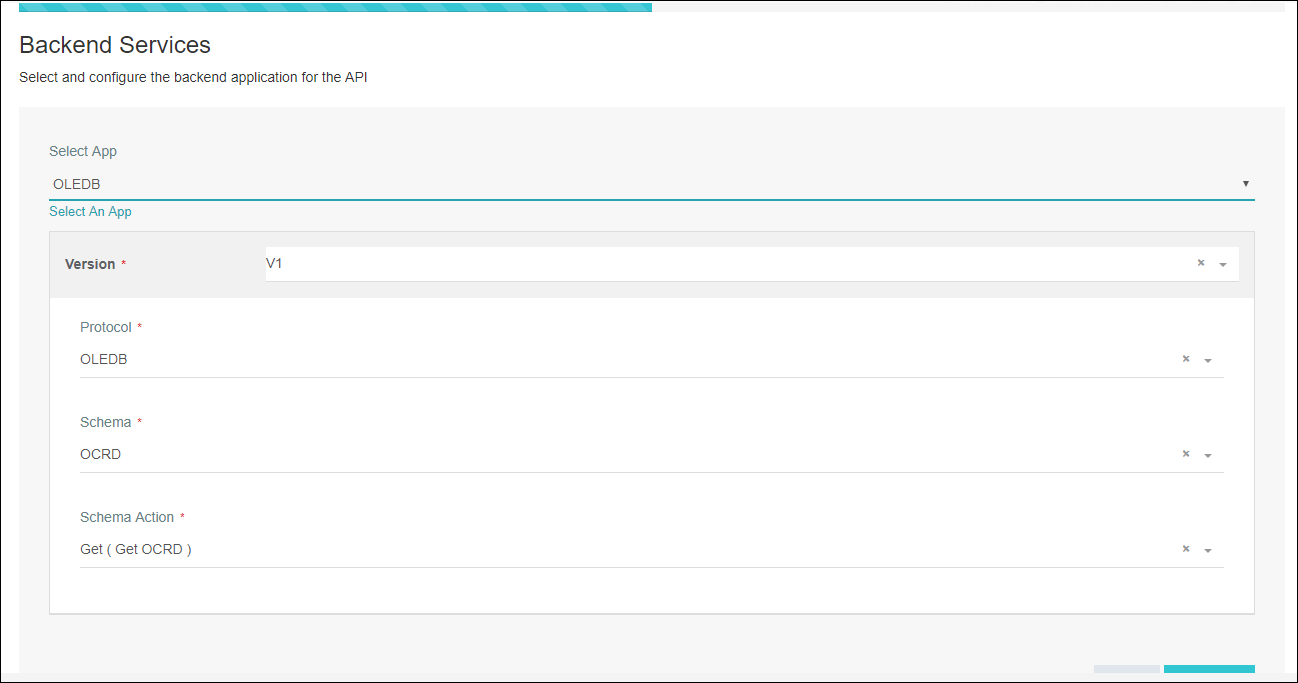
- The backend needs to be configured correctly by specifying the Application, Schema, and Action. Select
Schema Actionfrom the drop down list. Click here to know more - The outbound policies are those which are applied after the backend is executed. Here also similar to the Inbound policies, you are allowed to choose as many policies from the list as you want and configure each of them to continue to the next screen.
- The next screen specifies the Response setup of the API. Here you are allowed to specify what response code the API
should return when there is a failure in execution or success in execution. You can also specify the response message
if you are not happy with our default messaging.
- HTTP Status Codes are the standard response codes that are provided by the internet server when a website or an API is called. These Codes helps in identifying the reason for the failure when called.
HTTP Response Codes present in AEC are:
200 - OK
201- Created
302- Moved Temporarily
207- Multi Status
301- Moved Temporarily
203- Non-Authoritative Information.
300- Multiple Choices
204- No-Content
206- Partial Content
102- Processing
205- Reset Content
202- Accepted
- By Default the user has 1 options each for Success and Failure status and can select the response codes
from the drop-down option depending upon the Response.
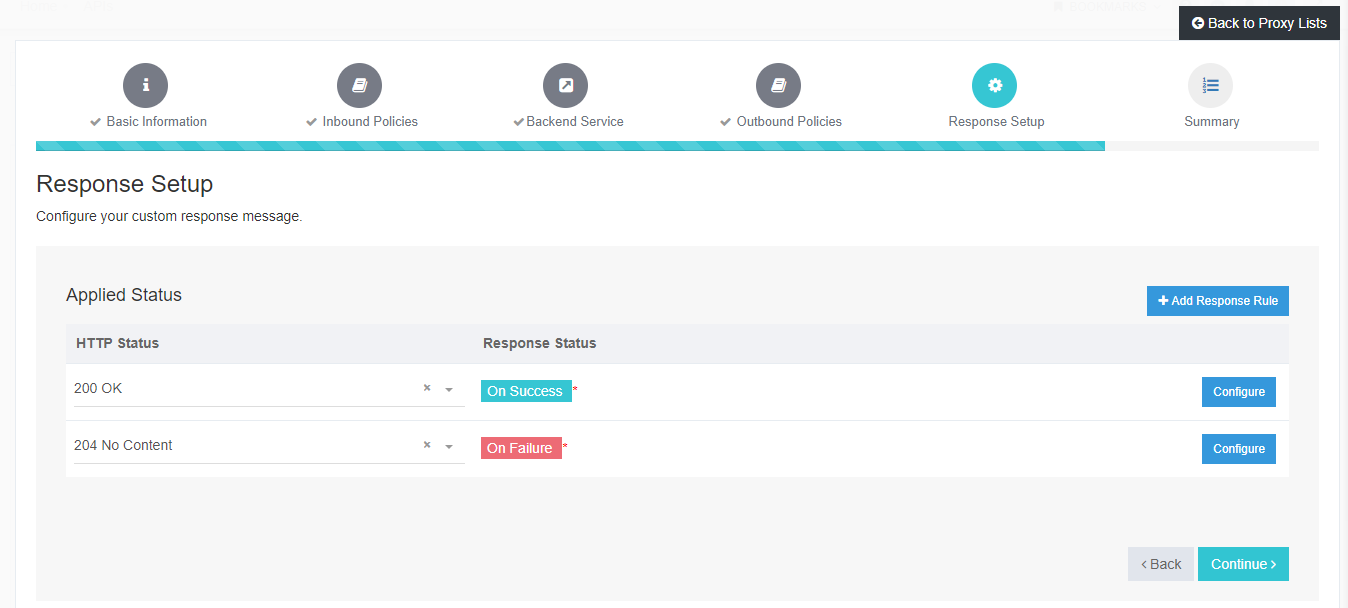
- The user can also add Custom Responses from the
ADD RESPONSE RULEoption.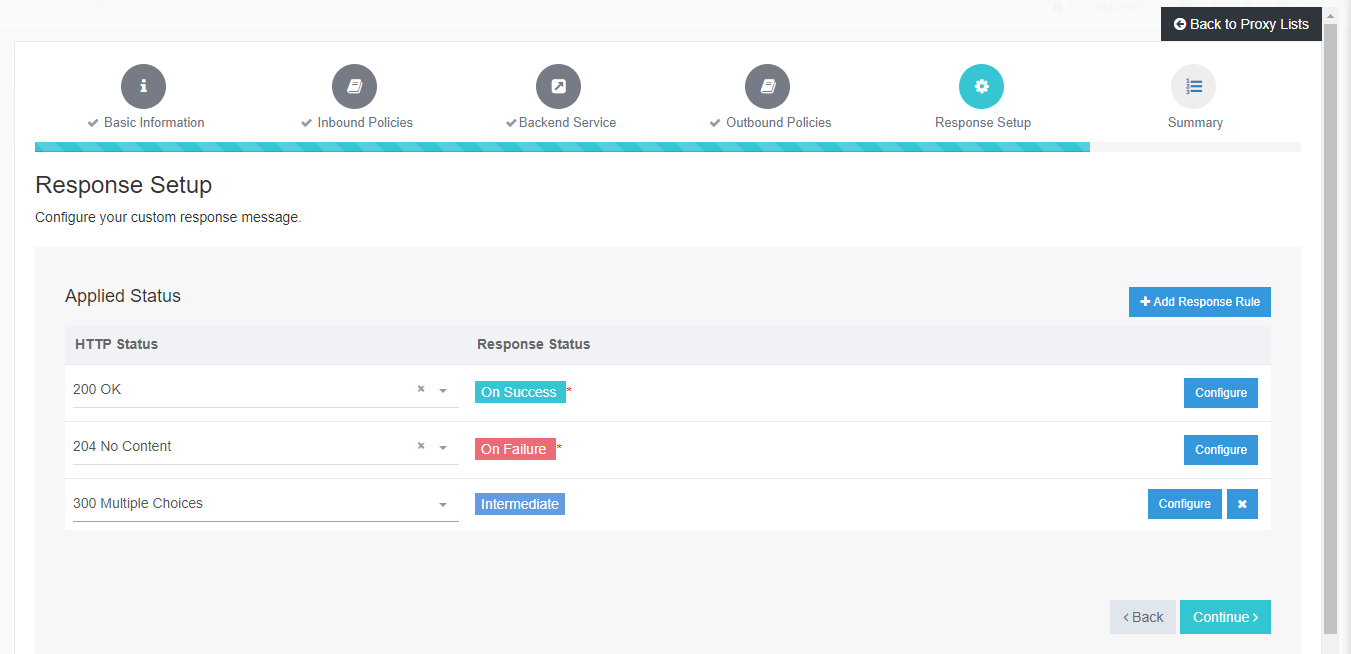
- The Response statuses can also be changed or edited by clicking on the Configure options. The Configure window is displayed below.

- Each of the APIs created will show the URL and Http Method which needs to be used to execute it from the listing screen.
Note: For simplicity, APPSeCONNECT Requires the API provider to specify a default version mandatorily
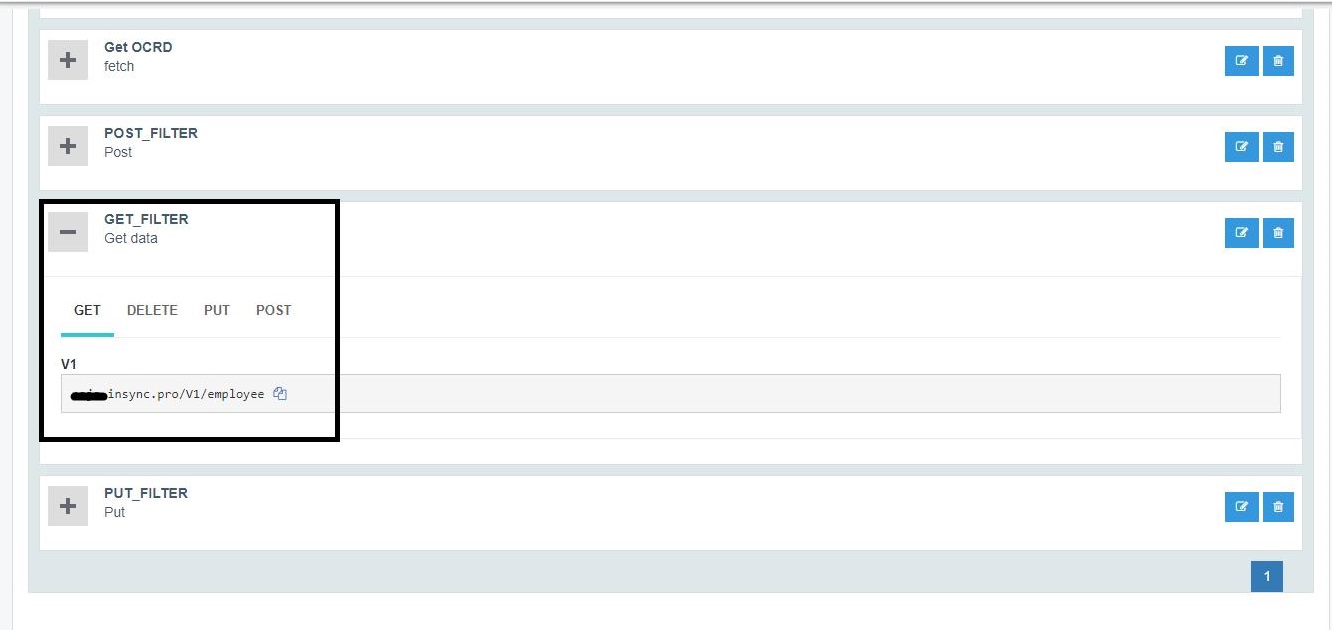
Note: For a Particular Proxy endpoint, users can have a multiple ACTIONS like `GET, PUT, POST, DELETE
Steps to edit your proxy endpoint
The Edit screen of proxy provides you a tree view which lets you edit individual section of the API, adding new sections, investigate policies or execute the documentation.
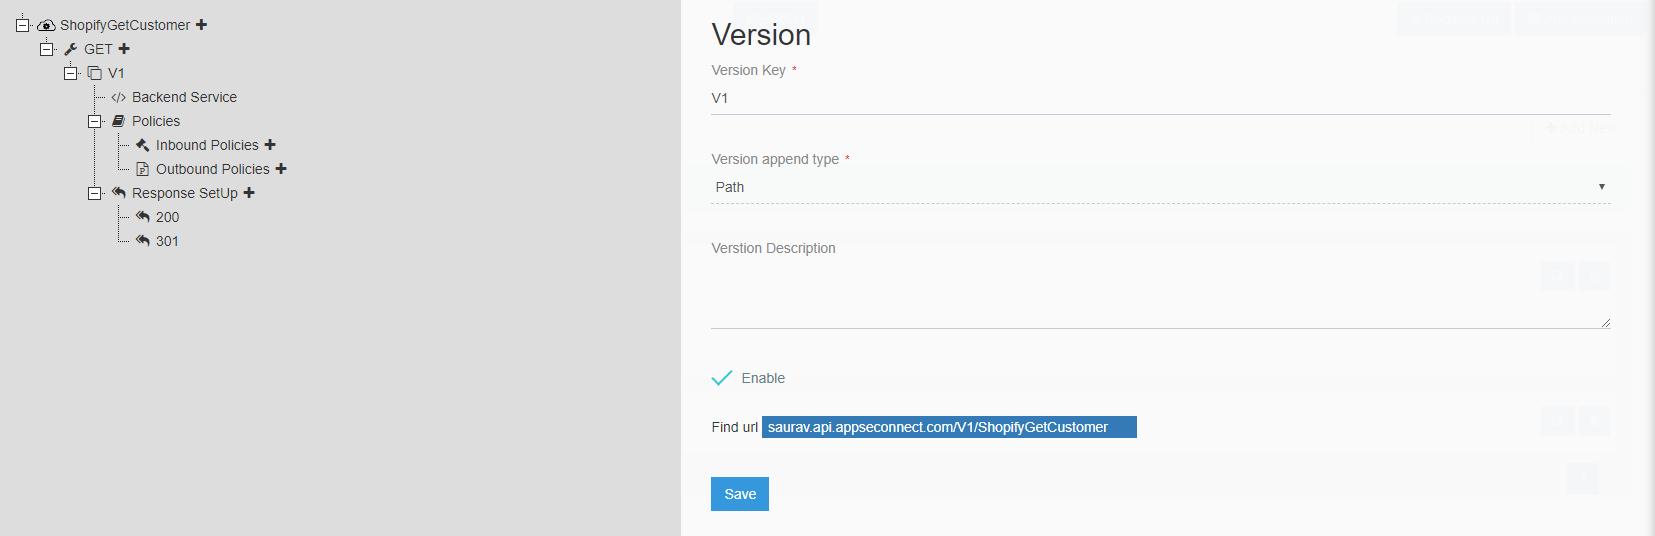
The above screen provides information of a particular API in individual nodes. You can add new methods to an API, change versions, publish new version or add credential to the backend.
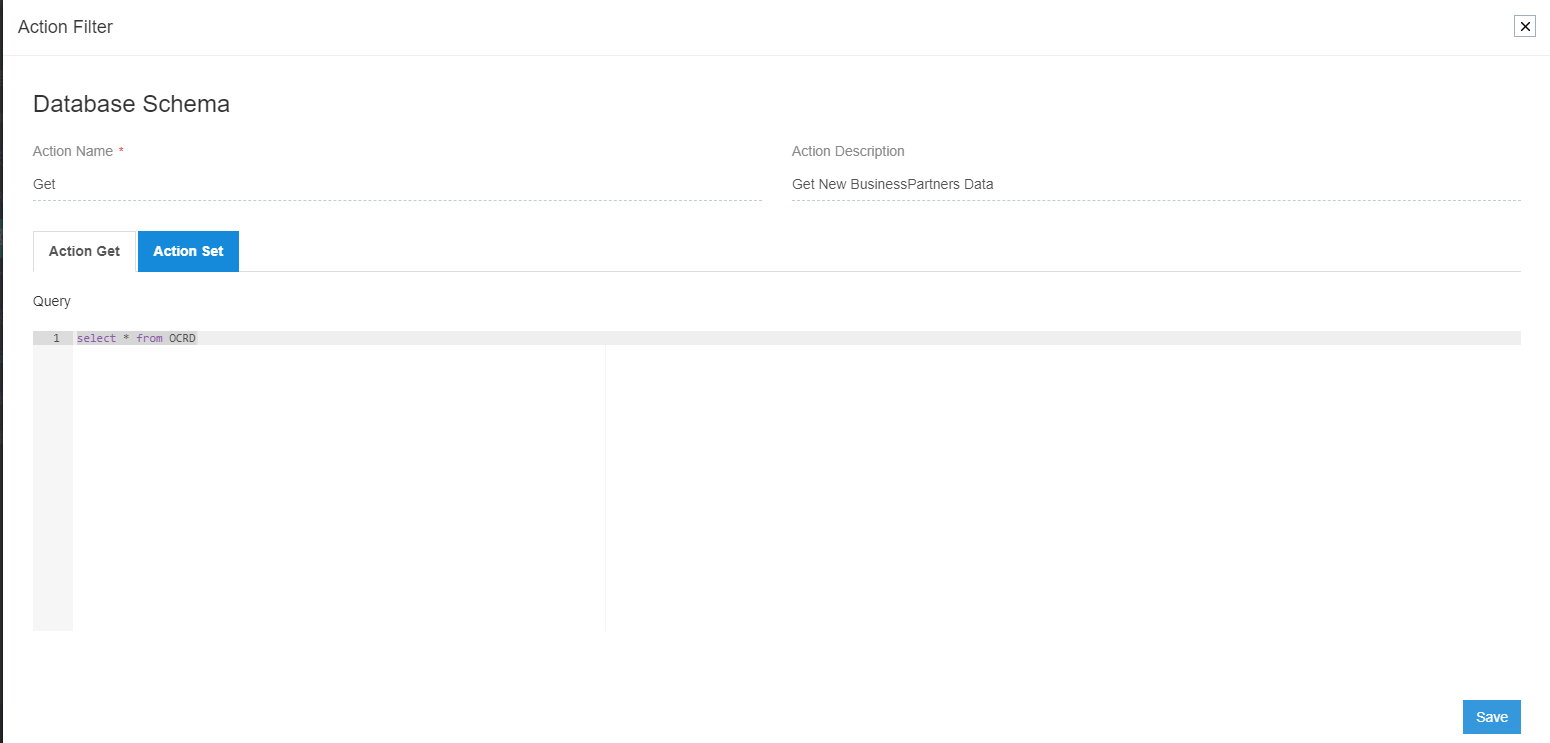
Editing Action filter in API
Schema Actions can now be created and edited in the API Level by editing the API Proxy. This feature can be accessed in the Backend Node in the API Proxy.
Steps to do the same
- In the API Proxy, click on the edit option for any proxy created.
- Expand the nodes until Backend Services.
- Click on the edit symbol for editing the Schema Action.
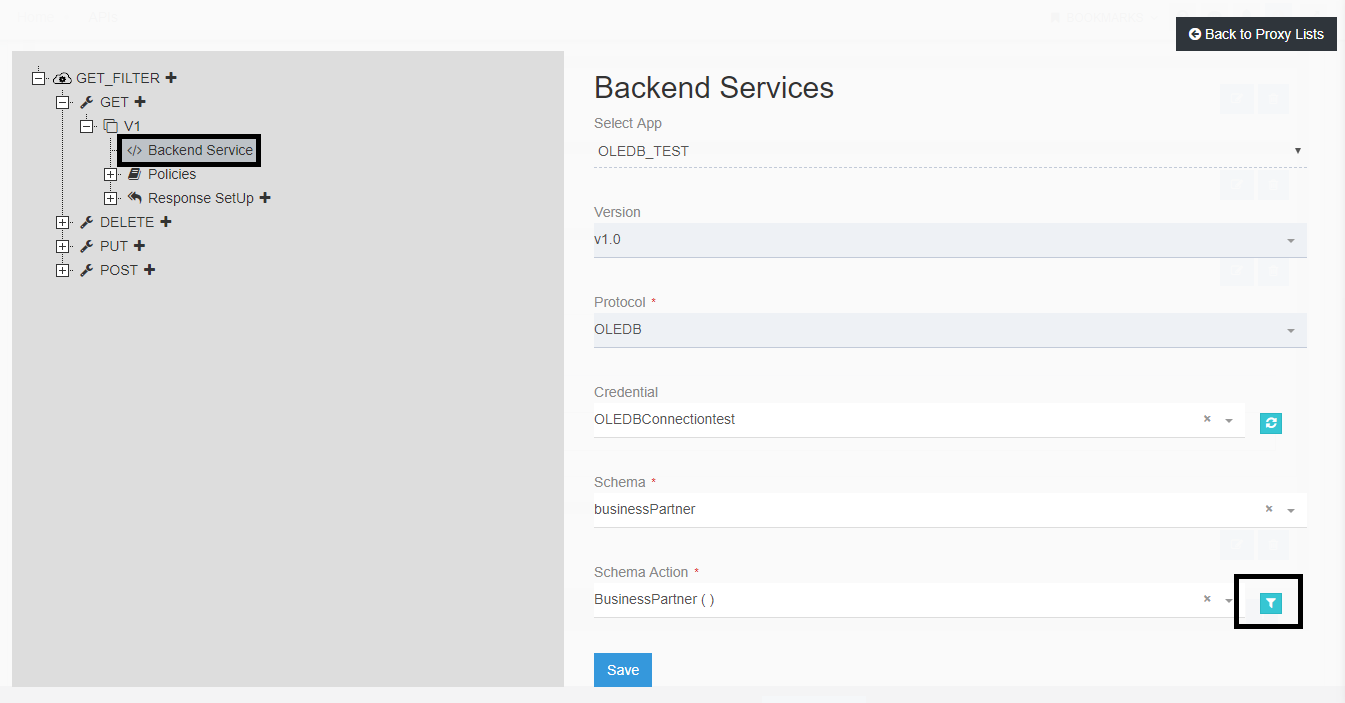
- Mention the Action Name, Description and the Query and click on SAVE.