
Creating Realtime API using Webhook
Updated:
Webhooks are custom callbacks from an application which is generated by the caller and data is pushed to all of the subscribers.Webooks are based on Publisher-Subscriber model, where the publisher will publish something and subscribers thats are only registered for the publisher will listen to it.
A Webhook is simply an event notification where the sender will send real time data
typically via HTTP POST to other applications which have registered for that event.
Data that are transferred are typically in XML or in JSON or in Form-Encoded format
which is to be decided by the provider.
With APPSeCONECT, you can create webhook endpoint which are basically handlers for a WebHook that can be used to fetch real time data from an application that has support of webhook and that data can then be synced to other apps via APPSeCONNECT Integration Platform in real time using real-time API.
Follow these steps to create a Webhook API with APPSeCONECT
Prerequisites
As per requirement, before you start creating a new API Proxy, you need to make sure you meet all the prerequisites. Here are some of them:
- Getting a new account for APPSeCONNECT
- Configuring your Environment
- Choosing Apps or Adding Apps
- Importing schemas and actions of an Application
- Feeding Credentials for applications and data sources
- Creating a Connection
- Registering URL for API
- User Authenticate
After all these steps are done, make sure the environment is kept running and credentials are properly updated.
Note: Registering an URL is must when syncing data through Realtime Touchpoints (Webhook APIs). Real-Time touchpoints would be executed only for the applications that supports Webhooks.
Few known examples of applications that supports Webhooks are:
- Shopify
- 3DCart
- WooCommerce
- Zoho CRM
- BigCommerce
- Salesforce
- Prestashop
Before, integrating with Realtime Webhooks, user needs to know whether the used application supports Webhooks.
Steps to Create Webhook Endpoint- Real Time API
For creating a Webhook Realtime API, login to APPSeCONNECT portal and follow the steps given below:
- Navigate to Manage > API section of the APPSeCONNECT Portal available on the left side menu. Inside APIManagementSection you can see Webhooks
and Proxy.
By default Webhook section will be shown. You can see all your connections listed here.
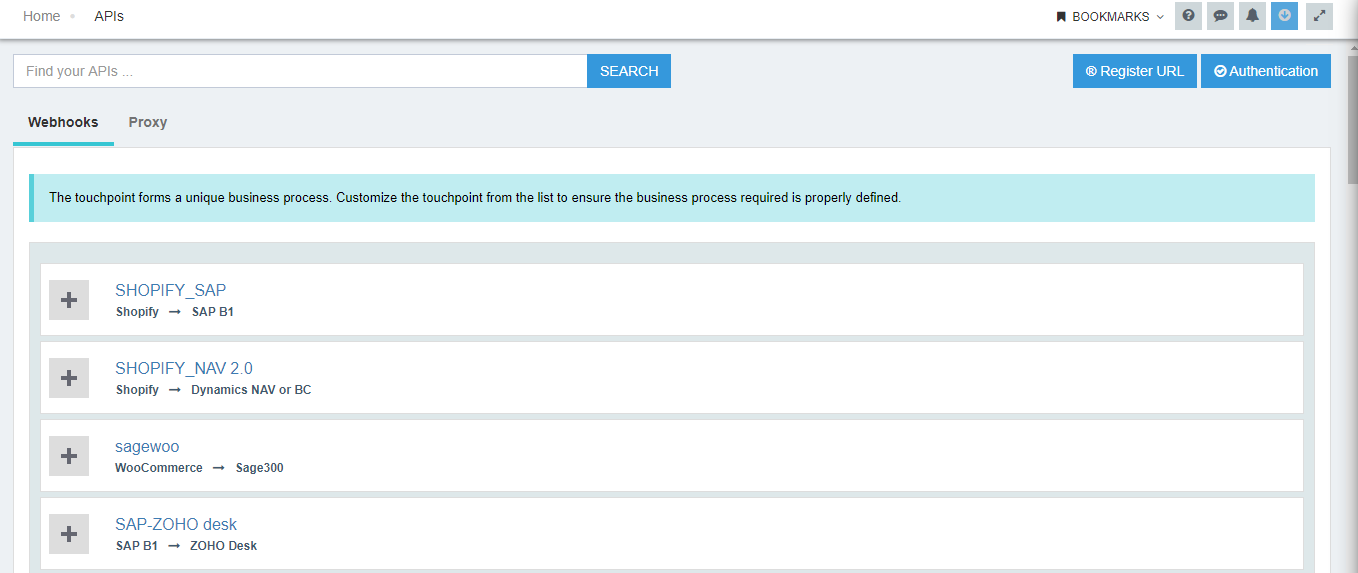
Note:If you do not have a registered URL with APPSeCONNECT you have to Register a URL for your organization.
- Now under the desired connection,Expand the Connection,you will find Add New API button like this.

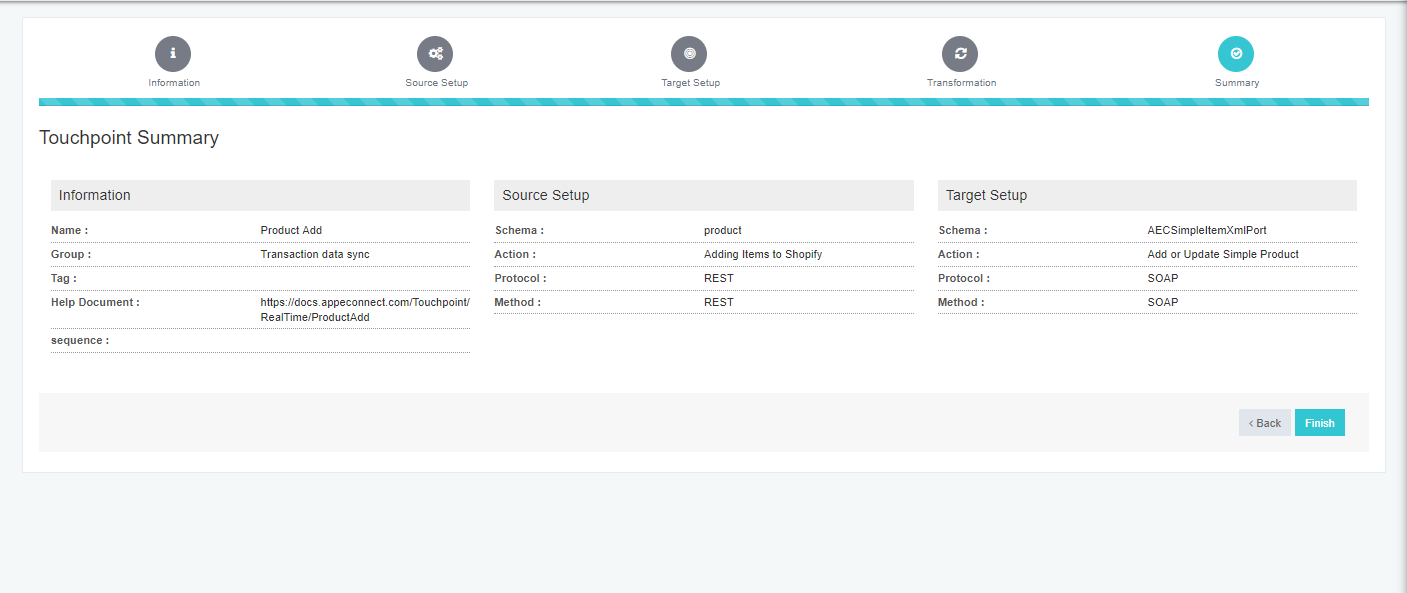
- Upon clicking the button you will get introduced to a Wizard like this. Provide basic information like API name,
API help document URL etc.
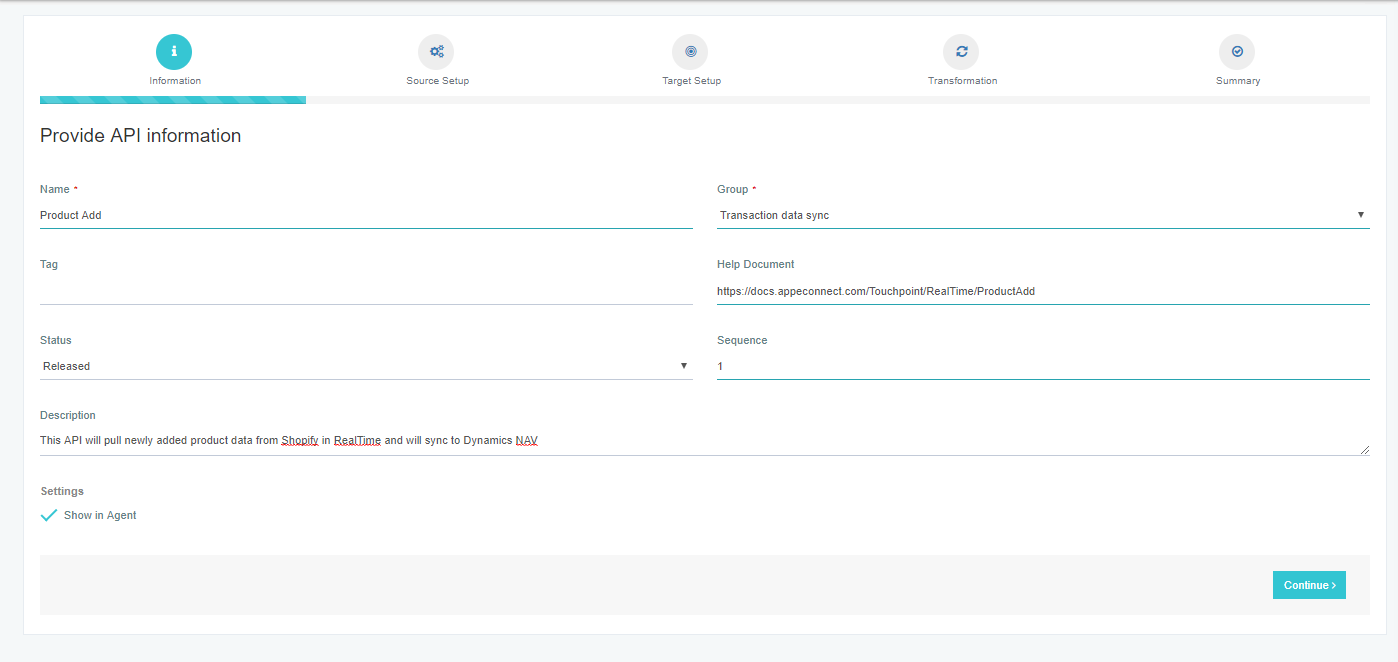
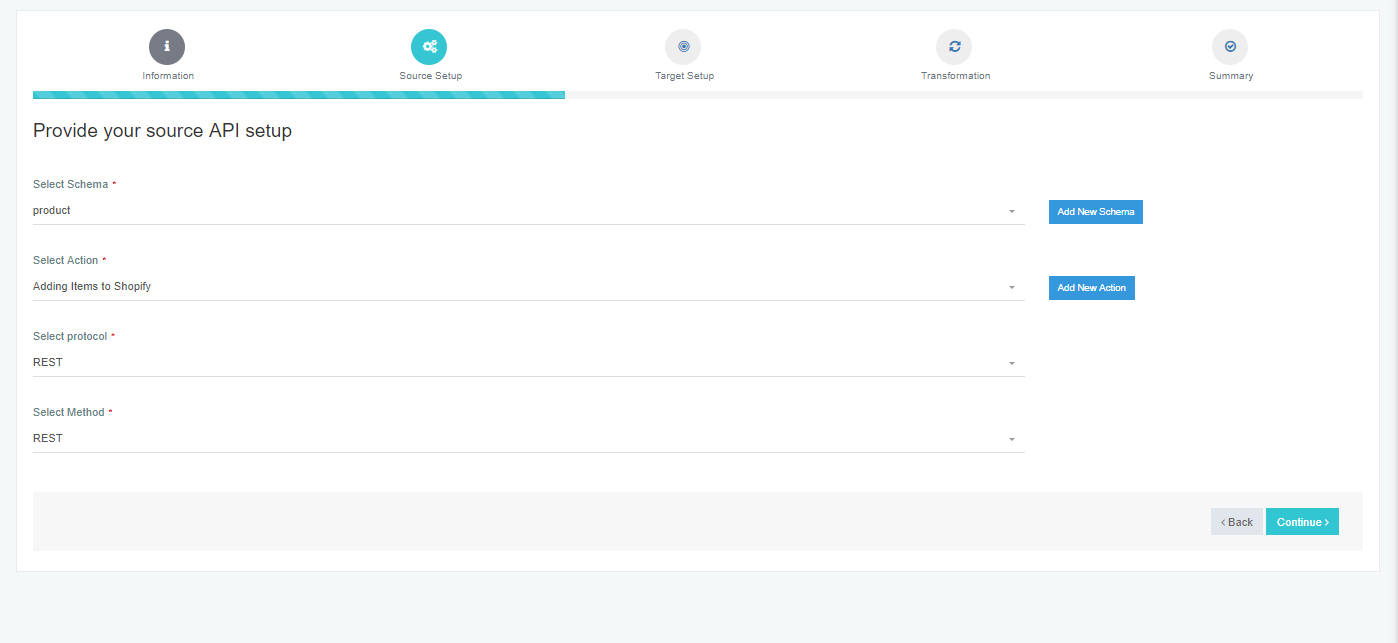
Note:It is mandatory for the user to enable the checkbox forShow in Agent, else user cannot view the touchpoint and run the sync process. - Now provide Source App Configuration like Source Schema,Action,Protocol and Protocol Method.
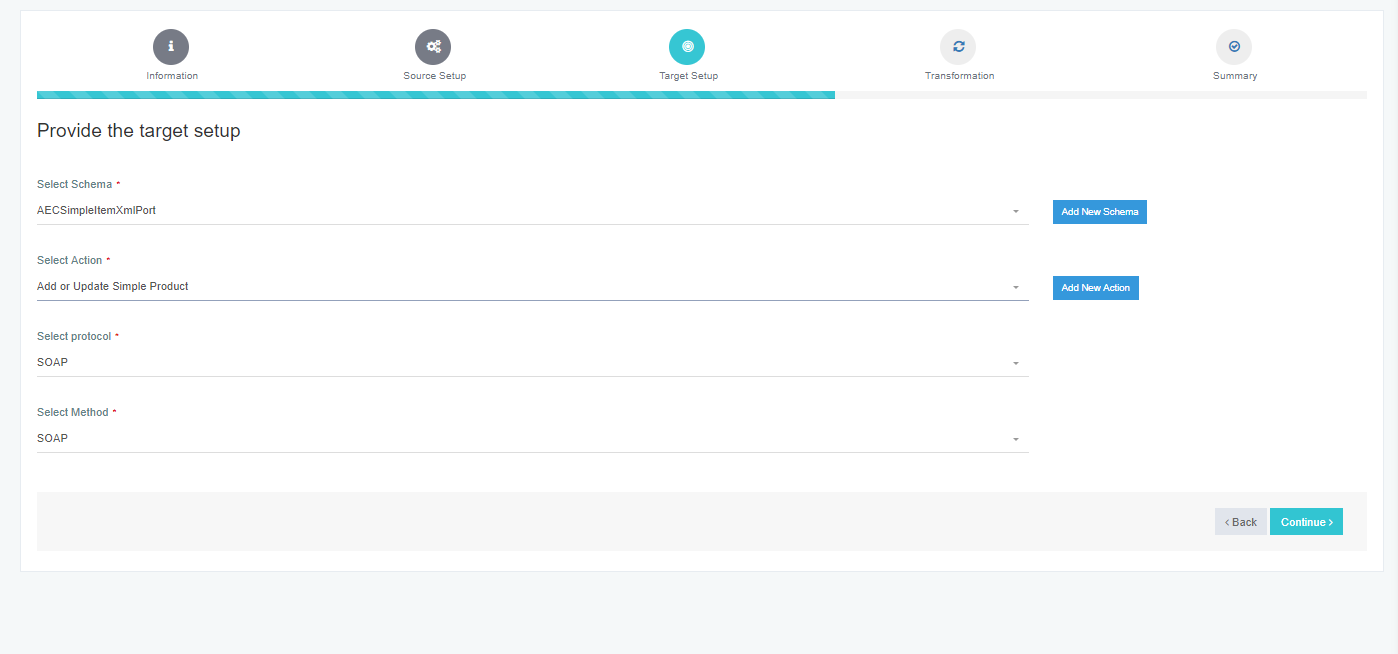
- Thereafter provide Destination App Configuration like Destination Schema,Action,Protocol and Protocol Method.
- Then you have to configure mapping for transformation from source to destination
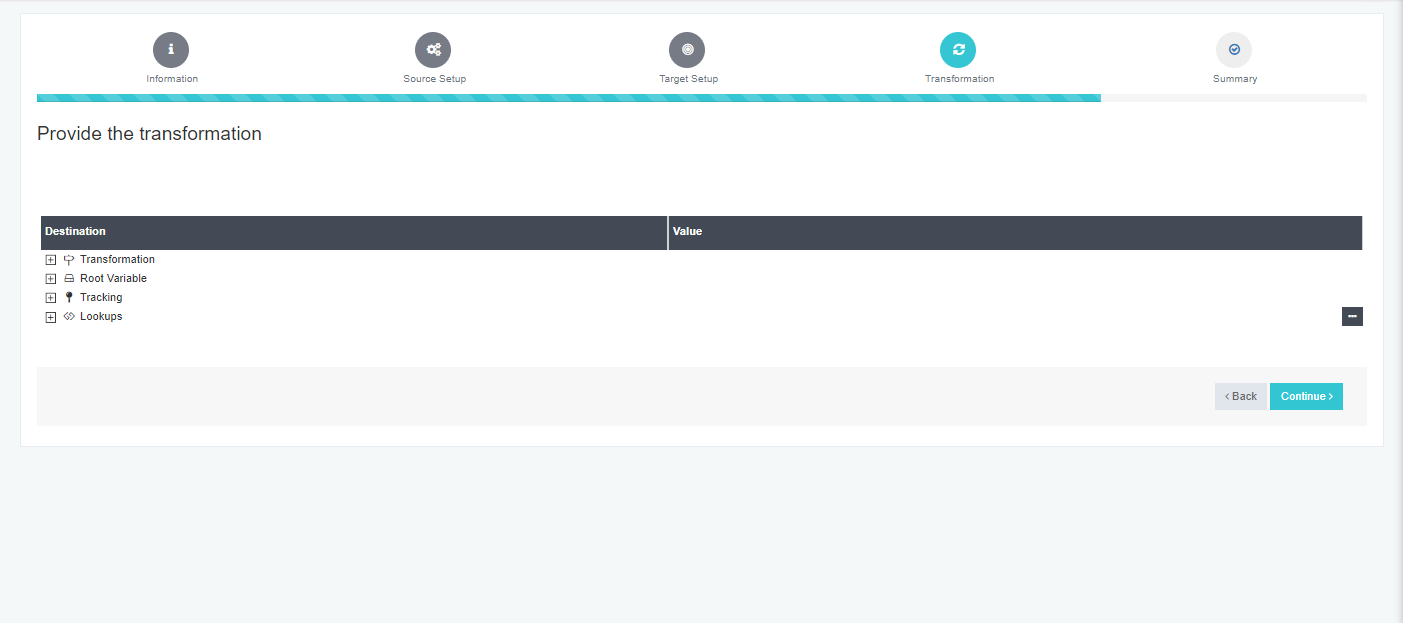
- After everything is done click on finish to Save your API.
- You will be re-directed to Webhook section afterwards.You can find your newly created Webhook API
under the connection you created.
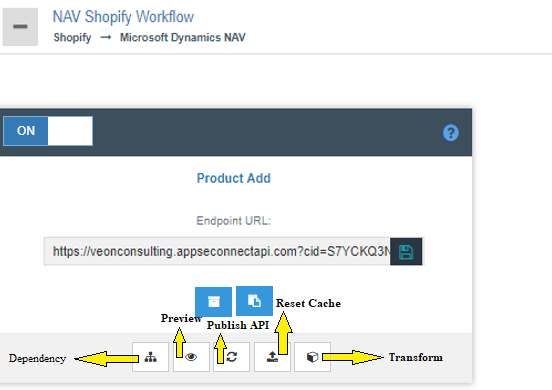
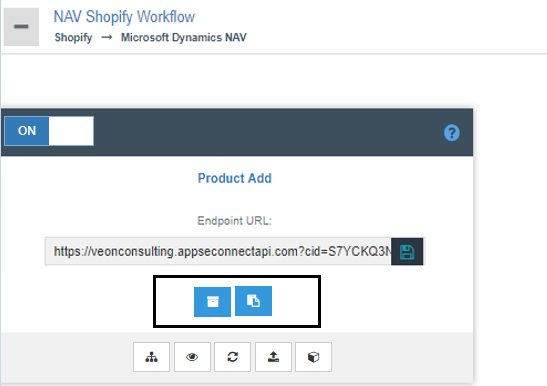
- The Touchpoint will consist of two buttons:
- Bucket: This is the Resync bucket of the touchpoint. Any Data synced (Data that are Success, Failed, Unprocessed & Skipped) in OP will automatically reflect in the Resync Bucket of the Portal.
- Log: This the Log Bucket of the Touch point and will display the logs, processed during the sync process.
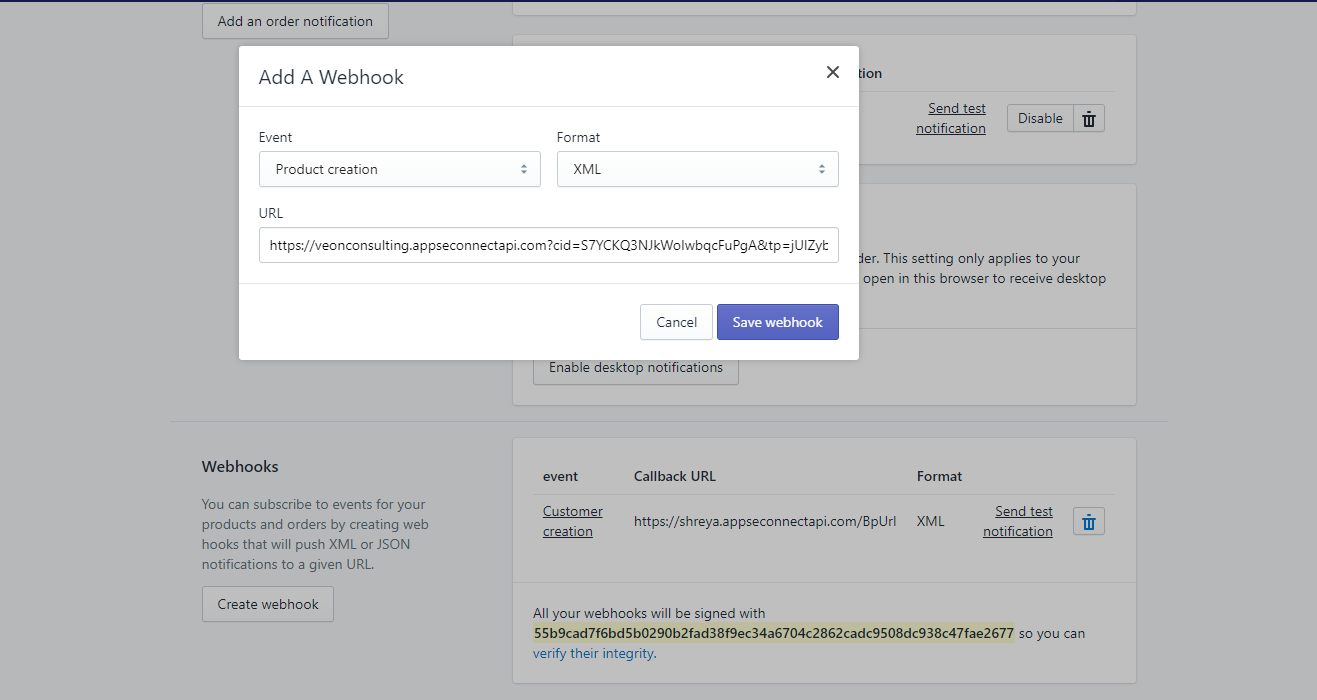
- Copy the URL and use it as a webhook endpoint in applications that support webhooks.
Note: The Endpoint URL is divided into two parts: Domain Name (Register URL) & URL Endpoint. User can edit only the Endpoint and not the domain name. For editing or changing the domain name, user needs to Register the URL again
Thus APPSeConnect provides you the platform to create Webhook API to fetch real time data and sync to other applications.
Note: Realtime Webhook APIs does not require any Actions & Action Filters for the sync process.
Executing Realtime API Touchpoints with APPSeCONNECT
Executing Real-Time API Touchpoints is one of the primary steps after you have successfully configured a Realtime Webhook API on your organisation. For the deployment, user needs to consider installing the on-premise agent, and configure it to be active on Environment section of APPSeCONNECT.
Steps to Deploy and Execute the Realtime APIs:
- Login to the APPSeCONNECT Portal with valid credentials.
- After creating the Realtime Webhook API/Touchpoint, from the API Section of the AEC Portal, reset cache and Publish the API to deploy the touchpoint to the agent.
- Publish the connection from the connections page.
- Once, the API is deployed to the agent, login to the On-Premise agent and Update Configuration, before its execution.
- Validate the applications used, before executing the sync process. If your Chosen application is pre-packaged, Click Here. You will be able to view the connectors & their steps to validate respective applications.
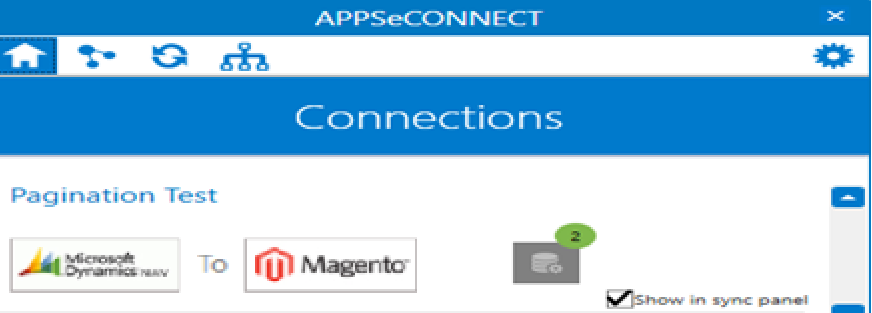
- Enable the connection by clicking on the
Show in Sync Panelcheckbox for viewing the touchpoint in the Sync panel of the On-Premise Agent.
- Navigate to the sync panel and execute the Real-Time Touchpoint that was configured through Autosync.

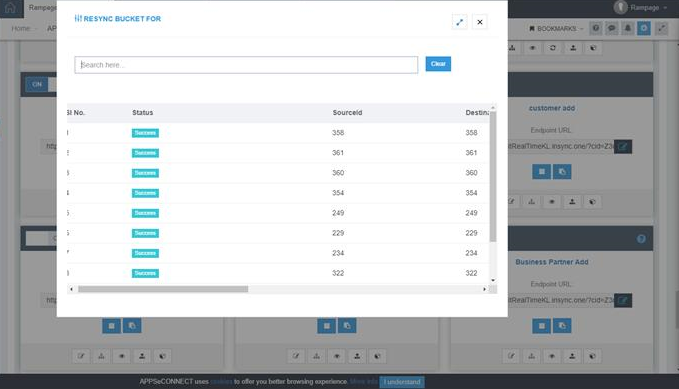
- Users can view the sync status, in the Resync Bucket of both the On-Premise Agent & in cloud portal.
- Click on the Bucket icon in portal, user can view the Resync bucket for the touchpoint. The Resync Bucket view (Portal view)
for a Realtime Touchpoint is given below
Note: * The touchpoint cannot be executed manually as sync button remains disabled. After Update Configuration, make sure you enable the Auto-sync option, as Realtime Touchpoints will only execute through AutoSync. * In-case of error, user cannot Resync any data.

