Inventory Update NAV-Mage2 Multiconnection
Updated:
Executing the Process is a vital part when integrating any applications. This Document will let the users to understand how the integration process can be executed through workflow for adding Inventory for products from Ms Dynamics NAV to Magento2 (Multi-store).
Brief Description
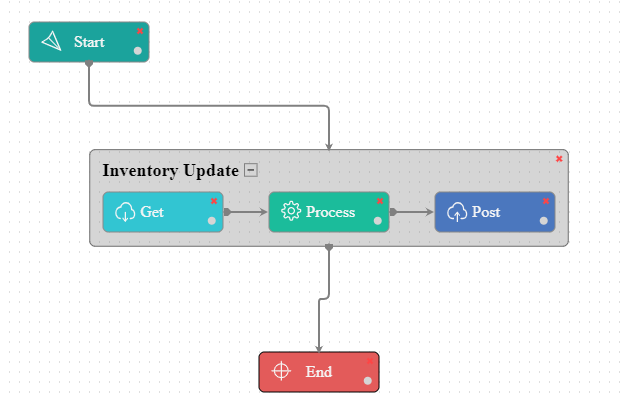
In this case, the quantity of the products is added by updating the inventory. Therefore, the above workflow
is designed to Update the Inventory of the products added in MS Dynamics NAV and will be posted to Magento2 (Multi-store).
Note: Before adding the inventory of the products, the user needs to make sure the products are synced which needs to be updated
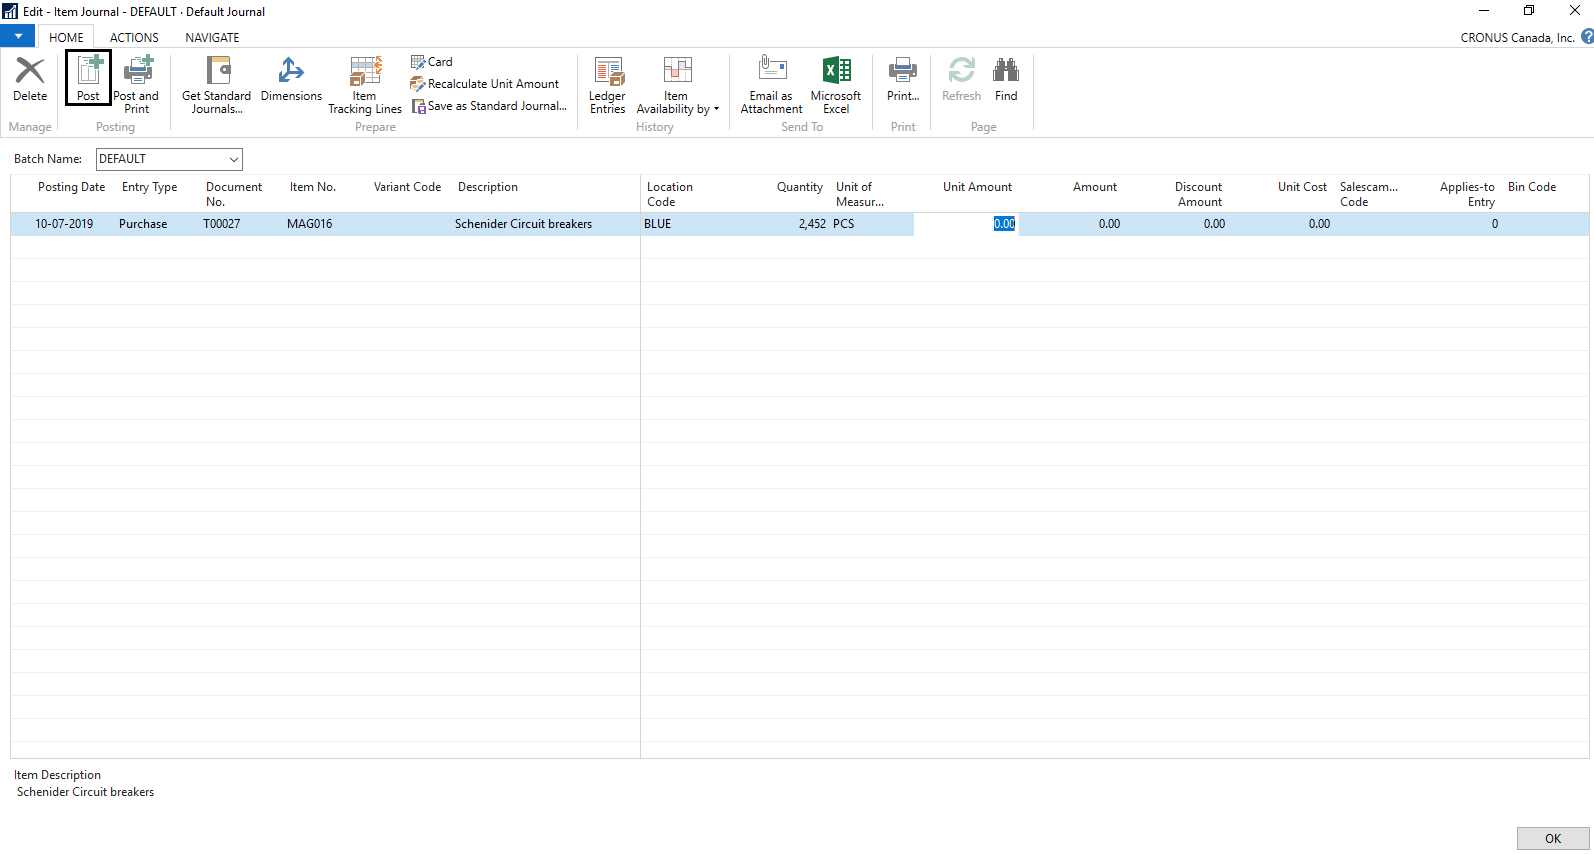
- For Updating or Adding Inventory in Dynamics NAV, navigate to the Product Item card-Item Journal.
- In the Item Journal window, select the Item No. for whom the inventory is added.
- Select the Warehouse location from the drop down present in the Location Code column.
- Input the Quantity in the quantity column and the Unit of Measurement.
- Enter the Unit Amount and Click on Post.
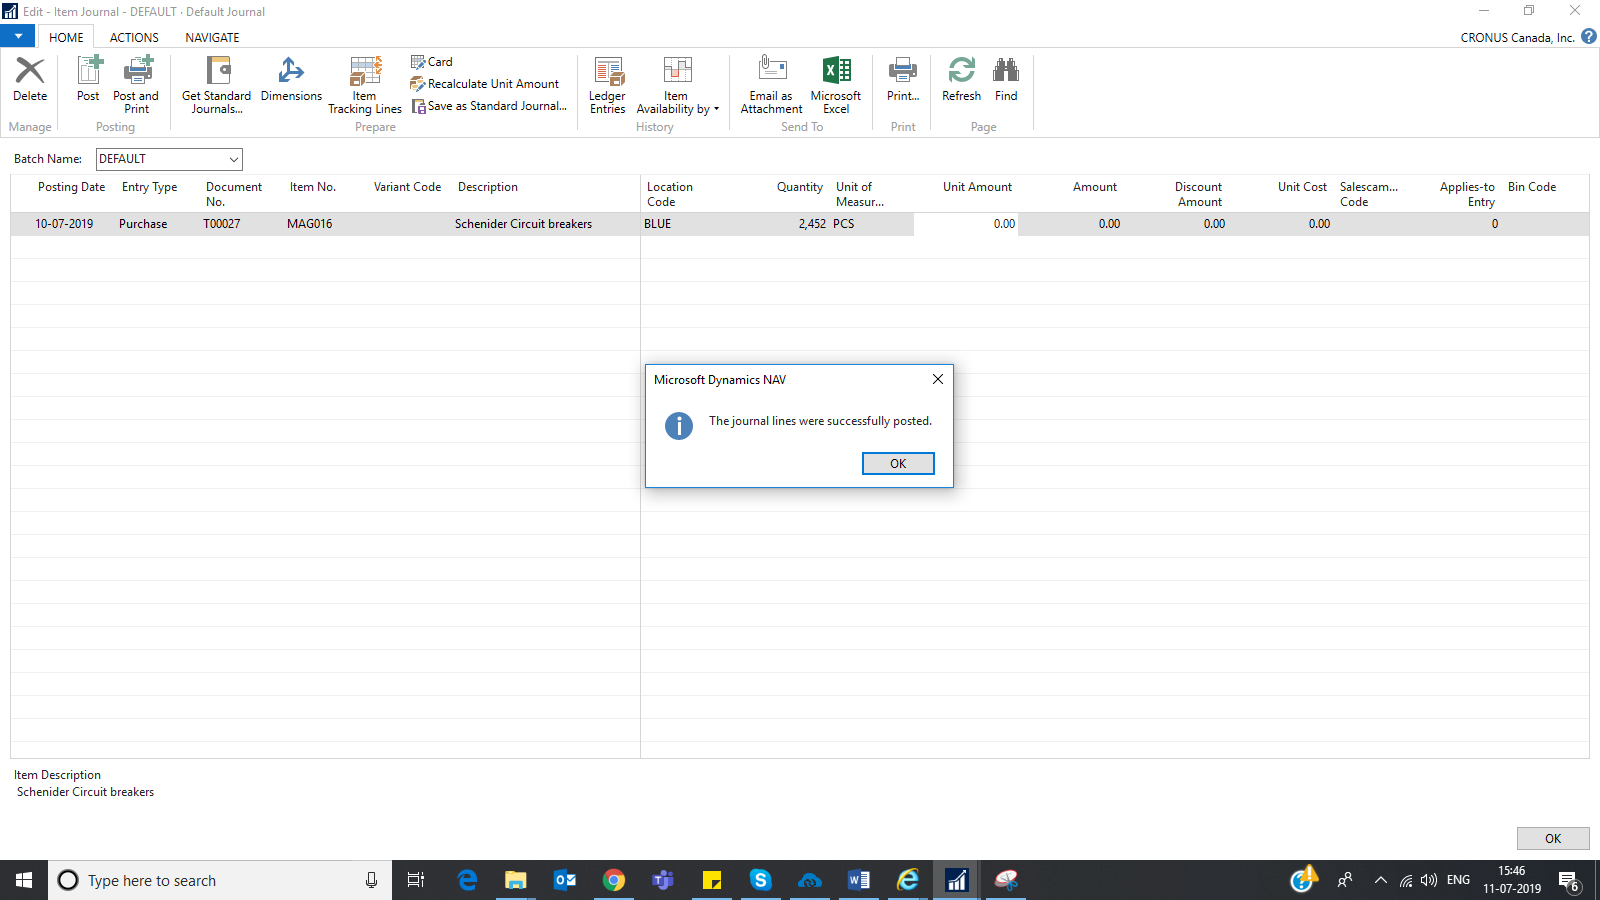
A successfully posted message will be displayed in the screen. Click on Ok after the message is displayed.
LookUp Mapping
The Lookup mapping for Currency shall be required in case the business logic deals with multiple currencies.
Attribute Mapping/Transformation
Following the Provided Mapping, the user can sync the Inventory Add from Ms Dynamics NAV to Magento2. To know more, see Mapping & Transformation Techniques.
Note: The mapping for the ComplexObject for Inventory Add, will be same as that of the Simple Product Add.
Mapping for the Root Variables for ‘Simple Product Add Touchpoint’

Note: The blank mapping is required for the Root Variable UpdateSyncFlag in case of Inventory Add sync for multiple
connection from Dynamics NAV to Magento2.
Action Filters
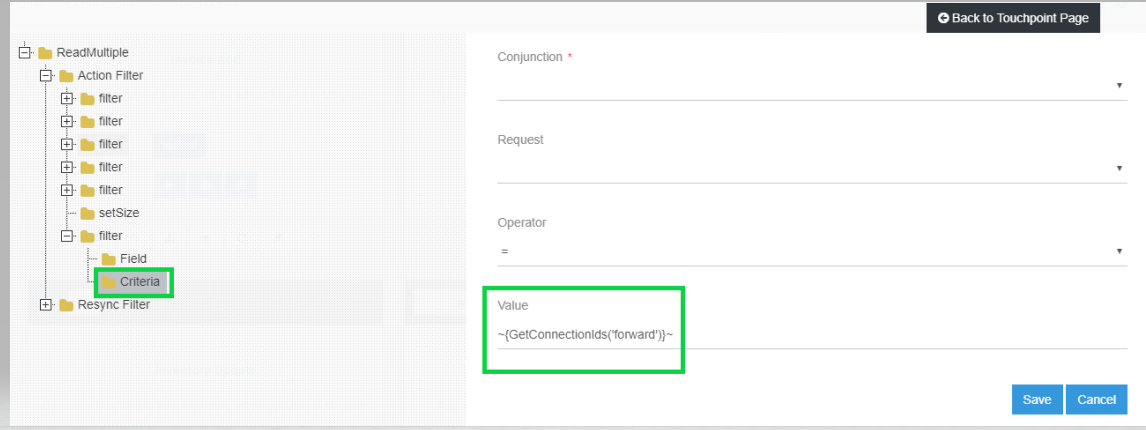
Add a node to the given pre-packaged order of the Action filter with two sub-nodes Field and Criteria
View the image below to define the Action Filters

Executing the Workflow Integration
Note: Before Integrating with Magento2 and MS Dynamics NAV, make sure all the Master Data Touchpoints are synced.
-
Once the workflow is designed, Update the Configuration in agent for deploying the workflow in the agent.
- Navigate to the Workflow Panel in the agent and click Start Sync Button for executing the Process.
-
Once the Execution is finished, click Resync Button in the agent.
- The Resync Panel show the Success Result in the agent.

Integration Data Survey
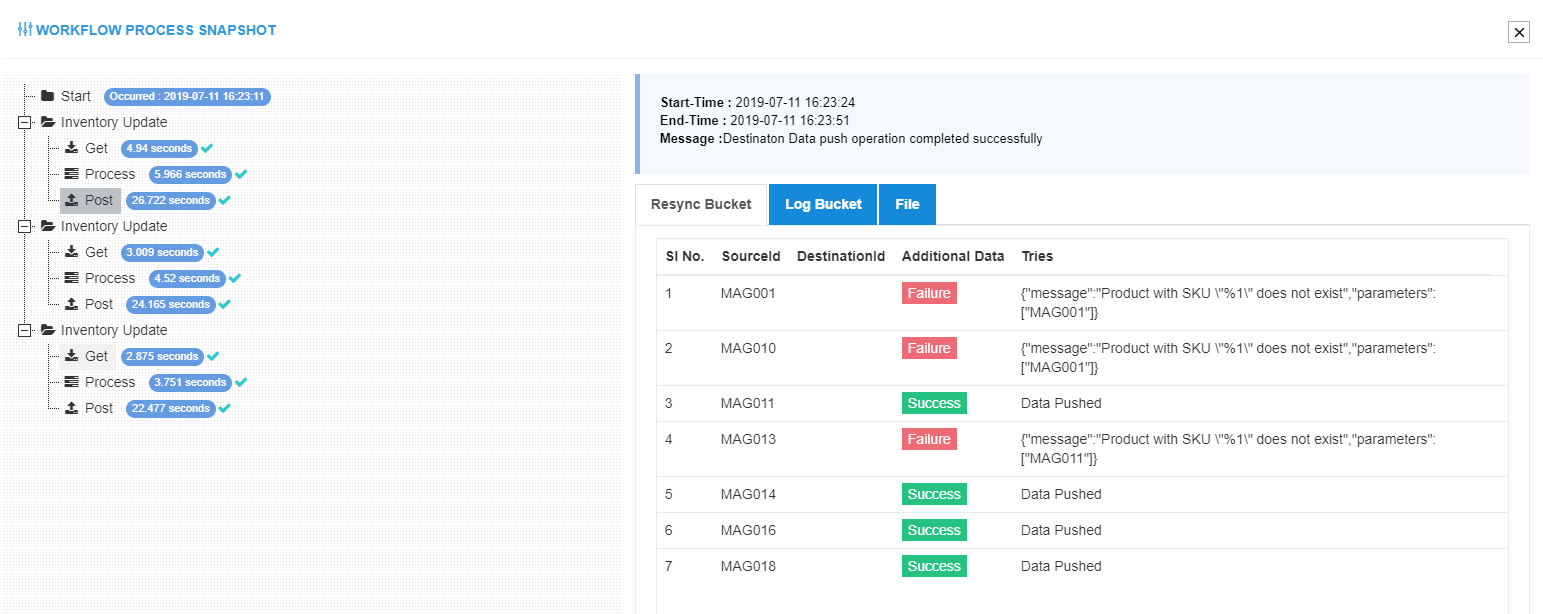
The user can survey the data by viewing the Processed Snapshot from the node level of the workflow.
This Snapshot View displays the successful execution of the workflow.
Post Conditions
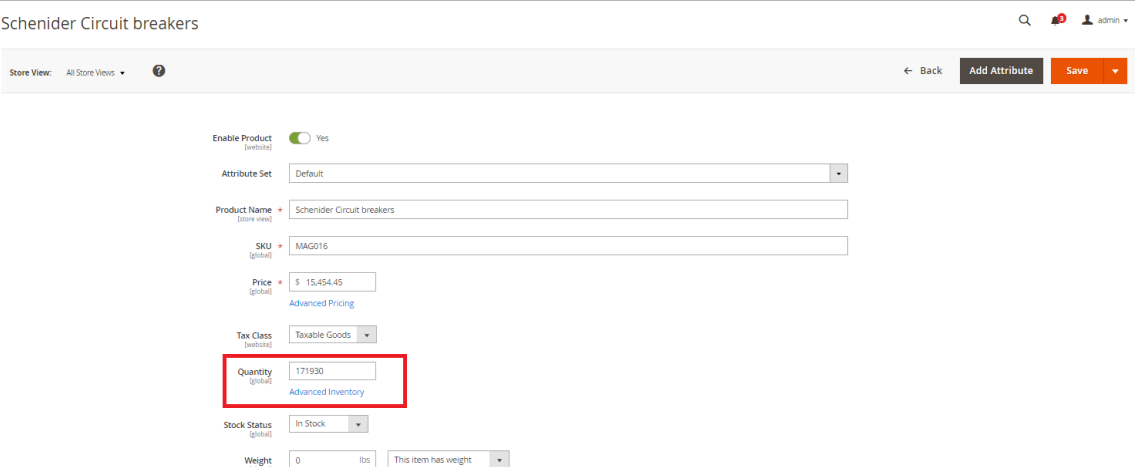
- The Inventory is successfully updated in Magento2 (Multi-store). The quantity can be viewed in the Magento Backend by navigating to Catalog - Products - View Product.
- WebStockFlag must get to
TfromFafter the sync is complete.
Frequency of use
The user can execute the Integration through workflow as and when required.
Troubleshooting
N/A


