
Enabling Tracking data in Transformation
Updated:
Use Case Name
Enabling Tracking in transformation.
Brief Description
Tracking is a feature in APPSeCONNECT which lets the user view and track all those elements (Child Elements under a parent attribute in XML) in the Resync Bucket of the agent (Cloud & OP) which gets synced. This is done by defining the tracking in the cloud portal against the touchpoint for whose tracking, one needs to view.
For Instance: The user wants to track the GENDER of all the data in the Resync Bucket of the Agent. For this, the Tracking Feature is made use which enables user to view the corresponding results as required.
Actors
Implementers, Developers, Partners.
Preconditions
Organisation Creation & Connection Creation.
Note: In case of Custom Apps Touchpoints is needed to be created first for implementing Tracking.
Basic Flow
- Navigate to the touchpoint after login, for which the Tracking is to be done.
- Click on the Transform button on the touchpoint you have selected. The user will now be able to view
the Transform screen of that touchpoint.
Note: In this case the touchpoint Business Partner add is used for the connection Magento2 and SAP B1. - Click on the option
ADD. The tracking configuration window opens up.
Note: The user can even Delete all the configured tracked data by clicking
on the DELETE ALL button. If the user clicks on Delete all button and there is no tracking
data available in the mapping, user will get a confirmation toaster message displayig Failed
to Delete Tracking Data
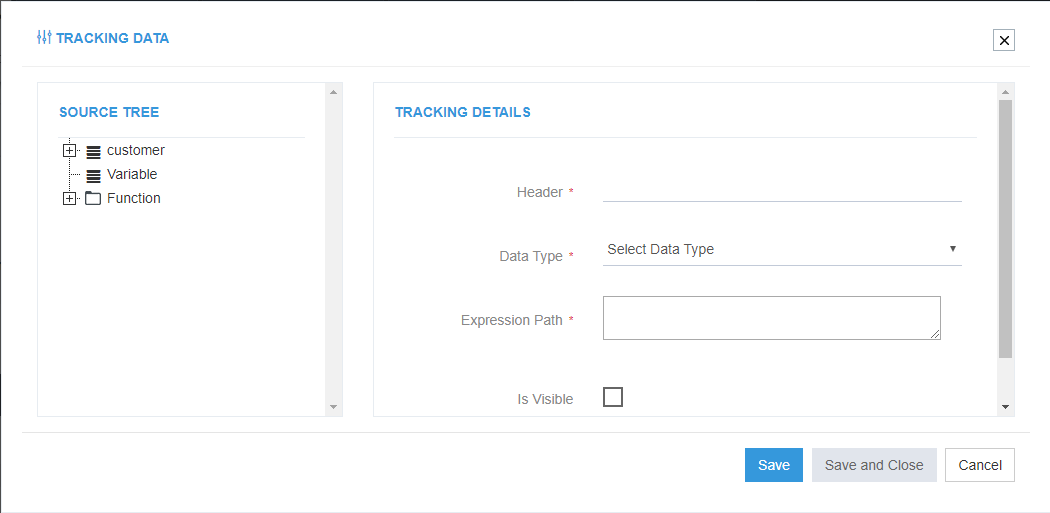
- The three sections of the Tracking Data feature will be visible.
- Source Tree: Contains all the elements (Child Elements) for which the tracking is to be done.
-
Tracking Details: This is the area where the Tracking is initiated. Tracking Details consists of the
field Header, Data Type, Expression Path, and a Check Box.
- Expand the Customer node, in the
Source Treeto get the view of all the elements whose tracking can be done.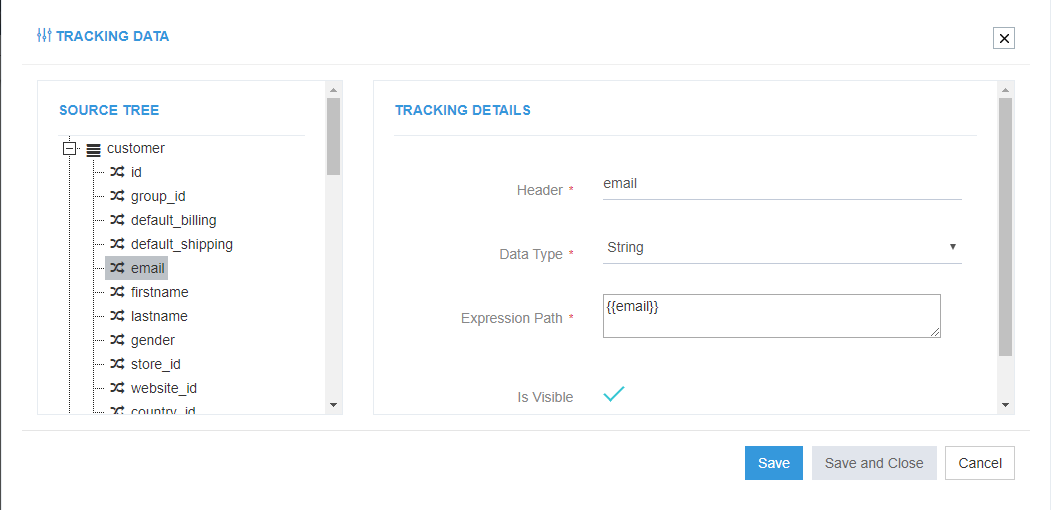
The Tracking Details are having the following fields:
- Header: It will display the column name of the Tracking Data in the Resync Bucket of the Touchpoint.
- Data Type: - This field is to display the data type of the Tracking Data to be created.
- Expression Path: - User can provide the mapping expression in this field. The output of this mapping expression will be displayed in the Tracking Data column in the Resync Bucket of the touchpoint.
- Is Visible: - This option is for controlling the visibility of the Tracking Data in the Resync Bucket of the Touchpoint.
- Clicking on any of the elements from the node, will automatically fill up the fields in the Tracking Section.
Note: By default, the Is Visible checkbox will be unchecked, the user needs to enable the checkbox for making it appear in the agent
- Now Click SAVE, the following screen appears
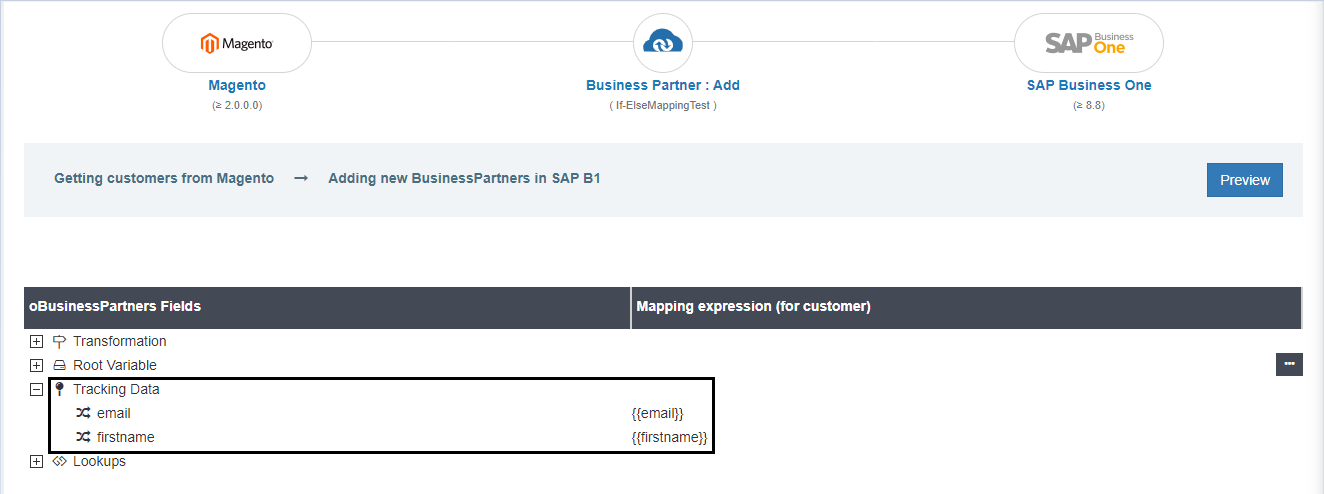
Note: One can either SAVE the Tracking element or can select the SAVE and Close option.
The Save and Close option will save that element and will close the Tracking window.
The SAVE option will provide you the opportunity to add multiple elements for tracking
Note:In the similar Procedure elements can be added for tracking for different Touchpoints too
- The corresponding window shows the impact in the Resync bucket of the agent.
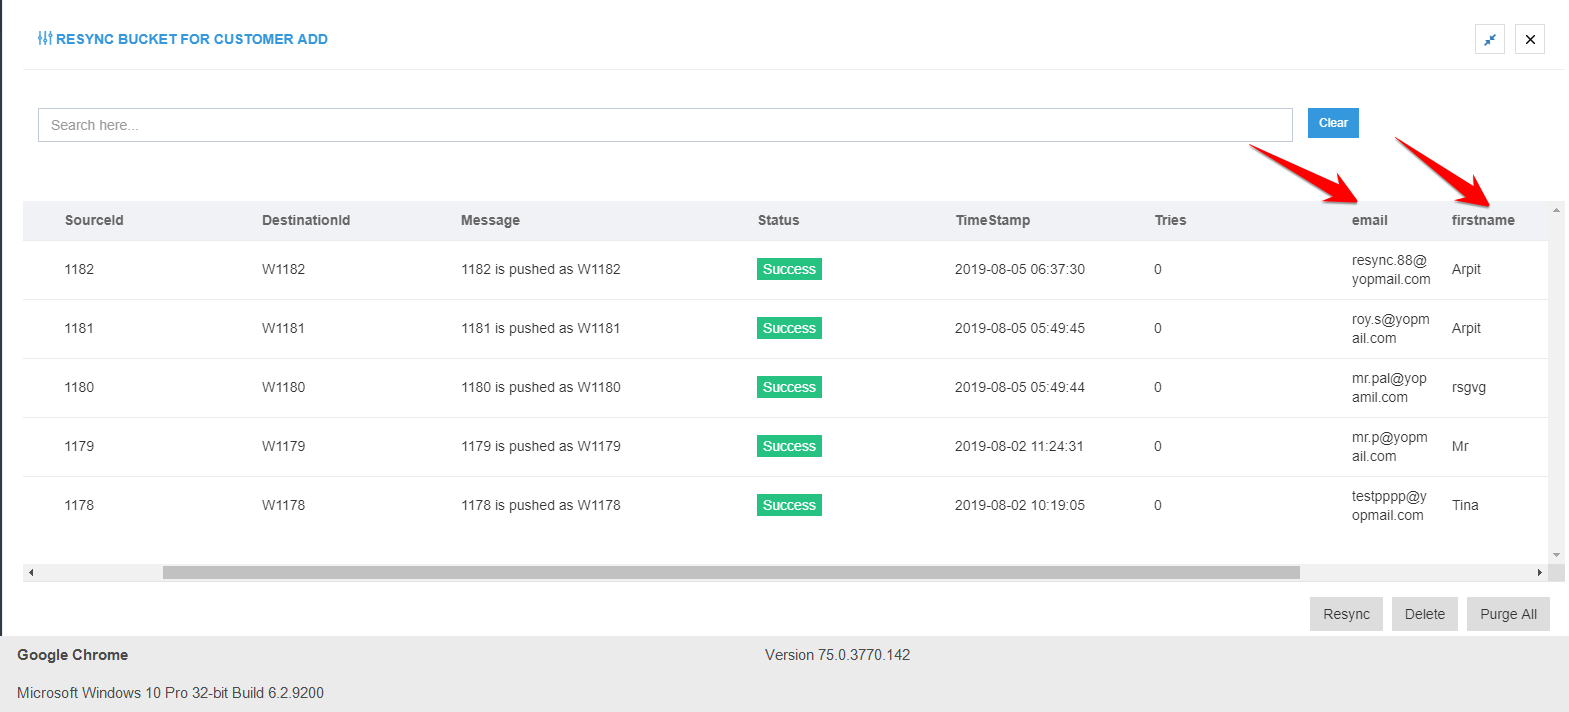
Note: Currently, tracking data is reflected only in the OP agent and the Cloud Agent. Workflow Snapshot doesnot reflect the Tracking Feature
Post-Conditions
The user can view the successful Tracking of the touchpoint for the connection Magento2 and SAP Business One. in the resync bucket of the agent.
Exception Courses
NA
Frequency of Use
The user can implement tracking when required for any touchpoint.
Assumptions
Not Applicable

