
Connect Shopify GraphQL to APPSeCONNECT
Updated:
APPSeCONNECT leverages Shopify GraphQL to enable seamless and efficient data queries, allowing business owners to access precise data while optimizing performance. This integration streamlines operations, enhances scalability, and provides real-time insights, empowering businesses to make data-driven decisions.
Why Shopify GraphQL?
Shopify GraphQL enables efficient, precise data queries, reducing unnecessary data transfers. Unlike REST APIs, it improves performance and response times by simplifying interactions with Shopify’s data. With the ability to access multiple resources in one request, it streamlines development, reduces overhead, and enhances scalability, providing a better experience for both developers and customers.
If you want to take a deeper look into the authentication mechanism and endpoints, here’s the link to Shopify’s GraphQL Admin API reference.
Setting Up Shopify
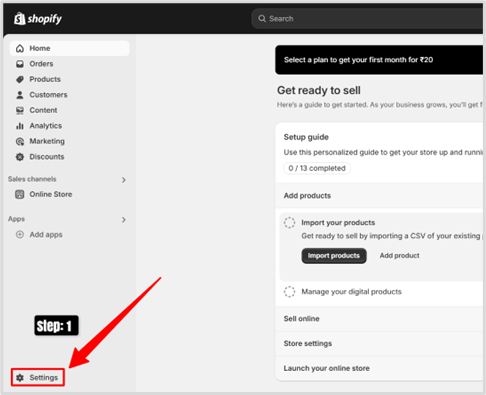
Now, to connect APPSeCONNECT with Shopify GraphQL you need to keep a few things handy.
Here’s a checklist to make your life easier :
- Shopify Account - If you don’t have one already, you can create an account using: Shopify Signup
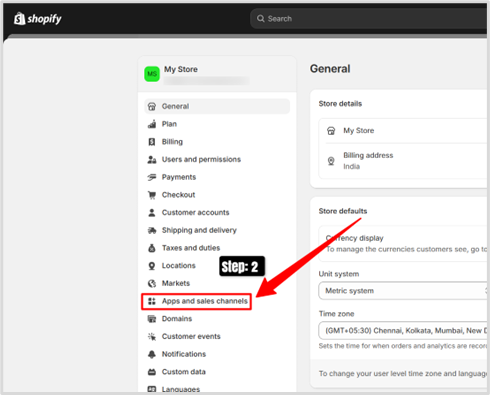
- Once inside, go to Settings → Apps and Sales Channels
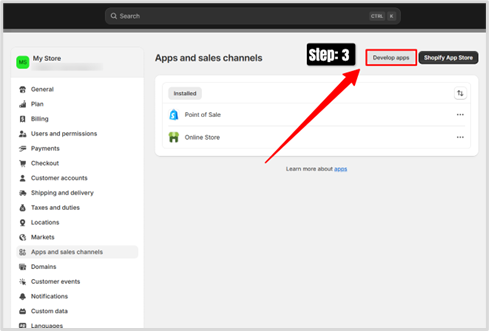
- Click on the Develop Apps → Create an app

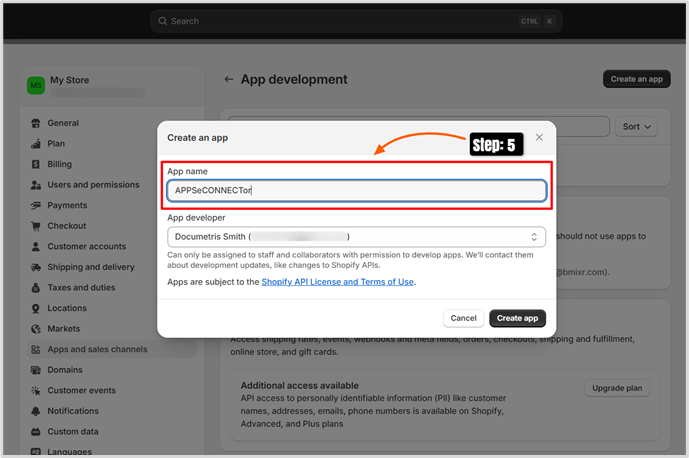
- Provide a name of your choice to the Custom App, we are using “APPSeCONNECTor” for this example.The app developer field should be auto-populated, however, if you want to change it there’s a ‘expand-collapse’ icon.
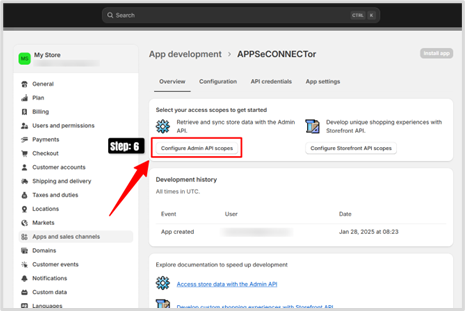
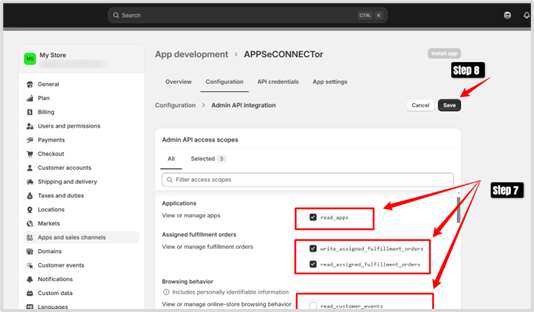
- Click on “Configure Admin API Access”. Once inside, you can choose the scope for the app by clicking on the checkboxes for the relevant Access Scopes. Note: make sure to select at least one of the “Access Scopes” in order to continue with the next steps. Once you are satisfied with your selection click “Save”.
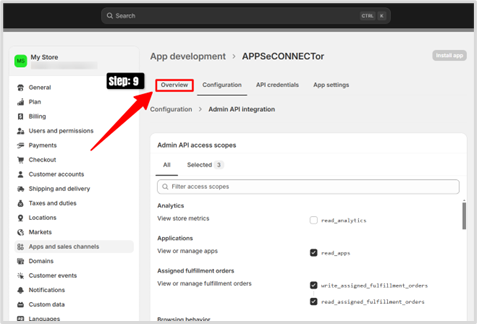
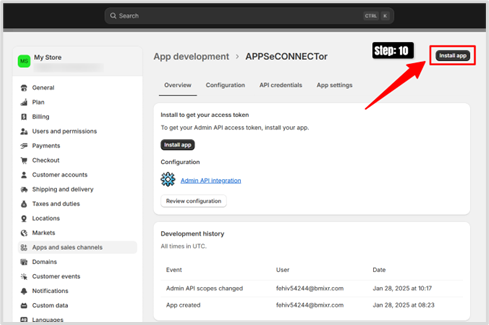
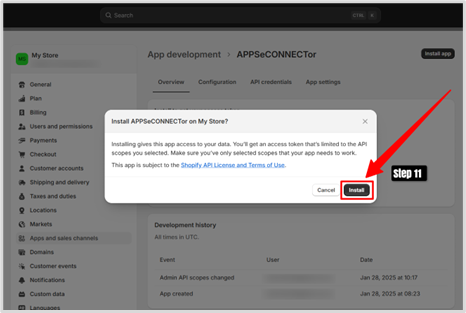
- Go back to the “Overview” Tab, You should see the “Install” button is now active.
-
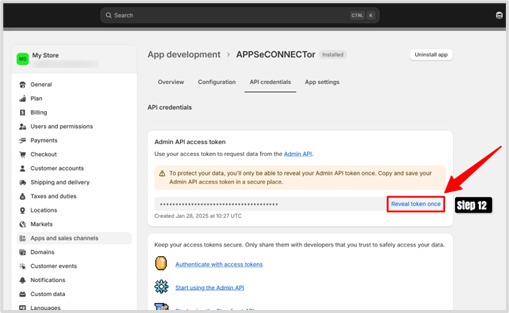
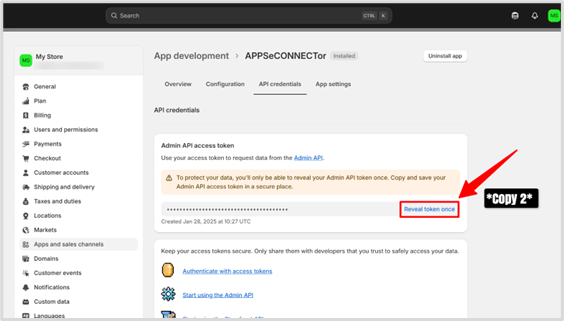
Click on Install, and wait for the installation to complete.Once finished, you will be redirected to the API Credentials screen. Click on the “Reveal token once” button, copy the credential and store it in a secured place.
Important Note: You will not be able to access this token from this section in the future, even as an Admin.
Connecting Shopify GraphQL to APPSeCONNECT
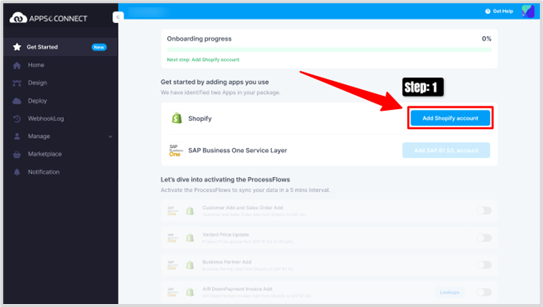
Back in the Package Onboarding Screen on APPSeCONNECT.
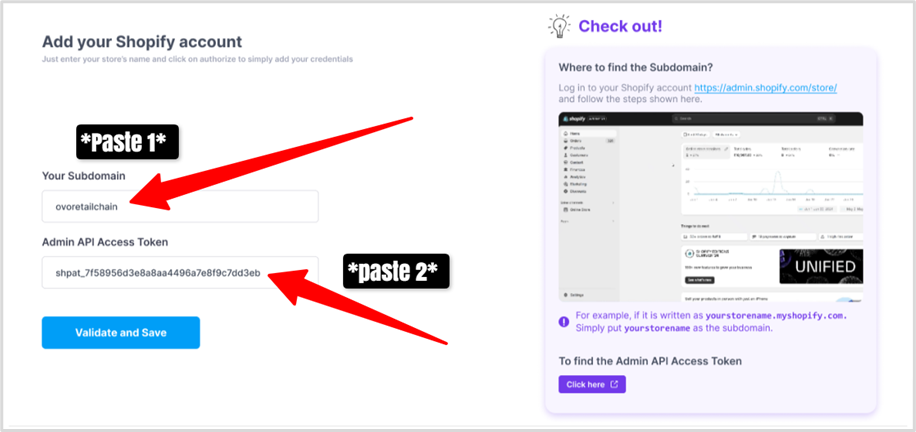
- Click on the “Add Shopify account” button.
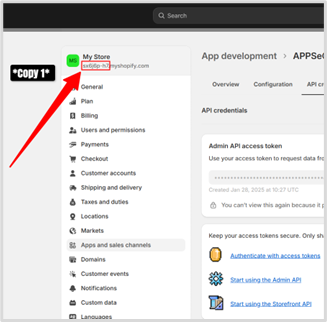
- First up, you need to provide your Store ID, the easiest way to find it is to look under “My Store” in Shopify’s side panel. You will find something in the format - “subdomain.myshopify.com”.
Only select the “subdomain” part as shown in the image below and paste it in the “Subdomain” section on the APPSeCONNECT Portal.
Next up, paste the Admin API Access Token that you saved in “Setting Up Shopify” section’s - Point 7 ; Step 12.
Once both fields are populated, Click on “Save/Validate”.
- If all the steps have been completed correctly, the Shopify app should be successfully connected.
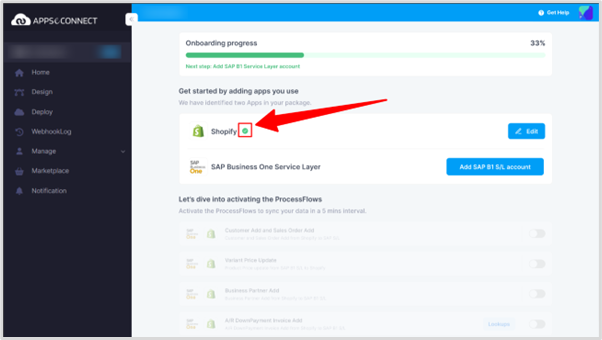
- To confirm, verify the ‘tick’ icon displayed next to the Shopify app.

