Shopify using GraphQL
Updated:
Shopify is a complete ecommerce platform that lets you start, grow, and manage a business. The adapter of the application Shopify provides
the leverage to communicate and adapt with the AEC portal. This section provides you the detailed process of validating the credential of the
application Shopify.
Application configuration is an integral activity prior to the process of integration. If your chosen application is Shopify, credentials
need to be provided for validating the agent. Here you will find the detailed description on how to configure the agents for the application
Shopify, Troubleshooting issues, the attributes and its action.
Pre-requisites for Shopify Configuration
- Create an account in Shopify and Login into it.
- Username and Password to access the application.
- Click here to know the authentication mechanisn and endpoints of the application.
How you can create a Custom APP
- Login to your Shopify Application. Naviagte to
Apps->Apps and sales channels settingsfrom the application admin page.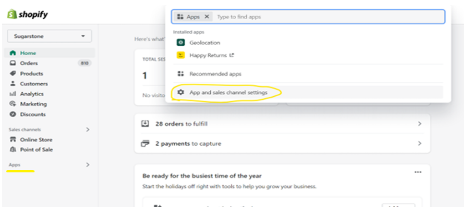
- Click on
Develop apps for your storeto create custom apps for your store.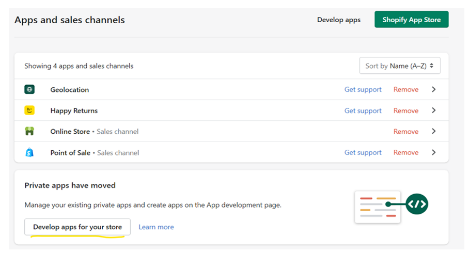
- The
App Developmentpage will open up. You need to click onCreate an appto create a custom app from scratch.

- Provide a suitable
nameto your App and theemail idwill automatically be availbale as provided during login to the application. Click onCreate appbutton at the bottom right corner of the dialog box.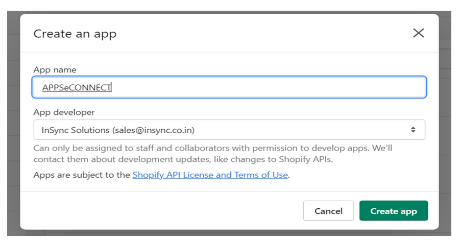
- On clicking the
Create appbutton, the app details page will appear. On clickingConfigure Admin API scope, theAdmin API access scopeswill be open up. Provide the necessary access by clicking on the check-box and click onSave.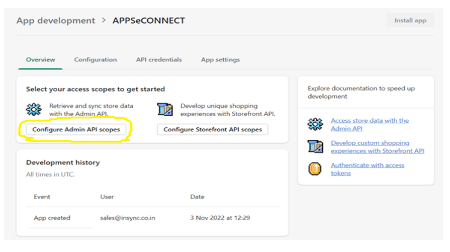

- On providing necessary accesses to you app, the
Install appwill be activated and click on the same to install the custom app in your store.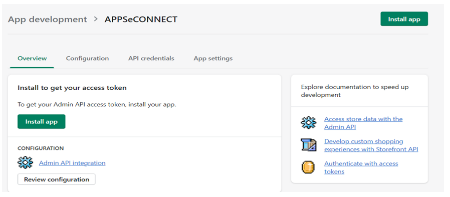
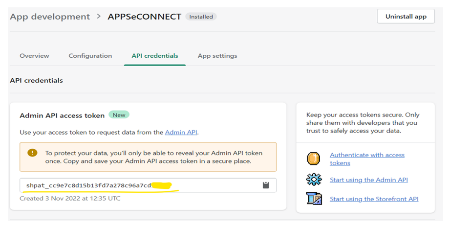
- After installing the app successfully, the access token will be generated automatically. You will get the access token inside
API Credentials.
On-Premise Agent Configuration
Installation of On-Premise Agent
You need to install the agent on your local server. To Know about On-Premise Agent Configuration, Click here.
Configure the Shopify Application in the Agent
-
Create a processflow with Shopify as
sourceordestinationapplication, and deploy the processflow in On-Premise agent. - Open the agent and click the checkbox in Settings Panel.
- Move into the App Configurational Panel of the agent and configure the details of the respective application.
Steps to Configure Shopify Credential in OP Agent
- In the App Configuration panel of the agent, click on the
+button, beside the app Shopify.
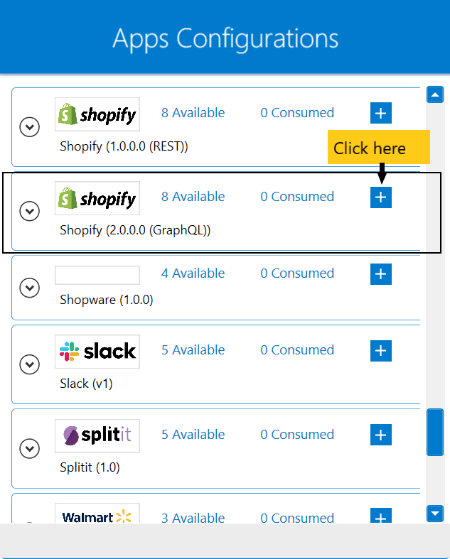
- On clicking the
+button, the credential panel opens for the application Shopify.
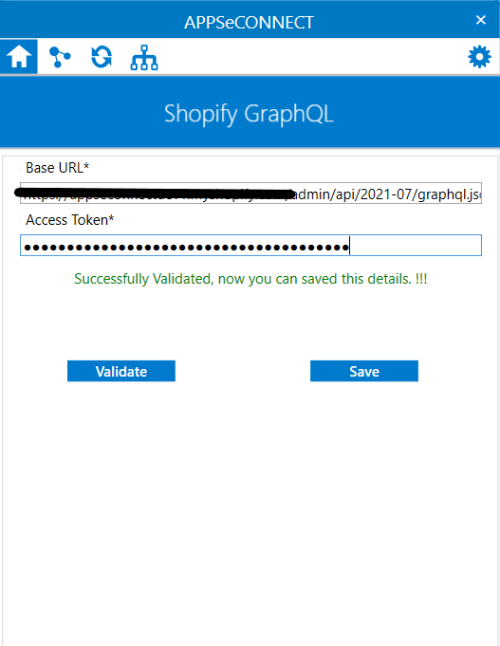
Provide theBase UrlandAccess Tokenin the agent. - After providing the credentials, click on
Validatebutton. On successful validation, a messageSuccessfully Validated, now you can save this details.!!!will be displayed. Click onSAVEto save the credentials.
Following this process, the Shopify's GraphQL application can be configured in the OP agent.
Cloud Agent Configuration
Configuring the Shopify GraphQL Application in Cloud Agent
-
Login to
APPSeCONNECT portalwith valid credentials. -
Navigate to Manage > App. Expand the
Shopify GraphQLapplication and click onCredential. -
Expand the
RESTnode, click onAdd New Credential. -
Provide the necessary information
Credential Name,Bae UrlandAccess Token.
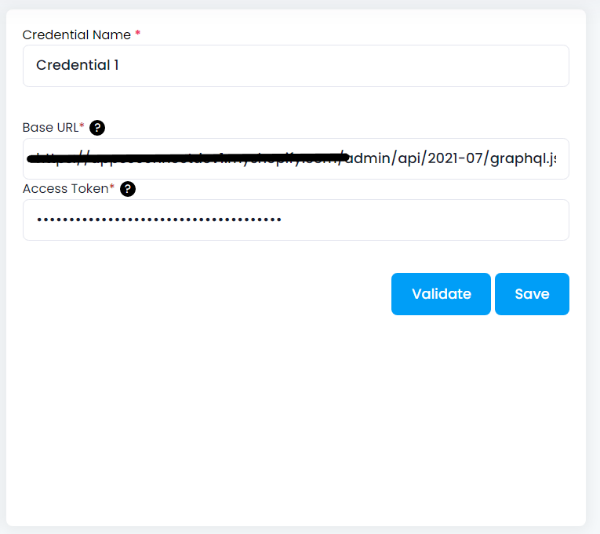
-
On clicking
Validatebutton, a messageCredentials validated successfullywill be displayed, if all credentials provided by you is correct. Finally, click onSaveto save the credentials permanently.
Troubleshooting
Some of the basic troubleshooting issues happens due to improper validations or even if it is accurately validated, the processflow do not sync data properly.
This basic issue resolves after removing the Temp and Cache files from the portal and from your system.
Therefore after clearing all this, you need to deploy and excute the processflow again to perform the required business integration in a smooth and free-flowing way.
For E.g. If the Source Application not Found , remove the Temp and Cache Files. Again re-deploy and execute the processflow.
While validating the credentials in the agent, it might happen that the store name used is not correct. Check it once again, from
the application dashboard page and validate the same again. Other than this, you need to remember to install the created custom app
else, the Access Token will not be generated.
Attributes and Actions
While defining a connection to a particular API endpoint in Shopify GraphQL, you require clear understanding about the data requirements
and endpoint configurations. You can refer to this document to find all the endpoint details of your shopify installation.
To define the endpoint in APPSeCONNECT you need to define Actions and Entities. Actions are specifically targetted for a particular
endpoint while schema is the data needed to execute the API. Here are the list of some of the prepackaged API actions defined
for you which you can easily plug and play while doing your integrations.
| Endpoint | Action | Action Type | Schema | Description | API Help |
|---|---|---|---|---|---|
| customer | customers | GET | customers | Fetches customers from Shopify | customer |
| product | products | GET | products | Fetches products frrom Shopify | product |
| order | orders | GET | order | Returns a list of orders placed | order |
| customerCreate | customerCreate | POST | customer | Creates a new customer | customerCreate |
| inventory | inventoryItemUpdate | POST | inventory | Updates an inventory item | inventoryItemUpdate |
Action Filter Implementation
Data is fetched from source application using APIs, and as you are aware of, API provides filters
which will allow you to specify a subset of data from the whole bunch of data created in the server,
the same can be specified through Actions and Action filters. The Action generally defines the
endpoint of the application which is being fetched, while the filters define the search criteria
of the data. You can add these parameters in the action filter to define the search criteria.
Filter while retrieving data from Shopify
While fetching data fom Shopify GraphQL, you need to mention the filters both in Headers and Body section.
Let us consider any API of shopify such as customer, the request structure will look like :
query {
  customer(id: "gid://shopify/Customer/544365967") {
    id
    firstName
    lastName
    acceptsMarketing
    email
    phone
    ordersCount
    totalSpentV2 {
      amount
      currencyCode
    }
    averageOrderAmountV2 {
      amount
      currencyCode
    }
    createdAt
    updatedAt
    note
    verifiedEmail
    validEmailAddress
    tags
    lifetimeDuration
    defaultAddress {
      formattedArea
      address1
    }
    addresses {
      address1
    }
    addressesV2(first: 10) {
      edges {
        node {
          address1
        }
      }
    }
    image {
      src
    }
    canDelete
  }
}
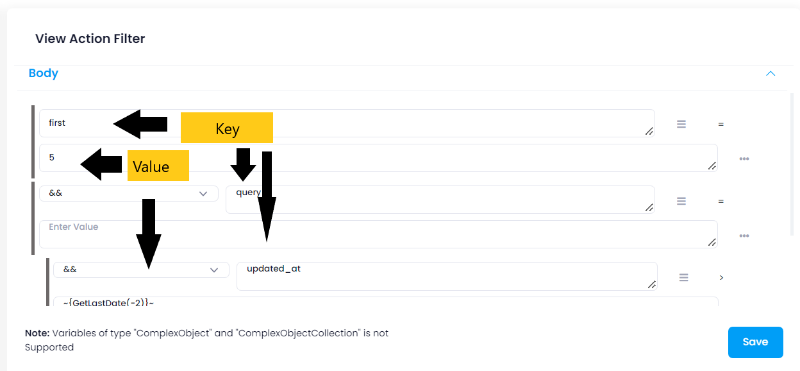
Let us assume that, you need to retrieve id, fiirstname, lastname and email of first 5 customers from Shopify.
To accomplish this scenerio, mention the following in the body section of action filter as the parent condition :
-
firstas thekeyand any numerical value in thevaluefield. -
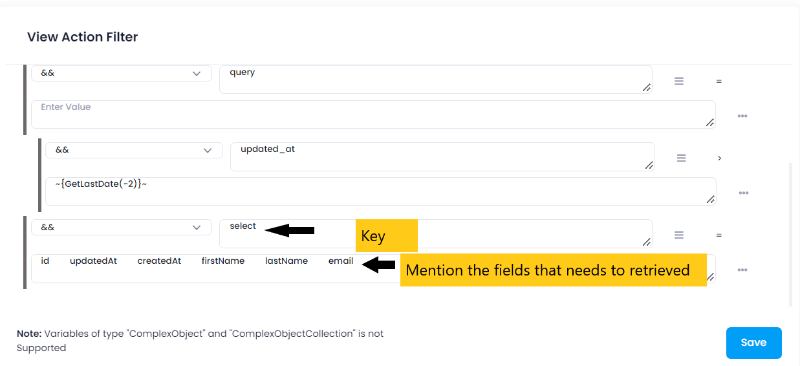
selectas thekeyand mention the fields to be retrieved as values. -
queryas theKeyand the value field will be empty since this will have some more fields as child conditions. You need to mention a date time filter as well. Provideupdated_atas the key and any specific value(‘2022-11-08T05:27:28Z’) in the value field. Else, you can also use dynamic date time by~{GetLastDate(-2)}~appresource function. Instead of2, you can also use any integer value. This function will retrieve customer details from the database, but 2 days back from know. - Combine all the above conditions using
&&.
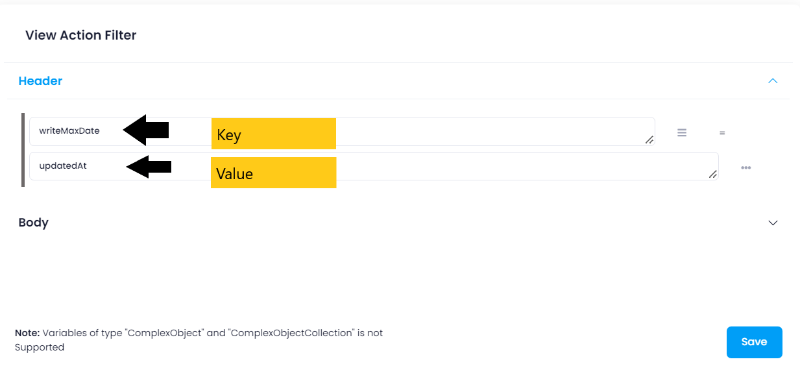
You need to add one action filter in ‘Header’ section as well, for storing the latest date in the database
from your input data along with that key must be there in the input data.
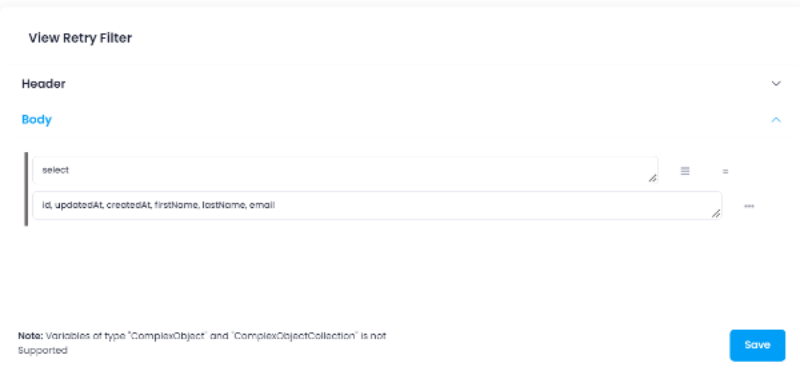
For Resync, you must configure the Retry Filter. In the Retry Filter, inside the body section,
you need to pass with ‘select’ key and the values. Without retry filter, the Resync will not work. The values will be the fields
that you want to retrieve from the API.
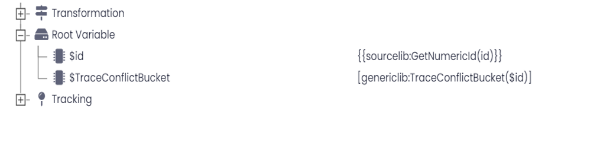
You Custom Trace Conflict Bucket as mentioned above.
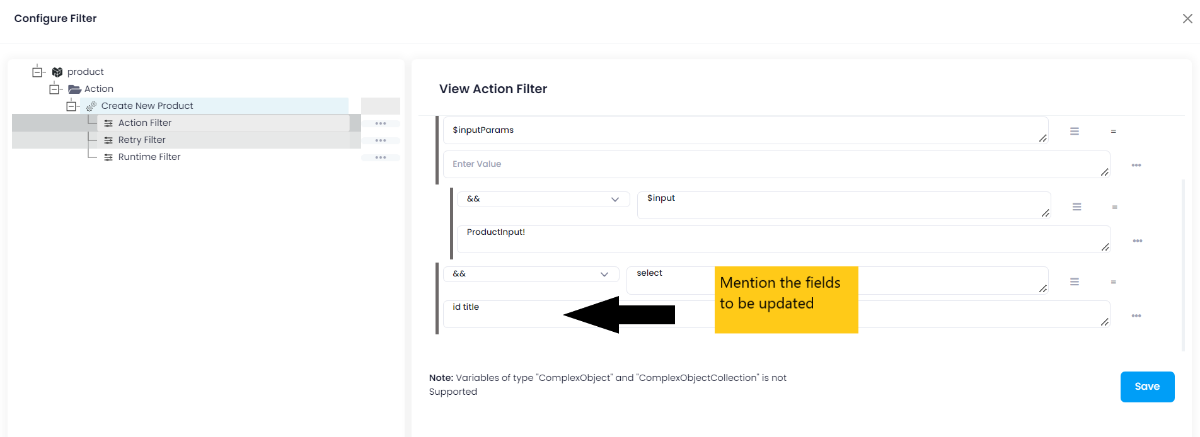
Filters while posting data to Shopify
You can also use Shopify as destination application to store data. While doing the same, you need to use some action filters in the
body section of the destination application. Let us suppose that, you need to add some product information in Shopify,
provide $inputParams as the key and the value fields corrosponding to $inputParams will remain blank. You need to use $inputParams
as the key irrespective of the schema used as the destination. Refer to the API of
Shopify to know the child condition that you need to mention $inputParams.
To specify the fields that needs to be updated, mention select as the key and the
field names as the value(you can provide title, id, createdAt and updatedAt fields and many more).