Pipedrive
Updated:
What is Pipedrive?
Pipedrive is a leading pipeline CRM service that seeks to make the sales and relationship-building
process more efficient than ever. Pipedrive helps you easily import your leads,
assign them to your salespeople and move them through different stages of the sales cycle.
With Salespanel integration, it can enrich all records with marketing data and provide crucial sales intelligence.
Pipedrive is entirely customizable enabling you to establish your own unique sales processes and patterns
without having to fall back on any default standards. One of the significant driving benefits of using
Pipedrive lies in its incredible flexibility.
Features of Pipedrive CRM
Pipedrive possess a number of great features that sales teams are likely to find useful :
- Build, label and manage your own custom pipelines and process stages.
- Track your complete contact history from start to end.
- Pull leads from chatbots and email forms through integrations.
- Track communications and have full visibility.
- Get complete control over your business data and sales paths.
- Automate tasks with Pipedrive and its integrations.
- Automate lead sourcing and build relationships.
However, application configuration is an integral activity prior to the process of integration. If your chosen application
is Pipedrive, credentials need to be provided for validating the agent. Here you will find the detailed
description on how to configure the agents in OP agent for Pipedrive.
Pre-requisites for Pipedrive Configuration
1) Create a developer account in Pipedrive with necessary credentials.
2) Click here to know the authentication mechanism and APIs of the application along with their structures.
3) Email ID and Password of Pipedrive application to login successfully.
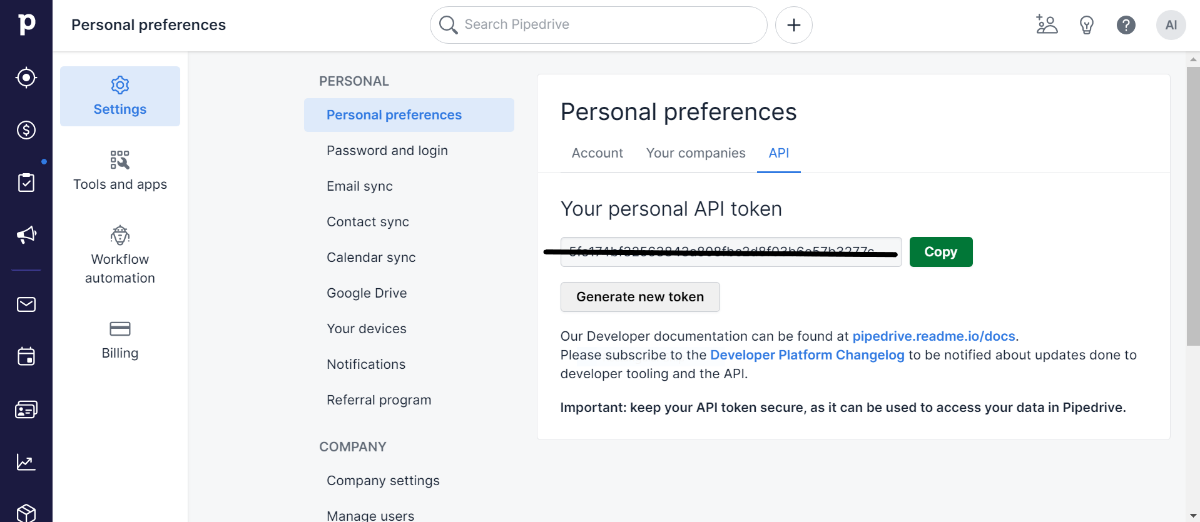
4) Api_Token of the application to validate the credentials in the agent.
How to access Api_Token?
1)Login to your Pipedrive account with valid credentials. From the dashboard, expand the user icon on top right corner
and click on Company Settings.
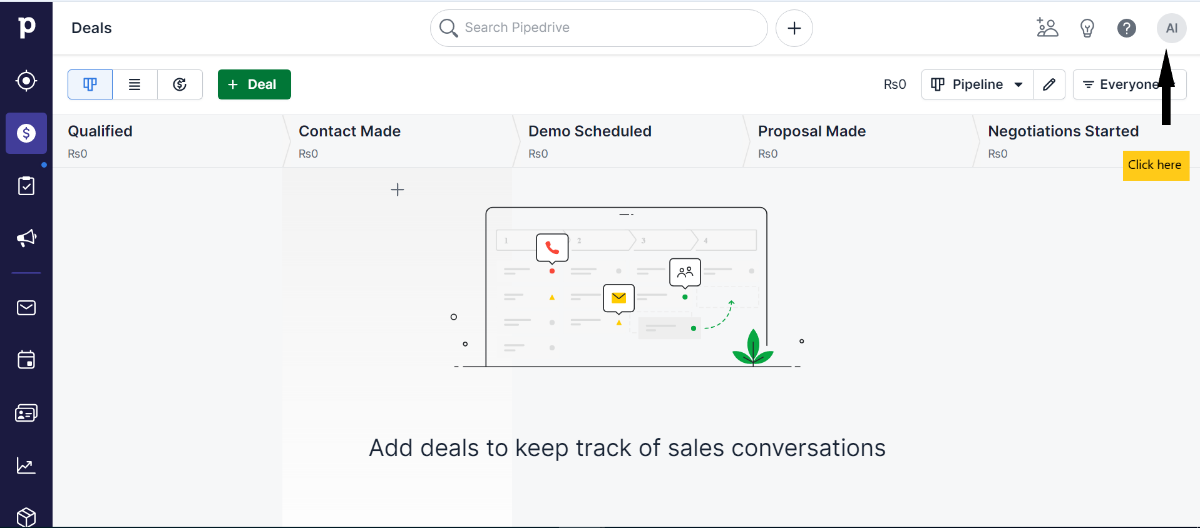 2) On clicking the
 user icon, a drop-down menu bar will appear. Click on Company Settings -> Personal preferences -> API. You will be find a API Token that already been generated.
On-Premise Agent Configuration
Installation of On-Premise Agent
You need to install the agent on your local server. To Know about On-Premise Agent Configuration, Click here.
How to configure Pipedrive Application in OP Agent
1) Create a processflow with Pipedrive as source or destination application, and deploy the processflow in On-Premise agent.
2) Open the agent and click the checkbox in Settings Panel.
3) Move into the App Configurational Panel of the agent and configure the details of the respective application.
Steps to configure the credentials in the OP agent
1) Open the OP Agent by providing valid credentials.
2) In the App Configurations panel of the agent, click on the + button, beside the application Pipedrive.
The credential panel opens for the application Pipedrive.
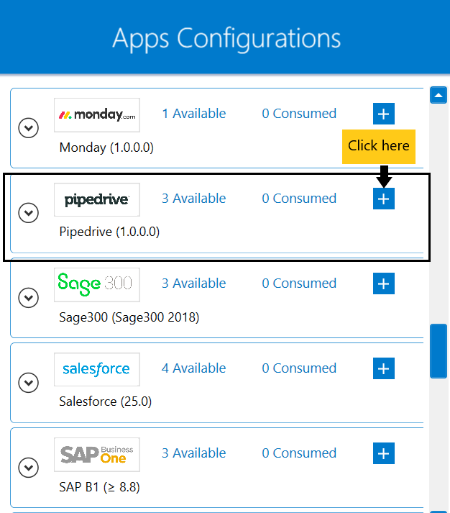 3)Provide the
 Company Url, Api Version and Api Token. Use v1 as the Api Version and the Api Token from the application settings page.
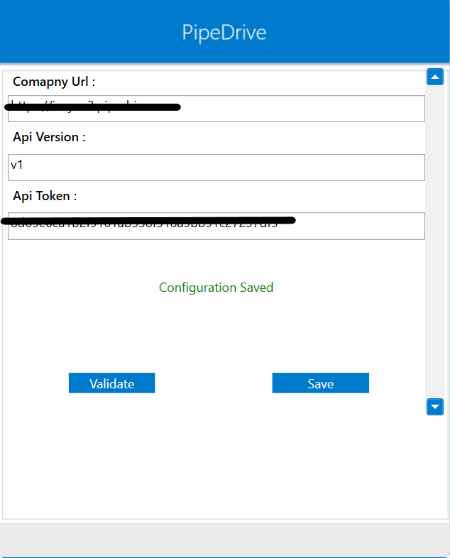 4) Click on the “Validate” button, to validate the connection. A message
 Test Connection Successful will appear
if all the credentials provided by you for Pipedrive is valid. After validating the credentials, click “Save” button to save the credetials.
Following the above processes, you can configure the Pipedrive application in the OP agent.
Troubleshooting
ISSUE 1
Some of the basic troubleshooting issue happens due to improper validations or even if it is accurately validated but the
processflows do not sync the data successfully. This basic issue resolves after removing the Temp and Cache files from the
portal and from your system. Therefore, after clearing the Temp and Cache files, again deploy and execute your processflow.
ISSUE 2
User validation may fail due to invaild Company Url, Api Version and Api Token. Check the credentials once again and re-Validate the credentials.
Attributes and Actions
While defining a connection to an API in Pipedrive, you require clear understanding about the data requirements and endpoint configurations.
You can refer to this document to find all the endpoint details of Pipedrive. To define the endpoint in APPSeCONNECT, you need
to define Schemas and Actions. Actions are specifically targeted for an endpoint while schema is the data needed to execute the API. Here is the
list of some of the pre-packaged API actions defined for you which you can easily plug and play while doing your integration.
Click here Pipedrive to know the authuorization and APIs details.
| Endpoint | Action | Action Type | Schema | UI Help | API Path |
|---|---|---|---|---|---|
| /v1/persons | persons | GET | persons | Returns all persons. | persons |
| /v1/users/find | users | GET | users | Finds users by their name. | users |
| /v1/leads | leads | POST | leads | Creates a lead. | leads |
| /v1/leads/{id} | leads | PATCH | leads | Updates one or more properties of a lead. | leads |
Action Filter Implementation
Data is fetched from source application using APIs, and as you are aware of, API provides filters
which will allow you to specify a subset of data from the whole bunch of data created in the server,
the same can be specified through Actions and Action filters. The Action generally defines the
endpoint of the application which is being fetched, while the filters define the search criteria
of the data. You can add these parameters in the action filter to define the search criteria.
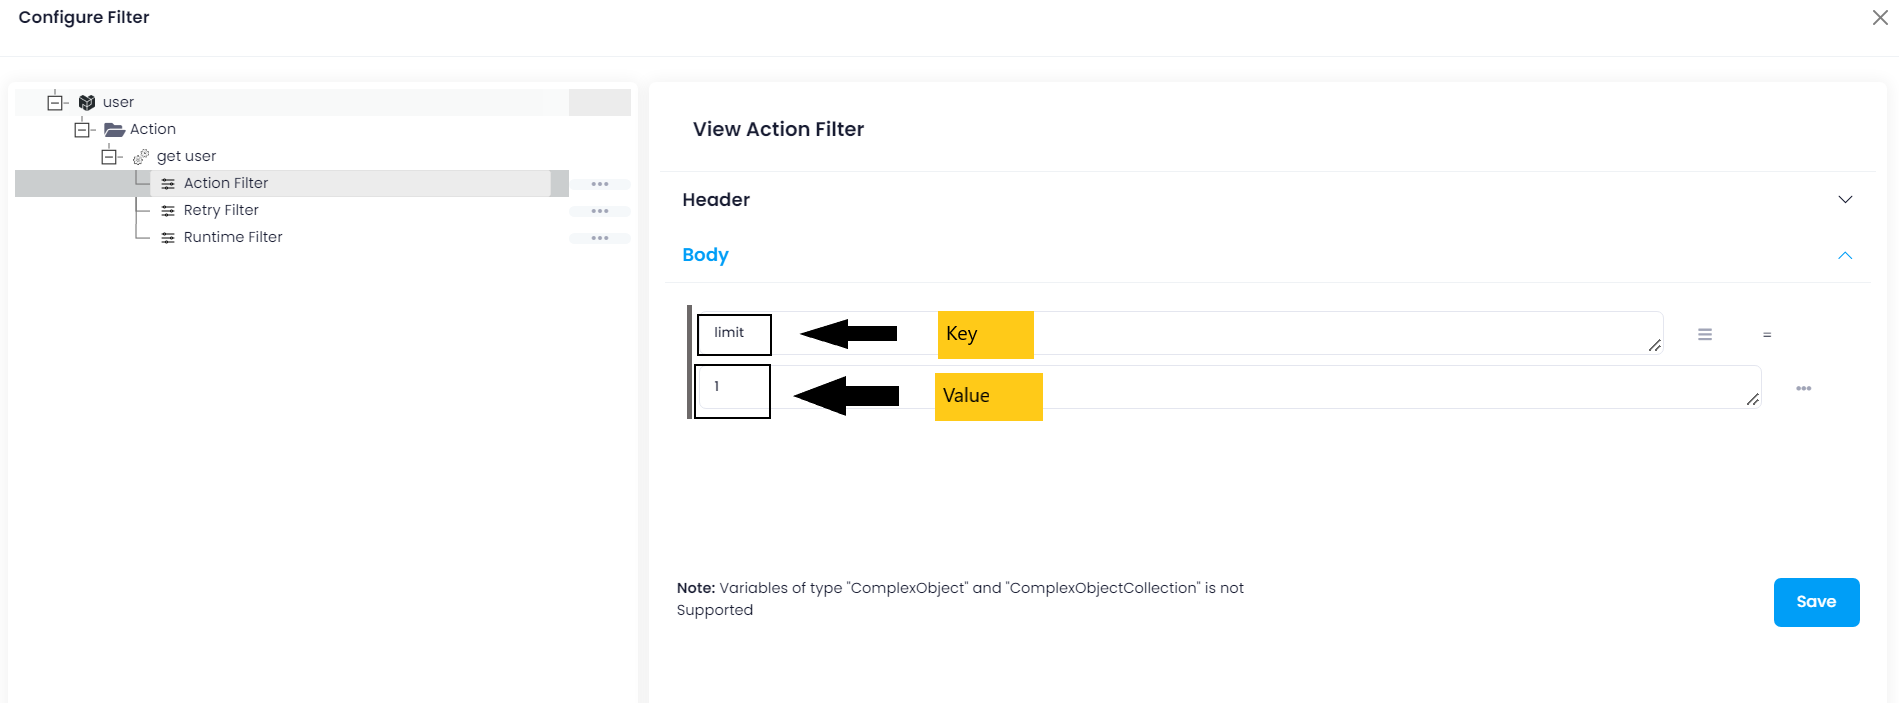
- General filters : It represents the overall filter criteria of the API. To define such filters, you do not need to specify anything special, just putting the field name and the value with the condition type is fine.
Let us consider any API of Pipedrive such as deals. Mostly, while retrieving data from the application, you will be
using the following as the key-value pairs.
Use limit as the key and provide any numerical value such as 2, 10 in the value field representing the number of items to be fetched;
items as the key and specify the name of the endpoint such as deal, leads etc. in the value field. You can also fetch data
as per the time instance using since_timestamp as the key and ~{CreatedDate}~ as the value.
